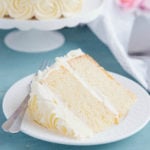
Vanilla Cake
This homemade Vanilla Cake recipe is the perfect tender cake with creamy, fluffy frosting. An easy vanilla cake recipe with PRO tips!
Servings 16 servings
Calories 723kcal
Equipment
Ingredients
For the cake:
- 1-2 tablespoons each, butter and flour for preparing the cake tins
- 1 cup unsalted butter softened to room temperature
- 2 cups granulated sugar
- 3 eggs at room temperature
- 3 egg yolks at room temperature
- 1 1/4 cups buttermilk at room temperature
- 3 tablespoons vegetable oil
- 1 teaspoon vanilla bean paste or use the seeds from 1 vanilla bean
- 3 1/4 cups all purpose flour
- 1 tablespoon baking powder
- 1 1/2 teaspoons baking soda
- 1 teaspoon salt
For the frosting:
- 2 cups unsalted butter softened
- 6 to 7 cups powdered sugar sifted to remove lumps
- a pinch of salt
- 2 teaspoons vanilla bean paste or the seeds from one whole vanilla bean
- 4 tablespoons heavy cream
Instructions
For the cake:
- Grease and flour two 9-inch round cake pans (with high sides) or three 8-inch round cake pans (with high sides), lining the bottoms with parchment paper rounds for easy release. Preheat your oven to 325 degrees Fahrenheit (165 degrees Celsius).
- In the bowl of your stand mixer (or in a large bowl using a hand mixer), whip the butter and sugar together on medium high speed until very fluffy and creamy. The sugar will start to dissolve into the butter a little bit during this creaming process, so you should be able to feel the grains of sugar getting smaller.
- Add the eggs and egg yolks one at a time, mixing well after each addition. Scrape down the sides of the bowl regularly at this stage to make sure everything is mixed well.
- Mix in the oil and vanilla bean paste on low speed.
- Measure the buttermilk into a liquid measuring cup and and set aside.
- Measure and sift the flour, baking powder, baking soda, and salt into a separate bowl and combine with a wire whisk.
- Add the dry ingredients and the buttermilk alternatively while the mixer is running on low speed. Add 1/3 of the dry ingredients, half the milk, another 1/3 of the dry ingredients, the other half of the milk, and the remaining dry ingredients.
- Turn the speed of the mixer to medium-low and mix until the batter is smooth (about one minute).
- Pour the batter into the prepared cake pans and bake at 325 degrees Fahrenheit (165 degrees Celsius) for about 29-34 minutes, or until a toothpick inserted into the middle of one of the cakes comes out clean.
- Cool the cakes in the pans for about 5-7 minutes and then turn them out onto cooling racks to cool completely.
- Once the cakes are cool, store them wrapped in plastic wrap in the fridge until ready to frost. They should be refrigerated for at least 1 hour before frosting.
For the frosting:
- Beat the butter on high speed until light and fluffy and smooth.
- Sift the powdered sugar and add it slowly , one cup at a time, mixing after each addition until incorporated.
- Add the vanilla bean paste, salt, then slowly add the heavy cream one tablespoon at a time, until incorporated and the mixture reaches spreadable consistency.
- Mix the frosting on medium-high speed for about 1-2 minutes, or until the frosting becomes very smooth and spreadable.
- Reserve about 1 1/2 cups of frosting for the crumb coat (the initial coat of frosting) and place the rest of the frosting in a piping bag fitted with a star tip. Set aside.
- Trim the cakes (if necessary) to level them, using a serrated knife. Place one cake, right side up, on a plate or cake board.
- Add a large dollop of frosting on top and spread it out to reach the edges of the cake. Place the other cake on top of the frosting, upside down so the flat side faces up.
- Add the remainder of the frosting (the 1 1/2 cup you reserved for the crumb coat) to the top of this cake and spread it over the top and down the sides of the cake, making sure to smooth it out to fill in any holes or cracks in the cake to create a very smooth edge.
- Remove any excess frosting - it's fine if the cake is showing through, you'll cover this with the final coat of frosting.
- Place the cake in the fridge to chill for about 45 minutes. Refrigerating the cake will cause the butter in the frosting to harden and it will create the perfect canvas for the second coat of frosting.
- Remove the cake from the fridge and get ready to frost! If you're not into rosettes you can feel free to simply spread the remaining frosting on if you'd prefer that look.
- For the rosettes, pipe a round, spiral shape beginning from the middle and moving to the outside.
- Start piping the rosettes on the side of the cake and begin at the very bottom. Pipe a row of rosettes along the bottom and then offset your second row so it fills in the empty spaces.
- On the top of the cake, pipe the rosettes around the outside first and then work your way in, offsetting the rows to fill in the gaps. Make sure you pipe the rosettes close together so they're almost overlapping each other. This will ensure you don't have many empty spaces to fill. It's also a good idea to end your rosettes in the gap where the next row will fill. This will hide the scraggly ends of the rosettes and create a really clean look.
- Once you've finished frosting your rosettes, chill the cake for another 30 minutes to an hour before serving to set the frosting. After you pull it out of the fridge, it will be quite hard if it's been in there for more than 30 minutes so it's a good idea to let it sit at room temperature again for about 15 minutes before slicing and serving.
Video
Notes
This cake can be made with 8 or 9 inch round cake pans.
Storage Instructions
Store the cake in the fridge until ready to serve (let sit out at room temperature for 15 minutes before slicing to let the frosting relax).Make Ahead Instructions
To make this cake ahead of time, follow the recipe directions and store it in the fridge for about 24 hours before serving. Alternatively, make the cake layers and store them in the fridge for up to 2 days or freezer for up to 3 months before making the frosting and assembling the cake.Freezer Instructions
Freeze the cake whole for up to 3 months and defrost it in the fridge until thawed. Alternatively, cut slices and freeze them with layers of parchment paper between them to prevent them from sticking to each other.Nutrition
Serving: 1serving | Calories: 723kcal | Carbohydrates: 91g | Protein: 5g | Fat: 39g | Saturated Fat: 24g | Polyunsaturated Fat: 2g | Monounsaturated Fat: 10g | Trans Fat: 1g | Cholesterol: 166mg | Sodium: 303mg | Potassium: 162mg | Fiber: 1g | Sugar: 71g | Vitamin A: 1243IU | Vitamin C: 0.2mg | Calcium: 81mg | Iron: 2mg