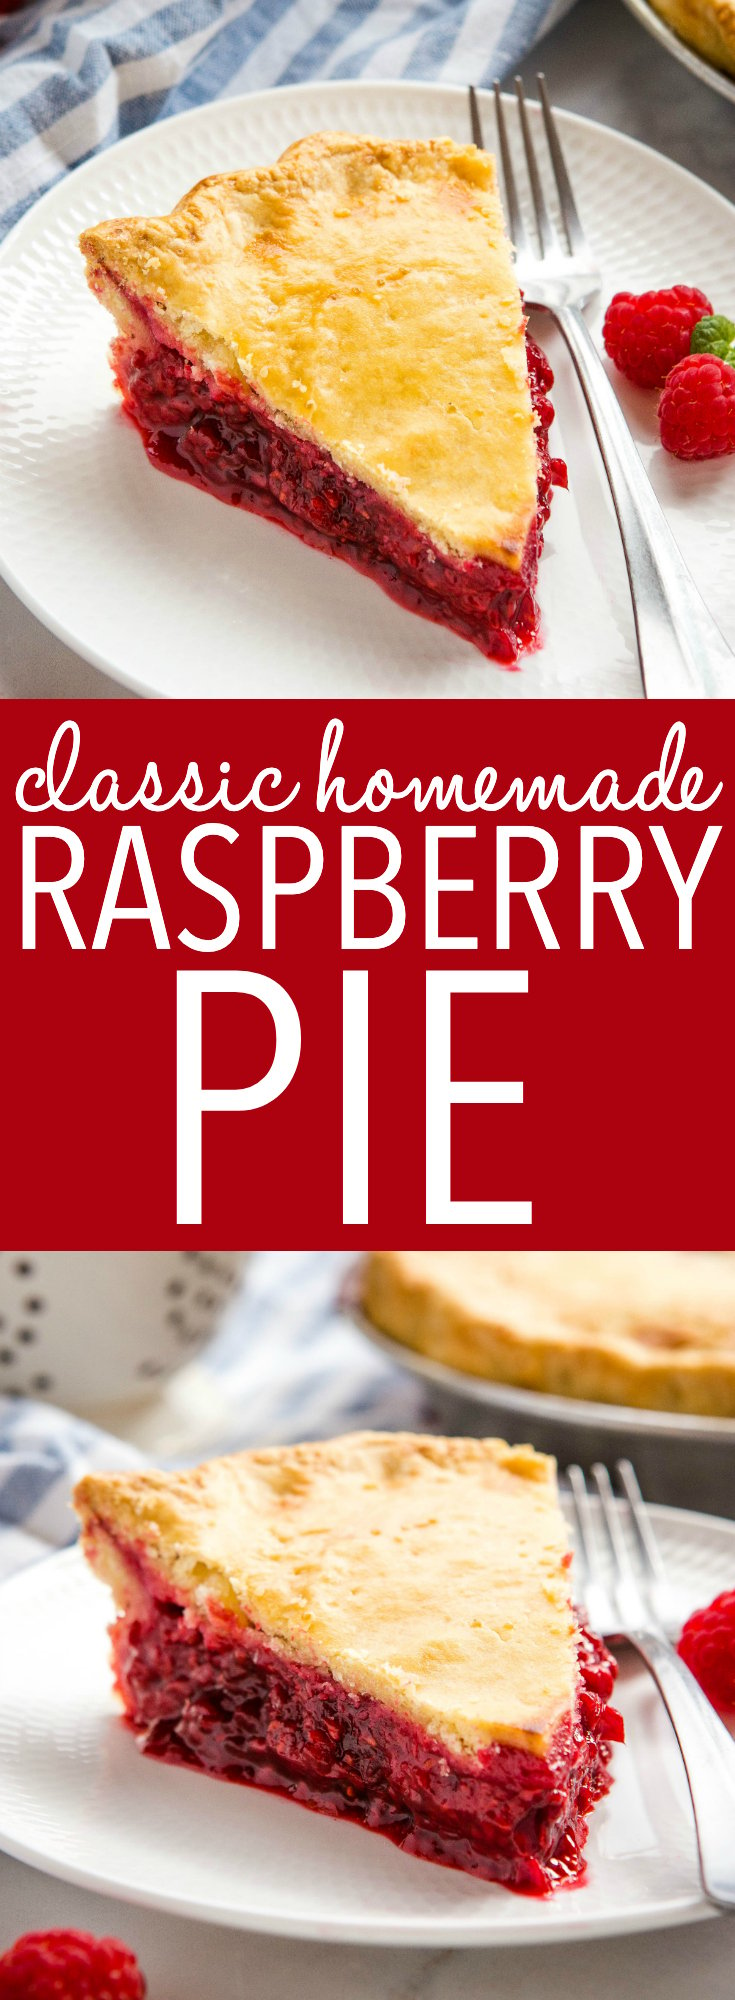
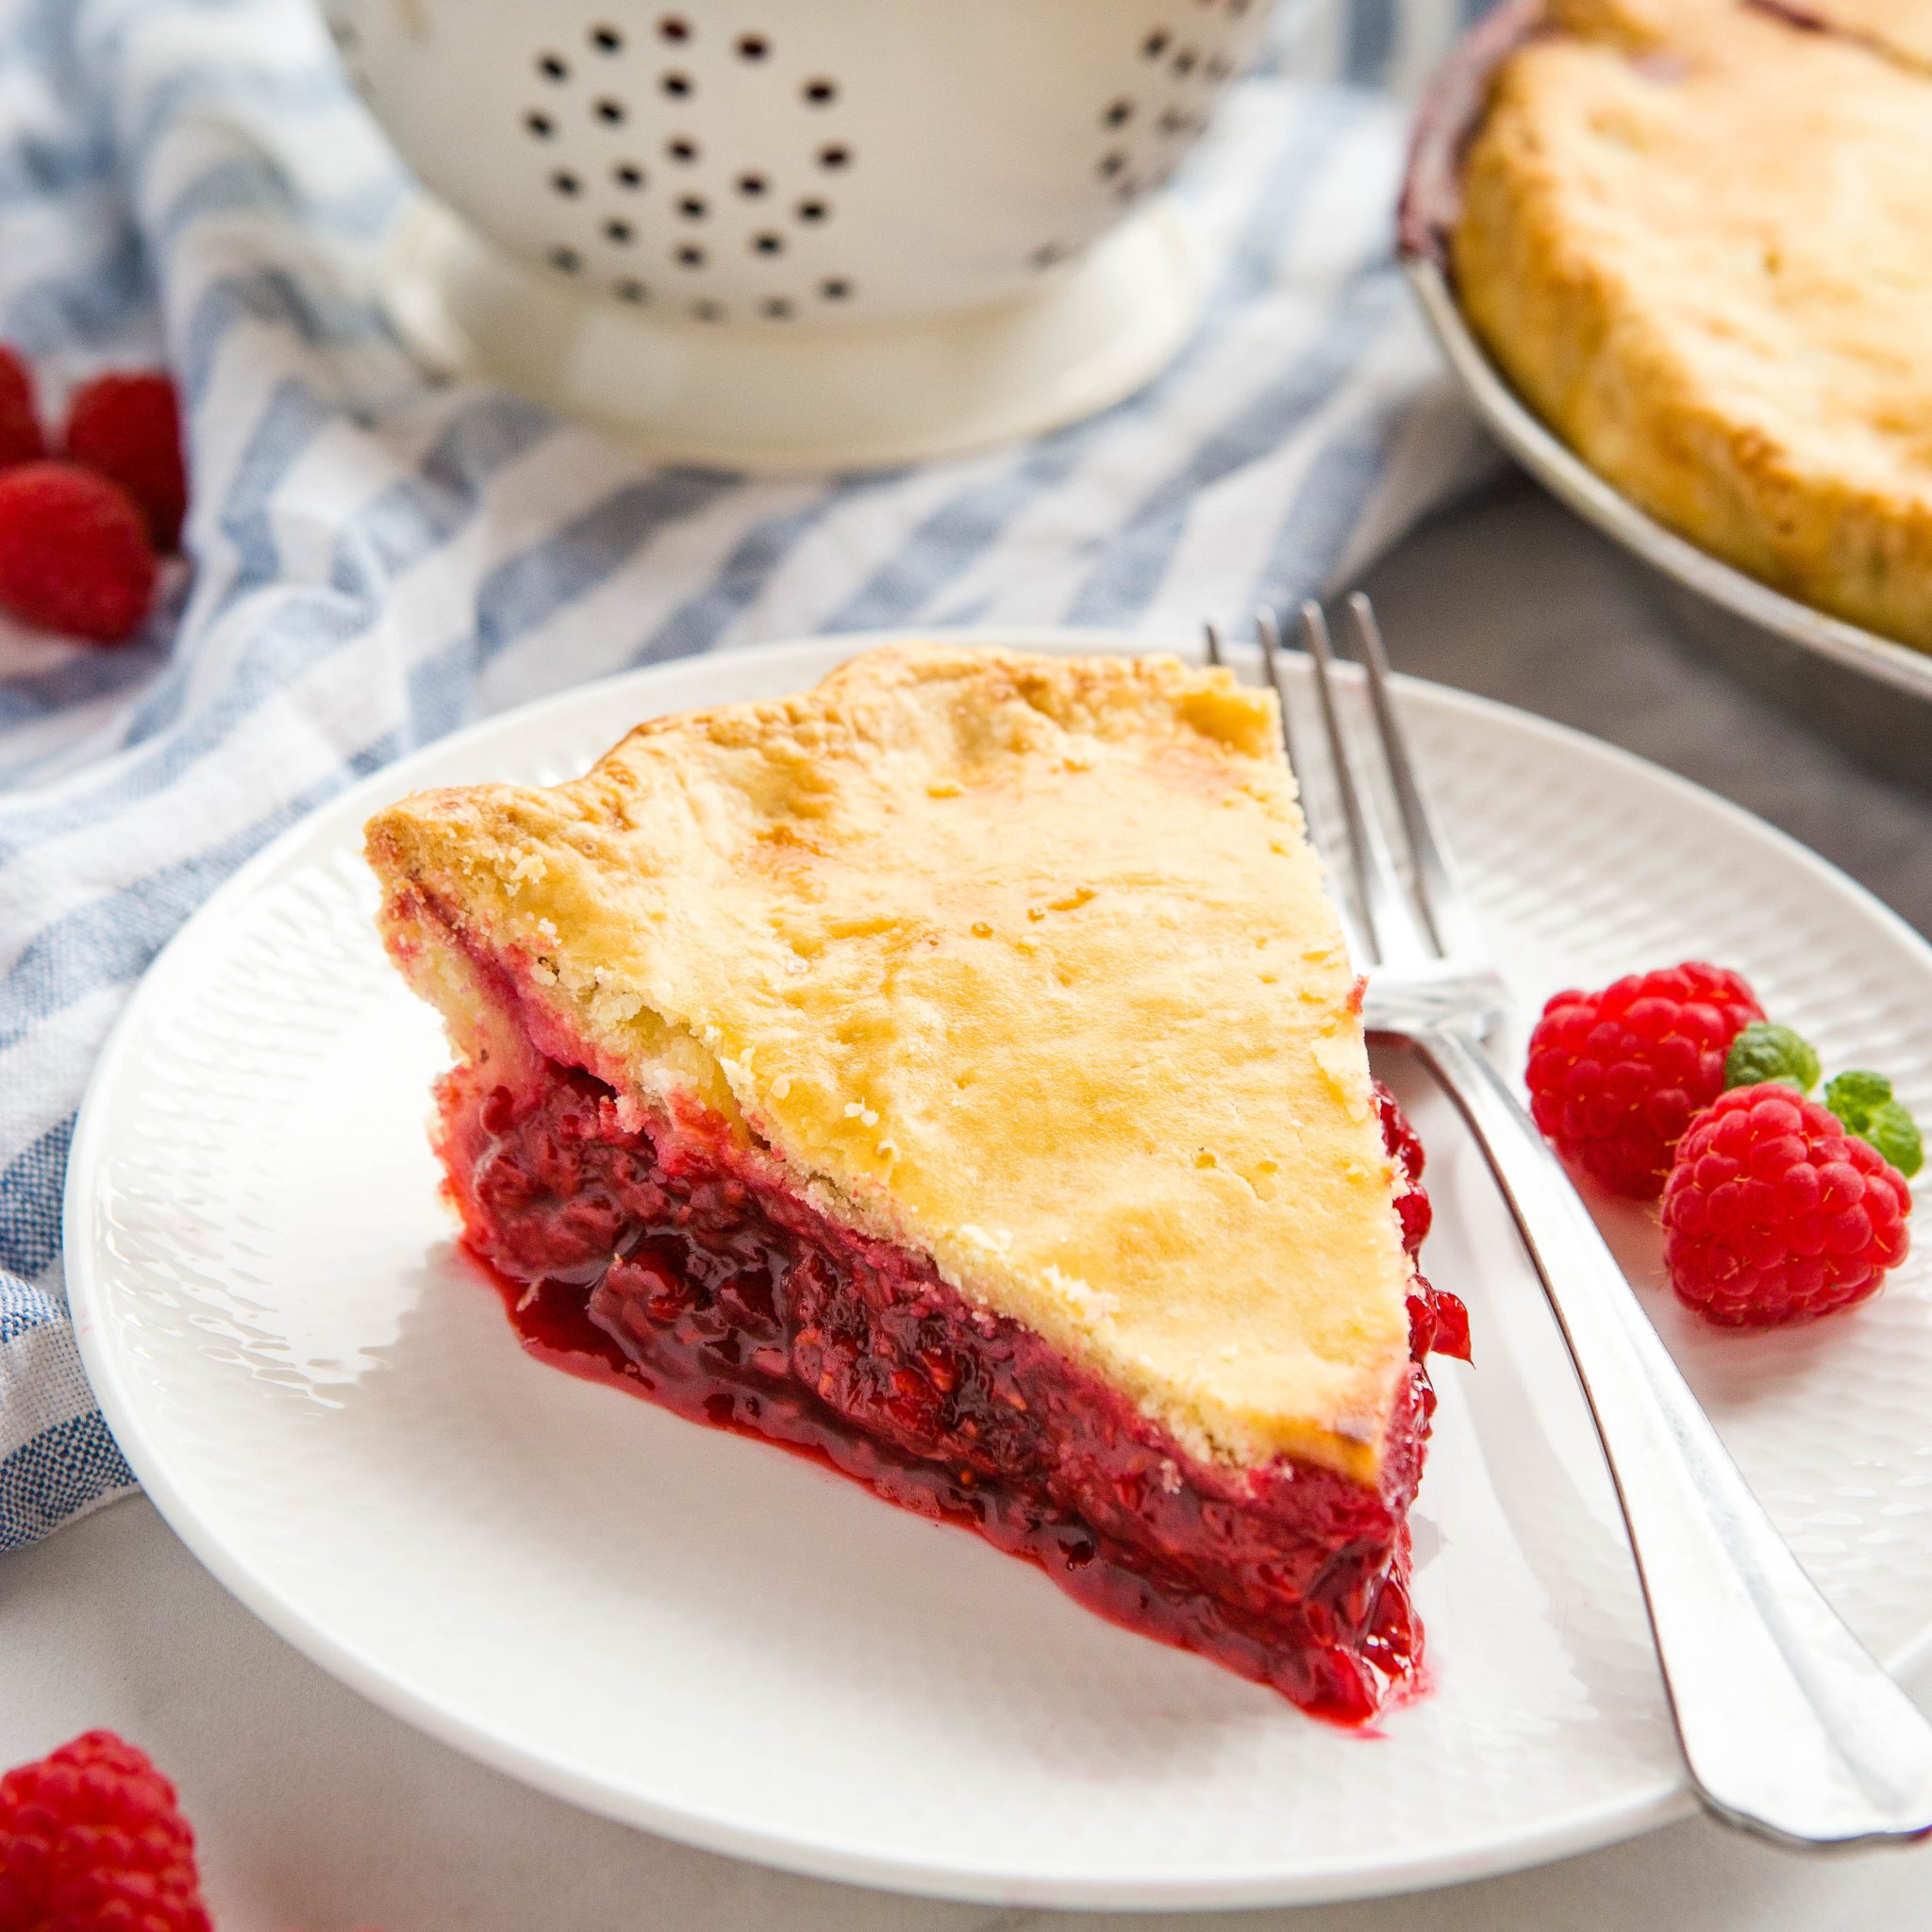
This Raspberry Pie recipe is a family favourite summer dessert made with an all-butter crust & fresh or frozen raspberries – with pro homemade pie tips. It’s a simple pie recipe that’s made with the BEST homemade pie crust recipe, a delicious raspberry pie filling recipe – and it’s easy enough for beginners!

Summer is the time for fruit-filled desserts and if you’ve been a reader of The Busy Baker for any length of time you’ll already know how obsessed we are with cooking and baking with fresh in-season fruit and veggies. This Raspberry Pie recipe is a classic recipe that’s been in our family for years and years. It’s sweet and tart and turns out perfectly every single time.
Made with a homemade all-butter pie crust and a delicious raspberry filling made from fresh or frozen raspberries, this raspberry pie recipe just screams summer and we know you’re going to love it as much as we do!

Making this pie crust recipe is so easy – just follow these steps!
- Use your food processor and COLD butter. Use COLD butter. And COLD water. This will help the butter stay in small, solid pieces as you mix which will create a flaky crust (and who doesn’t love a flaky pie crust!?). Using your food processor to make the crust helps the butter stay cold and creates a nice tender dough, plus it makes making your own pie crust from scratch super easy and low maintenance!
- Work quickly and gently when you handle the dough. If you do work the butter into the flour mixture using your hands, make sure you use quick motions, flattening the pieces of butter between your hands as you slide your hands apart (one toward you, one away from you). The goal here should be to handle the butter as little as possible because the heat from your hands will cause it to soften and even melt. It’s ideal for the butter to remain cold and hard but be distributed throughout the flour mixture in small pieces.
- Shape the dough into discs. Once the dough comes together, divide it in half and gently form it into 2 round disc shapes. This makes it easy to roll out later in a round shape!
- Refrigerate the dough before rolling out. This will help it keep its shape and also help the pie crust to become crispy and flaky in the oven as it bakes. The pie crust should be as cold as possible when you work with it, at all times.
Making raspberry pie filling is so easy – just follow these steps!
- Use fresh or frozen raspberries. Both fresh and frozen raspberries will work in this raspberry pie filling recipe.
- Add the cornstarch for thickness. Use more cornstarch if you’re using frozen raspberries since frozen raspberries will release more liquid that fresh ones. Adding cornstarch to your pie filling will create a deliciously thick and silky sauce around the fruit and it will help the filling stay together a little better when you cut into the pie. You’ll still have that gorgeous juiciness oozing out of each slice, but it won’t look like soup on your dessert plate.
- Add the sugar. Raspberries are a tart fruit, so adding a whole cup of sugar to the filling helps balance out the flavours and helps keep the filling together so the pie isn’t too runny.
- Don’t forget the lemon juice. Adding lemon juice to the filling brightens the raspberry flavours.
- Add a pinch of salt. The salt works to create flavour so the filling is not too sweet or too tart. It brings out the flavour of the fruit and balances the sweetness.
- Create a clean edge and vent your pie. There’s nothing worse than a pie with uneven, over-browned edges. Creating nice clean edges is easy! Just fold the edges of the dough under and tuck them into whatever pie dish you’re using. And don’t forget to vent the top of the pie so the steam can escape – just poke it with a fork in a few places. No need to vent if you’re making a lattice-top pie as the steam will escape through the holes on its own.
- Use an egg wash. Combine an egg and 1 tablespoon of water in a small dish and whisk them together. Using a pastry brush, brush on a SMALL amount of egg wash onto the top crust of the pie and around the edges. Don’t overdo it! Cooked egg on the top of a pie is never tasty. The idea is to brush a very light coating of the egg wash over every surface of the crust before it bakes. This will create a shiny finish and it will help the upper crust to brown perfectly and evenly in the oven.
- Sugar the crust. Sprinkle a little bit of turbinado sugar or other coarse sugar onto the top of the pie after you’ve brushed on the egg wash. This will create a beautiful finish on the upper crust, but it will also add a nice crunch and a beautiful texture to the pastry
- Heat things Up. Bake your pie at 400 degrees Fahrenheit for the first 10 minutes and then reduce the heat to 375 Fahrenheit and bake for 45-50 minutes longer. Baking at a higher heat at first allows the crust to brown beautifully and baking at a lower heat afterwards allows the filling to cook evenly without the crust over-browning in the process.
- Protect your oven! It’s also a great idea to bake your pie with a baking sheet on the rack below, just to catch any stray drips before they burn onto the bottom of your oven (been there, done that…more times than I’d care to admit!)
- Let it cool before slicing! Cutting into a hot pie may seem like a good idea, but all it will leave you with is a steamy hot soupy mess. Be sure to let the pie to cool to room temperature before slicing – this will make sure your slices are juicy but keep their shape
The Done-For-You SUMMER BUNDLE + BONUS Menu Guide!
5 complete recipe guides for effortless summer hosting. The invisible work of summer? Done for you.

To make this raspberry pie recipe, you’ll need these kitchen items (affiliate links);
- a food processor
- measuring cups and spoons
- a silicone spatula
- a pie plate or dish
- mixing bowls
- a rolling pin
- a dough or pizza cutter
- a sharp knife
- a pastry brush
To make this raspberry pie recipe, you’ll need these ingredients:
- all purpose flour
- granulated sugar
- salt
- lemon juice
- water
- unsalted butter
- fresh or frozen raspberries
- cornstarch
- egg
- coarse sugar (optional)

Time needed: 1 hour and 50 minutes
Follow these steps for the BEST raspberry pie!
- Make the dough first.
Use your food processor to make the pie dough with flour, sugar, butter, water, salt and lemon juice. Follow the pie crust recipe below.
- Chill the dough before rolling.
Right after it comes together, the dough is far too soft to roll. Chill it in the fridge before rolling, as outlined in the Pie Crust recipe below.
- Preheat the oven.
Before you remove the dough from the fridge or make the filling, preheat the oven to 400 degrees Fahrenheit.
- Let the dough sit before rolling.
Let the dough relax after removing it from the fridge for about 10 minutes before rolling.
- Prepare the raspberry pie filling right before baking.
Add the raspberries to a bowl, along with the cornstarch, sugar, salt and lemon juice. Toss just until combined.
- Don’t defrost the fruit (if using frozen berries).
If using frozen raspberries in your raspberry pie filling, make the filling with the raspberries as they’re frozen (do not defrost the raspberries first).
- Work quickly.
Once you’re rolling out the chilled dough, work quickly so the dough stays cold. This will create a flaky crust.
- Vent the pie crust.
Poke holes in the top of the pie to the air can escape as it bakes. This will help the filling thicken and cook properly.
- Don’t forget the egg wash.
The key to a golden pie crust is brushing the pie crust with some beaten egg mixed with water.
- Reduce the heat after 10 minutes of baking.
The first 10 minutes are to brown the crust and the remainder of the baking time is to cook the filling.
- Let the pie cool before slicing.
As the pie cools the filling will thicken. If you slice into it when it’s hot the filling will be far too runny.

Why is my homemade pie runny?
Homemade pie can be runny if it’s underbaked or if there isn’t enough thickener in the filling.
What is the best thickener for fruit pie?
The best thickener for any fruit pie is cornstarch.
What to add to pie filling to make it better?
Adding lemon juice and a pinch of salt to your homemade fruit pie will make the filling more flavourful.
Is flour or cornstarch better for pie filling?
Cornstarch is much better to use than flour for homemade fruit pie filling. Cornstarch makes a much silkier sauce while flour creates a thicker, more dull-looking sauce. Another reason cornstarch is a better choice is that less cornstarch is required to thicken pie filling than flour.
What is a trick to making a good pie crust?
The trick to making good pie crust is using cold butter and not over-working the dough. Refrigerating the dough before rolling out is also a critical step for flaky, crispy pie pastry.
Is pie crust better with butter or shortening?
Butter creates a much stronger, flakier and more crispy pie dough than shortening.
What is the secret to flaky pie crust?
The secret to flaky pie crust is using cold butter instead of shortening. It also helps to avoid overworking the dough and to refrigerate it before rolling out.
Can I freeze the pie dough before baking?
Yes! Simply freeze the raw pie dough in discs (as directed in the recipe below) and remove from the freezer and place in the fridge for 12 hours before rolling out.
Can I use frozen fruit in my homemade pie filling?
Yes. Simply increase the cornstarch in the filling by several tablespoons if using frozen fruit in the filling.
We hope you love this raspberry pie recipe as much as we do! Let us know in the comments below, what’s your favourite summer pie recipe? We’d love to know!

Looking for more delicious summer recipes? You’ll love these:
- Easy Classic Peach Pie
- No Bake Lemon Blueberry Icebox Cake
- Classic Apple Berry Fruit Crisp
- Strawberry Swirl Cupcakes with Fresh Strawberry Buttercream
- Easy Strawberry Hand Pies
- Easy 3-Ingredient Chia Seed Raspberry Jam
- Strawberry Spinach Salad with Lemon Poppyseed Dressing
- Classic Blueberry Pie
- Classic Strawberry Pie
- Best Ever Fresh Strawberry Pie
The Done-For-You SUMMER BUNDLE + BONUS Menu Guide!
5 complete recipe guides for effortless summer hosting. The invisible work of summer? Done for you.
Watch the video below to see exactly how I make this recipe. You can find more delicious recipe videos on my YouTube channel
If you made this, share a photo!
Are you trying this recipe? Use the comment form below to share your take; now with support for image uploads and comment voting!
Raspberry Pie
Recipe: Ingredients
For the pie crust recipe:
- 3 cups all purpose flour
- 2 tablespoons granulated sugar
- 1 teaspoon salt
- 1 cup cold unsalted butter, cut into small chunks
- 1 teaspoon lemon juice
- 6-7 tablespoons ice cold water
For the raspberry pie filling recipe:
- 6 cups fresh raspberries (or use frozen raspberries)
- 5 tablespoons cornstarch 8 if using frozen raspberries
- 1 cup granulated sugar
- 1 pinch salt
- 3 tablespoons lemon juice
For finishing:
- 1 egg
- 1 tablespoon water
- 1-2 tablespoons coarse sugar
Recipe: Instructions
For the crust:
- Add the flour, sugar and salt to the bowl of your food processor (or a large bowl if your making the dough by hand).
- Turn the food processor on low speed and add the chunks of cold butter one at a time while the food processor runs until all the butter is added and the mixture resembles coarse crumbs.If making by hand, use a pastry blender or your hands to work the butter into the dough until the mixture is crumbly. Try not to handle the butter too much (the heat from your hands will soften it) – use quick movements and don't worry if some larger chunks of butter still remain.
- Add the lemon juice and the water slowly as the food processor runs on low, just until the dough comes together and pulls away from the sides of the bowl. Depending on the weather and even on the brand of flour, I use anywhere between 5 and 8 tablespoons of water. If making by hand, use your hands to form the dough gently and quickly using just enough water for the dough to come together.
- Dump the rough dough onto the counter and divide the dough into two disc shapes and wrap each one separately in plastic wrap, placing it in the fridge to chill for 45 minutes or overnight.
For the filling:
- Add the raspberries to a bowl, along with the cornstarch, sugar, salt and lemon juice. Toss just until combined. If using frozen raspberries, make the filling with the raspberries as they're frozen (do not defrost the raspberries first).
- Set the filling aside while you prepare the crust for baking.
Assembly:
- Preheat your oven to 400 degrees Fahrenheit. If your oven runs hot, set it to 375 degrees Fahrenheit. (Use an oven thermometer to ensure the correct temperature)
- Remove the chilled pie dough from the fridge and let it sit for about 10 minutes before rolling. Roll out one of the balls of dough into a large circle using a rolling pin. Add a generous amount of flour to the rolling surface and to the rolling pin, to prevent sticking and cracking.
- Peel the rolled out dough off the counter surface gently by rolling it backwards onto the rolling pin.
- Transfer it to a 9-inch pie plate and gently press the dough into the bottom of the pie plate and over the edges (try for a 1-2 inch overhang if possible).
- Add the raspberry filling to the pie crust and smooth out the top.
- Repeat the rolling out process with the second ball of dough, rolling it into a flat circle, just larger than the pan. Place it gently over the filling, letting the excess hang over the sides.
- Trim any dough that hangs over the edge of the pie to 1-2 inches past the edge (try to keep the overhang amount even all the way around). Tuck any overhanging dough under and into the pie plate to create a clean edge.
- If your pie plate has a wide edge, seal the edge of the pie by creating a fluted pattern – press into the edge of the pie from the outside with your left thumb and index finger while pressing into the edge of the pie from the inside with your right index finger. Do this all the way around the edge of the pie to create a fluted pattern (and see my tutorial HERE for how to create a beautiful fluted edge to your pies!)
- Use a fork to make some holes in the top of the pie. This will help the pie vent and steam to release without cracking the top of the pie.
- Beat the egg and 1 tablespoon of water and brush it lightly onto the unbaked crust. Use a light hand while brushing – too much egg wash creates an eggy texture after baking.
- Dust the crust with the coarse sugar and bake at 400 degrees Fahrenheit for about 10 minutes, and then reduce the heat to 375 (350 if your oven runs hot) and bake for an additional 35-45 minutes or until the crust is evenly browned and the filling is bubbly.
- Let the pie cool to room temperature before slicing and serving with whipped cream or ice cream.
Recipe: Notes
No-Fail Tips
Watch the pie closely as it bakes to ensure it bakes and browns evenly. Feel free to turn the pie halfway through baking so it browns evenly in your oven. Bake this pie on a baking sheet to prevent the filling from spilling out of the pie as it bakes and burning to the bottom of your oven.Storage Instructions
Store any leftovers of this pie in an airtight container at room temperature for up to 3 days or in the fridge for up to 5 days. Reheat any leftovers in the microwave or toaster oven until heated through.Freezer Instructions
It can be frozen for up to 2-3 months before baking (cover in plastic wrap or freeze in an airtight container), thawed in the fridge overnight and then baked fresh in the morning. (Be sure to always place a cold baking dish into a cold oven to prevent the dish from cracking.) They can also be frozen after baking for up to 2-3 months (cover in plastic wrap or freeze in an airtight container). Thaw at room temperature and reheat before serving, if desired.Recipe: Nutrition
Notice: Nutrition is auto-calculated, using Spoonacular, for your convenience. Where relevant, we recommend using your own nutrition calculations.
I thought the pie was excellent, and a great balance of tart & sweet. Perfect to add French vanilla ice cream on top to sweeten it a little more. I used fresh berries & left my pies in the oven about 15 minutes longer until it bubbled in the middle, & the juice had a thicker appearance. It was a perfect consistency, not runny and held together like a slice of pie should. I wouldn’t change anything.
We’re so happy you enjoyed it! Thank you for taking the time to leave your feedback!
The flavor is great. I used frozen raspberries and the filling was running juice (very thin juice) it did not thicken as well as I expected. Would adding a bit more cornstarch help or would this work better with fresh raspberries only?
If you’re using frozen raspberries you should increase the cornstarch to 8 tbsp.
Very good pie.
We’re so happy you enjoyed it! Thank you for taking the time to leave your feedback!
Made this today. Way too much lemon juice and not enough sugar. It was so tart my family could barely eat it. Followed directions exactly, even leaving out 1 tablespoon of the lemon juice and it was still too sour.
I’m sorry you didn’t enjoy it. The recipe is very tart, and unfortunately the tartness of the raspberries can make a big difference in this recipe too.
This pie just screams summer! We loved every bite of it!
LOVE the looks of this pie! I’ve never had a raspberry pie, but I can just imagine how good it’d be with some ice cream!
Oh goodness, this pie looks delightful! I bet it tastes perfect 🙂