
This Peach Pie recipe is a rustic version of a fresh peach pie recipe with an all butter crust and fresh peaches. It’s a simple peach pie filling and crust that’s easy enough for anyone to make – even beginners! Be sure to follow my pro tips below for the perfect peach pie!

Estimated reading time: 11 minutes
If you’ve never made pie before it can definitely be an intimidating dessert to attempt. Homemade pie crusts can be difficult to handle and if you don’t get the texture just right, it can make for a disastrous experience. But this fresh Peach Pie recipe is one of the easiest pies to start with; it’s got a simple all-butter crust and a really easy 4-ingredient filling. We are sharing all our pro tips with you to help YOU make this stunning pie for all your summer guests!
There are so many reasons we love this delicious peach pie recipe! Here are just a few:
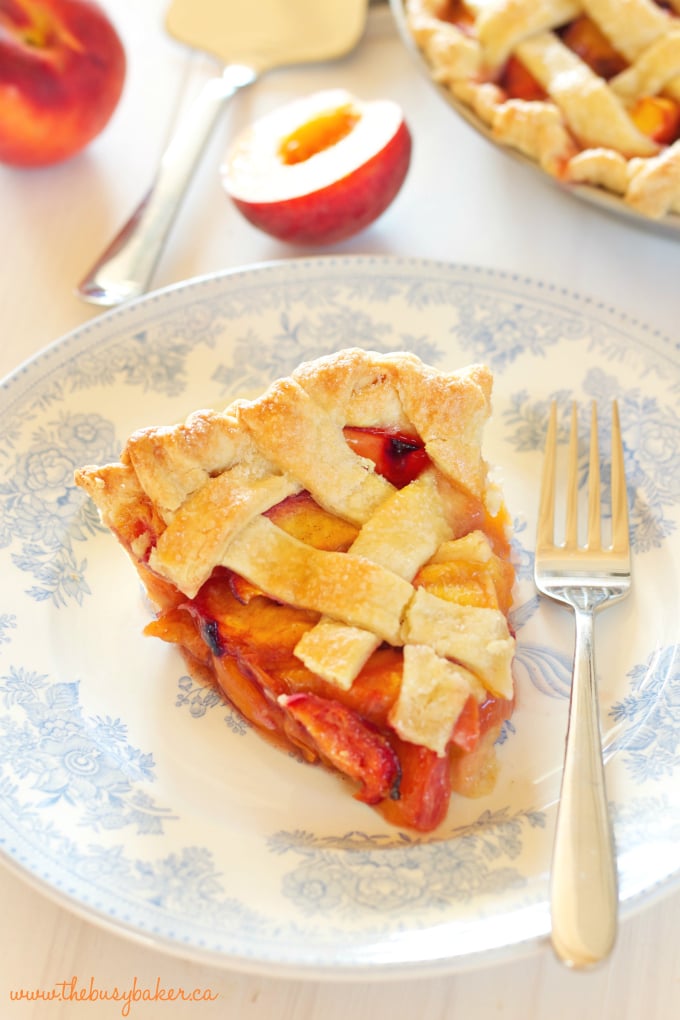
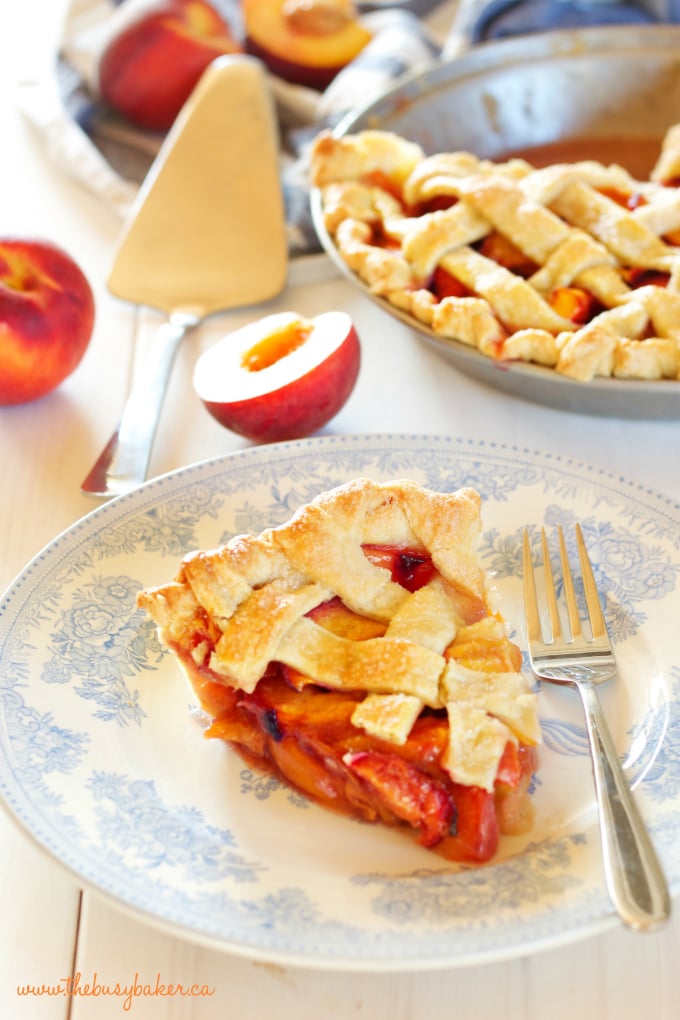
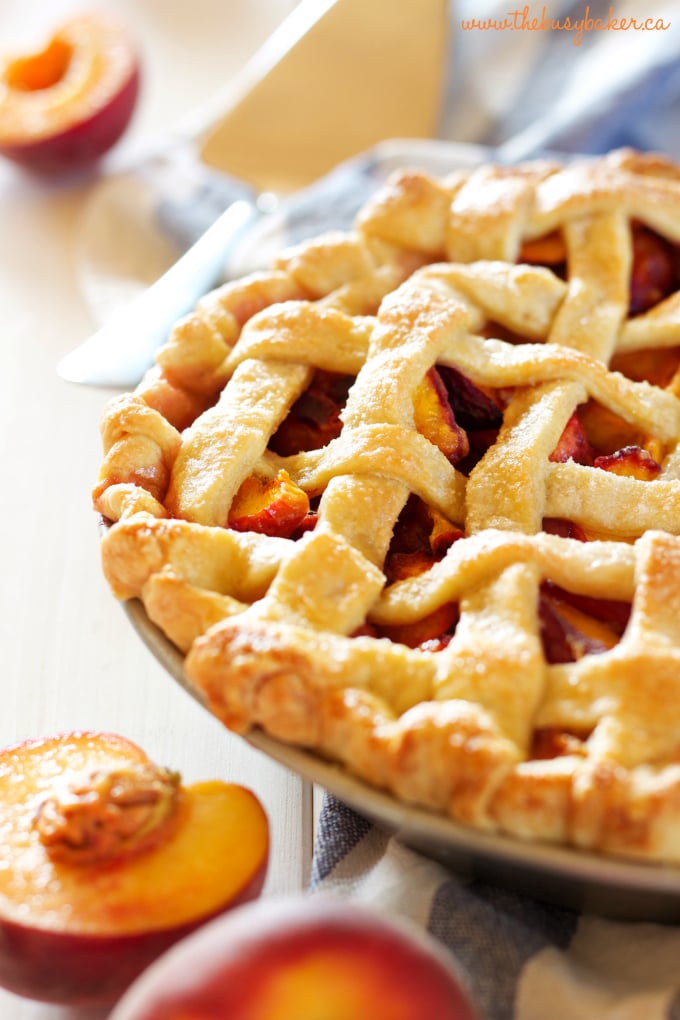
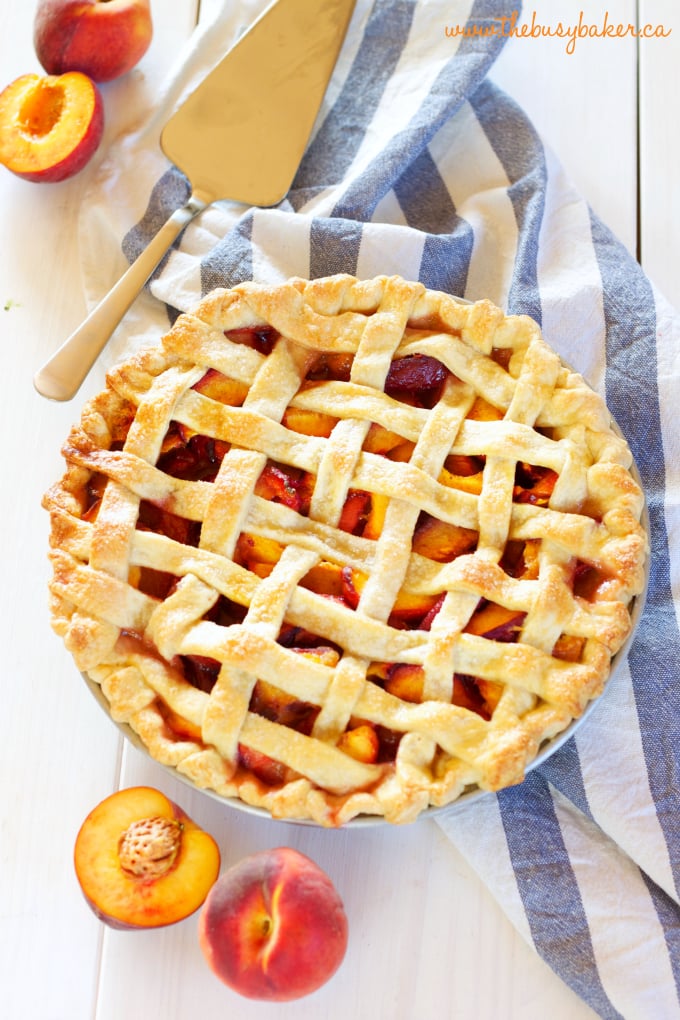
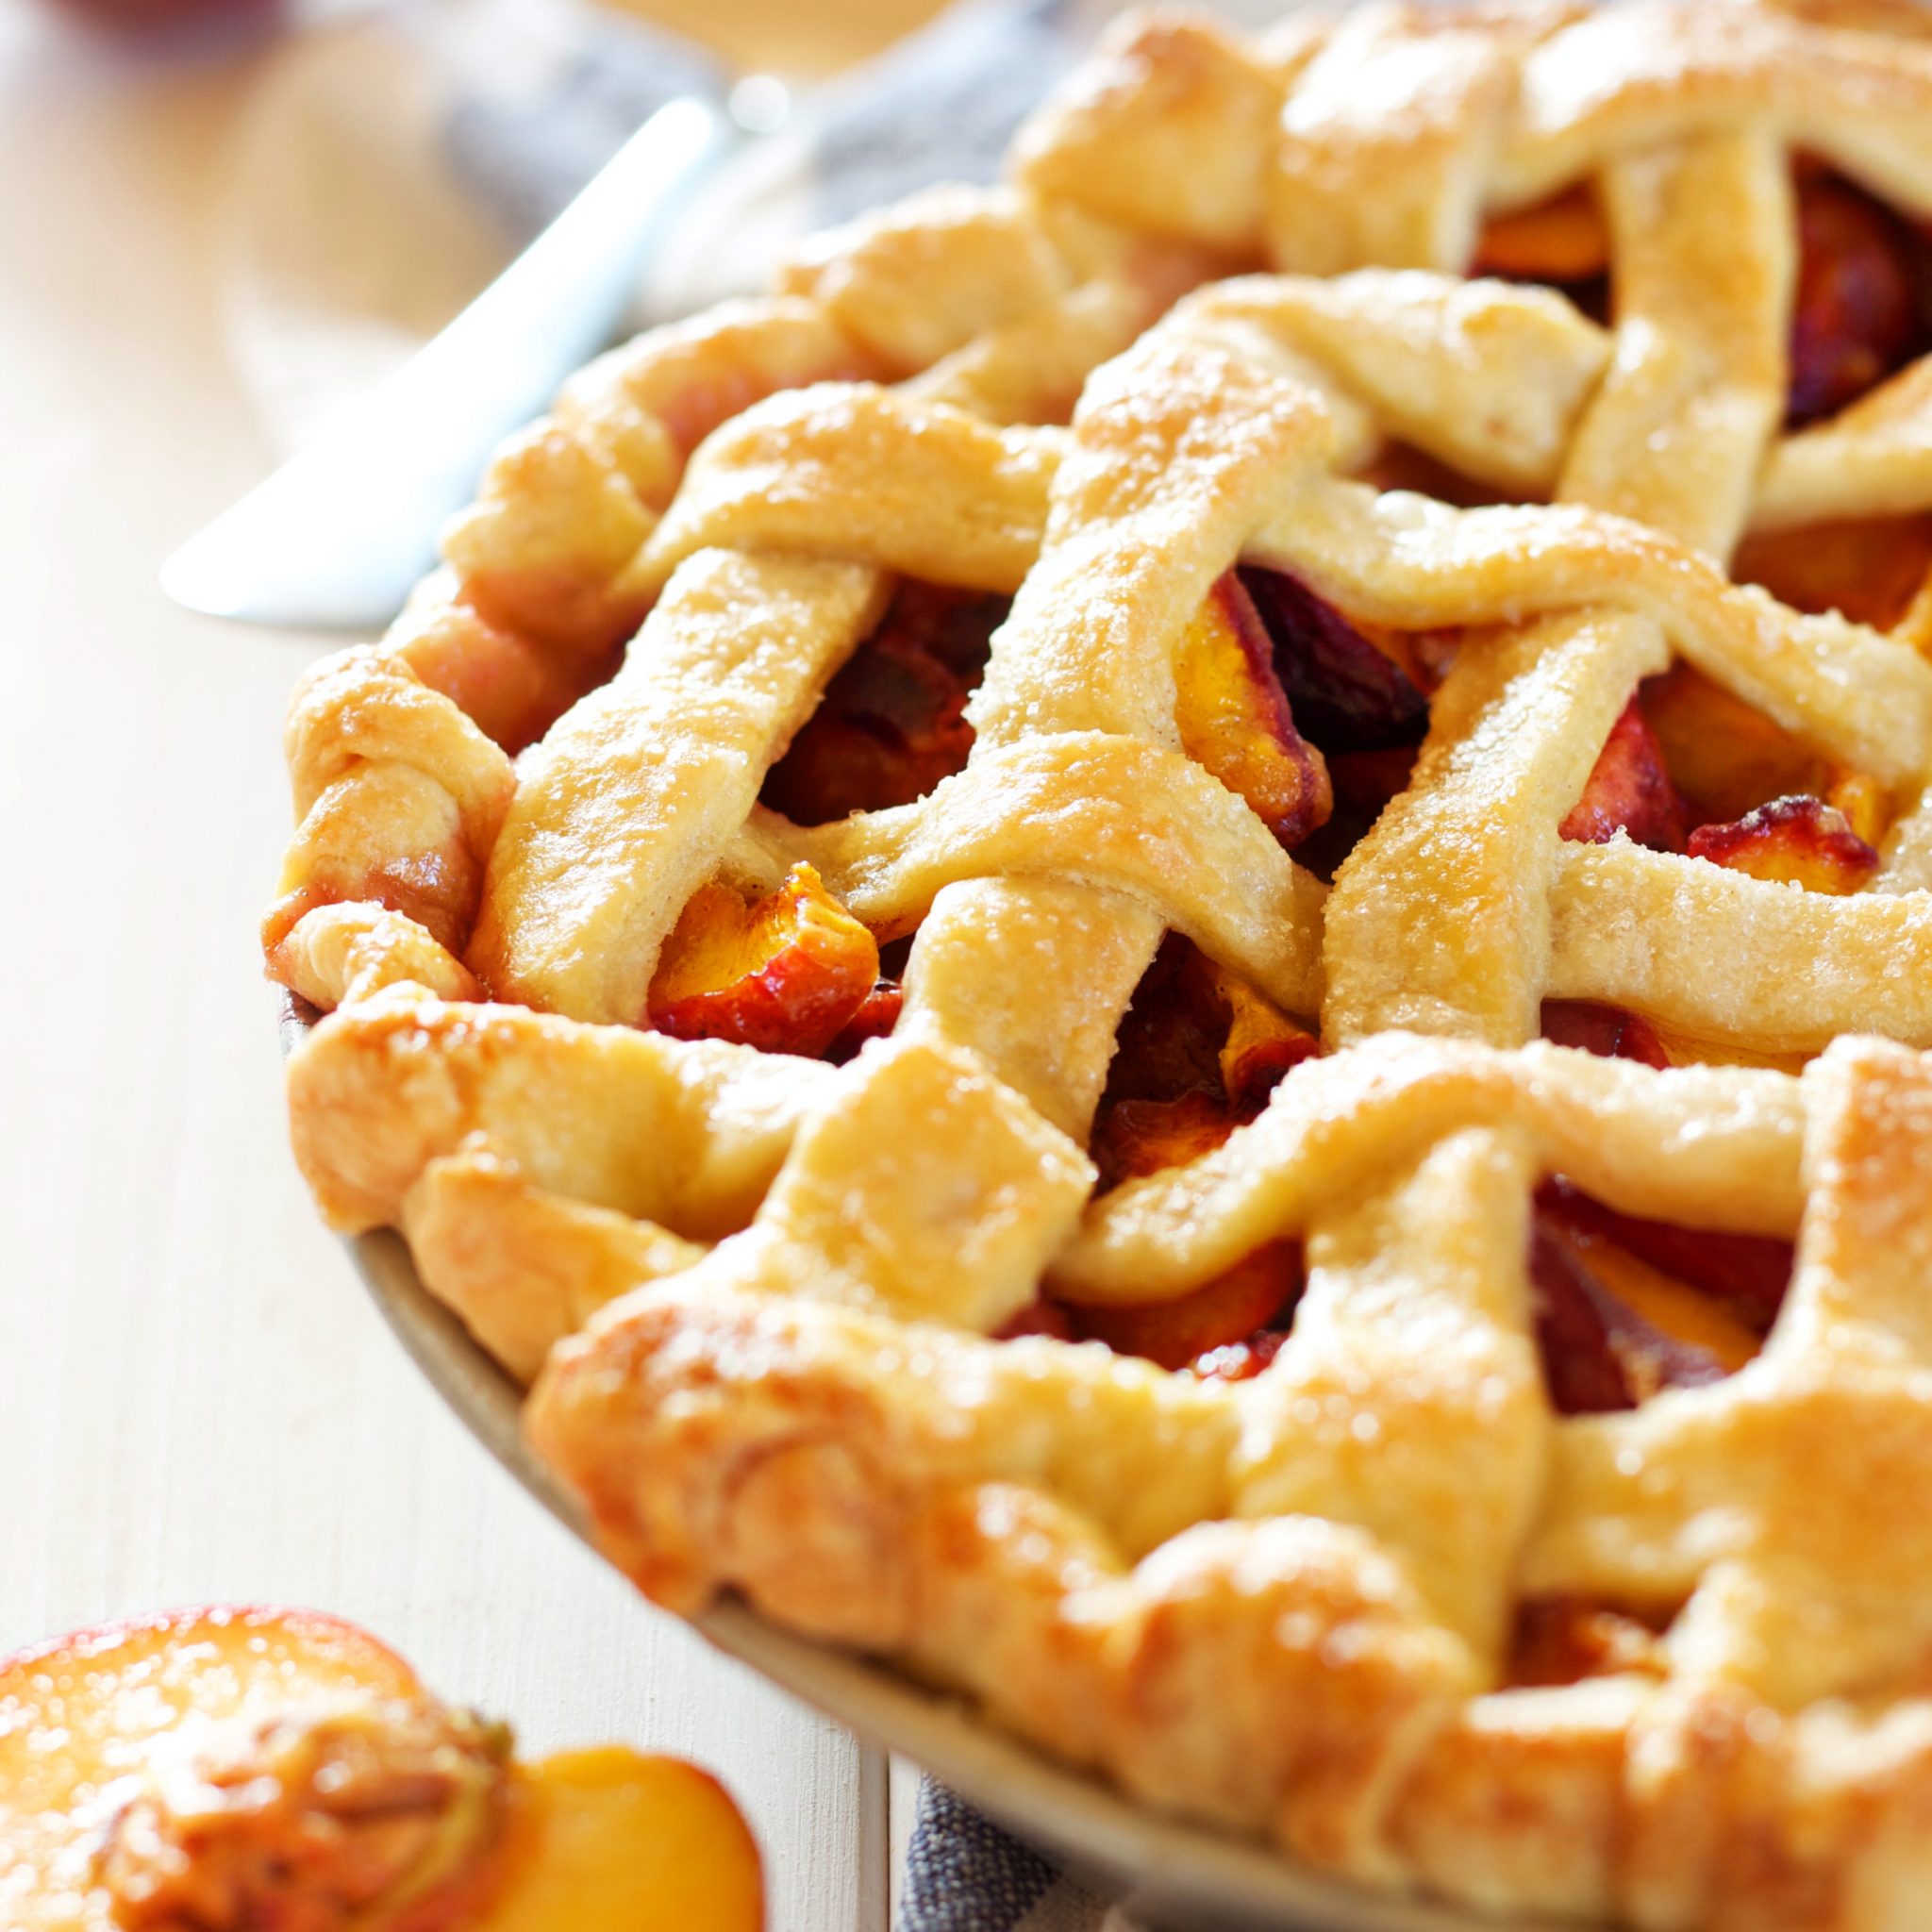
- It’s BEAUTIFUL and IMPRESSIVE: The lattice top crust makes the peach pie filling so beautiful with the contrast of the colour of the peaches and the golden brown crust. It’s great for summer entertaining!
- It’s GREAT for beginners: Following our pro tips and simple pie crust recipe is a great way to learn how to make pie from scratch!
- It’s made with FRESH FRUIT: Fresh peaches, especially when they’re in season, make this pie so juicy and flavourful!
Follow these pro tips to make the perfect peach pie!
Add the flour and mix it with your bare (clean) hands on your counter top. Stop working the pie crust dough as soon as the flour is incorporated.
Cold ingredients will help the butter stay in small, solid pieces as you mix, which will create a flaky crust (and who doesn’t love a flaky pie crust??).
Add a tablespoon or so of rolled oats in the bottom crust before adding the filling. The oats will soak up any extra liquid from the filling and prevent the bottom of the crust from becoming soggy.
Make sure to leave room in the crust so the filling doesn’t bubble over while baking.
Cornstarch. It’s a pie-baker’s best friend. Add it to your fruit filling and it’ll help your slices of pie keep their shape.
Brush your completed pie gently with egg wash (a mixture of beaten egg and water). This will help the pie achieve that gorgeous golden brown crust with a slight shine. A little sprinkling with some coarse sugar after the egg wash (before baking) helps add a little something extra too!
It’s also a great idea to bake your pie with a baking sheet on the rack below, just to catch any stray drips before they burn onto the bottom of your oven. (Been there, done that… more times than I’d care to admit!)
Cutting into a hot pie may seem like a good idea, but all it will leave you with is a steamy hot soupy mess. Be sure to let the pie to cool to room temperature before slicing – this will make sure your slices are juicy, but keep their shape.
If you run into trouble while making this peach pie, here’s a list of possible problems you might encounter and how to fix and prevent them.
Don’t over-mix dough. Mix the dough quickly and just until it comes together. We want the dough to stay cool.
If you choose to make this pie with a top crust instead of a lattice crust, make sure to vent your pie before you bake it so that the steam can escape and the filling does not overflow. To do so, cut slits in the top of crust. Using a lattice top crust (as pictured) will allow the pie to vent and gives a beautiful visual appearance.
Make sure to use ripe peaches to give the best flavour. If you use unripe peaches, the filling won’t be sweet and overripe peaches become mushy.
Make sure to follow the recipe – don’t add too much sugar or it will overpower the natural flavour of fresh peaches. If the filling is still too sweet, simply add a pinch of salt to temper the sweetness.
Make sure to use the appropriate amount of thickening agent so that the filling is thick and doesn’t run out of the pie crust. The filling will always seem runny when the pie is hot – be sure to wait until it’s cool to slice into it.
If the pie is baked at too high a temperature or too low, the crust can burn or the pie can be baked unevenly, giving it an inconsistent texture. If your crust is browning too much, tent some aluminum foil over it to stop the browning.
You’ll need these items on hand to make the peach pie filling and crust (paid links):
- mixing bowls
- measuring cups and spoons
- Silicone Spatula
- pie pan
- Rolling Pin
- Pastry Brush
- Food Processor
- wooden spoon
- a sharp knife
You’ll need these ingredients to make this recipe for peach pie (paid links):
FOR THE CRUST:
- 2 1/2 cups all purpose flour (315 grams)
- 1 tablespoon white sugar
- 2 pinches sea salt
- 1 cup cold unsalted butter, cut into small chunks (225 grams)
- 1/2 cup cold water
FOR THE FILLING:
- 1 tablespoon rolled oats
- 6-7 cups sliced fresh peaches (ripe is best!)
- 2 tablespoons cornstarch
- 3 tablespoons brown sugar
- 1 teaspoon ground cinnamon
FOR FINISHING:
- 1 egg
- 1 tablespoon water
- 1-2 tablespoons coarse sugar
Try these variations on this classic peach pie recipe!
- Apple: Add in apples slices together with the peaches for a peach apple pie.
- Spices: Add a teaspoon of nutmeg or ginger for added flavour.
- Blueberry: Add a few handfuls of blueberries to the fresh peaches to give a burst of colour and flavour.
- Raspberry: Add raspberries to the fresh peaches for a sweet and tangy tasting pie.
- Pecan: Add chopped pecans to the peach filling or sprinkle some on the top for a fruit and nut pie.
Time needed: 1 hour and 50 minutes
Follow these steps to make this homemade peach pie recipe!
- Make the Dough First.
Combine the ingredients to make the dough.
- Chill Dough Before Rolling.
Divide the dough into two balls and wrap each one separately in plastic wrap, placing it in the fridge to chill overnight.
- Preheat the Oven.
Preheat your oven to 350 degrees Fahrenheit (175 degrees Celsius). If your oven runs hot, set it to 325 degrees Fahrenheit (160 degrees Celsius). (Use an oven thermometer to ensure the correct temperature)
- Let Dough Sit.
Let the dough relax after removing it from the fridge for about 10 minutes before rolling.
- Prepare Peach Pie Filling.
Add the sliced peaches to a bowl, along with the cornstarch, sugar, and cinnamon. Toss just until combined.
- Work Quickly.
Remove the chilled pie dough from the fridge and roll out one of the balls of dough into a large circle using a rolling pin. Add a generous amount of flour to the rolling surface and to the rolling pin, to prevent sticking and cracking.
- Transfer to your Pie Plate.
Peel the rolled out dough off the counter surface gently by rolling it backwards onto the rolling pin. Transfer it to a 9-inch pie plate and gently press the dough into the bottom of the pie plate and over the edges (try for a 1-2 inch overhang if possible).
- Add the Oats.
Sprinkle the rolled oats evenly in the bottom of the unbaked crust and add the filling overtop, making sure not to press the filling into the bottom of the pan, letting it fall naturally.
- Make the Top Crust.
Repeat the rolling out process with the second ball of dough, this time slicing it into about 10 long, thin slices using a pizza cutter (or a pastry cutter, if you have one). Create a lattice pattern using the strips of dough, overlapping every second vertical strip with every second horizontal strip
- Create a Clean Edge.
Trim any dough that hangs over the edge of the pie to 1-2 inches past the edge (try to keep the overhang amount even all the way around). Tuck any overhanging dough under to create a clean edge.
- Seal the Edge.
Seal the edge of the pie by creating a fluted pattern – press into the edge of the pie from the outside with your left thumb and index finger while pressing into the edge of the pie from the inside with your right index finger. Do this all the way around the edge of the pie to create a fluted pattern (and see my tutorial HERE for how to create a beautiful fluted edge to your pies!).
- Add Egg Wash.
Beat the egg and 1 tablespoon of water and brush it lightly onto the unbaked crust. Use a light hand while brushing – too much egg wash creates an eggy texture after baking.
- Bake.
Dust the crust with the coarse sugar and bake at 350 degrees Fahrenheit (175 degrees Celsius) for about 35 to 50 minutes, or until the crust is evenly browned and the filling is bubbly.
- Serve!
Serve with a scoop of vanilla ice cream on a hot summer day! It will be a dessert that no one will be able to resist!

Why is my homemade pie runny?
Homemade pie can be runny if it’s underbaked or if there isn’t enough thickener in the filling.
What is the best thickener for fruit pie?
The best thickener for any fruit pie is cornstarch.
What to add to pie filling to make it better?
Adding lemon juice and a pinch of salt to your homemade fruit pie will make the filling more flavourful.
Is flour or cornstarch better for pie filling?
Cornstarch is much better to use than flour for homemade fruit pie filling. Cornstarch makes a much silkier sauce while flour creates a thicker, more dull-looking sauce. Another reason cornstarch is a better choice is that less cornstarch is required to thicken pie filling than flour.
What is a trick to making a good pie crust?
The trick to making good pie crust is using cold butter and not over-working the dough. Refrigerating the dough before rolling out is also a critical step for flaky, crispy pie pastry.
Is pie crust better with butter or shortening?
Butter creates a much stronger, flakier and more crispy pie dough than shortening.
What is the secret to flaky pie crust?
The secret to flaky pie crust is using cold butter instead of shortening. It also helps to avoid overworking the dough and to refrigerate it before rolling out.
Can I freeze the pie dough before baking?
Yes! Simply freeze the raw pie dough in discs (as directed in the recipe below) and remove from the freezer and place in the fridge for 12 hours before rolling out.
Can I use frozen fruit in my homemade pie filling?
Yes. Simply increase the cornstarch in the filling by several tablespoons if using frozen fruit in the filling.
How do I store this fresh peach pie recipe?
Store any leftovers of this pie in an airtight container at room temperature for up to 3 days or in the fridge for up to 5 days. Reheat any leftovers in the microwave or toaster oven until heated through.
Can I freeze this easy peach pie recipe?
It can be frozen for up to 2-3 months before baking (cover in plastic wrap or freeze in an airtight container), thawed in the fridge overnight and then baked fresh in the morning. (Be sure to always place a cold baking dish into a cold oven to prevent the dish from cracking.)
They can also be frozen after baking for up to 2-3 months (cover in plastic wrap, foil or freeze in an airtight container). Thaw at room temperature and reheat before serving, if desired.
If I don’t have cornstarch, what are other options for thickening agents?
Other thickening agents include instant tapioca, arrowroot powder, potato starch, pectin, and Agar-Agar.
What is the difference between a peach cobbler and this peach pie?
Peach cobbler doesn’t necessarily need a thickening agent like this pie does. Peach cobbler has a cake topping or an oatmeal crumble topping. This fresh peach filling has a thickening agent to make it firmer between this double-crust pie.
Do I need to put the peaches in boiling water to remove the skin? *
No, the filling is simply divine with fresh peaches and leaving the skin on the peaches adds such a gorgeous texture to this dessert.
We hope you like this recipe! Let us know in the comments below, what’s your favourite fruit pie for summer?

Looking for more delicious summer desserts? You LOVE these!
- No Bake Blueberry Lemon Icebox Cake
- No Bake Oreo Cheesecake
- Berry Cheesecake Sugar Cookie Bars
- Lemon Cupcakes
- Blackberry Pie
- Raspberry Pie
- Strawberry Rhubarb Crisp
If you made this, share a photo!
Are you trying this recipe? Use the comment form below to share your take; now with support for image uploads and comment voting!
Peach Pie
Recipe: Equipment
Recipe: Ingredients
For the crust:
- 2 1/2 cups all purpose flour (315 grams)
- 1 tablespoon white sugar
- 2 pinches sea salt
- 1 cup cold unsalted butter, cut into small chunks (225 grams)
- 1/2 cup cold water
For the filling
- 1 tablespoon rolled oats
- 6-7 cups sliced fresh peaches (ripe is best!)
- 2 tablespoons cornstarch
- 3 tablespoons brown sugar
- 1 teaspoon cinnamon
For finishing:
- 1 egg
- 1 tablespoon water
- 1-2 tablespoons coarse sugar
Recipe: Instructions
For the crust:
- Add the flour, sugar, and salt to a large bowl.
- Add the chunks of cold butter and use a pastry blender or your hands to work the butter into the dough until the mixture is crumbly. Try not to handle the butter too much (the heat from your hands will soften it) – use quick movements and don’t worry if some larger chunks of butter still remain.
- Add the water slowly, just until the dough comes together. Depending on the weather, I sometimes don’t use the entire half cup of cold water, so start by adding several tablespoons at a time just until the dough comes together.
- Dump the rough dough onto the counter (there will still be some flour remaining) and combine it in folding motions just until the flour disappears. Using a folding motion will also help create flaky layers in your pie crust.
- Divide the dough into two balls and wrap each one separately in plastic wrap, placing it in the fridge to chill overnight.
For the filling:
- Add the sliced peaches to a bowl, along with the cornstarch, sugar, and cinnamon. Toss just until combined.
- Set the filling aside while you prepare the crust for baking.
Assembly:
- Preheat your oven to 350 degrees Fahrenheit (175 degrees Celsius). If your oven runs hot, set it to 325 degrees Fahrenheit (160 degrees Celsius). (Use an oven thermometer to ensure the correct temperature)
- Remove the chilled pie dough from the fridge and roll out one of the balls of dough into a large circle using a rolling pin. Add a generous amount of flour to the rolling surface and to the rolling pin, to prevent sticking and cracking.
- Peel the rolled out dough off the counter surface gently by rolling it backwards onto the rolling pin.
- Transfer it to a 9-inch pie plate and gently press the dough into the bottom of the pie plate and over the edges (try for a 1-2 inch overhang if possible).
- Sprinkle the rolled oats evenly in the bottom of the unbaked crust and add the filling overtop, making sure not to press the filling into the bottom of the pan, letting it fall naturally.
- Repeat the rolling out process with the second ball of dough, this time slicing it into about 10 long, thin slices using a pizza cutter (or a pastry cutter, if you have one).
- Create a lattice pattern using the strips of dough, overlapping every second vertical strip with every second horizontal strip.
- Trim any dough that hangs over the edge of the pie to 1-2 inches past the edge (try to keep the overhang amount even all the way around). Tuck any overhanging dough under to create a clean edge.
- Seal the edge of the pie by creating a fluted pattern – press into the edge of the pie from the outside with your left thumb and index finger while pressing into the edge of the pie from the inside with your right index finger. Do this all the way around the edge of the pie to create a fluted pattern (and see my tutorial HERE for how to create a beautiful fluted edge to your pies!)
- Beat the egg and 1 tablespoon of water and brush it lightly onto the unbaked crust. Use a light hand while brushing – too much egg wash creates an eggy texture after baking.
- Dust the crust with the coarse sugar and bake at 350 degrees Fahrenheit (175 degrees Celsius) for about 35 to 50 minutes, or until the crust is evenly browned and the filling is bubbly.
Recipe: Notes
No-Fail Tips
Watch the pie closely as it bakes to ensure it bakes and browns evenly. Feel free to turn the pie halfway through baking so it browns evenly in your oven. Bake this pie on a baking sheet to prevent the filling from spilling out of the pie as it bakes and burning to the bottom of your oven.Storage Instructions
Store any leftovers of this pie in an airtight container at room temperature for up to 3 days or in the fridge for up to 5 days. Reheat any leftovers in the microwave or toaster oven until heated through.Freezer Instructions
It can be frozen for up to 2-3 months before baking (cover in plastic wrap or freeze in an airtight container), thawed in the fridge overnight, and then baked fresh in the morning. (Be sure to always place a cold baking dish into a cold oven to prevent the dish from cracking.) They can also be frozen after baking for up to 2-3 months (cover in plastic wrap or freeze in an airtight container). Thaw at room temperature and reheat before serving, if desired.Recipe: Nutrition
Notice: Nutrition is auto-calculated, using Spoonacular, for your convenience. Where relevant, we recommend using your own nutrition calculations.

The Done-For-You SUMMER BUNDLE + BONUS Menu Guide!
5 complete recipe guides for effortless summer hosting. The invisible work of summer? Done for you.
I made this today and it turned out really well. My guests LOVED it.
It took 50 minutes.
The one “thing” that I was surprised about was that it was still quite runny despite the oats and the corn starch…
Glad you liked it! 🙂
I love this recipe. I’ve only even baked it fresh, but I need to freeze it this time. Should I fully defrost it before baking when I’m ready to bake it?
I’d suggest defrosting it at least partially in the fridge first, but be sure not to let the pastry become too warm before baking.
Can this pie be frozen? Pre or post baking?
Yes! It can be frozen pre-baking for sure (I’ve done this many times!), and this might be a better option that freezing it post baking (it will prevent the crust from becoming soggy as it thaws).