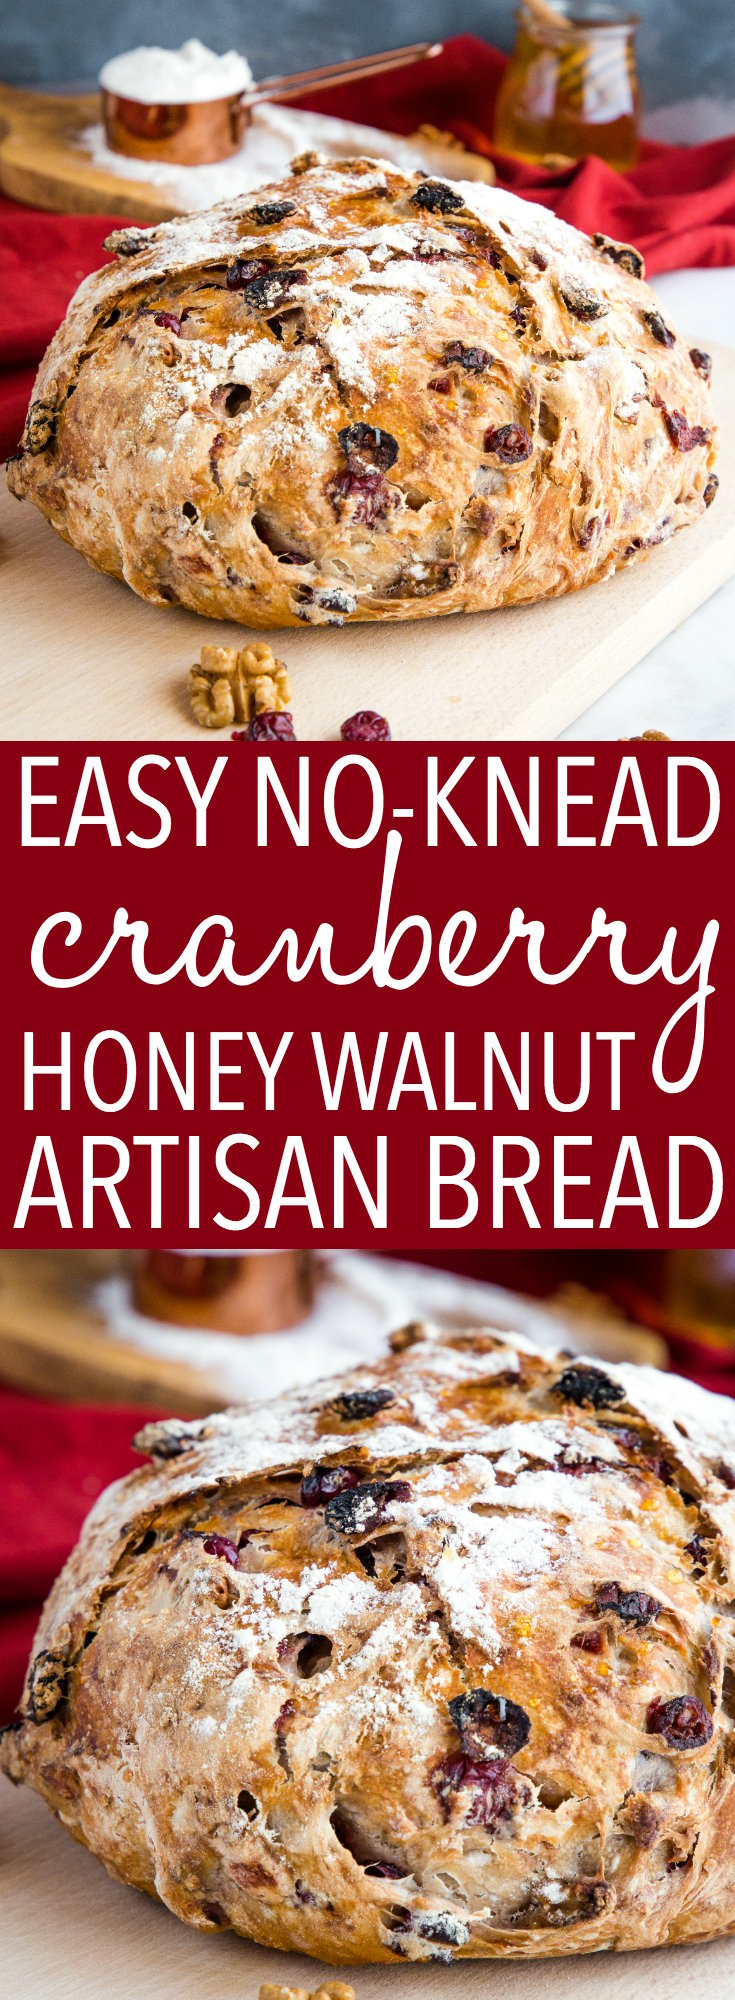
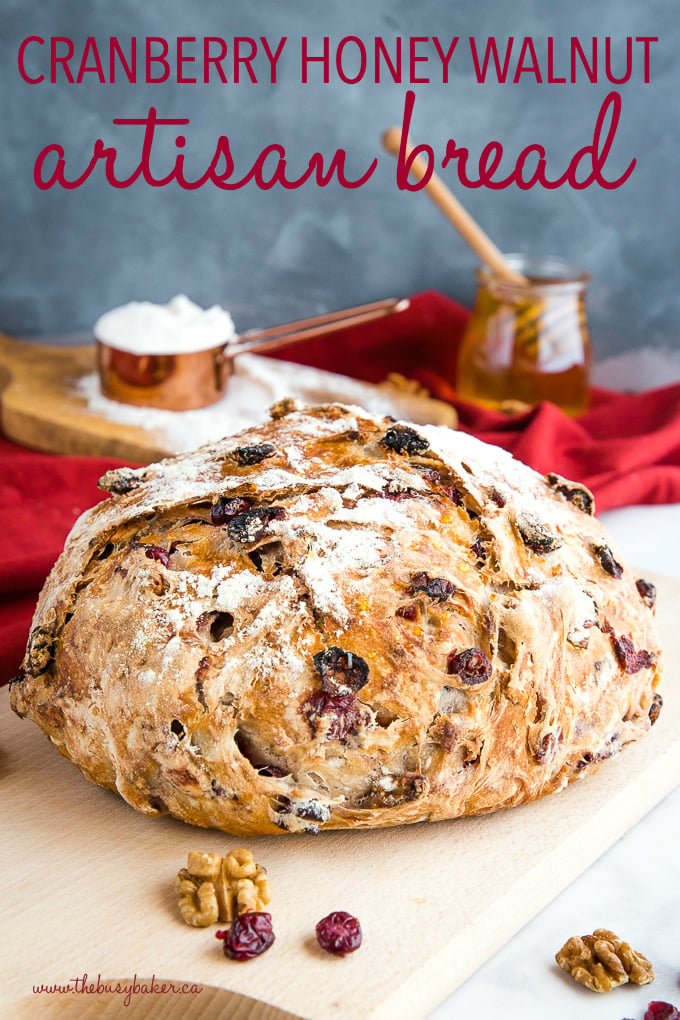
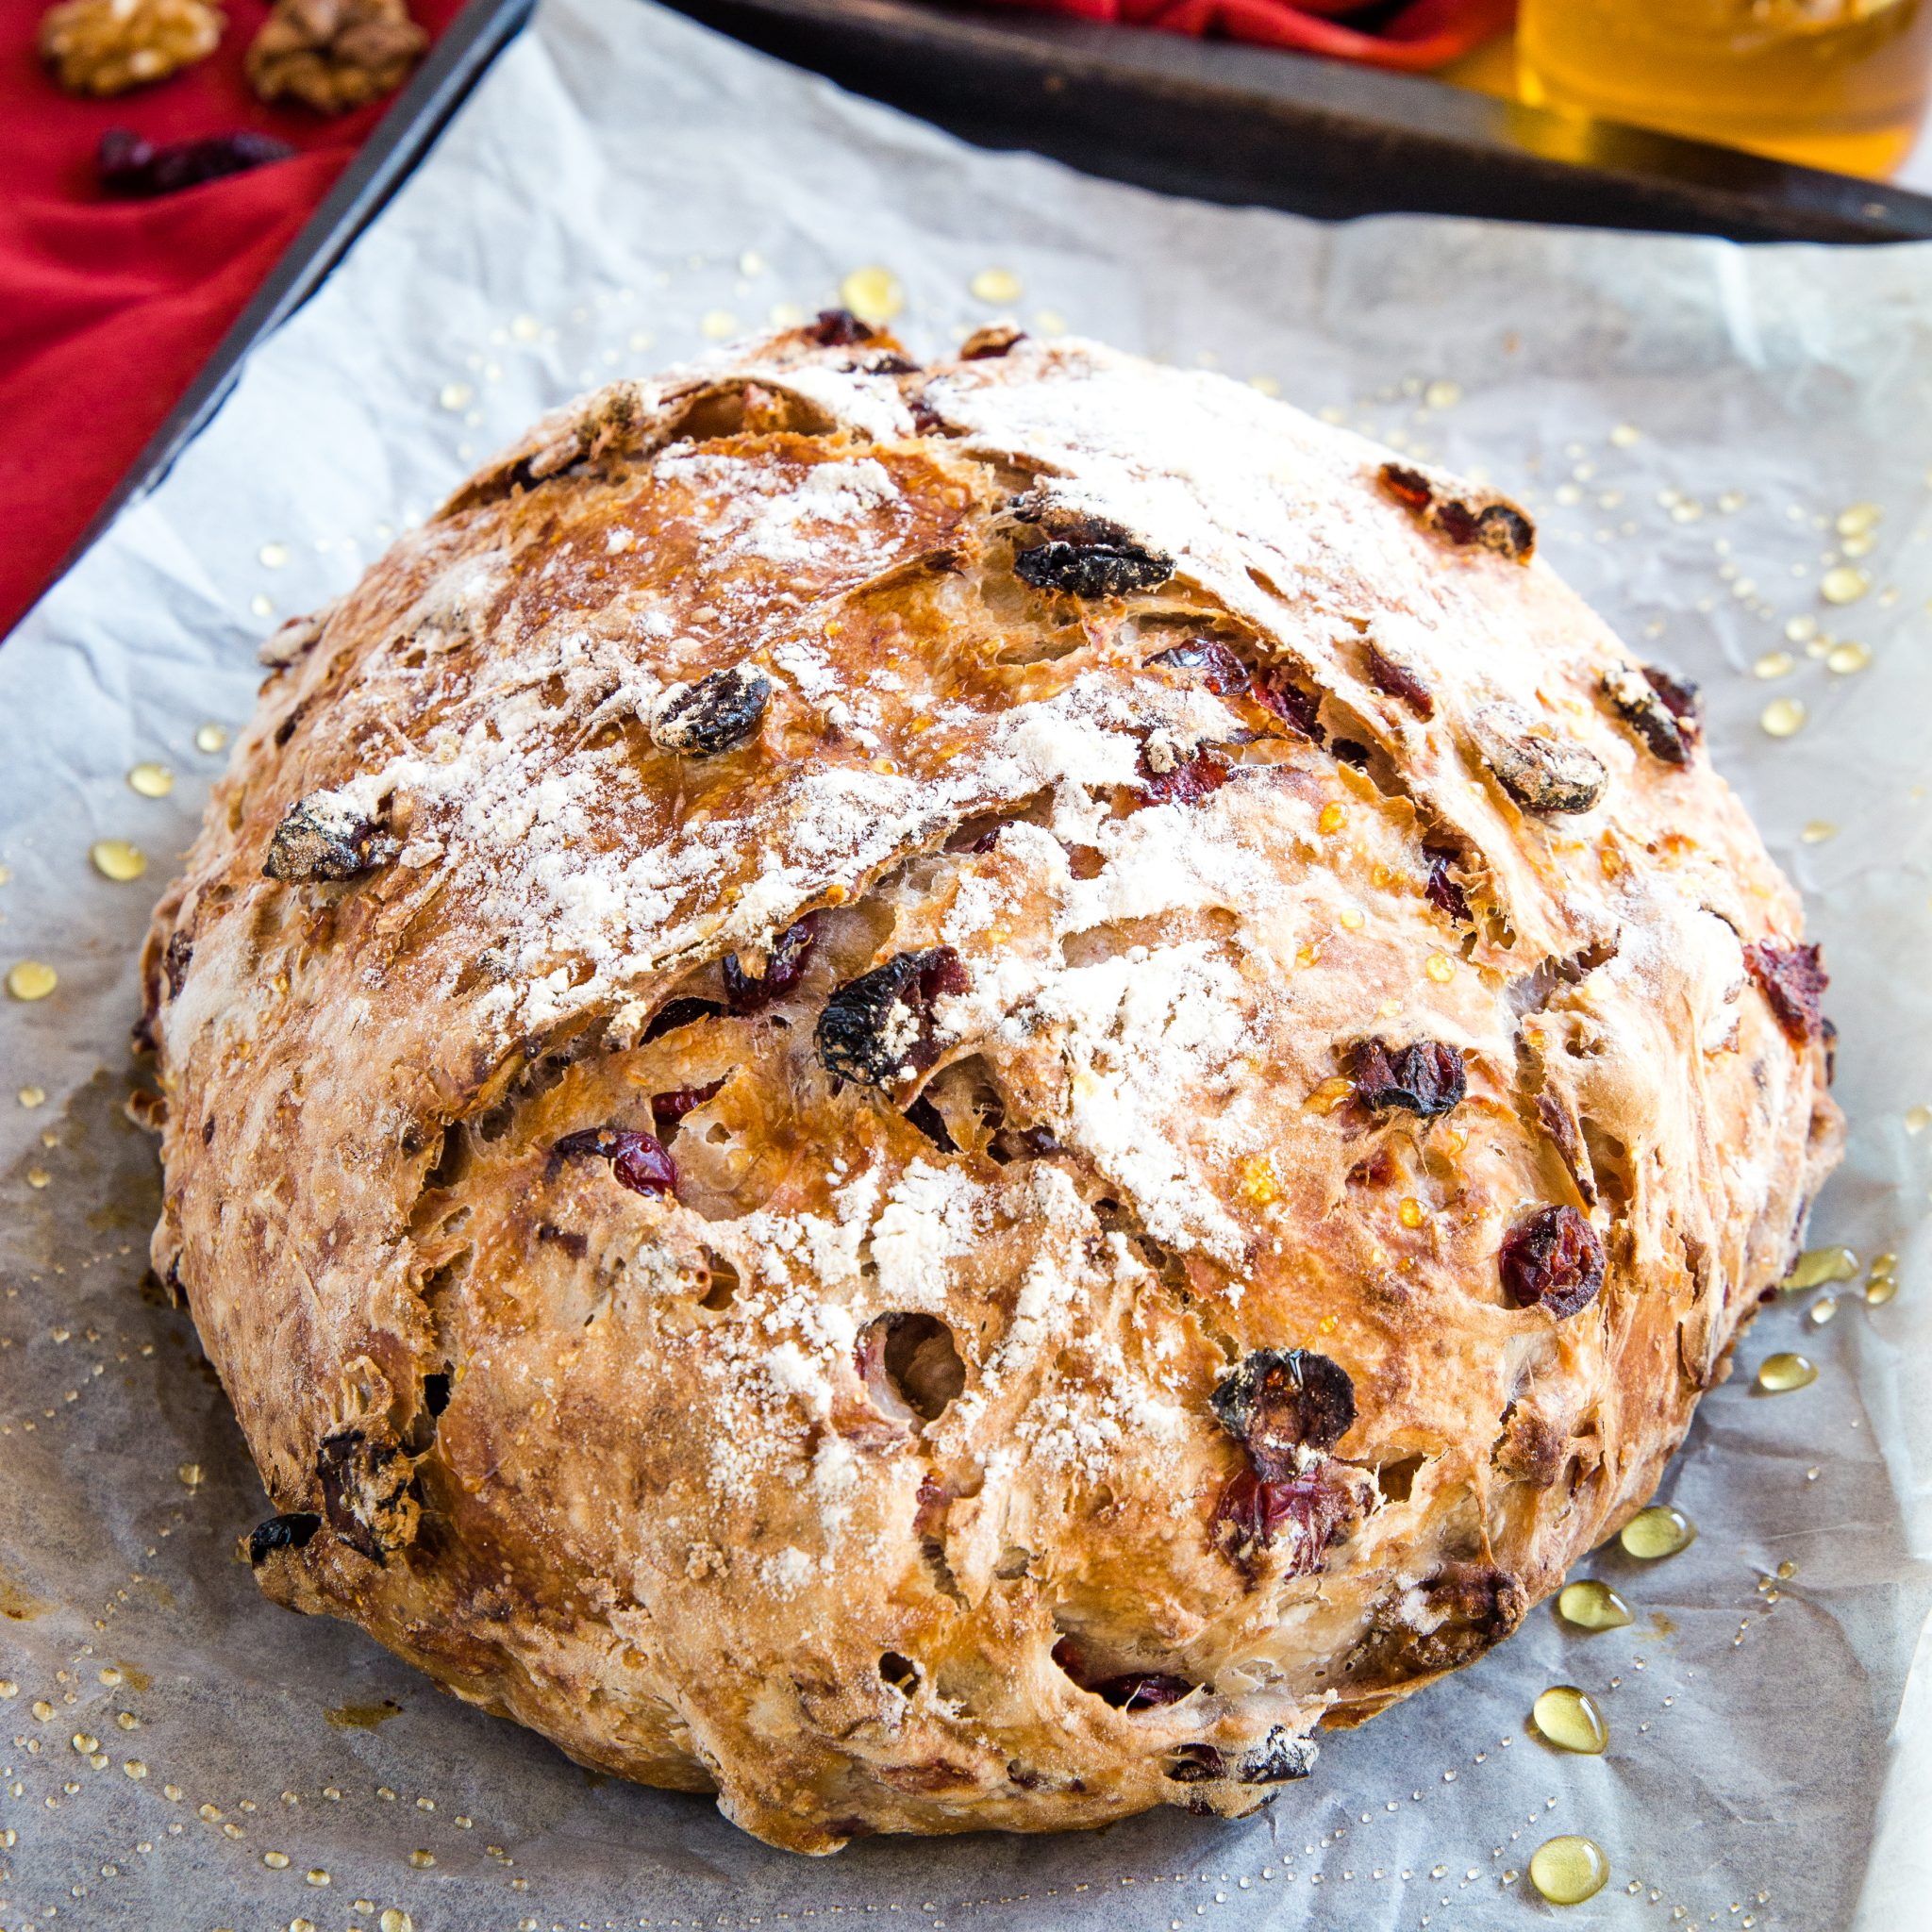
This No-Knead Cranberry Walnut Bread with Honey is a delicious bakery-style bread that’s sweet and delicious! Make it perfect with my easy pro tips for homemade bakery-style bread!
NEVER MISS A POST! FOLLOW ME ON:
FACEBOOK | PINTEREST | INSTAGRAM | TWITTER
The BEST No-Knead Bread Recipe!
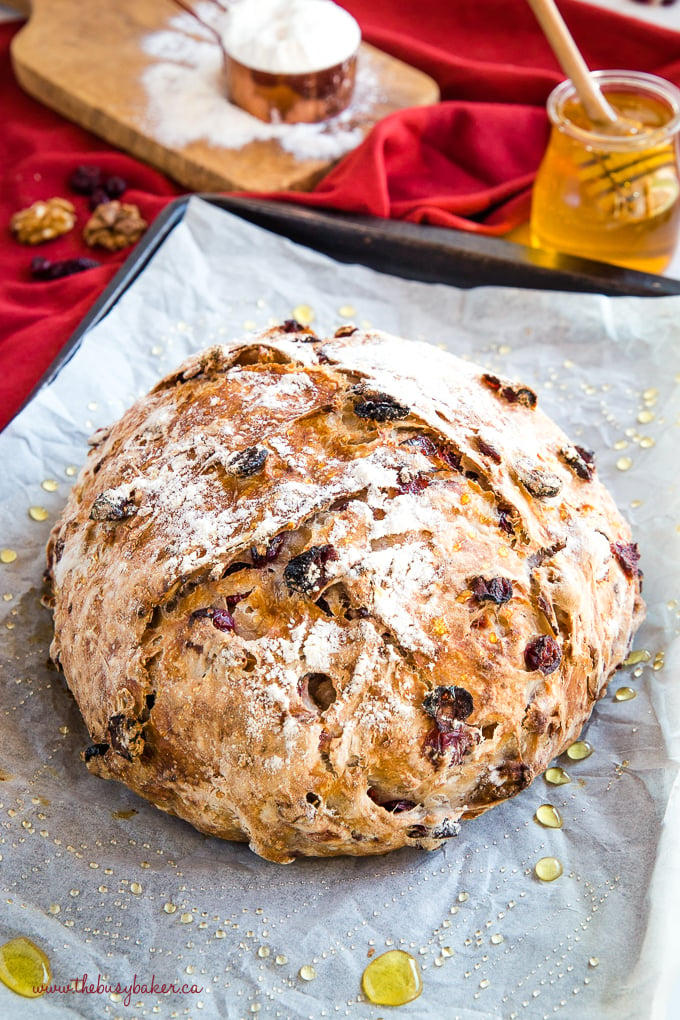
If you’ve been following thebusybaker.ca for awhile now you’ll already know how obsessed I am with no knead artisan-style bread recipes! Way back when I first started my blog I shared this Easy No Knead Artisan Bread recipe with you and it’s a recipe I’ve made more than a hundred times I’m sure, with countless flavour variations. My favourite variation yet is this No-Knead Cranberry Honey Walnut Artisan Bread! It’s delicious for breakfast or with a cup of tea in the afternoon, and it is a simply gorgeous loaf of bread that everyone will love, especially for the holidays! And with my pro tips, you’ll be able to make it too!
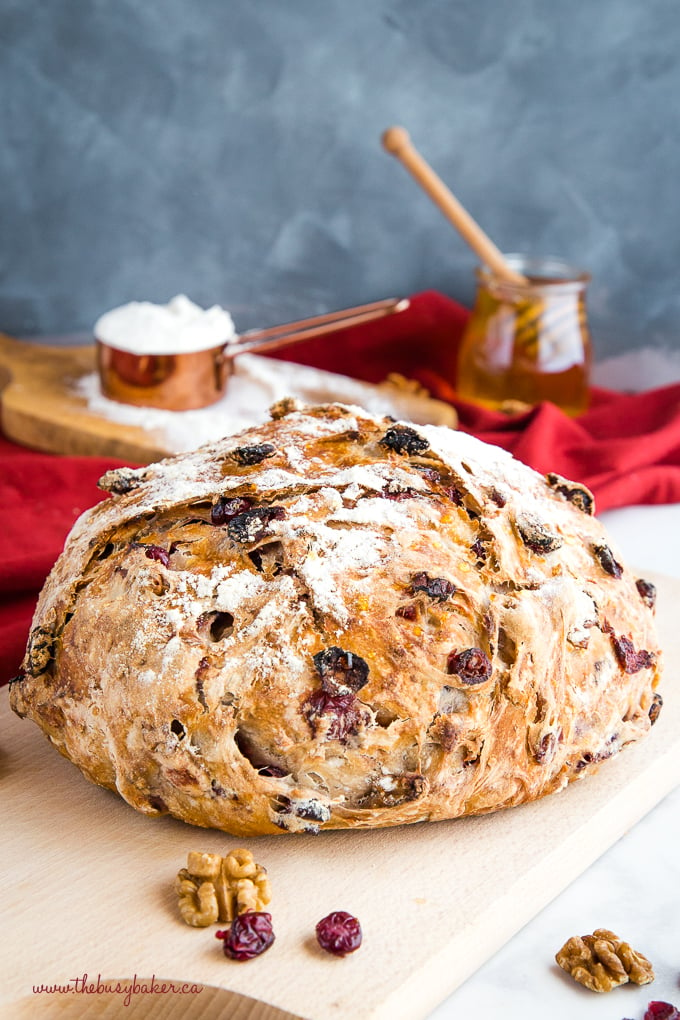
How to make Cranberry Walnut Bread
Pro tip#1: Pre-heat your Dutch Oven pot before baking.
This bread is baked in an oven-safe Dutch Oven pot which traps in steam, making the crust of the loaf extra crispy. Pre-heating the pot before baking helps make the crust even more crispy and golden brown! If you’re looking for a great Dutch Oven pot for making bread recipes like this No-Knead Cranberry Honey Walnut Artisan Bread, I will tell you that it’s one of the best investments you can ever make for your kitchen. Mine is a total beauty from Le Creuset (affiliate link) and I use it almost ever day throughout the year for soups, stews, sauces, curries, and of course for baking bread (if you want my original Dutch Oven Crusty Bread recipe, grab it HERE!). A pot like this one is definitely a financial investment, but considering how much I use mine and considering its high quality, it’s definitely a worthy investment since it will last for 10, 20 or even more years. I’ve also used similar cast iron pots from other brands, like THIS ONE from KitchenAid and THIS ONE from Lodge Cast Iron (both affiliate links) if you’re looking for something a little less expensive but still high quality that’ll do the job well.
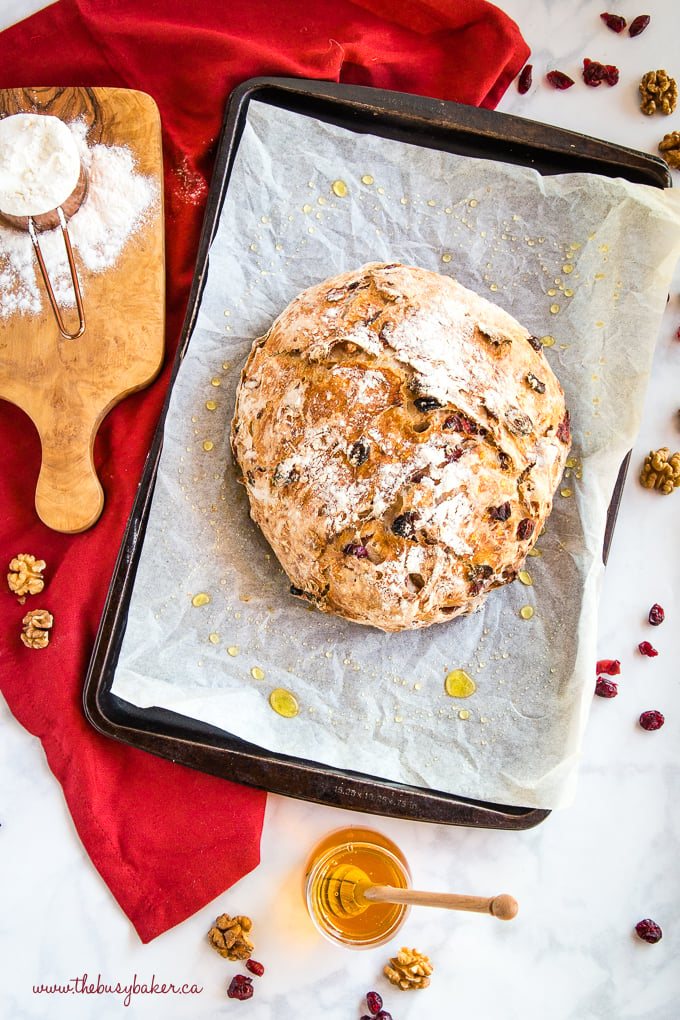
Pro Tip #2: Shape your loaf firmly but gently and dust the top of the loaf with flour.
Creating a round shape will help the loaf bake evenly and dusting the top with flour will create that gorgeous, bakery-style appearance that everyone loves!
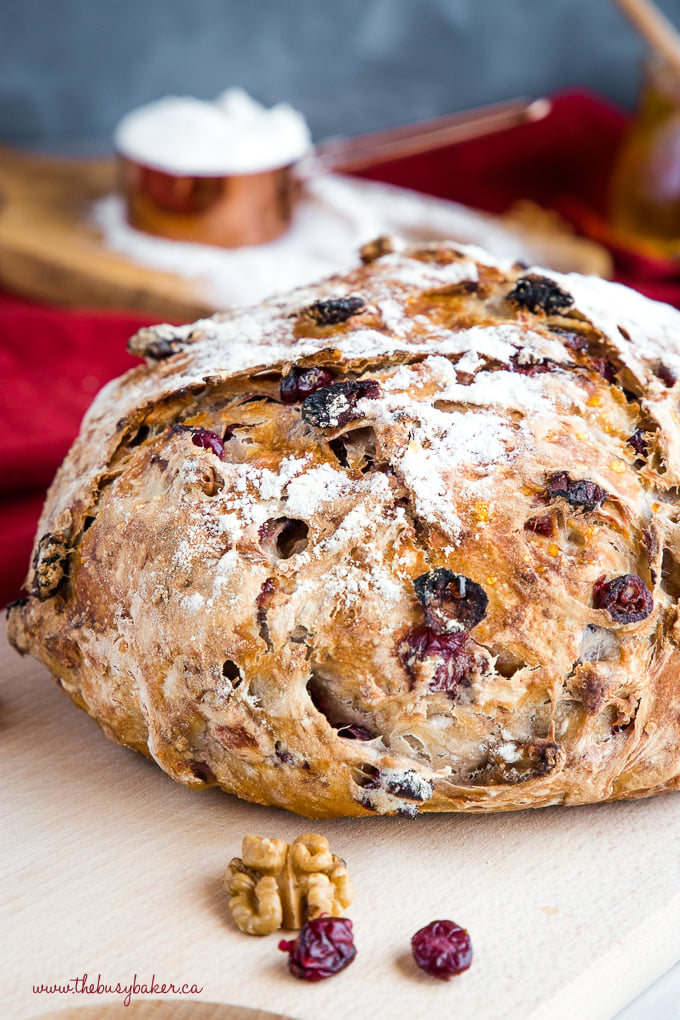
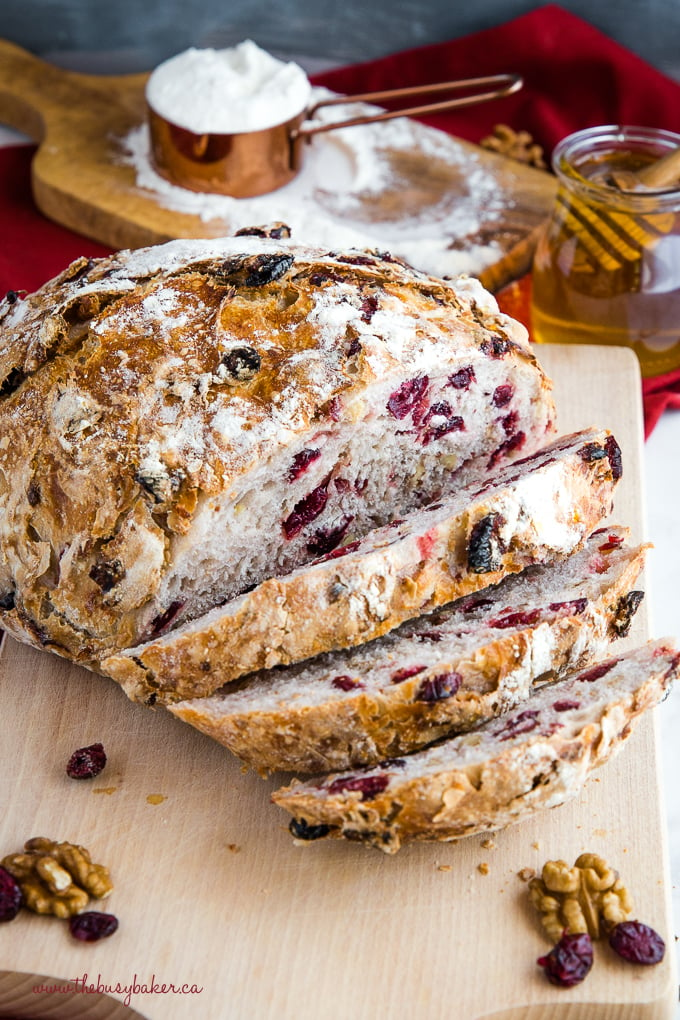
Pro Tip #3: Let the No-Knead Cranberry Honey Walnut Artisan Bread loaf cool completely before cutting into it!!
Resist the urge to slice the bread while it’s hot. Did you know that after removing a loaf of bread from the oven it continues to bake inside as it cools?? Slicing into this gorgeous loaf too early will cause the inside of the loaf to be under-cooked and gummy. Letting the loaf cool completely before slicing ensures the perfect fluffy texture when you slice into it!
NEVER MISS A POST! FOLLOW ME ON:
FACEBOOK | PINTEREST | INSTAGRAM | TWITTER
I hope you love this No-Knead Cranberry Walnut Bread with Honey as much as we do! Let me know in the comments below, what’s your favourite bakery-style bread to make at home? I’d love to know!
KITCHEN PRODUCTS I RECOMMEND:
Looking for even more delicious bread recipes? You’ll LOVE these:
-
Garlic Butter Dinner Rolls
-
Healthier Cornbread
-
Pumpkin Cornbread Muffins
-
Easy No Knead Artisan Bread
-
Easy No Knead Cinnamon Raisin Artisan Bread
LOOKING FOR MORE EASY STRESS-FREE HOLIDAY MEAL IDEAS AND RECIPES?
GET MY EASY NO-FAIL HOLIDAY MEALS E-COOKBOOK!
RECIPE VIDEO
Watch the video below to see exactly how I make this delicious bread recipe. You can find more delicious recipe videos on my YouTube channel.
No-Knead Cranberry Walnut Bread with Honey
Ingredients
- 3 cups all purpose flour, plus 3 tablespoons
- 1/2 teaspoon instant yeast
- 2 teaspoons sea salt
- 1/2 cup chopped walnuts
- 1 cup dried cranberries
- 1 1/2 cups water at room temperature
- 2 tablespoons liquid honey, plus more for brushing on after baking or other vegan honey substitute
Instructions
- Start with a large bowl and a wooden spoon, and add your flour to the bowl. Measure the yeast and add it to one side of the bowl. Measure the salt and add it to the other side.
- Using a wooden spoon, stir the yeast into the flour on its side of the bowl first and then stir the salt into the flour on its side of the bowl. This will prevent the salt mixing directly with the yeast. Give the whole mixture a few good stirs to make sure everything is combined.
- Add the cranberries and walnuts to the flour mixture and toss well to coat, and to make sure they're distributed evenly throughout.
- Measure the water. Make sure the water is at room temperature; water that is too warm or too cold can kill the yeast and prevent the bread from rising at all. Add the honey to the water and stir with a fork to combine.
- Pour the water in and stir with a wooden spoon. The dough will be rough and a bit sticky, but that's normal.
- Stir until all the flour is combined. This is not normal bread dough (there's no kneading involved in this recipe), so you don't need to be too concerned about the appearance of the dough at this point. Just make sure the ingredients are combined well.
- Cover the bowl with plastic wrap. It's a good idea to ensure there's adequate space left in the bowl for the dough to at least double in size. Place the bowl in a warm, draft-free place and let it rise for 12-18 hours.
- After the dough has risen for 12-18 hours, preheat your oven to 425 degrees Fahrenheit (if you're using convection, 410 degrees. If your oven runs hot, 400 degrees). Place your Dutch oven with the lid on in the cold oven and let it heat up with the oven. If your dutch oven is black or dark-coloured on the inside, set your oven to 400 degrees Fahrenheit instead of 425. I recommend a 6 or 7-quart dutch oven for this recipe.
- Place a piece of parchment paper on the counter and dust it with flour so the dough doesn't stick to the paper. Rub flour on your hands and scrape the dough away from the sides of the bowl, gathering it in your hands as best you can (it may feel kind of fluid and not at all like regular bread dough) and forming it into a circular loaf on the parchment paper. Don't worry if it still looks a little rough in places - this lends to the rustic look of this loaf. If your dough is very fluid, simply add an extra 1/4 to 1/3 cup of flour to the dough as you shape it.
- Once you have it shaped, the dough needs to undergo a second rise (much shorter than the first). The goal is to handle the dough as little as possible at this stage because any amount of tugging at the rough can cause it to deflate after it has undergone its second rise. The next few steps will help prevent this. But don't worry if it deflates a bit. This bread dough is pretty forgiving.
- Sprinkle flour over the top of the loaf and loosely cover it with plastic wrap to prevent a skin from forming over the dough. The flour also prevents the plastic wrap from sticking to the dough so when you take it off at the end of the rise, it doesn't disturb the dough and wreck the rustic shape you've created. Let the dough rise for about 45 minutes. Your oven will also be preheating during this time (and so will your pot).
- Once 45 minutes have passed remove the plastic wrap from the dough and trim the parchment paper into a circle closely around the dough. If it doesn't look like the dough has risen that much, don't worry about it. The loaf will puff up a bit when it hits the heat of the oven.
- Remove the preheated pot from the oven and transfer the dough into the pot as carefully as possible by handling only the parchment paper. Place the lid on the pot and return it to the oven for 30 minutes. Don't open the oven during this time, and certainly don't take the lid off the pot; the crispness of the crust develops because of the steam that builds up in the pot during this 30 minutes.
- After 30 minutes have passed, remove the lid from the pot and continue baking for another 15 minutes. After the 15 minutes have passed, remove the pot with bread from the oven and place it on a wire rack to cool. You'll probably hear it crackling as it cools - this is normal. Brush a little extra honey on the top of the bread now, if desired.
- If you can, resist the urge to cut into the bread until it has pretty much cooled completely. The bread continues to bake on the inside even after it has been removed from the oven and cutting it too early could result in the inside becoming gummy or rubbery.
Notes
Quick rise method:
- Add 2 1/2 teaspoons of active dry yeast instead of the amount listed in the recipe.
- Rise for 2 hours and follow the recipe directions after the rise time as written.
No Knead Bread Troubleshooting Tips:
- If you find your dough is too wet and fluid, add an extra 1/3 cup all purpose flour and stir until a shaggy dough appears. The dough should be slightly sticky but not wet. You can do this after the first rise as well, before you shape the loaf.
- Add 1 tablespoon of Vital Wheat Gluten to the dough with the flour to create a very voluminous dough that rises beautifully every single time and isn't too dense (optional).
- I recommend a 6 or 7-quart dutch oven for this recipe, but any covered pot that's oven-safe can be used for this recipe.
- If the bottom crust of your bread burns or becomes too hard or tough, it's likely that the bottom burner of your oven is too hot OR you're using a pot that's black on the inside (these conduct heat more efficiently than one that's a light colour on the inside). Try lowering your oven temperature by 25 degrees, using the convection setting, or using a different pot that's light in colour on the inside.
- Every person's oven is different, so it's a good idea to check on this bread about 15 minutes into the baking time if you know your oven runs hot, if you're using a gas oven, or if you are using the convection setting.
- Use an oven thermometer to make sure your oven temperature is correct. If your oven runs hot, lower the temperature of your oven by 25 degrees to be sure you don't burn the bread.
- Don't forget to dust the bottom of your pot with flour, or dust the parchment paper with flour (if you're using parchment paper as directed) so the bread doesn't stick.
- During the last 15 minutes of baking if you notice the bread is becoming too brown simply remove it from the oven early.
Demeter says
This looks fantastic and so perfect for the holiday! Thanks for all of your tips to getting this done right.
Chrissie says
I hope you enjoy it!!
Carol LiVecchi says
Unfortunately, my bottom was very over done, actually inedible, too. The rest of the bread is superb. My dough was so wet it seemed more like a batter so I added 1/4 cup of flour. It could have used more but I didn’t dare. I would like to try this bread again but I’m afraid I would have the same results as I followed the recipe. Photos of dough would be appreciated as well as metric measurements. You can’t make a mistake with measurement if you know the gram weight….
The Busy Baker says
There’s a blue button that says Metric, right under the ingredient list. If you click on it, all the measurements will automatically convert to metric. As for the crust, I suggest that you read my troubleshooting tips and tricks in the notes, at the bottom of the recipe card. Hope this helps! ☺️
Leanna says
I do really need to say thanks! I add some vanilla extract and add pure honey to the water… the bread came out amazing!
The Busy Baker Team says
We’re so happy you enjoyed it! Thank you for taking the time to leave your feedback!
debbie says
Hi
Was wondering if this bread could be made with gluten free flour?
The Busy Baker says
I’m sorry, I couldn’t tell you as i have never tried it but it should work if you use a gluten free flour that performs similarly to all purpose flour. Happy baking! ☺️
Liz says
Can you double this recipe? Made it several times & love it but would like to do 2 loaves since rising time is so long.
The Busy Baker says
Sure you can! We love it too and it always gets eaten so fast when I make it! Happy baking ☺️
Sabrina says
What a delicious flavor combination! The hardest part looks to be having the patience not to cut into right as it comes out! A true test of wills, haha!
Chrissie says
Ha ha! Thanks! 🙂
Anna says
This is one gorgeous loaf! I need to make it soon!
Chrissie says
Thanks!
Dee says
This sounds very yummy! In my family we eat bread a lot so it’s nice to bring some variety to the table
Chrissie says
I’m SO glad!
Alyssa Brantley says
This is a gorgeous loaf of artisan bread! Thanks for sharing your tips!
Chrissie says
Thanks! 🙂
Tameka Gilles says
Looks yummy. Why is the rise time so long? 12-18 hours seems long but I am new to bread making.
Chrissie says
The long rise helps create the artisan bread texture. It’s a unique technique used in recipes like this. Normal bread rises in only an hour or so. 🙂
Summer says
I let this rise for a total of 3 hours and it turned out AMAZING. It was so good! I also just used a glass pan and covered it with foil. Soooooo good. Couldn’t stop eating it
The Busy Baker says
Thank you for your feedback! I’m always glad to hear that the recipe turned out delicious.
Melanie Bauer says
I love everything about this! So much flavor packed into each bite, absolutely a must try!
Chrissie says
Thanks!!
Elizabeth Vlug says
I made this bread yesterday and I can say it is really, really tasty. And so easy to make. Will definitely be making this one again. Thank you for sharing yet another delicious recipe. I can hardly wait to have a slice of this bread toasted this morning for breakfast. 🙂
Chrissie says
It’s SO great toasted in the morning 🙂 Glad you loved it!
Erin | Dinners,Dishes and Dessert says
This looks so tasty! I want it so bad!
Chrissie says
Hope you enjoy it!! 🙂
Linda says
Beautiful cranberry walnut honey artisan bread. I have been looking for this perfect easy recipe for a while. I had use the Italian lady recipe, but crust is not crispy and lots of work like proofing first. Yours looks so easy. Only thing I have to get a Dutch oven. King Arthur Flour has one on sale on Black Friday . Out of stock now, but will be available December 3. Hope I can get one for same sale price.
I looked all over your recipe, no mention of SIZE of the Dutch oven. Did I miss it! What size does your bread fit in?
Thank you for your time.
Chrissie says
I use a large 5-quart dutch oven for this recipe. I hope you can get one – they’re GREAT to have! 🙂
Drea says
I was wondering which 5 quart Dutch oven brand you used for this recipe?
Chrissie says
Mine is from Le Creuset, so it’s a very heavy cast iron. It’s the best I’ve ever used and totally worth the price since I use it almost daily!
Sharry says
I only have a cheap stainless steel Dutch oven but I do have a Lodge cast iron 12 inch skillet with a stainless steel domed lid that fits it. I was wondering if it would work to make the bread in the skillet instead? I do have a gas oven with a convection setting. I’ve been dying to try an artisan bread. Would appreciate your suggestions.
Chrissie says
A cheap dutch oven should work – I used to make this bread in a cheap covered turkey roaster 🙂
Pearl says
I own two Le Creuset but decided on not using either for bread bc the knob on ea can endure different temperature. They come with several types depending on the one you buy and heat for knobs are from 250C to 500C. Unless you have the stainless steel knob. I bought a cheap Lodge online at Home Depot fir $39 i use for making bread only. It’s normally for camping. All cast iron and treated. I love it. The cover can also be used as a pan.
Alyson Goroski says
I too will not spend %450 on a pot. I alsos have a lodge pot I picked up on ebay for $40. What I like is the pot has a flat lid. I put it in the oven with the lid on the bottom, place the bread in the lid then lift the bottom over the top. It keeps you from reaching into a scorching pot to get your bread out.
Chrissie says
Any heavy dutch oven works well 🙂
Darran says
You can buy le Creuset replacement knobs on their website. My Dutch oven came with the non metal knob, so I purchased a metal one and switched it out.
Catherine says
Could I use fresh cranberries for this recipe?
Chrissie says
Yes, although I’d recommend slicing them in half or using a few less.They add moisture which can affect the consistency of the dough more than dried cranberries.
Lisa Z. says
I am trying to reduce my sugar intake. Have you ever tried it with 1 3/4 C plain water? Thank you.
Chrissie says
Yes, using 1 3/4 cups water in place of the honey is just fine. The honey is for flavour 🙂
priscilla says
is it possible to use regular yeast instead of instant yeast?
Chrissie says
Yes, it is possible 🙂
Laura says
How much regular yeast would you use?
Chrissie says
The same measurement, but dissolve it in the water first instead of adding it directly to the flour.
Deborah Findley says
I’ve been wanting to bake in the fall and winter months. I am making a sourdough starter then saw your no knead bread. Just made the cranberry bread and found it fit my lifestyle well. With arthritis I did not want to knead, even though it’s a much loved practice. Winter is time to rest. My bread came out beautifully tastes wonderful and a great gift idea.
Thank you for making it easier to bake again.
Chrissie says
I’m so glad you liked the recipe!! Thanks!
Ellen says
Does it really have to rise for 12-18 hours or is that minutes??
Chrissie says
It is 12-18 hours! It’s a slow rise, which is what develops the delicious flavour and texture 🙂
Christina Calvert says
This looks so yummy… I do have a few questions as I would like to make it and have only read through your recipe and the comments. When you say to mix the yeast with half the flour in the bowl and the other half with the salt and flour and then to stir chicken by does that mean at that point combine all of the flour and the yeast and the salt? Also near the end after it has risen for many hours, when you let it rise again is it just covered in a ball or is it back in a bowl? Finally have you ever tried to refrigerate or freeze this bread? I was thinking it might be nice to give us some gifts for Christmas… Thank you
Chrissie says
Just be sure the yeast and salt don’t touch directly – stir them in with a bit of the flour first before stirring altogether. Yes, you need to rise it again while the oven and the pan heat up 🙂 I haven’t had much luck freezing it, as it loses its crusty/artisan texture after freezing.
Christina says
So this may sound dumb but how do I. It have them mix if they are in the same bowl and you say to combine everything??? Also, I am still unclear on the 2nd rise…is it just out on the parchment paper or in a bowl?
Chrissie says
If you keep them on opposite sides of the bowl and then mix, the flour will act as a bit of a barrier between the two when you mix them all together 🙂 And the second rise is on the parchment paper, not in a bowl.
Ester F. says
It wasn’t quite clear whether the pan needed to be greased or if the parchment paper was to be placed in the preheated pan …. I’m afraid I didn’t do either, so I’m worried my bread may stick to the pan 🙁 too late now, it’s in the oven baking .
Chrissie says
The bread shouldn’t stick, even without the parchment. I almost always use the parchment anyway 🙂
Kimberly Smith says
This looked so good and easy! I used a 5-qt Lodge dutch oven, oven set at 425 rather than 450, and the bottom of the loaf burned black. Any suggestions?
Chrissie says
That has NEVER happened to me or anyone else I know of, and I’ve made this recipe and others like it many, many times. My guess is your oven has a hot spot or possibly uses a bottom element only. Try turning on the convection setting, if you have it, or moving up the oven rack. An oven thermometer might help too, so you can see exactly how hot your oven actually is. Good luck!
Jill says
This happened to me too. When I took the lid off at 30 minutes, the bread looked perfect. I set the timer for another 15 and when I went to take it out, it was dark on top. But that didn’t compare to the bottom which was black. 🙁 The bread was delicious, but we had to cut off the bottom which was unfortunate. I am almost positive that my oven temp is correct. I’ve never had any other issues with it and a thermometer always says it is. I have a gas oven and it does not have a convection setting. My guess would be that it’s my pot. I have an enameled cast iron dutch oven, but it’s a cheaper $40 one from Target. It’s very heavy, but my thought is that maybe it isn’t as thick on the bottom as a Le Creuset. Knowing that, do you think it would be better to cook it at a lower temperature, or for less time? I didn’t know if it would be fully cooked inside if I had taken it out at 30 minutes. It was so yummy, I’d love to try it again.
Chrissie says
I’ve made this bread in a cheap turkey roaster (super thin pan) once when I was in someone else’s kitchen and that’s all I had, and it still didn’t burn on the bottom. However I did use the convection setting on the oven, and I do on mine too (but not all the time). Unfortunately, I’m not familiar with gas ovens, which may be the issue. You could try turning down the temperature slightly and baking it higher in your oven. Or try your turkey roaster like I did!
Cassandra says
I adore this bread and have made it about ten times since I found the recipe in February. I use 410 all the way through and it’s mildly brown which I love. I would love to bake it sooner than the 12 hours because we love to eat it! But I normally go the 18 hours because I make it in the morning then get up early the next day to bake it for breakfast. Delicious!
Chrissie says
So glad you love it!
Cathy Seward says
The pot you used may not been heavy enough.
Velvet Oberg says
The bottom of mine turned black, also! I made it yesterday. I made a jalapeno cheese bread a few days ago. It had the same directions and it was perfect. I”m not sure what went wrong with this one. Same oven temperature, same timing. The bread was good after cutting off the bottom. A couple of spots on the top were black, as well. I want to try this one again, but I’m not sure how to make adjustments so it doesn’t burn again.
Pat says
I’ve made this recipe twice and it was too dark on the top and black on the bottom both times. My oven is usually a little cooler than it reads, taking a little longer than most recipes call for. Not so with this one! Next time Ill try 425 instead of 450. We still eat the middle—it’s so good! Not overcooked at all.
Chrissie says
I’d recommend 425 and also moving the rack away from the burner in your oven, if possible. If your dutch oven is black in colour (on the inside) this can cause burning as well. If so reduce the temperature by another 10 degrees.
Laura Gardner says
I had an issue with the loaf spreading out (a LOT) on the second rise and baking, resulting in a much more flat and dry loaf. Any suggestions?
Chrissie says
This is likely because your dough was too wet. I’d suggest adding a little more flour next time – sometimes if our measurements are just a little off it makes a big difference.
Ann Jones says
Just buy a Lodge 8 inch cast iron trivet. Put in bottom of Dutch oven when you preheat. Insert your dough on the parchment paper. No more overbrowning or burn. Has nothing to do with hot spots, etc.
Beverley says
I was going to ask if the parchment goes in the Dutch oven. Makes sense now. Thanks
Sarah says
We are so happy with this recipe. It turned out beautifully. We enjoyed a slice this morning for breakfast and fighting the urge for a second piece. This recipe is a keeper!
The Busy Baker says
So glad you liked it! Thanks for taking the time to leave a comment! 🙂
Patricia says
I prepped this yesterday for Christmas morning today. It is gorgeous. My house smells wonderful! And I wish I could post a picture of how wonderful it looks. Thanks for this recipe. It’s my first ever Dutch oven bread. I’m super pleased!
The Busy Baker says
So glad you enjoyed it! Thanks for the positive feedback!
Karen Kehorek says
In step 4 it says to mix water into flour – then in next step it says to mix honey with water, but doesn’t say what to do with it, I’m robably not reading correctly, but can you clarify please?
Chrissie says
Mix the honey and water together and then add them to the flour mixture 🙂
Julie says
Could I use whole wheat flour instead of AP and if yes, would the amount change?
Chrissie says
I’ve never made this recipe with entirely whole wheat, however I have made it with half all purpose flour and half whole wheat flour (same measurement) and it worked beautifully. It might be too heavy and dense made from entirely whole wheat flour, but it’s worth a try!
Vani Vijayakumar says
how long does this store good?
Chrissie says
It stores well for a few days, but it’s really great made into toast the days after 🙂
Wanda says
Making this beautiful bread today…. perfect was to bring in 2019…. thanks for sharing
The Busy Baker says
Thanks!
Andre Laudadio says
Im confused….In step 4, you say measure the water and stir into the flour. Then in step 5 you say to add the honey to the water and stir.
Can you clarify please.
Chrissie says
Water and honey should be stirred together, and then added to the flour mixture. 🙂
Lann says
Hi, May I ask, as I do not have french oven, what is the alternative way in order to make this bread. Thks!
Chrissie says
It’s a Dutch Oven pot that the recipe requires, and it’s simply an oven-safe heavy pot with a lid. 🙂
Debbie says
Will this process reduce the amount of gluten in the bread like sourdough.
Chrissie says
I don’t think so. Even if it does reduce, it certainly wouldn’t be gluten-free 🙂
Jen says
The long ride actually promotes gluten formation. That’s why it’s possible to have a no-knead bread that’s so nice and chewy. Def not low in gluten.
Gabi says
Absolutely fantastic and very yummy
Thanks
The Busy Baker says
So glad you enjoyed it!
Kathy Catanzaro says
Hi. I have the dough rising right now for this gorgeous loaf! You mention in the ingredients to use a little more honey for brushing the loaf after baking, but it’s not mentioned in the recipe steps. Would brushing honey on the baked loaf make it less crispy? I also was thinking of sprinkling coarse sugar on the loaf before baking. Would that also work?
Chrissie says
I brush a little bit of honey on top as it cools. It doesn’t make it any less crispy, but it gives a nice sweet coating on top. And, as always, is optional 🙂
Desiree says
Okay, I have a few questions because my bread did not turn out that great. The instructions were so clear and I followed them closely. I really want to try again. I am new to baking bread and the attempts I`ve made in the past have been not so great either, so when I saw your super easy recipe, I was excited. I still am! I`m anxious to fix the issues. My bottom also turned out a bit burned and so did the top. I need to figure out the temp of my oven. I don`t have a convection oven or a convection setting on mine. Just a normal gas oven, which heats from the bottom mostly. I had the pot in the center of the oven, but the bottom still got a bit overdone and the dried fruit bits on top got too done. Hmph! Also, the inside was gummy even though I let it rest for an hour and a half after and made sure it was barely warm before slicing into it. So, it seems it was underdone, but overdone(the agony! lol ). The taste is FANTASTIC. So good, but the texture leaves much to be desired. Also, I used regular yeast instead of instant and it did rise some, but not as much as I would have hoped during the first or second rise.Is there a difference between regular and instant yeast? So, my bread was sort of flat, but did have a lovely crust on the outside. So many issues but I`m sure not due to your recipe. Anyway! If you or anyone else would like to chime in with some tips for a beginner, I`d appreciate it. Thank you!
Chrissie says
It sounds to me like there are a few problems. First, try baking at a lower temperature for a longer length of time. Gas ovens can run hot and have a more uneven temperature. This can cause the issues you mentioned. Also, using instant yeast will give the dough a better rise, and leaving it to rise for the full amount of time is important too. If you reduce the rise time you must increase the amount of yeast you use. For example, if I rise this bread for 3-4 hours I’d use almost one tablespoon of yeast. But the flavour is MUCH better if you use less yeast and rise for longer. Also, if your oven is hot on the bottom, bake the bread up one rack than you would typically. Let me know how try #2 goes! 🙂
carole says
im not sure i can wait 18 hours for a bread to rise. if you use warm water it wakes the yeast esp with adding a little sugar in it. But my question is….is it because to ferments the taste by waiting that long?
Chrissie says
The slow rise creates the delicious flavour of the bread, as well as the unique texture. It’s worth the wait 🙂
Eileen says
Ha ha I thought I invented this bread. I use the no knead recipe and add various seeds , grains,nuts and berries. My recipe doesn’t call for a second rise and I bake it in a parchment lined old speckled oval roasting pan. I have never had a failure and everyone loves the bread. I also use my KitchenAid mixer on stir to mix ingredients. So quick and easy.
Chrissie says
As they say, there are no original recipes anymore 😉 Glad you love it!
Jennie says
Which no knead recipe do you use? I’ve been having trouble with this recipe burning on the bottom.
Sandy says
Thank you, Eileen, for letting us know that a parchment-lined old speckled oval roasting pan also works. I didn’t want to invest in an expensive Dutch Oven! I also have a recipe that calls for active dry yeast and only one 12 hour rise. I’ve only made it once (TODAY-Yum!) but I think I’ll try the craisins, walnuts and honey that this recipe calls for.
Heather says
Could you use spelt flour?
Chrissie says
I’ve never tried this, so I can’t say whether or not it will work. But it’s worth a try!
Molly says
My oven has a bread proof, can I use it?
Chrissie says
I wouldn’t suggest this – this loaf’s flavour comes from the slow rise. I wouldn’t recommend accelerating the rise at all as the loaf may not turn out as the recipe suggests.
Cyndee says
I hope to try this recipe soon. Not sure how this bread will taste but it sure is a beauty!
Chrissie says
I hope you love it!
Jana says
It took me 4 tries, but I finally nailed – it’s as beautiful as it is delicious! I suggest adding 2 pics – what the dough looks like and what it looks like after the first rise – for those of us familiar with “normal” dough and not sticky dough like this. My 1st try burned on the bottom and didn’t rise well, so I reduced the heat to 425 and used convection bake for the 2nd try. The 2nd try, I let it rise too long and it collapsed before I got around to shaping it for the second rise, so it was tasty but kind of flat. The 3rd try, I still let it rise a little too long, but it turned out better than the first 2 tries.
The 4th try is perfection! I used agave instead of honey because of the lower GI index of agave, 1-3/4 c of bread flour and 1-1/2 c of whole wheat flour, 1/2 tsp active dry yeast. I took more care with the rise time and found that after 11 hours it was ready to form. Baked it covered at 425° on convection for 30 minutes (in a preheated cast iron Dutch oven) and uncovered for 10 minutes. It’s gorgeous and has the best flavor yet! I doubt that it will last the day!
By the way, the new parchment paper is only heat tolerant to 425°!
Chrissie says
Glad you figured it out! And good to know about the parchment paper! Thanks!! 🙂
Sue says
So I’d like to make this later today. I’ve made this same type of bread, just without fruit and nuts and it was delicious. I also had burnt bottom problems. I will reduce heat and raise rack. My question is, once it is out of oven after baking, does it cool in dutchoven or should I take it out of Dutch oven to cool on the rack? Thanks for your help in advance.
Chrissie says
I’d cool it out of the pot on the rack 🙂
Amanda says
Can you let this dough rise in the fridge even slower? If so how long would you leave it in there?
Chrissie says
I wouldn’t recommend this. You can rise it for up to 24 hours at room temperature.
Melissa says
I made this for the first time and it came out beautiful and tasted wonderful! I will make this again. I did let it rise for almost 22 hours at room T because I started the recipe in the morning. It just didn’t seem convenient to bake it at 10 p.m. so I waited the next day. Delish. I did brush honey lightly on the top of the bread immediately after baking. It gives the bread a nice taste and look. Thanks for a great recipe.
The Busy Baker says
So glad you liked it! Thanks for taking the time to leave a comment! 🙂
Billie McCombs says
Hi…just made today…and it’s cooling as we speak. My question is from step 14. Do I pull the bread out to put on wire rack to cool or do I cool on rack in pan. I can see it as maybe continuing to cook in pan (a good thing) or overcooking because pan is hot (a bad thing).
I cannot wait to taste. Smells wonderful!!
Chrissie says
I’d cool it out of the pan on a rack 🙂
Jana says
Has anyone tried dividing this into 2 loaves? If so, would you reduce the temp and bake it using the same time? Or bake it at the same temp for a shorter time? Or bake it at the same temp for the same time?
I only have one dutch oven so the second load would have a 1.5 hr second rise. Would that be ok?
Allison says
The last 15 minutes of baking resulted in a thoroughly burnt loaf of bread.
Chrissie says
Hmmm…it sounds like your oven is too hot. Have you tested the oven temperature lately to see if it’s accurate?
Sharon Strack says
Please tell me that the calorie count on this recipe is incorrect?!
Chrissie says
It’s about 200 calories per slice (thanks to the honey, the fruit, and the nuts!)
Neragena Crafts says
I made this bread and you can see my picture on Pinterest as proof how good is this recipe . Bread turn out so good and delicious. Now we keep making it at home as Saturday morning treat. Thank you so much for sharing this recipe with us on internet.
Chrissie says
So glad you liked it! 🙂
JoAnne says
In the oven right now, looks amazing already. Wondering what you consider as a serving?
Chrissie says
There should be about 12 slices per loaf and one slice is a serving.
Janis Gougeon says
My question is this. Do you leave the parchment paper in the post while it is baking? If yes, no worries about the paper burning?
Chrissie says
I do leave the parchment paper in and it has never burned for me 🙂
Jess says
Excited to make this! I don’t have instant yeast, just active dry yeast. How should I adjust for this? (I’m new to bread baking :)) thank you!
Chrissie says
Active dry yeast also works 🙂
Viviana Delgado says
Thanks for the amazing tips and the great recipe. I just made it but I waiting for my husband to cut it and see the final result. Two questions: in the ingredients list talks about cups of flour and additional spoons, are these last ones for use to spread over the bread and in the parchment paper? I hope so because I didn’t add them to the mix… second question: how do you store the bread after it’s cool? I covered with plastic but I am not sure if was the right move
Chrissie says
You can store the bread in plastic, yes. 🙂 Glad you liked it!
Leah DiPofi says
This photo definitely looks better than the bread. I have been baking for a long time and thought I would give this a trey. My first doubt was the small amount of yeast called for. The bread never rose, it just stayed flat. I followed the recipe to the letter. Waste of good ingredients. I would not waste my time on this recipe.
Chrissie says
I’m sorry it didn’t work out for you. If it didn’t rise, perhaps your yeast was old, or maybe the water was too warm and killed the yeast.
Jeanette says
I questioned that myself. I used more yeast.
Abigail says
It looks absolutely amazing. Definitely going to try it out 🙂 I am just getting into bakery so hopefully I will be able to handle it haha thank you very much for sharing and please keep up the good work.
Chrissie says
Thanks so much! Hope you enjoy!
Ashlen says
I followed the directions exactly, and it turned out beautifully. We paired it with homemade honey butter, and it was delicious. Thank you for this great recipe- definitely a keeper!
Chrissie says
I’m so glad you enjoyed it! Thanks for taking the time to leave a comment!! 🙂
Sandra says
I made this bread about a month ago…..DELICIOUS. I also have one sitting overnight to be put in the oven about 9am tomorrow morning. Thank you for the recipe.
Chrissie says
You’re welcome! I’m so glad you enjoy this recipe!!
Wanda says
Hi, I wanted to know if there’s something else I can use instead of a Dutch oven pan to do this recipe. Because I have been wanting to do this bread but I don’t own a Dutch oven pan and I wanted to purchase one but they are too expensive.
Chrissie says
You can buy a cheap turkey roaster or any kind of metal pan with a lid will do. Just be sure to line the bottom with parchment paper and use the lid! Best of luck!
Judy McMahon says
After 18 hours plus, bread did not rise, crust so think and charred, center gummy, entire effort is in the garbage.
Chrissie says
Sorry to hear that! My guess is your water was too cold or too hot and it killed the yeast, or perhaps your yeast was old and didn’t activate. If there’s an issue with the yeast all those things you described will happen. Hope you give it another try!
Judy McMahon says
My comment wasn’t posted?? Too negative??
Well, I made a couple of tweaks, less flour, less heat, and will nake in skillet. Will comment tomorrow on outcome.
MJ says
Great recipe! have made it twice now and it comes our perfect. I used a little more yeast (1tsp) and in the latest one used figs and walnuts which is also delicious. Thank you so much for posting this one!
Chrissie says
You’re welcome! Glad you love it as much as I do! 🙂
Julie says
If i knead the dough, can i reduce the proofing time? You think?
Chrissie says
Unfortunately no, it’s the amount of yeast in the dough that determines the rise time. The long rise time develops the desired flavour and texture in the bread as well.
Lea Hayes says
I made this using a gluten free flour. It didn’t rise. The dough seemed very dry. Do you think it was the water? The yeast or the 1:1 gluten free flour help!
Chrissie says
I’m sorry, I can’t comment on this as I’ve never made this bread gluten-free – the recipe is designed to contain gluten (it takes so many hours for the gluten to develop in this recipe, giving the bread the texture it has). Sorry!
Linda says
Made this recipe today, well started last night without the walnuts (did not have any on hand) still a pretty good recipe.
Chrissie says
Glad you liked it!! 🙂
Lucille says
Just mixed all ingredients and set it aside to rise. Will this fit in a 3 1/2 quart Dutch oven? Thank you.
Chrissie says
Yes, it should 🙂
Bethany says
I only have active dry yeast, not instant yeast. What exact steps would I take to adapt this recipe? I see several other comments where you replied that it could be done, but no further details were provided. As a novice bread-baker, I’m not sure how to go about the substitution. Would I proof the yeast first in warm water and then add it into the flour mixture? Or would that not work, since the instructions state the salt and yeast must be mixed into separate sides of the dry ingredients? Any help and further instructions would be much appreciated. Thank you! 🙂
Chrissie says
You can add the yeast to the water and proof it first, and then mix everything together 🙂
Luv says
So easy. Really delicious. Made it three times so far and each time it turned out perfect. Thank you.
The Busy Baker says
So glad you love them as much as we do! Thanks for the positive feedback! 🙂
Teresa says
Hi My Dutch pot is small. Will the size of the pot affect the bread? Thank you
Chrissie says
I use a 7.5 quart and it’s plenty big enough.
Lucille says
So delicious. Easy. On my third one and each one turns out great. Thank you.
The Busy Baker says
Wow, so happy you liked it! Thank you for the comment😊
mel says
I also had a problem with this bread becoming way overcooked, almost to the point of burnt. I have been making no knead bread for years, the same recipe as this without the added berries honey and nuts. Never had a problem. I made a dill and garlic one last night in fact, and it came out perfect. The one thought I had was that perhaps all the added sugars were burning off at the high heat? I’m going to try making it again, just cut each baking time by about 5 minutes and use a slightly lower heat. Hopefully that will work.
Chrissie says
I’m sorry this didn’t work for you – I’ve never had this happen with this recipe. Perhaps your oven temperature is too warm?
Sylvie Bedard says
Thanks for this recipe. I’m wondering if you’ve ever tried with pecans instead of walnuts….or any other nuts for that matter.
Chrissie says
Feel free to use whatever nuts you’d like.
Elizabeth says
Just make this today. My dough was a little too “sticky” and was difficult to get into a round shape because it kept spreading. Regardless, when I checked it after 30 minutes it looked done so I kept it in the oven just 5 more minutes without the lid. The bread was a bit flatter and longer than I would have liked, but was delicious. The crust was just right and the whole family loved it.
Chrissie says
So glad you enjoyed it! 🙂
Nancy Mcleary says
This bread is sooooo delicious!!! I make it all the time! I don’t care for walnuts so I use sunflower seeds.
I have not been making yeast bread very long, but it is actually fun! I always get a little nervous though when getting the water ready, is it too cold, is it too warm, etc! So far it has a
Ways turned out great, and gorgeous too!
One question. How do I manage the 18 hour rise during cold weather? ( no pilot)
Chrissie says
Rising in cooler weather is tricky, but you could place the bowl beside a heater to rise overnight.
Paula says
Hi Christie – I just stumbled upon your website and I am so glad I did. Your recipes look delicious. I tried this bread and while the flavour is delicious, the inside is a bit gummy. I followed directions exactly and let cool for three hours. This is the same problem that I have with every recipe for artisan bread. I live in Canada so could it be a difference in the flour? I am stumped. Also, the bread has a purple hue to it from the cranberries. I made it yesterday and it is half gone so it can’t be that bad! While it is delicious I would like to see a different crumb. Maybe add a little more flour?
Paula
Chrissie says
It sounds like the dough was a little too wet maybe. Try a bit more flour 🙂
Jenna says
I wonder if you actually need less flour? I figure approximately 3/4 cup of Canadian all purpose flour to 1 cup of American for yeast doughs.
Arlene says
Hi — after some research and a few emails to the Robin Hood Flour company (I live in Canada) –their measurement for 1 cup AP Robin Hood flour is 150g. If you use the (U.S.) King Arthur Baking site, it stipulates 1 cup AP flour is 120g. To avoid confusion and second-guessing, go with the metric gram weights.
Bhuvana says
Hi! the bread looks amazing and I would love to bake them. Just wanted to know if I can use dried yeast instead of instant yeast.
Chrissie says
Yes, just activate it in a little water with a bit of sugar first 🙂
Hiba says
When do you eat this? I mean do you eat it as normal bread or as something sweet with tea?
Chrissie says
We love it with turkey and cheese for sandwiches! 🙂
Joyce says
Hi
Fabulous recipe but there is a 12-18 hour rise/rest – so it’s not really a 1 hour recipe as the recipe indicates at the top.
Chrissie says
Yes, you’re right. The long rise makes this bread so perfectly crusty and gives it the artisan texture. 🙂
shelly says
Hi. Can I use a sourdough starter for this recipe? How would I adjust the recipe? Thanks
Chrissie says
I can’t comment on this as I’ve never used starter for this recipe. Sorry! 🙁
Megan says
This recipe looks delicious and so festive for the upcoming holidays! I can’t wait to try it! Is it possible to use bread flour instead of all purpose flour? Would it turn out the same? Thanks!
Chrissie says
I would recommend all purpose flour, not bread flour, as this recipe makes a sturdy loaf anyway 🙂
Lisa says
Love this recipe! Baked it yesterday and had it with left over turkey for sandwiches from thanksgiving dinner and it was a hit! So easy and very tasty, will definitely be making again!
Chrissie says
So glad you loved it! 🙂
Mary Lou says
Just an fyi I added about 3/4 cup of almond flour ad an additional half cup ap flour. Did not do the honey on top. Made it a little spongier than regular bread but got some additional protein from the almond flour. Surprised it worked.
The Busy Baker says
Thanks so much for letting us know! Glad you liked it!!
Sadie Leman says
Hi, I just have a question, when baking normal bread I always thought you needed warm water about 110 F. Is this not the case due to the slow rise?
Chrissie says
Yes, use room temperature or warm water. Too hot will kill the yeast, so it’s better to be a little on the lower side just to be safe 🙂
Laurie Cowell says
Can Craisins be used?
Chrissie says
Yes!
EILEEN CHRISTINE says
I CAN’T WAIT TO TRY OUT THIS RECIPE, IT LOOKS SO GOOD.
HOWEVER, HOW MUCH WATER DO I PUT INTO THE DUTCH OVEN?
I DON’T SEE THAT IN THE RECIPE, IT JUST SAYS 1 AND A 1/2 CUPS OF
WATER AND YOU PUT THAT INTO THE FLOUR?
Chrissie says
The water goes into the bread dough. 🙂 You add the risen dough, shaped into a loaf, into the dry dutch oven for baking.
Erin says
This looks delicious! I’m a sucker for any kind of bread, but the crispy outside, soft inside is where I just melt. I know that salt makes the bread more flavorful and also aids in the rising process. The bummer is, I now have a medical condition that doesn’t allow me to have salt. So, my question is: How do I make marvelous, tasty bread (that actually rises properly) without salt? Thanks!
Chrissie says
Leaving the salt out shouldn’t affect the rise at all, but it will affect the taste (bread without salt is just a little more bland than normal). If that’s not a problem for you, then this recipe should be fine for you, even without the salt.
Maribel says
I made this bread in a cast iron pot. It trues out really good. I’ve juat purchased a cloche. Can I make this bread in an cloche? Should I preheat it as well?
Chrissie says
Yes, a cloche would work as well. 🙂
Bonnie Gray says
Is the timing on this recipe correct? 12-18 hours on the initial rise?
Chrissie says
Yes 🙂 The long rise creates delicious flavour and texture.
Corinne says
Delicious bread. My first attempt resulted in burnt bottom. I tried again at 425 for 30 with lid then 5 minutes without and it worked beautifully.. I live at a high altitude location and wonder if that may be the difference as my oven temp is bang on.
Chrissie says
Glad you liked it!!
Varunn S. says
BTW I don’t have duch oven then I will bake with stream pan and spray water.
Thomas says
I just finished making my first loaf and went exactly by the recipe, including oven temps. Not only did my loaf burn on the bottom, the top is also overdone. I am very disappointed in the results of this recipe. I have a standard electric oven with the heating coils on the top, and had the Dutch oven in the center.
I want to make this bread for Christmas, but will be looking for another recipe. Too much time goes into this for such a bad result.
Chrissie says
Sorry it didn’t work for you…did you try the convection setting on your oven? Also, what kind of dutch oven did you use?
Jason Wolfe says
Great recipe and has become a family hit. Thank you.
A question. I would like to split the dough and make two smaller loafs. Can you recommend cooking time adjustment if any?
Chrissie says
I wouldn’t recommend splitting the dough, although if you do cutting the time in half would be a good place to start.
Laura Foss says
I really want to master this – any ideas as to why my loaf was heavy and dense, almost wet, on the bottom (the bottom inch or so)? I followed the instructions to a t. I wonder though if it was too warm while rising? Thanks!
Chrissie says
It sounds like that could be the case, or perhaps you added too much liquid to the recipe.
Linda says
Absolutely The Best! Great Recipie, effect for the Holiday Season!
Thank You!!
Chrissie says
So glad you love it! 🙂
Jennifer Braun says
I am about to try this recipe! Sounds wonderful! Do I use 3 cups flour and 3 Tablespoons of flour in the recipe or is the 3 Tablespoons to put on top of the bread before I bake it?
Chrissie says
The 3 cups plus 3 tablespoons is added to the bowl right at the beginning. 🙂
Sue says
I just made this and it is so amazing! Tastes like bread from a fancy artisan bakery. I even miss read the directions and missed the honey part (only rubbed some on the end when it was done) and thought I messed it up…nope. It was awesome! Can’t stop eating it. Thank you!
The Busy Baker says
Really happy to hear it still turned out well and you enjoyed it! Thank you!
Adrien says
This looks delicious I can’t wait to make it. I’ve read ALL the comments and have picked up some goods tips,my question is can I use a 7 at. Dutch oven? Will the loaf be too flat or should I double the recipient?
Chrissie says
Yes, you can use a 7 quart dutch oven.
Jennie says
The bottom was burned and the top, but the top was tolerable. The inside was gummy but I did cut into the bread before it was completely cooled. I have a electric oven but it is not a convection oven. I used 2 cups bread flour and 1 cup AP flour. I followed the recipe exactly it raised fine etc.
I have made artisan bread before but not with honey or any other sweetener I’m wondering if the honey makes this bread burn easier then the other recipes.
Any ideas?
Chrissie says
It sounds like your oven’s burner might be on the bottom. Does your oven have an option to use a top and bottom burner? This would give a more even heat. This recipe definitely works best on a convection setting or a more even heat setting.
Jayne says
My first try making this resulted in a flat and gummy loaf. The taste was great and the crust was unbelievable but I made an error in using traditional active dry yeast instead of instant or rapid rise yeast. My second try is in the proofer right now and I will let it rise for 16 hours before I move to the next step. I noticed this second try the dough is not any where near as wet as the first try. I agree, photos of the dough appearance at each step would be very helpful! Both times I added grated orange zest. I’m not 100% clear whether you remove the bread from the Dutch oven when cooling it on the wire rack. My first try I removed it (thinking the crust would get soggy if I left it to cool inside the dutch oven. Fingers crossed this second attempt is the bomb.
Lana says
Great bread!!!!!! Definitely a must try
The Busy Baker says
Thank you Lana!!
candace campbell says
Made this 2 times now. It is amazing. My top was more brown the second time I made it which I thought was odd so I just put it in for 10 minutes without the lid. The bottom was black but I forgot about the suggestion of the trivet. I will try that next time. You cant even imagine how impressed I am with myself. Thank you so very much for making me look good.
The Busy Baker says
Glad to hear you liked it so much! Thank you Candace!
Tara says
I am not an experienced bread makers but just had to try this bread. My bread did not rise as much as expected. Should I put it in my oven to proof (obviously not on)? I just sat it on top of the oven overnight and it rose some but not much. The finished bread got very dark, almost burnt in places, I even pulled it out a few minutes early. Any suggestions for an inexperienced bread maker?
The Busy Baker says
Your oven might run a little hot. Try lowering the temperature a bit: 25 degrees under what the recipe calls for. As for raising, the dough is not supposed to raise a lot outside of the oven, just make sure your kitchen is not drafty and you should be good! Have fun baking!
Michele says
How come mine came out tasting bitter.
Ana Ghiran says
Could it be the cranberries you used?
Bini says
I loved this, it was so easy to make.
I don’t own a durch oven, so I used a baking dish that I have, that comes with a lid and it worked just fine.
Thanks for the recipe, since I don’t have bread maker, this is perfect!
The Busy Baker says
Thanks so much for the feedback! Really happy to hear that it turned out perfect!🙂
Peggy says
Is the bread dough made with 3 cups and 3 tablespoons of flour or are the 3 tablespoons of flour used for dusting the loaf on the second rise?
Chrissie says
All the flour goes into the recipe. You can use extra for dusting on the loaf. 🙂
Terri says
This looks fabulous! I’m a bread novice, so wondering if I halved the recipe, would I need to adjust the cooking time? Thanks!,
The Busy Baker says
Yes, you would need to adjust it a bit but i couldn’t tell you exactly how much because my family likes this bread so much that we always eat the whole thing!
Carol F says
Absolutely delicious. It looked professionally made.
The Busy Baker says
Thanks Carol!! Glad you like it!🙂
Barb says
This is a great recipe that everyone loves. I just want to suggest
That if you have an Instantpot, you can prove the dough in that
For 4 hours on the low yogurt setting……and then you can eat it
The same day!! Just continue on after the 4 hours with step 8.
Thanks for the recipe!
The Busy Baker says
Thanks for the idea Barb!!😊
Allyson says
Mine came out very dark on the outside and I followed the instructions to a T. Any advice on how to prevent that? Bake less with the lid off maybe?
Chrissie says
I’d recommend lowering your oven temperature.
Alice says
Can I use dough starter since I can’t find any yeast anywhere and if so what is the equivalent of (1) tsp as called for in the recipe? Thank you.
Chrissie says
Unfortunately I can’t say as I don’t use dough starter. Best of luck!
Lisa says
So I just mixed the dough following the recipe to a T, but my dough looks like cake batter. I’ve double and triple checked the measurements. Is this right? I’m so confused. I’m about to set it to rise but I’m concerned something isn’t right. Help! Thanks!
Chrissie says
It sounds like your dough is too wet. I’d suggest adding a little bit more flour until a shaggy dough forms.
Paula says
Can I make like your other bread recipe without a pot? I have made your no knead bread at least 5 times! Always perfect! Would like to make your Cranberry Walnut Honey bread the same way! Thank you
Chrissie says
You can! It won’t turn out exactly the same, but if it works for you with the other recipe this one should work too! 🙂
Alice says
Hi! First off, excellent recipe!!!
Is it possible to make this bread without the parchment paper? Can I pour the dough directly into the dutch oven?
Also, I love this recipe but every time I’ve made it, the bottom of my bread turns completely black and burnt, even with the parchment paper at the bottom of my dough. I’m using a Le Creuset dutch oven. The dutch oven is placed on the rack as far away from the bottom, I’ve placed another baking sheet below the dutch oven, and I’ve tried lowering the temperature. I’ve also calibrated my oven. HELP! What am I doing wrong???
Chrissie says
Do you have a convection setting on your oven? If so, I’d recommend this. It sounds like your oven has a bottom burner and this can cause the bottom to burn. And to make the bread without the parchment paper, simply dust the bottom of the pot with flour.
Jenn Clay says
My second attempt making bread ever and this came out wonderfully! I didn’t have parchment paper so I took a chance with foil. Worked out great! As a matter of fact it probably helped keep the bottom from getting to brown. However it probably didn’t get as “crispy.” The only issue I had was that the foil got a bit stuck in the folds of the bread on the sides but it was only minor. So pleased!
Chrissie says
So glad you liked it!
Dave says
This is the first bread I ever baked. Turned out great!! A little darker than intended due to missing the slam sounding.
The Busy Baker says
Happy to hear it turned out so great!! Thanks Dave!🙂
Charmian Chan says
First attempt working on a no knead artisan bread. Didn’t have a dutch oven, but substituted it with a springfoam pan with a foil cover and it worked! Also, i used bread flour instead of all-purpose flour and the bread still came out prettily. Thank you for the recipe 🙂
The Busy Baker says
Glad it turned out delicious! You’re welcome!!🙂
Marah says
This is my second time making this bread and I love it! It’s delicious and so simple to make. I will be making this for my family, can’t wait for them to try it🙂
The Busy Baker says
Thank you Marah!! Glad you like it!
Joanna says
I’ve made two half batches. The first batch I let rise overnight for about 15 hours and it was way over-fermented. I did use warm water and active dry yeast, but I don’t think it would have made that much of a difference. It didn’t give off the delicious bread smell as it was baking and didn’t rise as it was proofing or baking in the oven. It was tasty, but oddly, too sweet. The second time I used room temp water, half the honey, and let it rise for 5.5 hours. It still smelled a little over-fermented and still didn’t rise in the oven, but it came out so much better! Both times I used convection bake at 420F. I determined the second rise based on summer in NYC, 75-80F indoor temp, and if it looked doubled. I think I could have cut off the second rise about 30-60 minutes earlier and it would have come out even better.
Chrissie says
Thanks for the information! A hot summer day would definitely affect rising time!
Arlene says
Hi — I double-checked the metric equivalents and I believe the recipe is incorrect in stating 2 TBSP of honey = 84g. According to many websites, 1 TBSP honey = 21g, therefore the recipe (in metric) actually calls for 4 TBSP of honey. The extra honey might affect the outcome — both to the activation of the yeast, and to the potential burning at the high heat required for no-knead breads. Go with 42g of honey.
Ana (The Busy Baker Team) says
Thank you for pointing out our error, Arlene. We’ve updated the recipe card!
Jan Litfin says
I just made this bread substituting dried cherries and pecans and oh my! It is wonderful!! Next loaf will be cranberries & walnuts. Thanks for the recipe. Love it!!!
The Busy Baker says
You’re welcome Jan!! That sounds like a delicious addition!🙂
Eileen B says
I’m really looking forward to this yummy no-knead bread variety, but I’m concerned about the stickiness of this dough even after adding more flour. I’ve made Jim Lahey’s recipe before with no problems. How will the sticky texture affect the consistency of the bread if baked that way? I used corn meal on my parchment paper to each removal, along with sprinkled flour. It’s in the oven for the first 30 minutes, so I’m hoping all is fine. Thanks
The Busy Baker says
Rustic artisanal bread dough is supposed to be more wet and sticky. If the dough keeps its shape after you form it into a ball, you should be good. Happy baking ☺️
Carol says
It’s fabulous. Always a huge hit at my house
The Busy Baker says
Glad to hear that Carol! Thanks for your feedback!
Peter says
I’ve learned that measurements need to be very precise when baking. Do you have the flour measurement in grams or does it not really matter for this recipe?
The Busy Baker says
Hi Peter! Yes, you can choose from the recipe box: US Customary – Metric.
Terry Links says
This was my 1st time making a no-knead bread and this recipe came out great with a couple changes. Instead of cranberries and walnuts, I used dried tart cherries and unsalted pumpkin seeds, a tasty combination. Based on other’s reviews about the crust getting overdone, I lowered my oven temp to 400 degrees and baked for 35 mins with lid on then removed lid and did final 15 minutes. The crust came out beautifully brown all around. I let it sit on cooling rack for 90 mins till completely cool before cutting into it. The middle was beautifully baked. I will definitely make this again!
Chrissie says
I’m so glad you liked it!
Jennifer says
Wow! I never write a review. I had too for this recipe. Delicious, and tasty. A most putting the honey on top.
The Busy Baker says
Thanks so much Jennifer for your great review!!🙂
Teresa says
Help! Next time you measure your sea salt can you let us know how many grams it came out to? I use coarse sea salt from Spain and maybe my 2 tsp is less than your 2 tsp? After 12 hours I got an alcohol smelling gloop that wouldn’t roll into a ball because it was so watery no matter how much flour I add to try to get it to stay in the shape of a ball. I baked it anyways but it didn’t rise much in the final proof… also my kitchen might be warmer than yours… already after 6 hours the dough was bubbling and 2.5 to 3 time the original size. How to know when the dough is READY to go o to the second step of shaping and 2nd rise? (I used half tsp of SAF instant yeast)
The Busy Baker says
There is a blue button that says Metric at the bottom of the ingredient list. If you click on it, all of the measurements will automatically convert to metric. As for your bread not working out, there are many things you could try, so i suggest that you read my troubleshooting tips and tricks, in the notes, at the bottom of the recipe card. Hope this helps!☺️
Kelly says
Can this be made without the Dutch oven? I assume the crust will not be as crisp but it would still be okay?
The Busy Baker says
Yes, you can use any heavy bottomed oven safe pot! Happy baking!
Marilyn Grangerr says
I USE TO BUY CRANBERRY NUT BREAD AT A LOCAL BAKERY FOR $4.25 A LOAF. NOT ANY MORE! INSTEAD OF BRUSHING HONEY ON THE TOP, I ADD 1\4 CUP HONEY AND 1\8 CUP OF MOLASSES TO THE WATER. LOVE THE FLAVOR!!
The Busy Baker says
So glad you like this bread more than the store bought bread!!🙂
Stephanie says
Hands down the best bread recipe I have made. Thank you for the pro tips, I found them exceptionally helpful. This is going to be my go to bread recipe for the holidays. Thanks again.
Ana (The Busy Baker Team) says
We’re so happy you enjoyed it. It’s so nice to know our bread will be part of your holiday feast! Thank you for taking the time to leave your feedback!
Renee Walsh says
I am heading into my kitchen to make the bread! I have been trying the no kneed for a while now and there are a couple of things I was doing that were not helping with the outcome of the bread. Your tips were VERY helpful and I will let you know how it turns out. I joined your list and am now following on Facebook and Instagram.
Thanks very
Renee
The Busy Baker says
Great! So glad you found the tips really helpful!!🙂
Izzy S. says
Amazing results. I followed directions to a T and it was perfect!
Tip: put the honey on top of finished bread.
The Busy Baker says
Thanks so much Izzy!!😊
Janine Magnuson says
I’ve been making this for months but proofing it in my crockpot pressure cooker for 4 hours on the yogurt setting. I bake it in my white Corning Ware dish on an airbake cookie sheet to prevent the bottom from burning. I often adjust the oven to 425 and just make sure the center of the bread reaches 190-200 degrees. If the top is getting too brown, put a piece of tinfoil loosely on top. Comes out perfect! And my family loves it!
The Busy Baker says
Thanks so much for your tips Janine!! So glad it turns out perfect!!
tnicolefox says
Love this! It looks beautiful too
The Busy Baker says
Thanks so much!!🙂
Thien Do says
This was delicious! I baked mine at 425 just to be on the safe side. I didn’t have any problems with a burnt bottom. It’s divine and I can’t wait to make it again! There’s a steakhouse that my husband and I love going to…in their bread basket, they have something that is very similar to this that they slice thinly and toast with butter and cinnamon sugar. I’ll try that if I have enough bread leftover in the next day or two… Thank you for the recipe and the detailed instructions!
The Busy Baker says
You’re welcome!! Glad it turned out delicious!!
Paige says
This bread turned out delicious! I have been wanting to get into baking bread and this recipe was the perfect one to start with. Followed the recipe exactly and it turned out perfect, will be making many more times! Thank you!
The Busy Baker says
You’re welcome Paige! Thanks for your feedback!!
Michelle says
I had active dried yeast so out this in the water for a few minutes first. I then added rest of ingredients.
Looking delicious at the moment. Can’t wait to try it later
Thanks for recipe
The Busy Baker says
You’re welcome Michelle!!🙂
Matt & Kat says
I LOVE baking bread for my wife and this was no exception. This was however the absolute best tasting bread that I’ve ever baked for her! She and I both are in love with every little morsel that we eat!! Thank you for sharing this masterpiece!
The Busy Baker says
So glad to hear that! Thanks so much for your feedback!🙂
Lori H says
Delicious! I used my sourdough starter instead of yeast and it was a beautiful Christmas-y loaf.
The Busy Baker says
Great! So glad it turned out delicious!!😊
Lynda says
How many grams of discard did you use.
Sandy Wentzloff says
This bread was delicious. Luckily I read the directions all the way through the day before I planned on making it. Because it needs to proof or rise for 12=18 hrs I needed to make the dough the night before I planned on using it. I loved it and I plan on making it again. I baked mine in a cast iron dutch oven and I would say it turned out perfect. I also baked it at 400 degrees since it was a black pan as directions stated. Thank you for the delicious and fun bread.
The Busy Baker says
You’re welcome Sandy!! I’m really happy to hear it turned out perfect!🙂
Maude says
Easy, tasty and looks great. I use maple syrup instead of honey to make it vegan and it is delicious. It’s my favorite bread and everyone loves it.
Chrissie says
So glad you loved it! 🙂
Jen says
This looks absolutely delicious!!! Anyone ever try it in a cast iron Dutch Oven?
The Busy Baker says
If you’re speaking about a non enamelled Dutch Oven I recomend lowering the oven temperature by at least 25 degrees as they conduct heat very intensely. Happy baking!☺️
Lynda says
I really want to make this using my sourdough discard can you tell me how many grams of discard (100% hydration) I should use
The Busy Baker says
I’ve never tried this recipe with sourdough discard so I couldn’t tell you, but if you try it, please let us know how it goes. Happy baking ☺️
Wendy Genaros says
Can you use fresh cranberries instead of dry cranberries in this recipe?
Chrissie says
Yes you can 🙂
Deborah says
Made yesterday. Very tasty loaf. I did have a burned bottom crust & im thinking it may be due to the 1/4 cup of honey, as i have never experienced my other recipes burning on the bottom. Will also add a touch of Cinnamon next time for this recipe.
The Busy Baker says
It sounds like the bottom burner of your oven is too hot or you’re using a pot that’s black on the inside (these conduct heat more efficiently than one that’s a light colour on the inside). Try lowering your oven temperature by 25 degrees, using the convection setting, or using a different pot that’s light in colour on the inside. Hope this helps! Happy baking ☺️
Jill says
Do you add all the flour into the bowl at the start and then use more flour for dusting the work surface/ parchment paper or do you use the 3 tablespoons of flour for dusting the work surface/parchment paper? Thank you
Chrissie says
You can save the 3 tablespoons for dusting, but if you find the dough is wet feel free to add a few extra tablespoons to the dough before rising.
Ann Chari says
I have tried your recipe a few times and always turns out well. However, the last time the dough is very sticky even though I follow everything. When I pre-shaped the dough and let it rest, the dough didn’t hold the shape and molded to the bowl, plus gluten strands also developed with the side of the bowl. The dough didn’t come out easily. Is this a sign that it’s not yet well proofed but I already proofed it more than 14 hours. So, I re-shaped it a few more times and let it rest longer on the counter. I tried stretch and fold but the dough was still very sticky. In the end, I put it in the fridge and it did help the dough to hold the shape a bit. I did the poke test and don’t think it’s overproof. However, the crumb turned out very close and tight. Is it because I touch the dough too much? Not sure you have ever had this experience.
Chrissie says
It sounds to me like the dough didn’t contain quite enough flour and was too moist. The humidity in the air can affect this, so feel free to add a bit more flour if this happens again.
Shelley says
So the addition of more yeast cuts the initial rise time from 12-18 hours down to 2 hours? Just want to make sure I understand that before I try this. Can I sprinkle some oatmeal on top before baking? Thank you.
Chrissie says
Yes, adding some more yeast will help the dough rise more quickly. Feel free to sprinkle some oats on before baking.
Alice says
This bread is amazing! Perfect for a beginner like me. One question – can I cover the bowl with a clean tea towel for the 12-18 hour rise or does it have to be plastic wrap?
The Busy Baker says
I’m happy you enjoyed it! It needs to be plastic wrap so that it traps the moisture inside! Happy baking ☺️
Debbie McCullough says
Delicious bread! Fabulous recipe!
The Busy Baker says
Thanks so much Debbie!!
Jesse De Gil says
I so love this simple recipe….such great goodness with so little work. Thank you for sharing!
The Busy Baker says
Glad you liked the recipe!🙂
Jilna says
Hi, can I use a regular oven for this bread ? I don’t have a Dutch oven ..
The Busy Baker says
You can use any oven-safe heavy pot with a lid. Happy baking ☺️
Maria says
I am just a newbie in baking and would love to give this somehow a try as it looks delicious and would definitely make someone happy.
The Busy Baker says
Thanks so much Maria! I hope you give it a try!
Tammy Jardine says
Hi, Absolutely love the bread, it is so hard to not cut a slice as it comes out the oven!! I was wondering if you had any tips to keep the crust crispy the next day. I keep it in an airtight container but the next day it just lacks that real crisp. I do understand that unfortunately it wont stay oven fresh forever, but was just curious if you had more luck than me 🙂
Thanks for great recipies 😉
The Busy Baker says
You could try to keep it in a paper bag or in a ziploc bag but wrapped in a kitchen towel.
Carmen L Czachor says
I used the short rise higher yeast version and it turned out fabulous! Not too hard. Crust was super. Crunchy! Mmm!
The Busy Baker says
Thanks so much Carmen!! Sounds delicious🙂!
Sandy says
Love this recipe! I make it very often and I double it!
The Busy Baker says
I’m so glad you enjoyed the recipe and found it simple to make!! 🙂
Gwen says
The whole family loved it. My first try at bread mixed with something else and turned out so good!
The Busy Baker says
I’m so glad!! 🙂 Thanks Gwen!
Jennifer says
You are a bread rockstar! This was amazing. I added a handful of white chocolate chips with the cranberry and walnuts. Yum. Like others, my bread nearly burned on the bottom before it was done. I took it out of the Dutch oven before it got to that point and placed the loaf on cold stoneware and finished baking it. That allowed the inside and top to brown nicely and keep the bottom from burning.
The Busy Baker Team says
I’m so happy you enjoyed it! Thank you for taking the time to leave your feedback! At the bottom of the recipe card, in the notes, we’ve put together a list of troubleshooting tips. Check it out!
Tiffani says
This was so easy to make, and delicious!
The Busy Baker says
Thank you for your feedback! I’m happy you enjoyed it!
Debra says
Do you use the Vital Wheat Gluten if you use King Arthur bread flour or is that only for all-purpose flour?
The Busy Baker says
This recipe calls for all-purpose flour, and yes, I use the Vital Wheat Gluten. I have never tried the King Arthur bread flour so I don’t know how it behaves in this.
Nadia says
Hi, Thank you for the recipe. Made it last night and was hard to wait to cut into it as it looked great. I used the quick rise method, the taste is good however it is a little dense, would like it fluffier (more holes!). What could have been the problem?
The Busy Baker says
You can try a different brand of flour or you can try adding 1 tablespoon of Vital Wheat Gluten to the dough with the flour. Hope this helps!
Joe S says
Perfect! Followed the recipe exactly and the bread was crisp on the outside and soft inside. The bar I was aiming for was to make a similar walnut cranberry loaf that you can buy at Costco. This recipe nailed it and better So simple to make as well. Thank you!!
The Busy Baker says
I’m so happy you enjoyed it! Thank you for taking the time to leave your feedback! Happy baking ☺️
Nene says
This came out so good. I have 2 dutch ovens so I made 2 small loaves at the same time. I cooked it for 25 mins before I took the top off. Then another 5 mins. The bottom got pretty brown and I used parchment paper. I may double up on the parchment paper to avoid this.
The Busy Baker says
I’m so happy you enjoyed it! Thank you for taking the time to leave your feedback!
Diana says
Hello! I just made this bread following your recipe and it came out sooo good! Thank you for sharing it!
The Busy Baker Team says
I’m so happy you enjoyed it! Thank you for taking the time to leave your feedback!
Angie says
Good morning. I noticed you recommend turning the temperature down for black Dutch ovens. Should the time be amended as well or should it bake for the same amount of time as stated in the recipe? Thank you.
The Busy Baker Team says
The time should be the same! Happy baking!
Robin says
Truly excellent bread. I use 50/50 AP flour and Sprouted Wheat flour to ensure I get the chewiness I’m after. The crust bakes up perfectly. Thank you for sharing.
The Busy Baker Team says
We’re so happy you enjoyed it! Thank you for taking the time to leave your feedback!
Jayshree says
Delicious! Thank you so much for sharing this recipe. Will be making it again soon.
The Busy Baker Team says
We’re so happy you enjoyed it! Thank you for taking the time to leave your feedback!
Karen says
I just found this recipe and can tell it will be absolutely amazing!
I tried to read all of the comments, but in case I missed one…I would love to add some orange zest and maybe a touch of orange juice. I love that cranberry-orange combo!
Would you have any suggestions as to how best to achieve that proper ratio?
The Busy Baker Team says
We have never tried that addition so we couldn’t tell you, but if you do try, please let us know! Happy baking ☺️
Kim Greer says
Followed the recipe exactly per instructions. Came out Perfect!!!
Thanks
Kim
Ana (The Busy Baker Team) says
I’m so happy you enjoyed our recipe! Thank you for taking the time to leave your feedback!
Sara says
1. After the first rise, I am dividing into two smaller loaves. What is your suggestion for cooking time?
2. I use half All Purpose flour and half Artisan flour. Works great.
3. Converted to metric using tab at top of page. Much more accurate.
4. Once I had to improvise. Used dried cherries and pecan instead. It was delicious.
Ana (The Busy Baker Team) says
Your observations on our recipes sound fantastic! Cooking time shouldn’t differ by much, I’d say about 10-15 minutes less for 2 smaller loaves. Thank you for your feedback!
Kathy says
Five loafs in five weeks! We absolutely love it! I can’t tell you how many different recipes and different store/bakeries that I’ve tried cranberry walnut bread! The first time I made your recipe I did the 18 hour rise time. The bread was perfect but I could taste the fermentation (I have an over abundance of taste buds) which I don’t care for. The rest of my family couldn’t taste it so they enjoyed the bread. The next week I tried the quick rise method, resting the bread two and a half hours. This time I felt I found the best bread ever! Since then, I’ve been making it weekly, adding a tablespoon of pure maple syrup and it’s amazing!!
Ana (The Busy Baker Team) says
We’re so happy you enjoyed it! Thank you for taking the time to leave your feedback!
Jadi says
I’m not sure if this question has been asked or not…I read MANY comments to see if it has and did not come across it.
Do you have to have a Dutch oven to make this bread? Also my daughter asked if we could jazz the bread up some for “her generation” with some white chocolate chips and almonds since walnuts are “for the older generations!” 🤣 The answer to these questions might be simple but I’m new to baking and haven’t a clue.
Ana (The Busy Baker Team) says
No, you don’t necessarily need a Dutch Oven, you can use any heavy bottomed oven safe pot with a lid. And yes, you can add white chocolate chips and almonds. Let us know how it turns out!