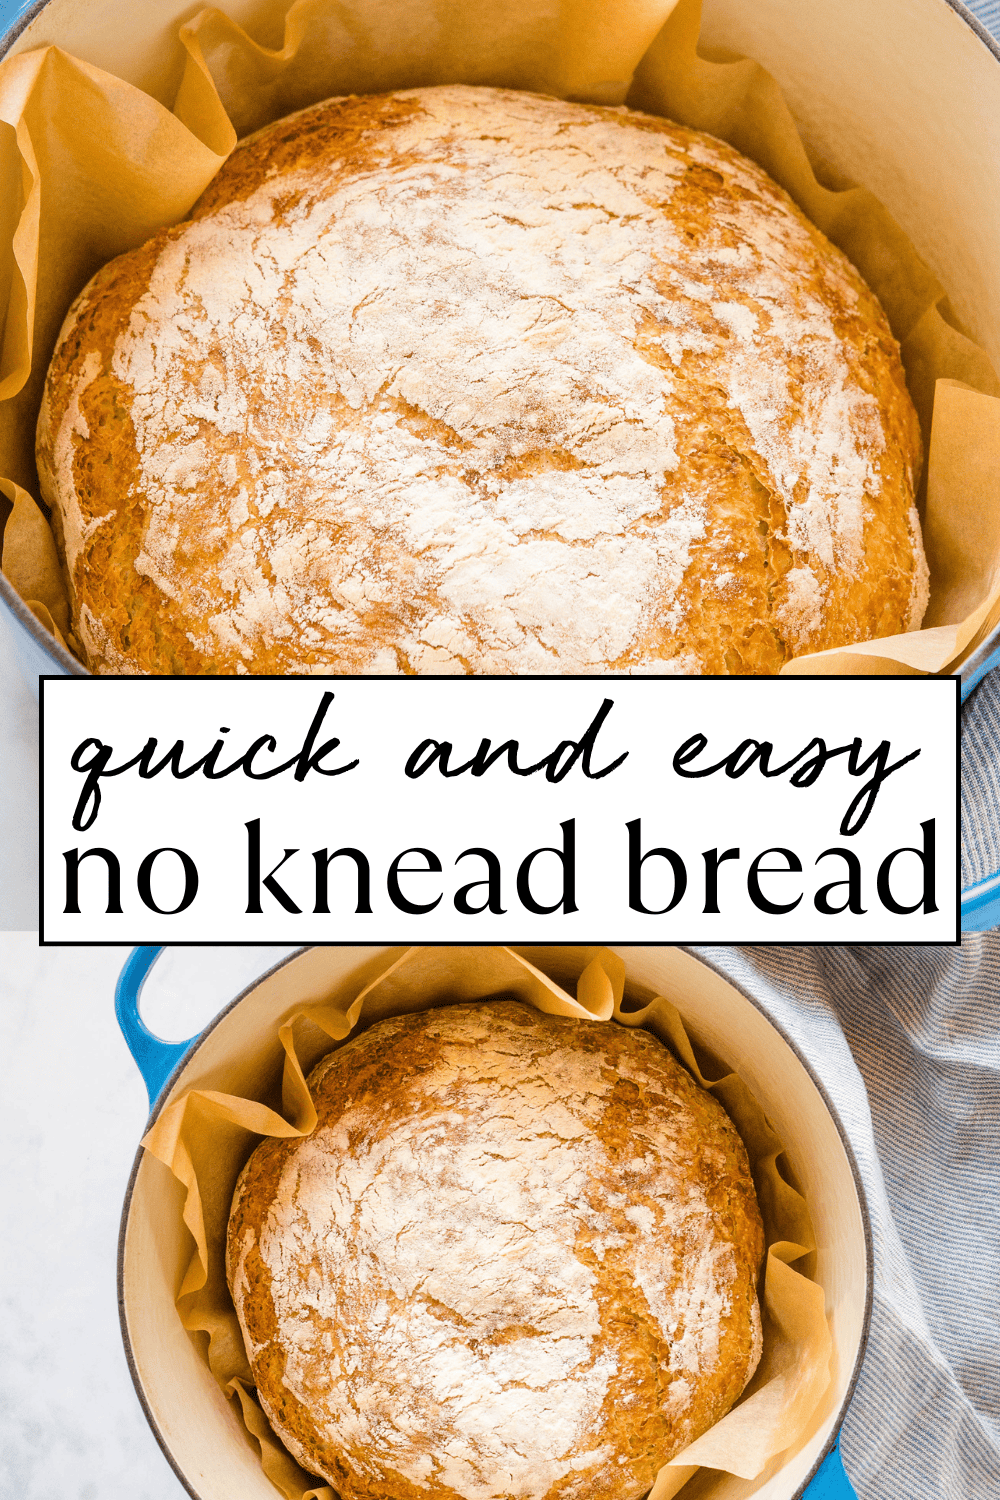
This Quick No Knead Bread is easy to make with 4 ingredients and a Dutch oven! No overnight rise and no kneading. It’s soft and fluffy bread with a crispy crust! You’ll love making this beginner-friendly artisan bread recipe!
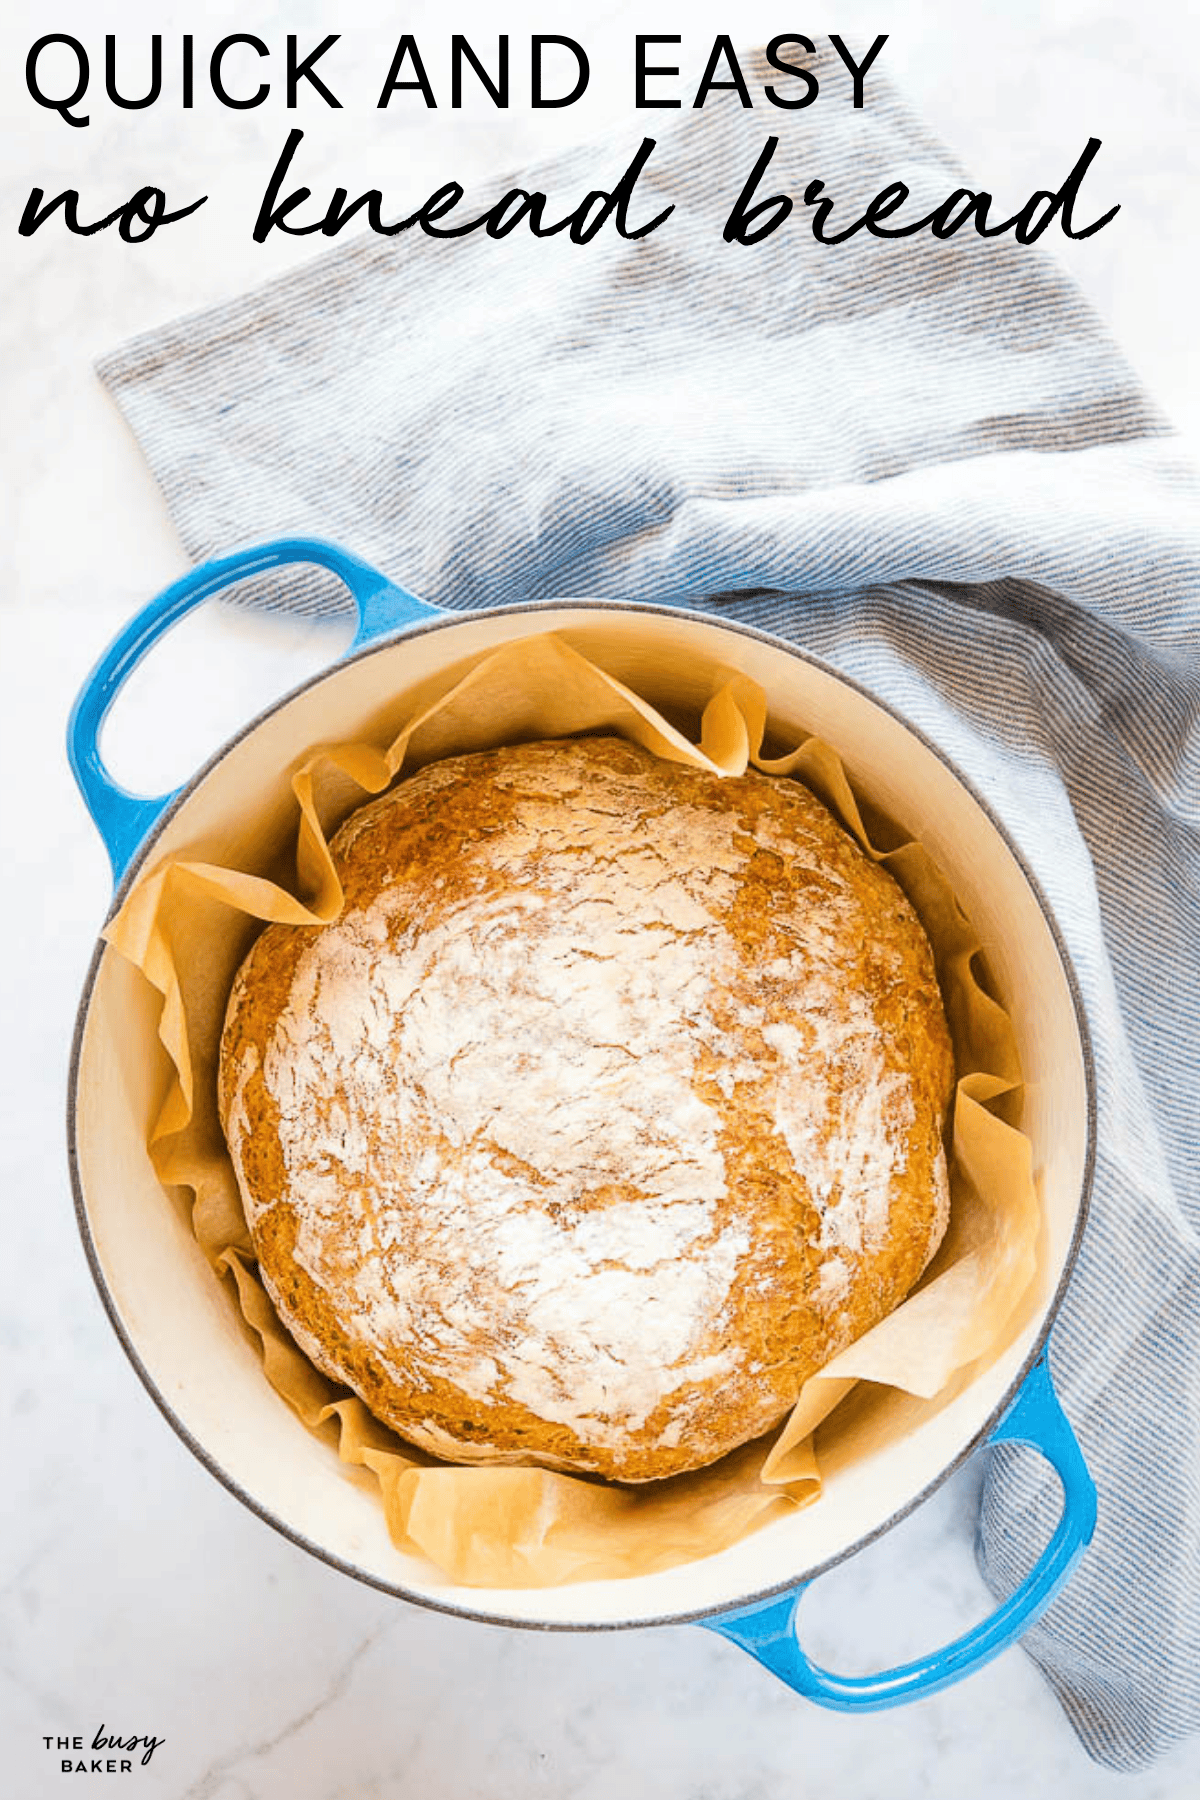
There’s almost nothing more satisfying than pulling a golden, crusty loaf of homemade bread out of your own oven? This Quick and Easy No Knead Bread gives you that sought-after bakery-style artisan loaf without any complicated steps, expensive equipment, or years of bread-baking experience. With just flour, water, yeast, and salt, you can create a rustic, crusty homemade bread with a soft, airy interior and an amazing crispy crust.
This is one of the best bread recipes for building baking confidence. It requires no kneading, no mixers, and no complicated shaping. Just simple ingredients, a little bit of patience, a hot oven, and a covered pot. Whether you’re serving it alongside your favourite soup or stew, slicing it for sandwiches, or enjoying it warm with salted butter, this homemade artisan-style crusty bread is one of the easiest and most rewarding things you can bake!

Traditional bread recipes rely on kneading to develop gluten, the network of protein that gives bread its chewy texture and structure. In a no knead bread recipe, fermentation replaces kneading. As the dough rests, gluten develops naturally and enzymes begin breaking down starches, which improves flavour and texture.
The high hydration level of the dough also plays an important role. A wetter dough creates a lot of steam during baking, which helps produce those large airy holes and that crisp artisan-style crust, especially when the steam gets trapped in a covered pot.
Baking in a very hot oven, especially inside a Dutch oven, traps steam during the first part of baking. That steam is what allows the loaf to expand fully before the crust sets, creating that dramatic rise and bakery-quality appearance.

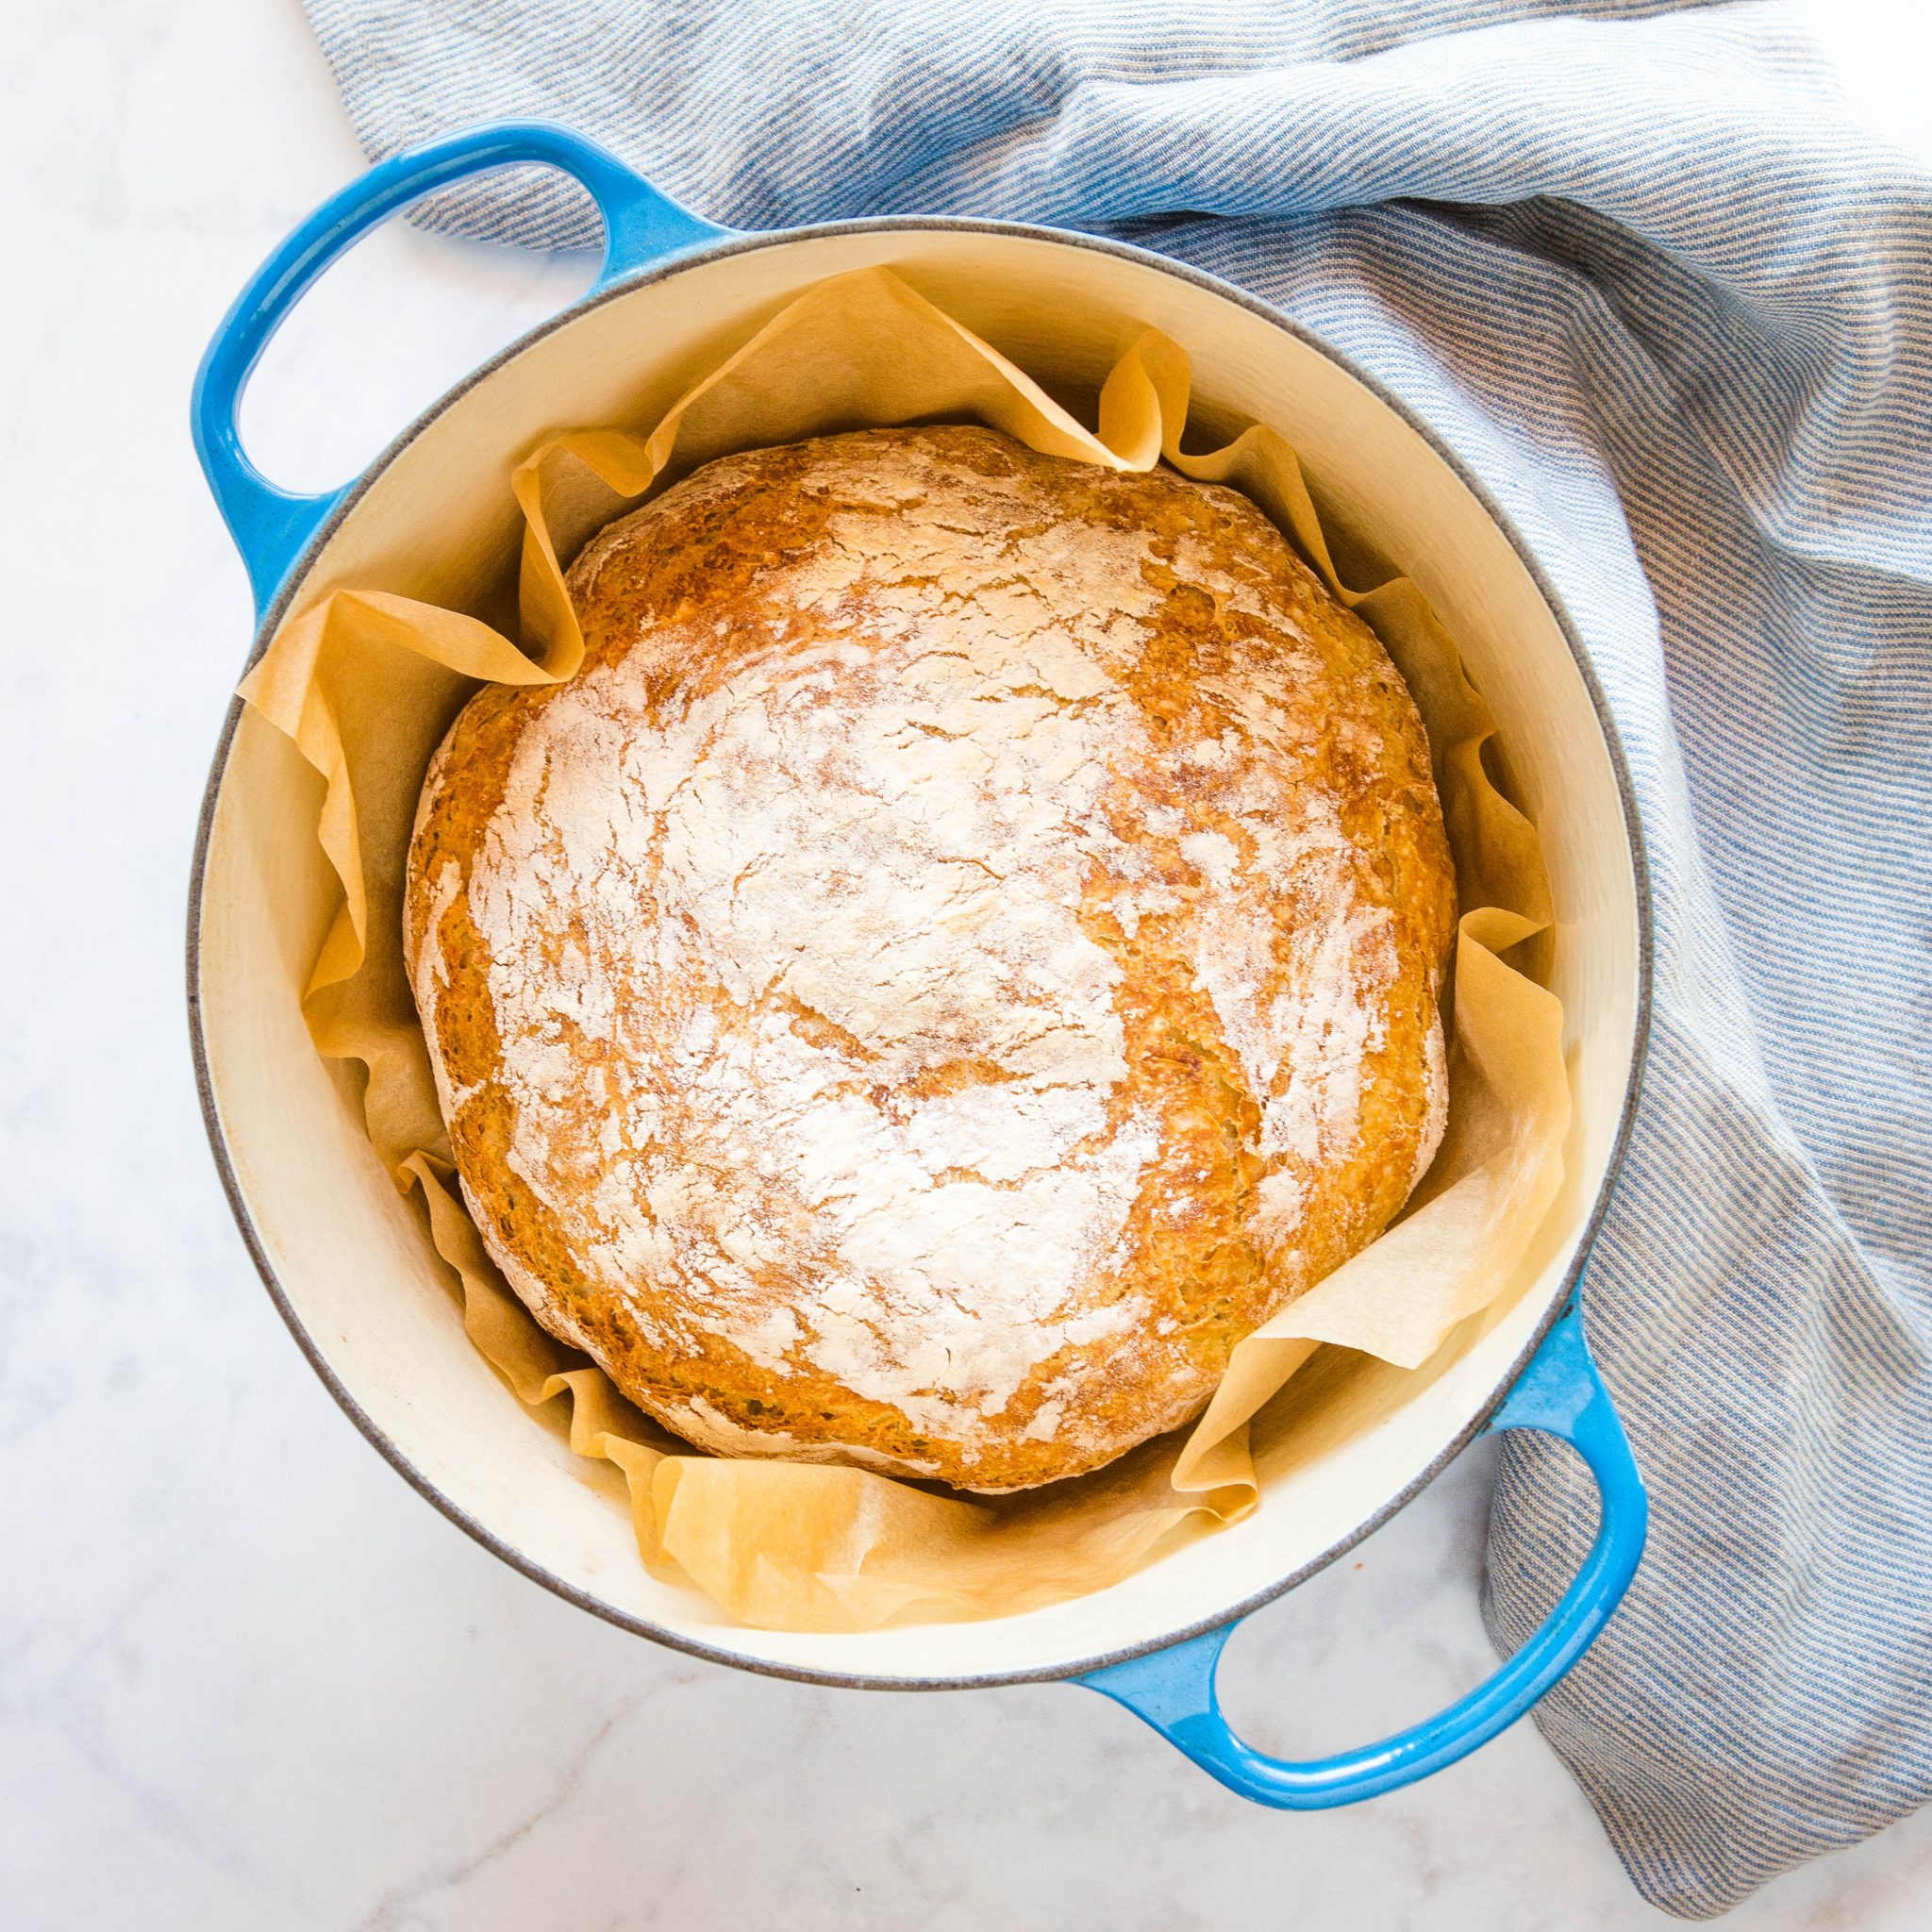
Preheating the pot will help you get that perfect crispy crust. The bread is baked in an oven-safe Dutch oven pot which traps in steam, making the crust of the loaf extra crispy.
If you’re looking for a great Dutch oven pot for baking bread, it’s one of the best investments you can ever make for your kitchen. My favourite is one from Le Creuset and I use it at least weekly throughout the entire year for soups, stews, sauces, curries, and of course for baking bread. (If you want my original Dutch Oven Crusty Bread recipe, find it HERE!). A pot like this one is definitely a financial investment for your kitchen, but considering how much I use mine and considering its high quality, it’s definitely a worthy investment. I’ve also used similar cast iron pots from other brands, like THIS ONE from KitchenAid and THIS ONE from Lodge Cast Iron if you’re looking for something a little less expensive but still high quality that will work just as well (paid links).
Water that is too hot can kill yeast, preventing the bread from rising at all. Aim for water that’s slightly warm to the touch but not hot.
One of the biggest mistakes people make when baking is in how they measure flour. To measure flour correctly for most bread-making, aerate the flour by tossing it with a spoon or measuring cup in the bag or container to “fluff it up”. As a result, it prevents the flour from becoming too densely packed. Scoop your flour very gently with a dry measuring cup, making sure it’s nice and fluffy and rounded at the top. If you scoop too harshly the flour will become packed into the measuring cup, adding more flour than is needed. Simply use the flat side of a butter knife and scrape off the excess flour, levelling out the top (scrape across the top of the measuring cup to level it out).
Some recipes call for you to weigh the flour in grams – this is a different method of bread-making that requires ultra-precise measurements. This easy recipe is very flexible and forgiving, but it’s still important that you measure the flour properly. Aerating the flour before measuring (as outlined above) will ensure your cup of flour weighs about 125 grams. You’ll need 500 grams of flour for this recipe. You can check it using a kitchen scale, but following this method of measuring will ensure your measurements are as accurate as possible without the use of a scale.
This dough is wetter than traditional bread dough. A wetter dough creates a more airy crumb on the inside of the bread, and it also helps create that crispy crust because of the increased amount of steam that escapes from the bread as it bakes in the covered pot.
Shape your loaf firmly but gently, and dust the top of the loaf with flour. Creating a round shape will help the loaf bake evenly. Also, dusting the top with flour will create a gorgeous, bakery-style appearance that everyone loves! Work the dough as little as possible. As a result, you’ll have a loaf with a shaggy exterior and an interior with LOTS of bubbles. If you shape the loaf a little bit more with your hands and roll it around into a tighter ball, the interior will be softer and the outside will be smoother, with fewer cracks. Both techniques work well – it’s up to your personal preference!
Allow the loaf to cool completely before cutting into it!! Resist the urge to slice the bread while it’s hot. Do you know that after removing a loaf of bread from the oven, it continues to bake inside as it cools?? Slicing into the gorgeous loaf too early will cause the inside of the loaf to be under-cooked and gummy. Allowing the loaf cool completely before slicing ensures the perfect fluffy texture when you slice into it!

Time needed: 2 hours and 20 minutes
- Mix until just combined.
Stir the flour, yeast, salt, and water together until no dry patches remain. The dough will look shaggy and slightly sticky. That’s exactly what you want.
- Let time do the work.
Cover and allow the dough to rise undisturbed for an hour and a half. During this rest, gluten develops naturally and flavour builds without kneading.
- Shape gently.
Turn the dough onto a lightly floured surface and shape it softly. Avoid pressing out too much air. Those bubbles create the airy interior.
- Bake in high heat.
Transfer the dough into a preheated Dutch oven or onto a hot baking surface. The intense heat creates rapid expansion and crust formation.
- Let it cool.
Cooling finishes the internal structure. Cutting too early can make the crumb gummy.

EASY NO-FAIL HOMEMADE BREAD RECIPES AND BAKING TIPS
Get my easy no-fail bread baking e-cookbook!

There are SO many ways to serve this:
- with your favourite hearty soups and savoury stews
- alongside your favourite pasta dishes
- for dipping in olive oil and balsamic vinegar
- toasted for breakfast
- used for sandwiches
- served with a charcuterie board

At Room Temperature: Store loosely wrapped for up to 2 days.
In the Freezer: Wrap tightly and freeze up to 3 months.
How to Reheat: Warm in the oven at 350 degrees Fahrenheit (175 degrees Celsius) for just a few minutes to restore crust crispness.

We’ve shared SO many variations on this easy no knead bread recipe. Here are a few of our favourites!
- Easy No Knead Bread – exactly the same bread, but with a slow rise twist!
- No Knead Honey Oat Artisan Bread – a sweet, fragrant bread made with oats and honey
- No Knead Whole Wheat Bread – a healthier, heartier version of the classic made with whole wheat flour
- No Knead Jalapeno Cheese Artisan Bread – perfect for serving with soups and for making sandwiches, this bread is cheesy and spicy!
- Easy No Knead Cinnamon Raisin Artisan Bread – amazing for toast and a mildly sweet treat, made with cinnamon and raisins!
- No-Knead Cranberry Walnut Bread with Honey – a decadent loaf made with honey, cranberries, and chopped walnuts.

Do I need a Dutch oven for this bread recipe?
No, but you do need any kind of covered pot that’s oven-safe at high temperatures. Covering the bread helps lock in steam for a crisp crust. If you bake this bread uncovered you won’t get the same crispy crust.
Can I make this without yeast?
This recipe relies on yeast for structure and flavour, so don’t skip it.
Can I let it rise overnight?
Longer fermentation improves flavour, but it’s important that you adjust the recipe if you let it rise longer. Try this Easy No Knead Bread recipe for a longer rise.
Can beginners make this?
Absolutely! This is one of the most beginner-friendly bread recipes.
What type of flour works best?
All-purpose flour works perfectly. Bread flour can create slightly more chew and a denser loaf.
How do I know it’s done?
The loaf should sound hollow when tapped and be deeply golden brown in colour.


More Easy Bread Recipes You’ll LOVE
- Potato Bread
- Easy Homemade French Bread
- Quick and Easy Cinnamon Rolls – Ready in One Hour!
- Quick Dinner Rolls – Ready in one hour!
- Easy White Sandwich Bread
- Easy Homemade Naan Bread
- No Knead Whole Wheat Bread
- Best Ever Cinnamon Raisin Bread
Watch the video below to see exactly how I make this recipe. You can find more delicious recipe videos on my YouTube channel
If you made this, share a photo!
Are you trying this recipe? Use the comment form below to share your take; now with support for image uploads and comment voting!
Quick No Knead Bread for Dutch Oven
Recipe: Equipment
Recipe: Ingredients
- 4 cups all purpose flour
- 2 1/4 teaspoons active dry yeast instant or rapid rise yeast also works
- 2 teaspoons salt
- 2 cups warm water just above room temperature
- more flour for shaping the loaf
Recipe: Instructions
- Start with a large bowl and a wooden spoon, and add your flour to the bowl. Measure the yeast and add it to one side of the bowl. Measure the salt and add it to the other side.
- Using a wooden spoon, stir the yeast into the flour on its side of the bowl first and then stir the salt into the flour on its side of the bowl. This will prevent the salt mixing directly with the yeast. Give the whole mixture a few good stirs to make sure everything is combined.
- Measure the water. Make sure the water is just above room temperature; water that is too warm or too cold can kill the yeast and prevent the bread from rising at all.
- Pour the water in and stir with a wooden spoon. The dough will be rough and a bit sticky, but that's normal.
- Stir until all the flour is combined. This is not normal bread dough (there's no kneading involved in this recipe), so you don't need to be too concerned about the appearance of the dough at this point. Just make sure the ingredients are combined well.
- Cover the bowl with plastic wrap. It's a good idea to ensure there's adequate space left in the bowl for the dough to at least double in size. Place the bowl in a warm, draft-free place and let it rise for about one and a half hours.
- After the dough has risen, preheat your oven to 450 degrees Fahrenheit (230 degrees Celsius). Place your Dutch oven with the lid on in the cold oven and let it heat up with the oven. If your dutch oven is black on the inside, set your oven to 425 degrees Fahrenheit instead of 450.
- Place a piece of parchment paper on the counter and dust it with flour. Rub flour on your hands and scrape the dough away from the sides of the bowl, gathering it in your hands as best you can (it may feel kind of strange and not at all like regular bread dough) and forming it into a circular loaf on the parchment paper. Don't worry if it still looks a little rough in places. This lends to the rustic look of this loaf.
- Once you have it shaped, the dough needs to undergo a short second rise. The goal is to handle the dough as little as possible at this stage because any amount of tugging at the rough can cause it to deflate after it has undergone its second rise. The next few steps will help prevent this. But don't worry if it deflates a bit. This bread dough is pretty forgiving.
- Sprinkle flour over the top of the loaf and loosely cover it with a clean kitchen towel. The flour you sprinkle on top also prevents the towel from sticking to the dough so when you take it off at the end of the rise, it doesn't disturb the dough and wreck the rustic shape you've created. Let the dough rise for about 30 minutes. Your oven will also be preheating during this time (and so will your pot).
- Remove the preheated pot from the oven and transfer the dough into the pot as carefully as possible by handling only the parchment paper. Place the lid on the pot and return it to the oven for 30 minutes. Don't open the oven during this time, and certainly don't take the lid off the pot; the crispness of the crust develops because of the steam that builds up in the pot during this 30 minutes.
- After 30 minutes have passed, remove the lid from the pot and continue baking for another 10 minutes. After the 10 minutes have passed, remove the pot with bread from the oven and place the bread on a wire rack to cool. You'll probably hear the loaf crackling as it cools – this is normal.
- If you can, resist the urge to cut into the bread until it has pretty much cooled completely. The bread continues to bake on the inside even after it has been removed from the oven and cutting it too early could result in the inside becoming gummy or rubbery.
Recipe: Notes
No Knead Bread Troubleshooting Tips:
- If your loaf falls or flattens during the second rise, simply re-shape before baking into as tight a ball as possible (creating surface tension should prevent the dough from falling).
- Add 1 tablespoon of Vital Wheat Gluten to the dough with the flour to create a very voluminous dough that rises beautifully every single time and isn’t too dense.
- If the bottom crust of your bread burns or becomes too hard or tough, it’s likely that the bottom burner of your oven is too hot OR you’re using a pot that’s black on the inside (these conduct heat more efficiently than one that’s a light colour on the inside). Try lowering your oven temperature by 25 degrees, using the convection setting, or using a different pot that’s light in colour on the inside.
- Use an oven thermometer to make sure your oven temperature is correct. If your oven runs hot, lower the temperature of your oven by 25 degrees to be sure you don’t burn the bread.
Recipe: Nutrition
Notice: Nutrition is auto-calculated, using Spoonacular, for your convenience. Where relevant, we recommend using your own nutrition calculations.
Can this recipe be used with Einkorn flour?
We’ve not tried using Einkorn flour. If you decide to give it a go, please let us know how it turns out!
Ive added one ice cube in each “corner» of the hot DO under the paper just as I’m placing the lid to return to the hot convection oven. The added steam makes for a wonderful crust !
Oof. 95% hydration with AP flour!?! Even after adding 1/3 cup more flour after the first rise and trying to develop the gluten by stretching and folding, the dough was closer to a ciabatta than a rustic loaf assumed the shape of the bottom of my dutch oven. I’ll try 1 2/3 cup water next time and bread flour. No real loss as we get to eat our mistakes.
Thanks for this, David. Feel free to add the additional flour if you feel it needs it, however it is a wet dough. We would suggest skipping the stretch and fold of the dough as it has been designed to be a “no knead” recipe (and tested with AP flour). Keep us posted on your next batch!
Beautiful bread
I was wondering if you think this would work well with gluten free flour?
Thank you!
Thanks for your question, Cindy. This recipe should not be used with gluten free flour – sorry!
I love your recipes for no knead breads. Can I make these with bread flour? If so, would any changes be necessary?
Great question, Debbie. We don’t recommend using bread flour with this recipe, as the flours do perform differently.
Came out beautiful!!!!
Looks yummy! I’m so happy you enjoyed the recipe! Thank you for taking the time to leave your feedback!
The only reason I bought a dutch oven this Black Friday was so that I could bake bread in it! I’ve tried this recipe twice and it is phenomenally easy. In fact, I work from home, and it’s really easy to whip up the dough during my lunch, and bake it in the afternoon for dinner that night. I’ve tried both instant rise yeast and active yeast, and the active yeast yielded a better result. Thanks for sharing the recipe!
Thank you for your feedback, Victorria! We’re so happy to hear you’re enjoying our recipe.
Thanks for your recipe! I’ve used several times now and my bread always comes out perfect!
We’re happy to hear that! Thank you for your feedback.
Any suggestion on substituting all purpose flour with whole wheat?
You could just try this recipe https://thebusybaker.ca/no-knead-whole-wheat-artisan-bread/
Just gave this a shot. I’ve done a handful of similar quick, no-kneed breads before, but decided to try this for some reason. It turned out gorgeous despite seeming like it was too wet. I didn’t change anything, but shaped on the counter to get it under control before putting it on the parchment for the second rise. After the second rise it was really big – just a big, thick, fat glob. I was not expecting much. But it baked up beautifully. We haven’t cut into it yet, but I expect it will taste great.
Looks great, Courtney! Thank you for taking the time to leave your feedback.
First attempt bombed, second time around I think I have it.. there it is hot out the oven and cooling.. I’ll update on the taste. Thank you for the recipes and tips. I have always wanted to make bread and now I think I can.
We’re so happy to hear that! Thank you for taking the time to leave your feedback ☺️
I added roasted garlic and fresh finely minced rosemary to it. Is beautiful! I needed a quick recipe instead of the overnight rising ones. It took me longer to find the recipe than to make it. Was so easy. Thank you!
We’re so happy you enjoyed it! Thank you for taking the time to leave your feedback!
How long would I bake the bread for if I don’t have a Dutch oven?
You can use any heavy bottomed oven safe pot with a lid for the same time. Let us know how your bread turns out!
Is it okay to add a bit of butter ( 1 tablespoon) to the recipe ? I bake regular bread and always use butter in the mix.
Sure!
Soup was on the menu for dinner, and on a whim I decided to make some bread that morning to accompany it. Thankful to find this recipe that required less time than typical bread making since I was baking it last minute. Overall, the bread was pretty good. It had the perfect crisp on the outside making it ideal to dip in our soup. Since my cast iron pot was small, I divided the bough in half and froze the other portion. Tbh on whether that turns out okay once I go to use it!
I’m so happy you enjoyed it! Thank you for taking the time to leave your feedback and let us know how the other loaf turns out!
Hi Busy Baker- I have a lot of bread flour I need to use up. Can I use bread flour in place of the all purpose flour? If so, do I need to make other changes to the recipe?
I was looking for an easy bread recipe. This is it! It was good and I can see many ways to change it up. Thanks!!
I’m so happy you enjoyed it! Thank you for taking the time to leave your feedback!
I received a Dutch Oven for Christmas and was so excited to make bread. I loved how easy this recipe was and my bread turned out delicious. I am so happy.
Thank you for a clear easy to follow recipe.
I’m so happy you enjoyed it! Dutch Ovens are the best! ☺️ Thank you for taking the time to leave your feedback!