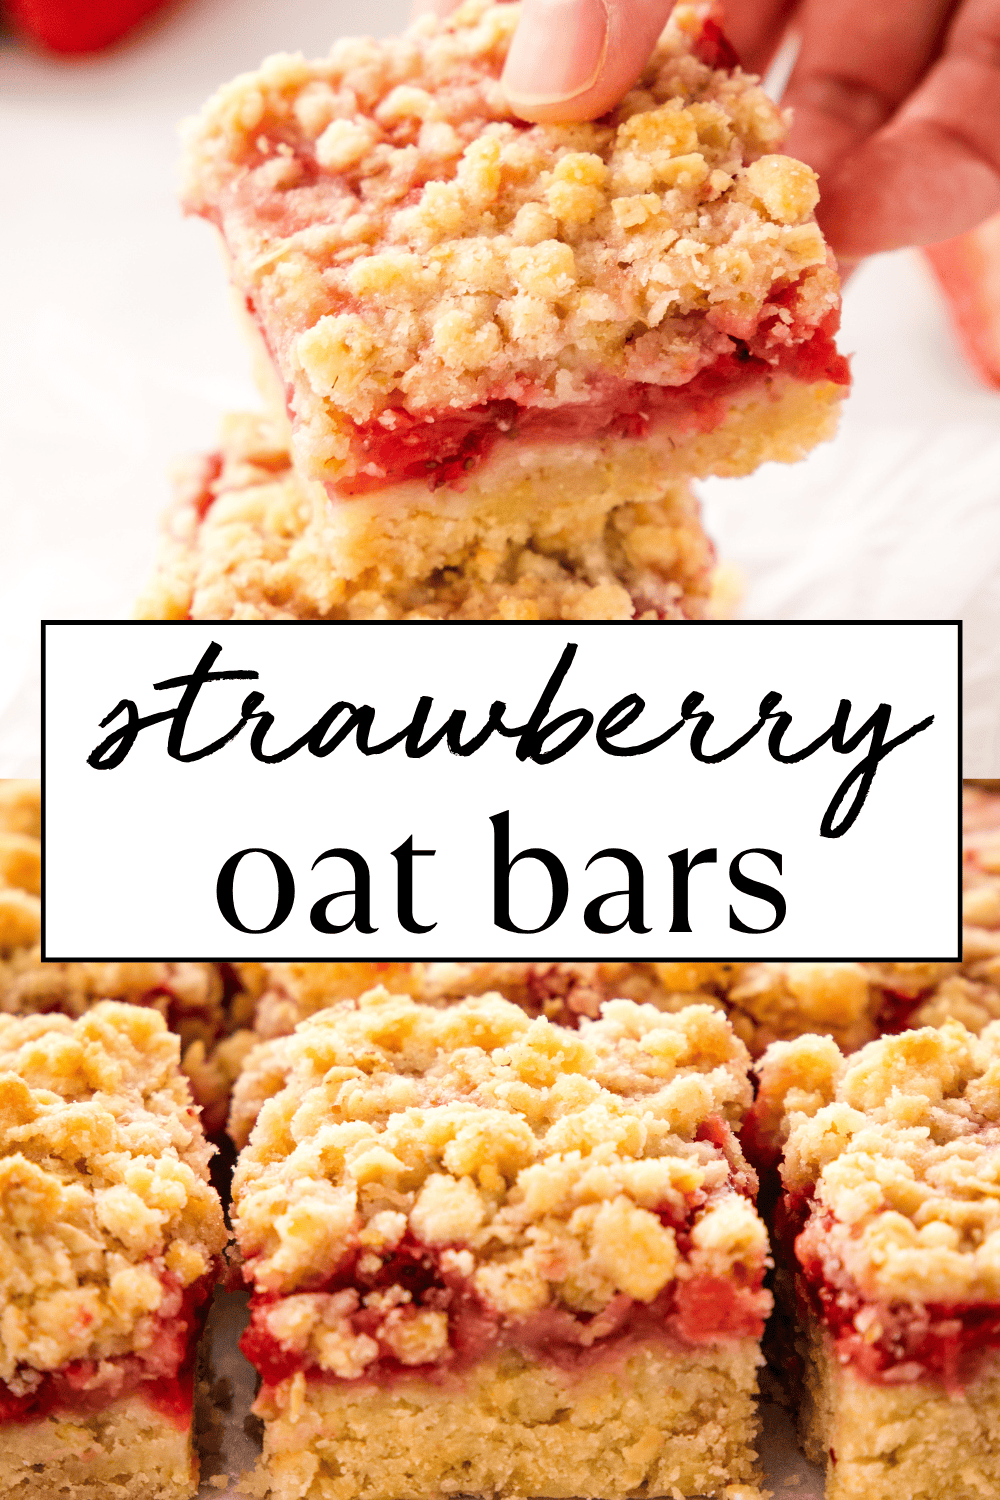
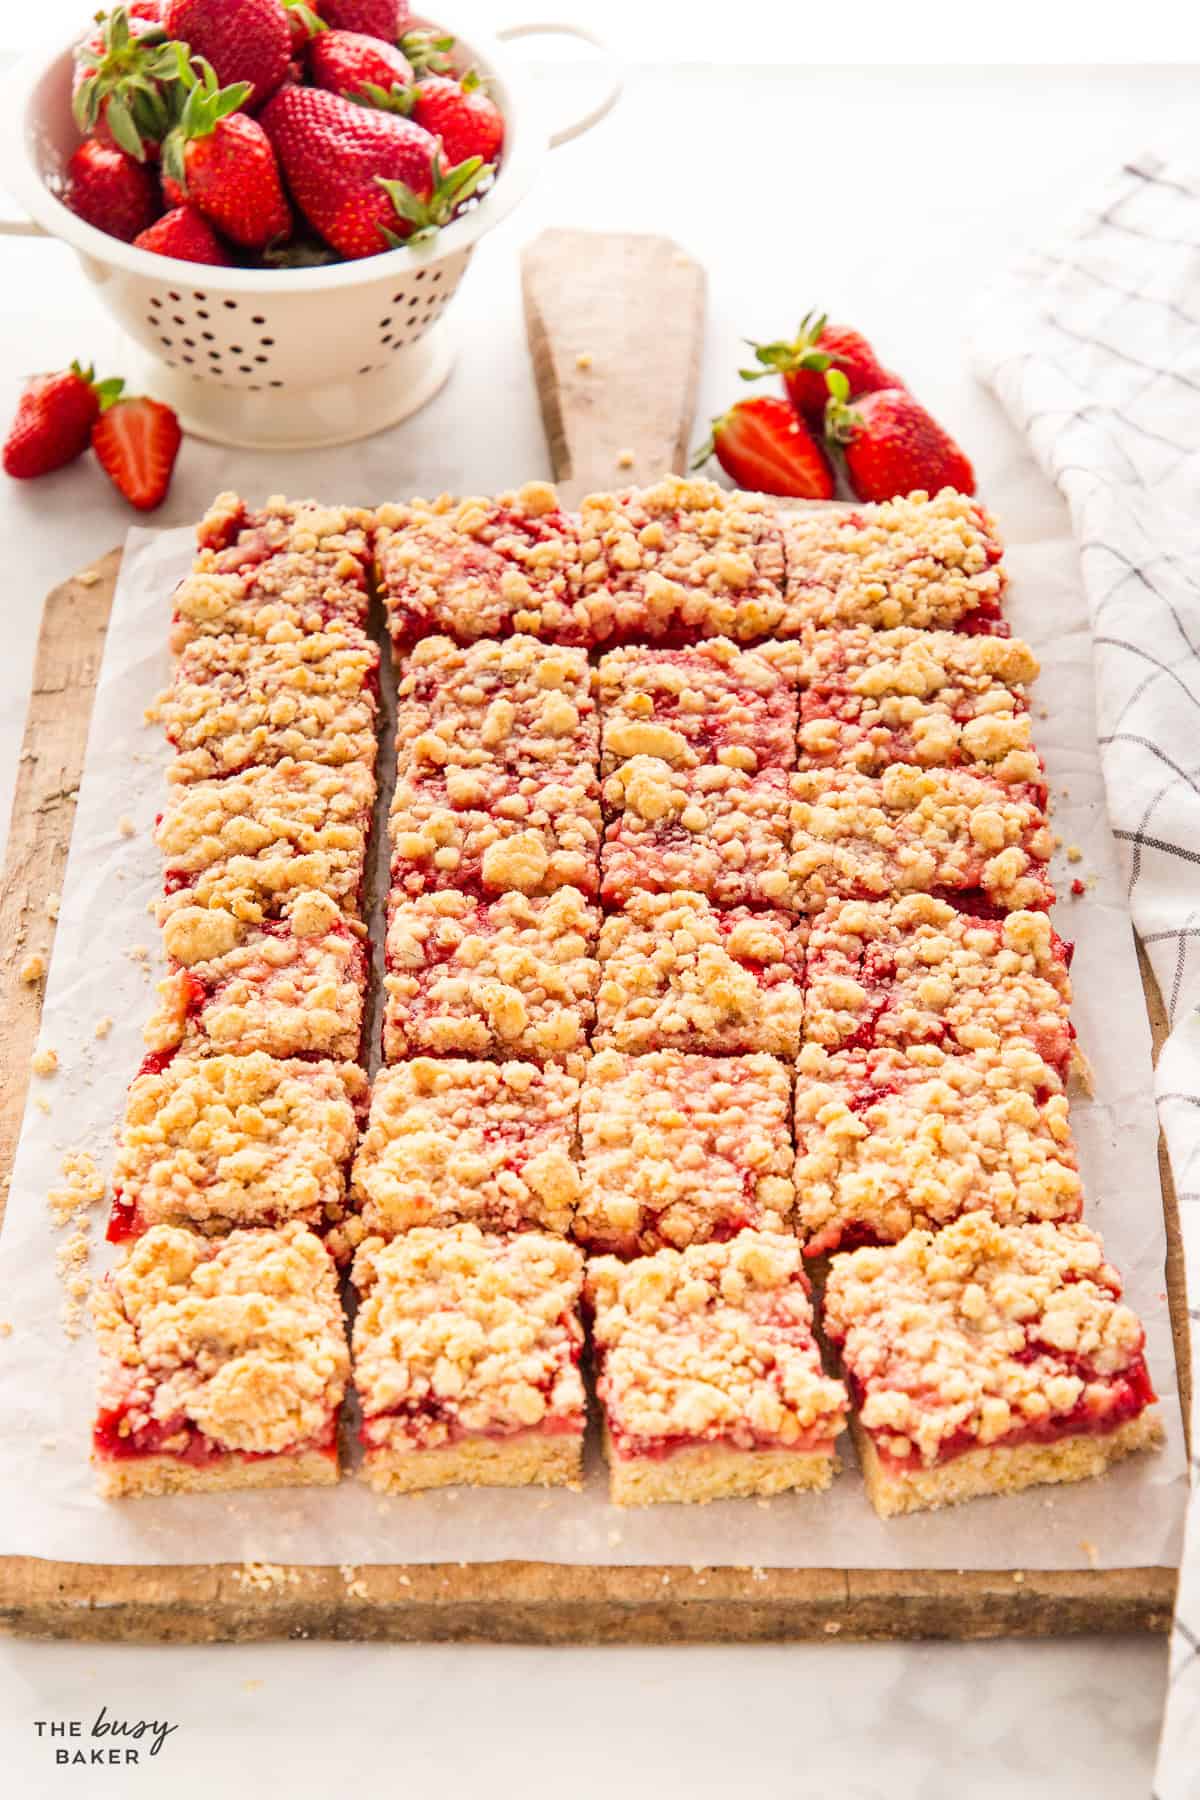
These Strawberry Oat Bars are buttery, crumbly, and packed with sweet fresh strawberries. An easy strawberry oat bar recipe with a tender shortbread oat crust and fruity filling that’s perfect for dessert, snacking, or summer baking.
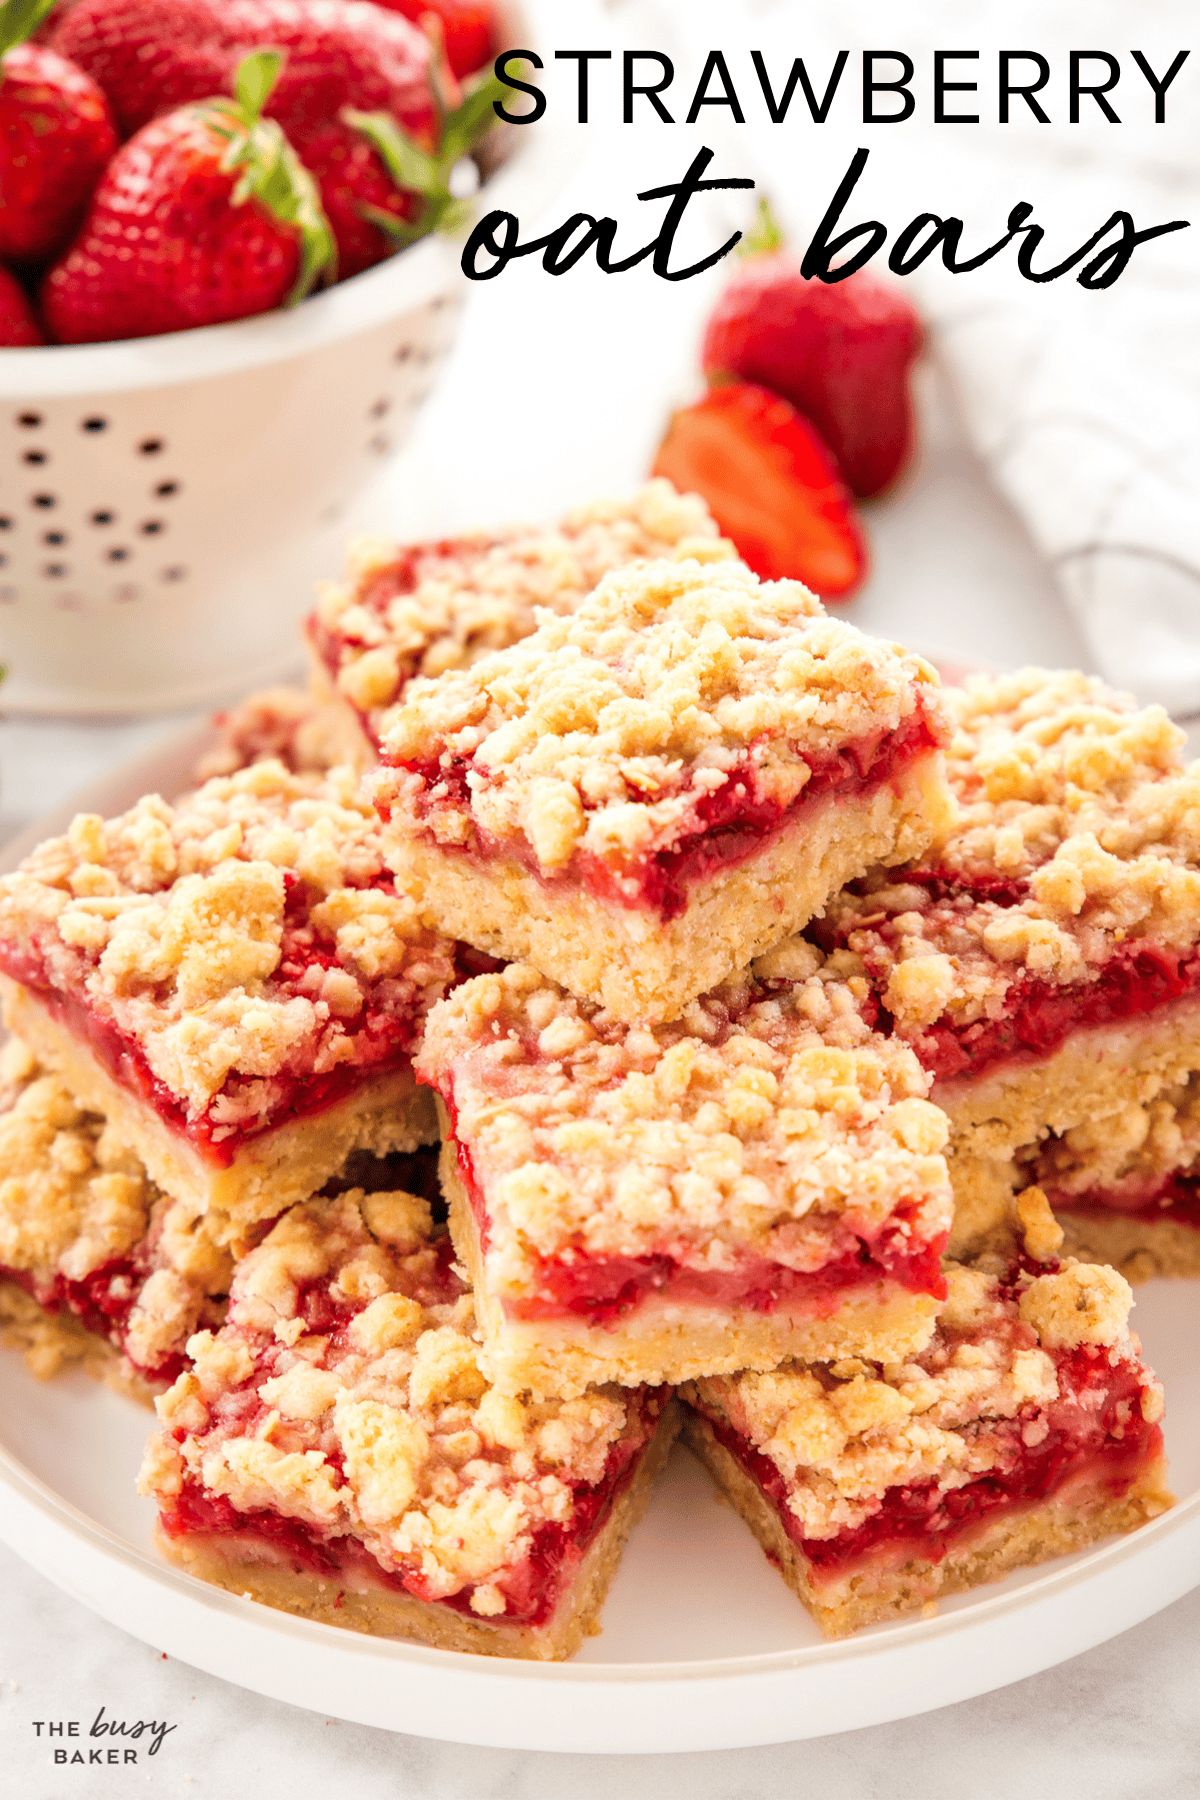
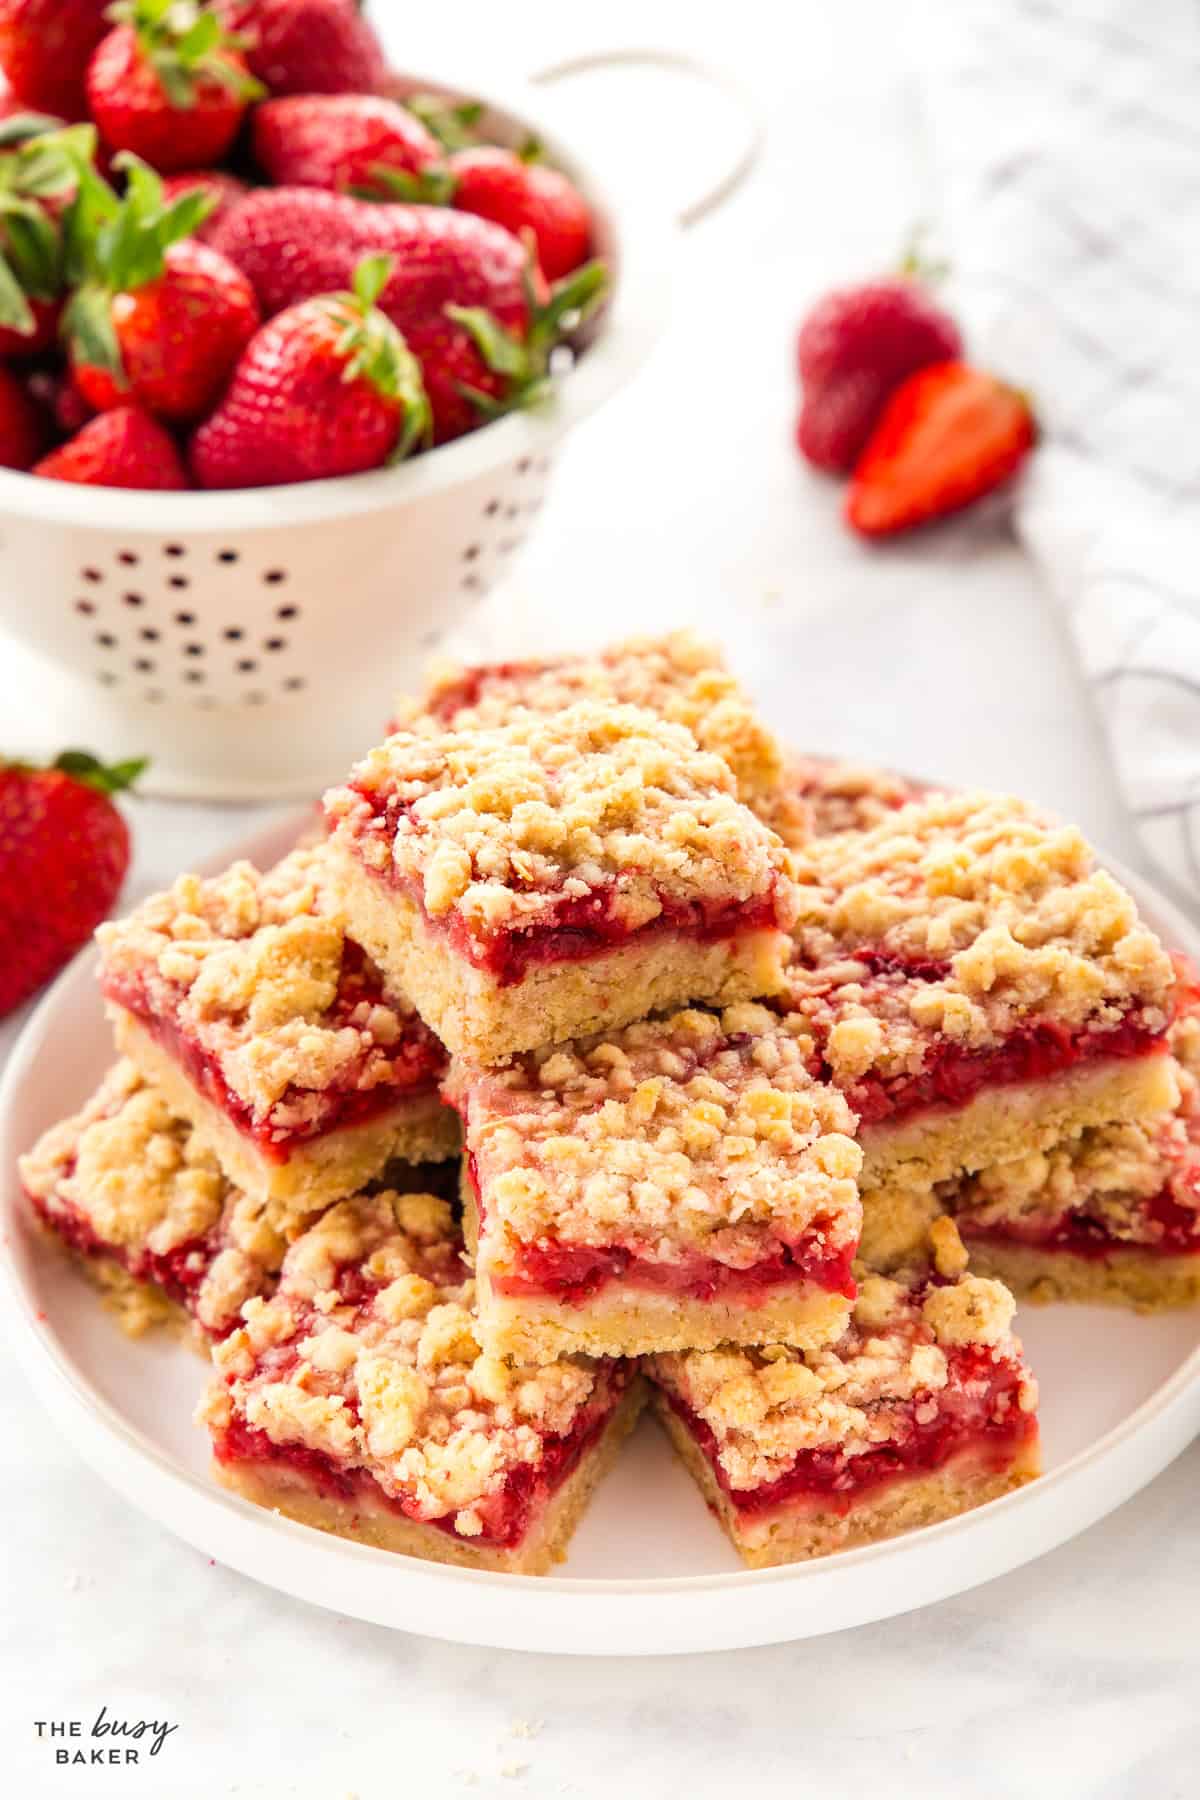
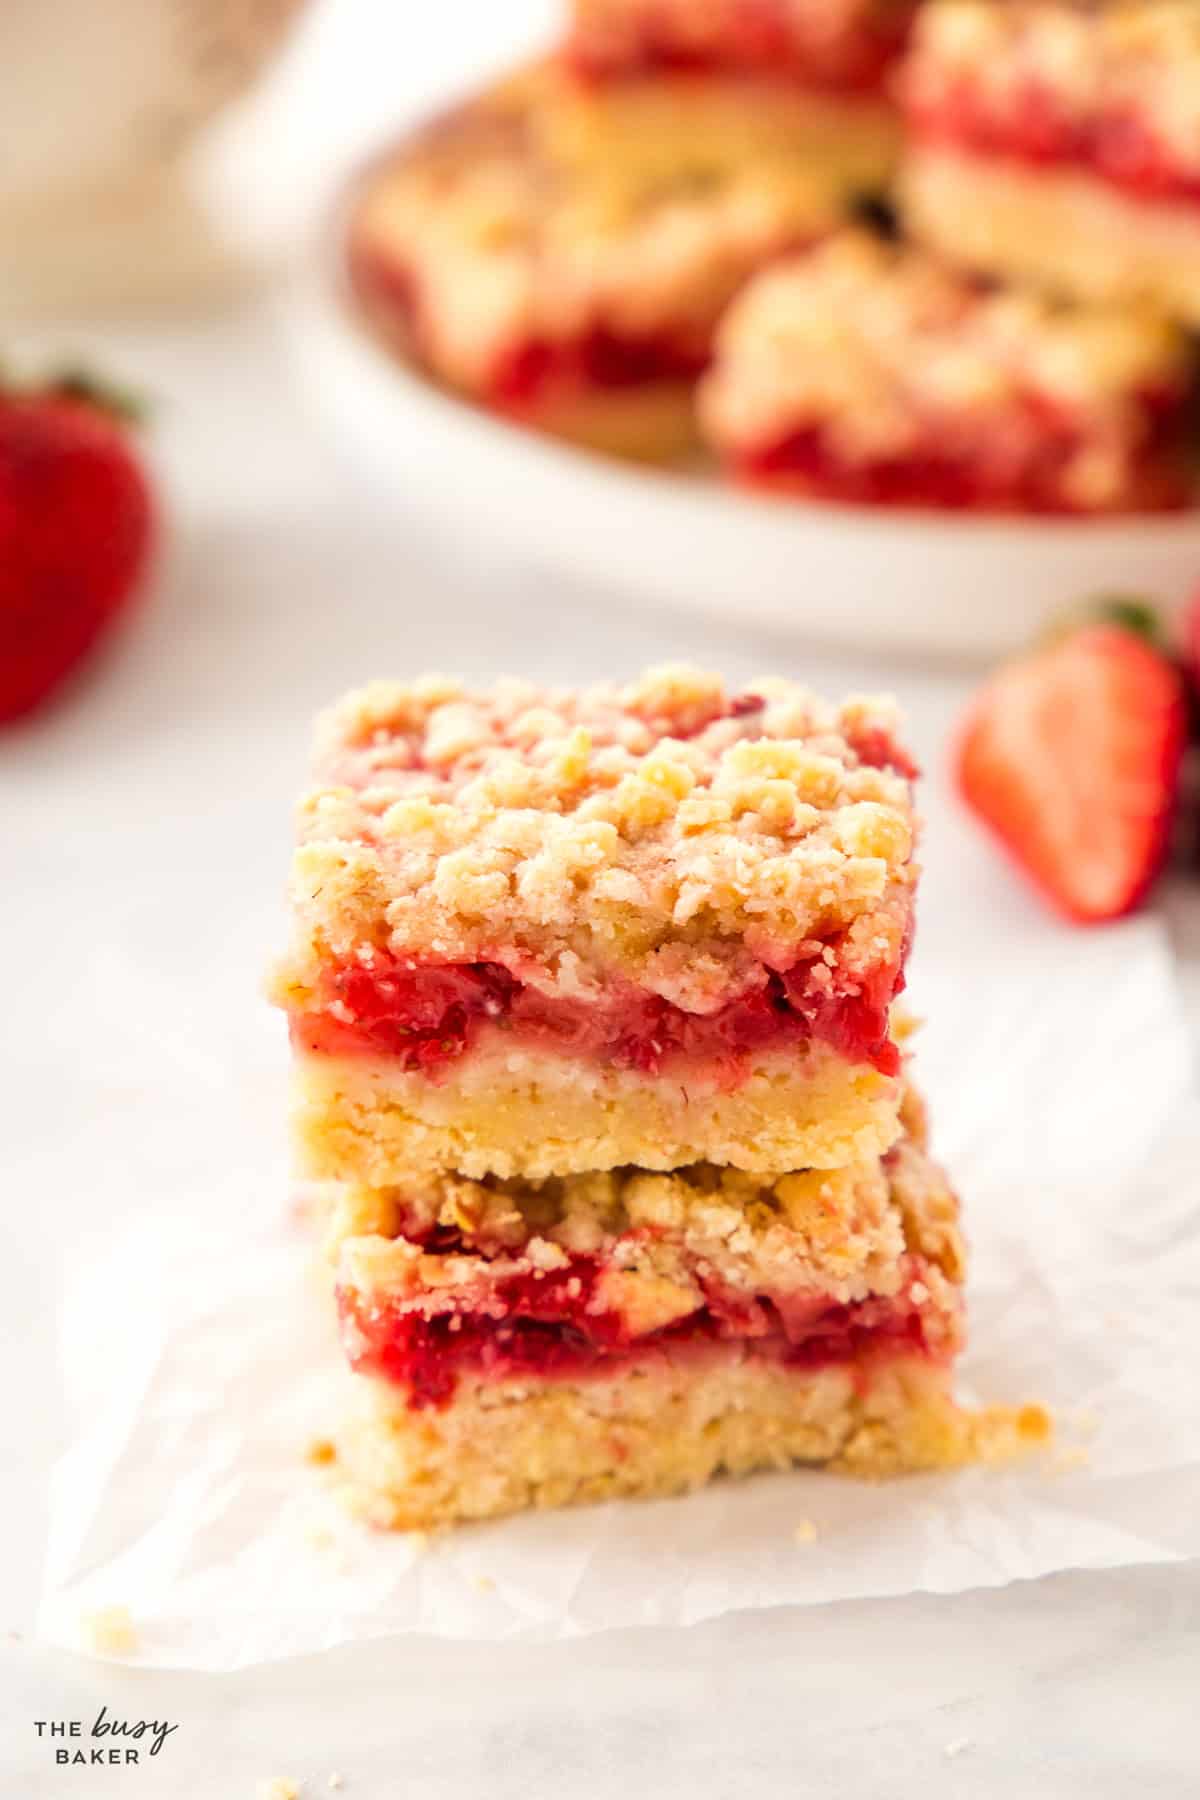
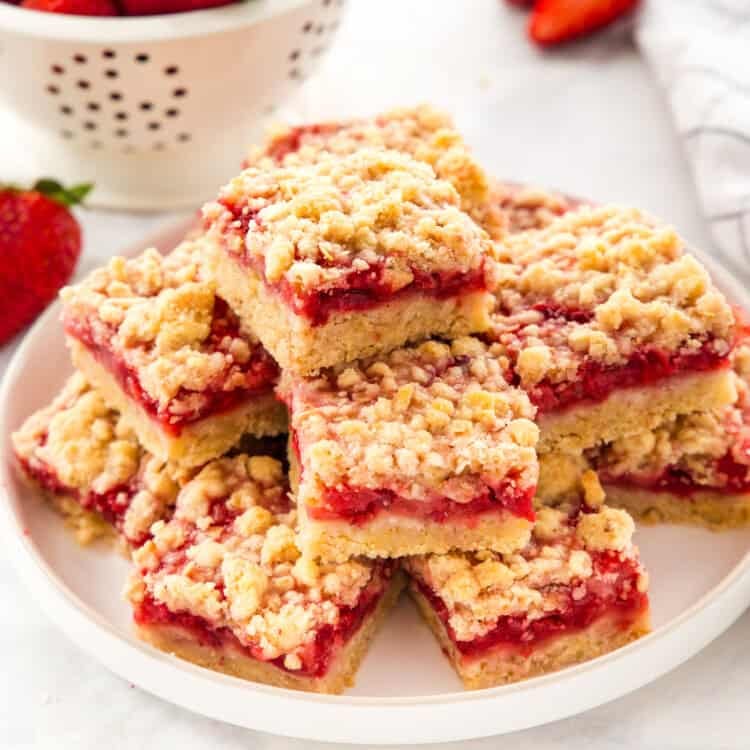
These Strawberry Oat Bars are the kind of simple, no-fuss dessert that always disappears quickly! They’ve got a buttery oat crust, a sweet and juicy strawberry filling, and a crumbly topping that bakes up lightly golden brown and absolutely irresistible. They’re easy enough for everyday baking (even if you’re a beginner!), but pretty and delicious enough to bring to a spring or summer picnic or potluck.
What makes them especially great is how straightforward they are. You make one buttery oat mixture for both the base and the topping, layer it with a quick strawberry filling, and bake it all in one pan. The result is somewhere between a fruit crumble, a shortbread bar, and a classic fruit square, which is exactly why they’re such a favourite. They’re sweet, fruity, comforting, and the kind of recipe you’ll want to make again and again when strawberries are in season.
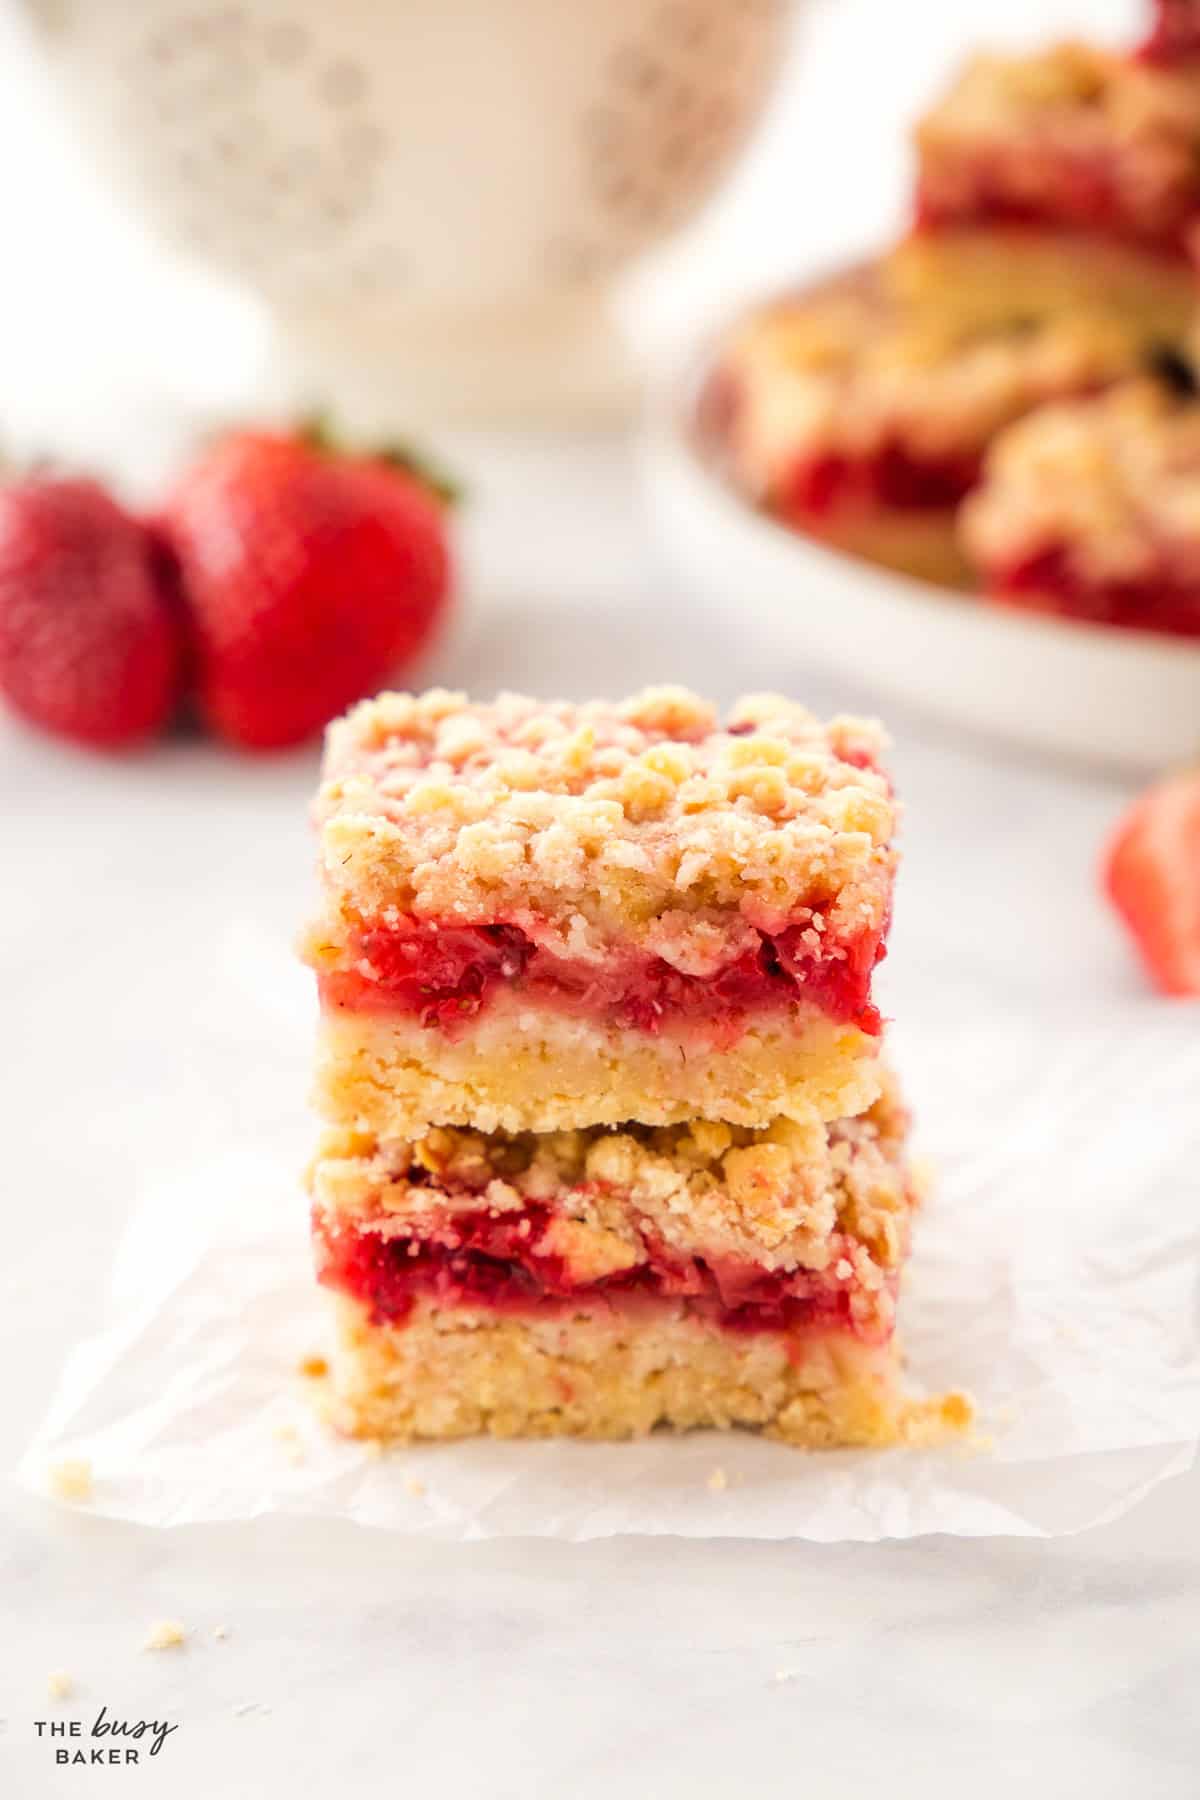
This recipe works because every part of it is doing its job! The crust and crumble topping are made from the same buttery oat mixture, which keeps the recipe simple and gives the bars a consistent, tender texture from bottom to top. It’s sturdy enough to hold the fruit when pressed into the bottom of the baking pan, but still soft and crumbly when you bite into it.
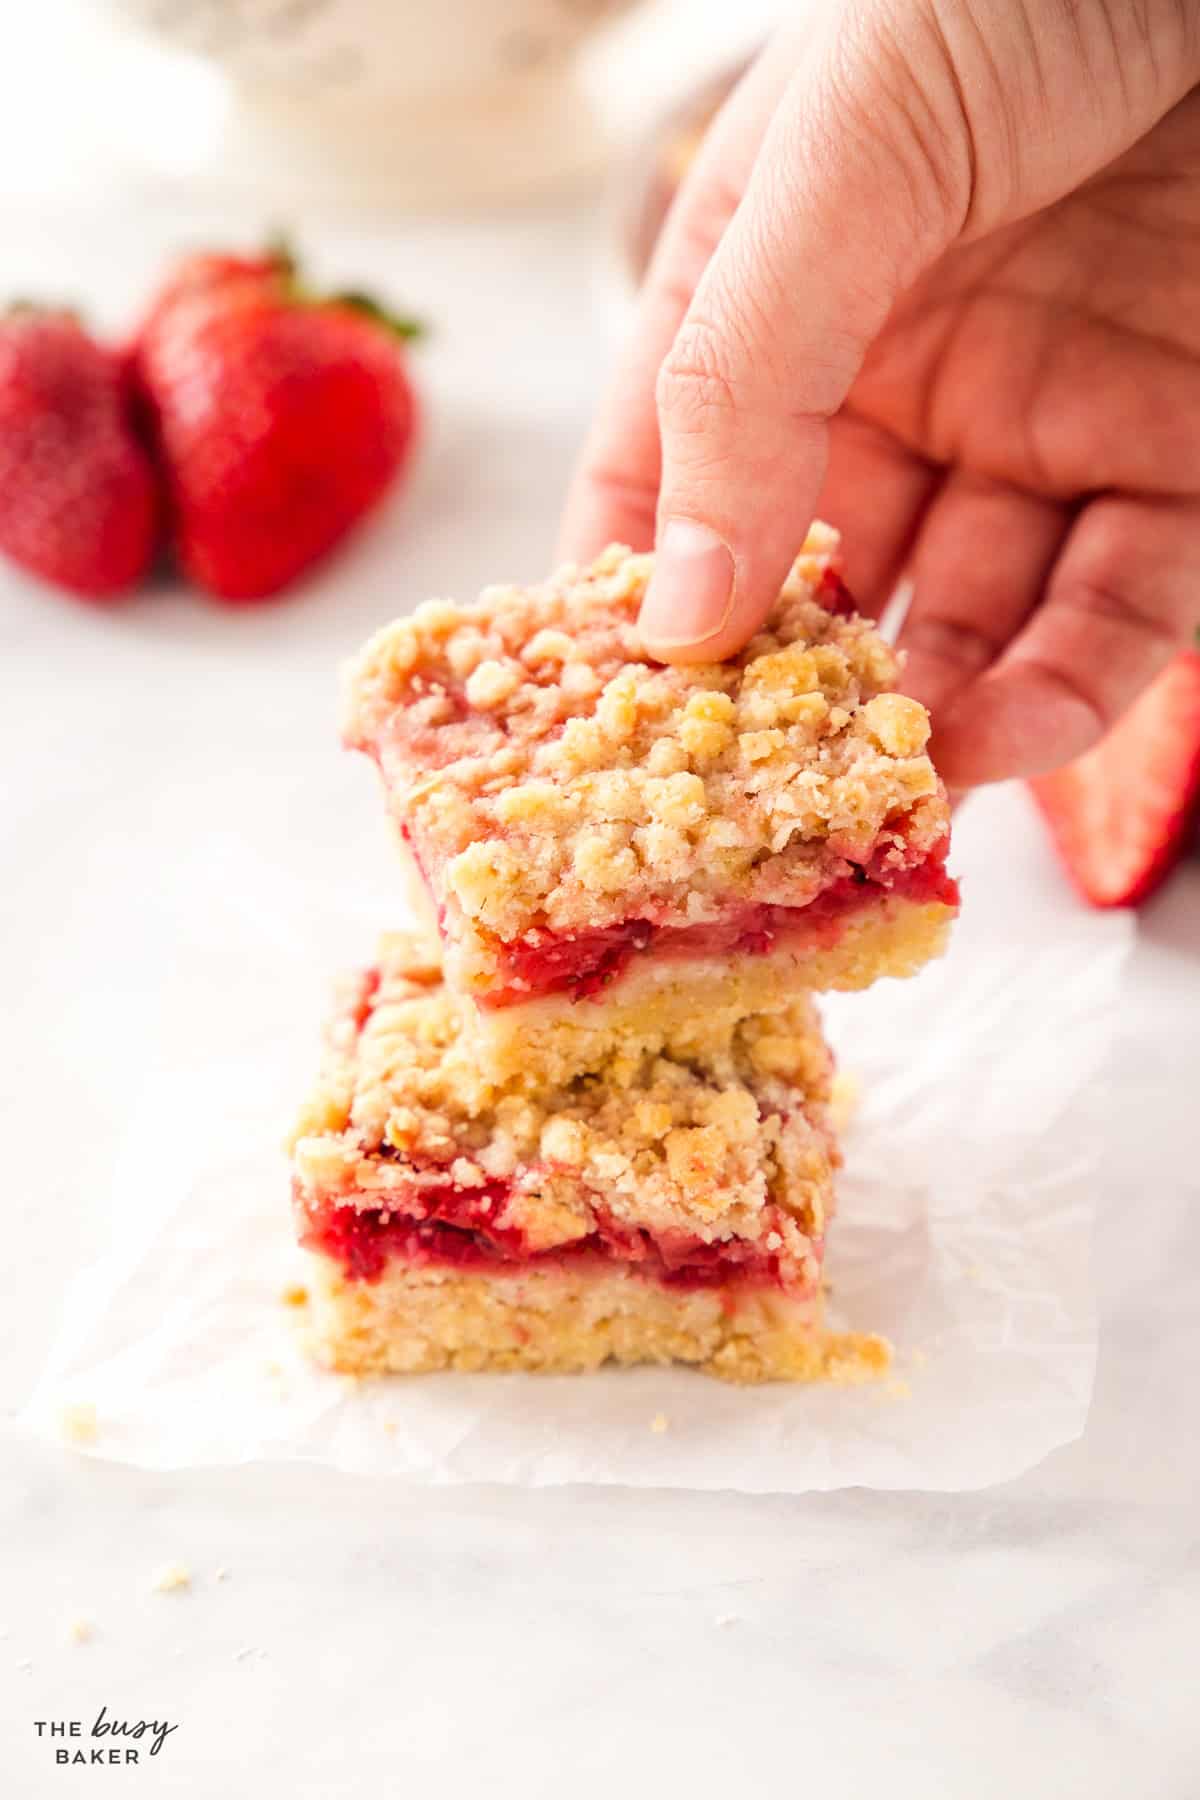
The strawberry filling is just as smart. The sugar draws out the berries’ natural juices, the lemon juice brightens the flavour, and the cornstarch thickens everything as it bakes so the bars slice cleanly instead of turning into a runny mess. That balance is what gives you a fruit layer that feels juicy and fresh without making the base soggy.
It also works so well because it’s such a simple, accessible recipe. There’s no mixer needed, no fancy techniques, and no complicated shaping or portioning. It’s a great recipe for beginning bakers, but it’s also the kind of dependable bar recipe experienced bakers come back to again and again because it’s easy, adaptable, and always satisfying.
Cold butter is what gives the crust and topping that crumbly, tender texture. If the butter is too soft, the mixture can turn pasty instead of crumbly on top of the bars.
Smaller pieces create a more even filling and make the bars easier to slice neatly once they cool.
It’s what thickens the fruit juices and helps the bars hold together properly after baking.
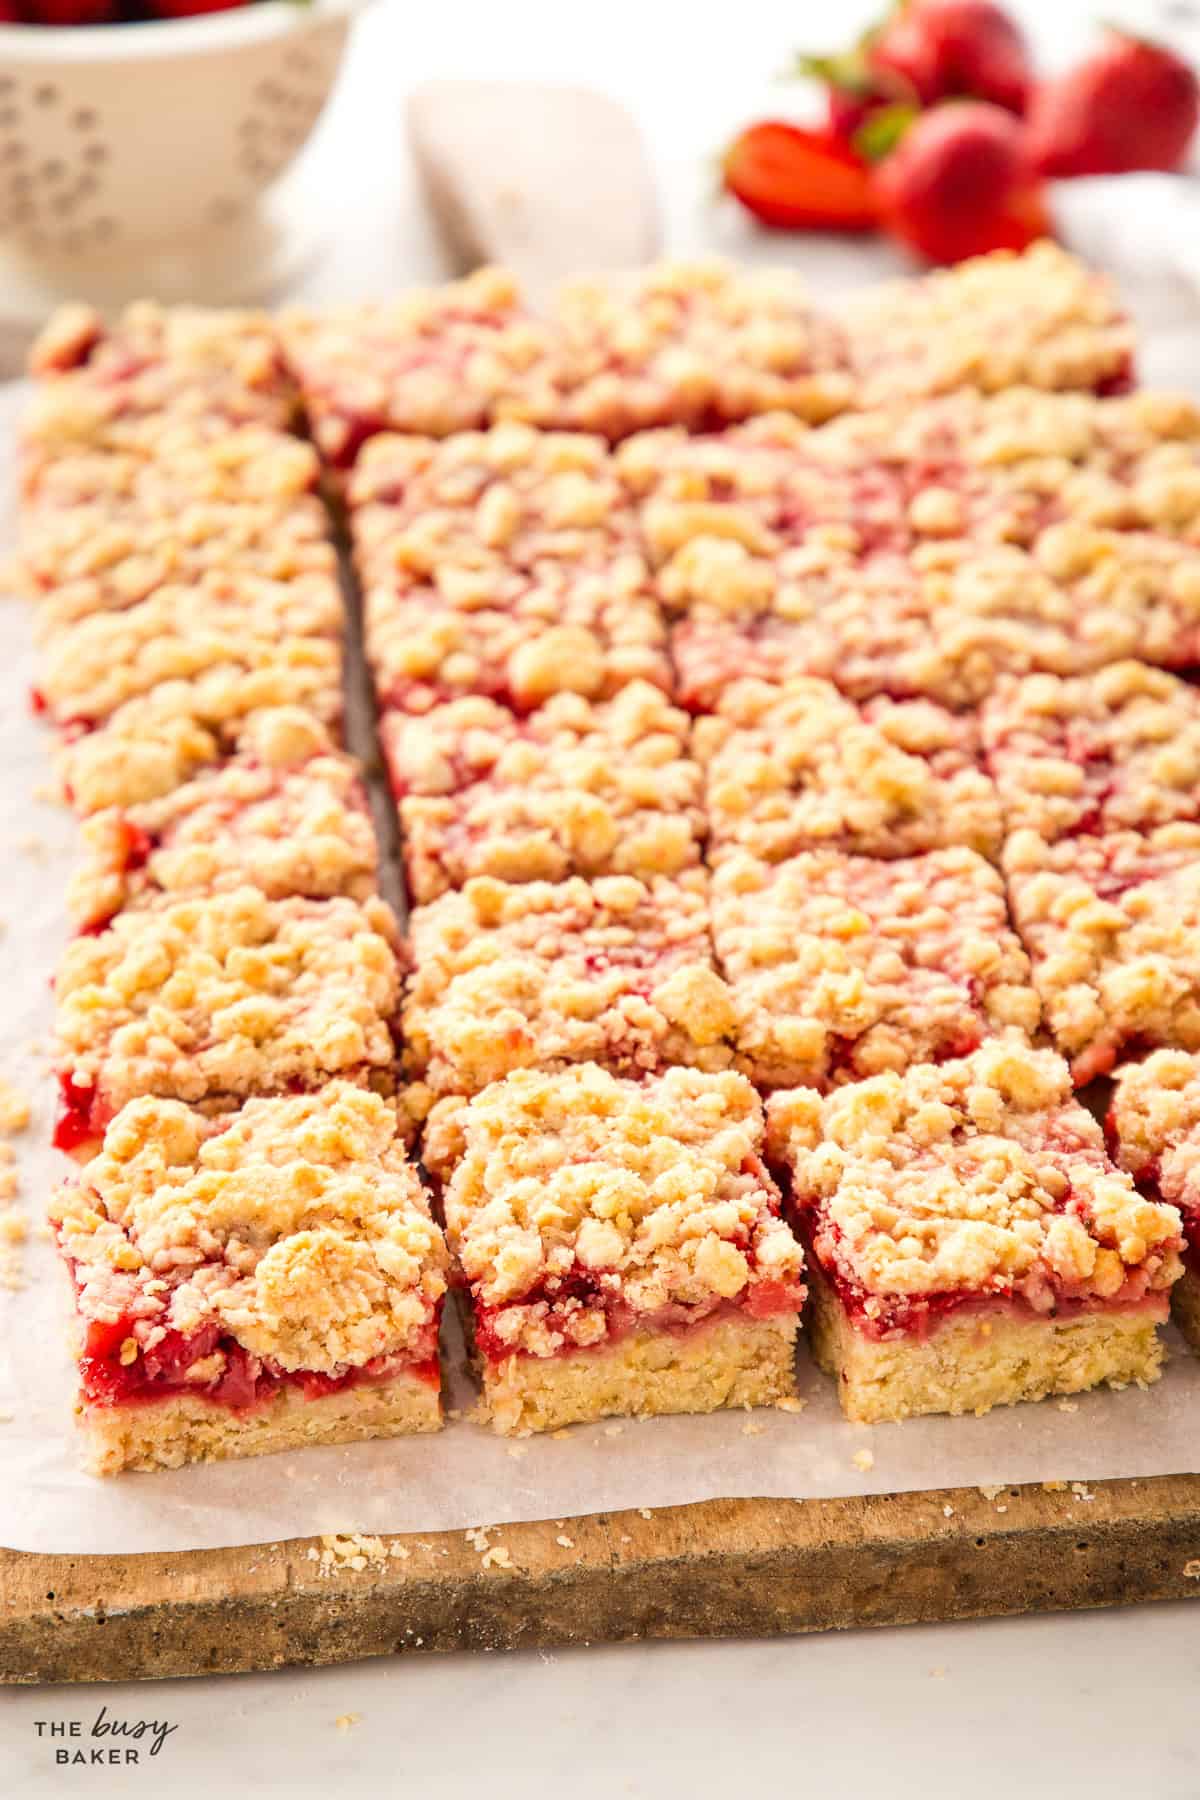
The base should be packed down well so it can support the fruit layer without falling apart when you cut the bars.
Don’t press the top layer down. Leaving it loose and crumbly gives you that classic oat bar texture.
You don’t want these bars to be any more brown than golden. The best texture comes from baking them until the top is just barely golden and the fruit layer is bubbling a little around the edges.
This is one of the most important steps. The filling needs time to set, and the bars will hold their shape much better once they’re fully cooled.
- Start with the crumble mixture.
Whisk the dry ingredients together well so everything is evenly distributed before you add the butter. This keeps the crust and topping consistent all the way through. - Cut in the butter until crumbly.
You’re looking for coarse crumbs, not a smooth dough. Some slightly larger bits of butter are fine and actually help give the topping a nicer texture once baked. - Add the egg just until the mixture comes together.
Once the egg goes in, mix only until the crumbs start to hold together when pressed in your hand. You still want a crumbly mixture, not a fully blended dough. - Press the base in firmly and evenly.
Be sure to press the base in firmly. A well-packed base is what creates bars that lift and slice cleanly instead of crumbling apart when. you cut them. - Toss the strawberries well with the sugar, cornstarch, and lemon juice.
Make sure the berries are evenly coated so the filling thickens properly and the sweetness is balanced throughout the bars. - Spread the fruit layer evenly.
Try to spread the strawberries in an even layer right to the edges so every bar has a good balance of crust, fruit, and crumble topping. - Sprinkle the remaining crumble over top.
Let it fall naturally over the fruit rather than pressing it down. That loose topping is what gives the bars their beautiful texture on top. - Be patient while they cool.
This is the step that makes the biggest difference. Warm bars will taste good, but fully cooled bars will slice cleanly and hold together much better.
- Use frozen strawberries. Frozen strawberries work well in this recipe, but be sure to thaw them first and drain off excess liquid so the filling doesn’t become too wet. If they seem especially juicy, add a little extra cornstarch (1 tablespoon).
- Try other berries. Raspberries, blueberries, blackberries, or a mix of berries all work well in this style of bar. Just keep the total fruit amount about the same, and chop the berries if they’re on the larger side.
- Add rhubarb. A strawberry-rhubarb version is especially delicious. Replace some of the strawberries with diced rhubarb for a slightly more tart filling.
- Use brown sugar. Up to half the white sugar can be substituted for brown sugar in the crust and topping for a deeper, slightly caramel flavour.
- Swap the lemon juice. Orange juice works in a pinch, though the flavour will be softer and less bright than lemon.
- Add chopped nuts. A handful of finely chopped pecans, walnuts, or sliced almonds in the topping adds extra crunch and a more rustic feel.
- Use quick oats if needed. Rolled oats give the best texture but quick oats can work if that’s what you have on hand. The topping will be a little finer and less hearty.

Store the bars only after they’ve cooled completely. If you put them away while still warm, the steam gets trapped and the topping will soften and get soggy.
Keep them in an airtight container at room temperature for up to 2 to 3 days. If your kitchen is very warm, you can refrigerate them, but the crust will firm up more in the fridge.
For longer storage, freeze them in layers with parchment paper between the bars so they don’t stick together. Store them in an airtight container or freezer bag for up to 2 months for the best texture and flavour.
To serve after freezing, let them thaw at room temperature. If you want them slightly warm, a few seconds in the microwave, air fryer, or toaster oven works well, but they’re easiest to handle and slice when cool or just lightly warmed.

FREE Baking Bootcamp
All the best tips, tricks, recipes and tutorials you need to become a successful home baker! If you’ve ever wanted to learn how to bake the BEST muffins, bread, cookies, cakes, buns and MORE, this Baking Bootcamp is for YOU!
Can I use frozen strawberries in strawberry oat bars?
Yes. Thaw them first, drain off excess liquid, and toss them with the sugar, cornstarch, and lemon juice just like fresh strawberries. If they seem very juicy, add a little extra cornstarch.
Why are my strawberry oat bars falling apart?
The most common reason is cutting them before they’ve cooled completely. The filling needs time to set, and the crust firms up as the bars cool.
Why are my bars soggy on the bottom?
Usually that means the fruit released too much liquid or the bars were underbaked slightly. Using enough cornstarch, draining thawed frozen berries, and baking until the filling is bubbling helps prevent this.
Can I make these bars ahead of time?
Yes. They’re a great make-ahead dessert because they slice best once cooled completely and hold up well for a couple of days.
Can I use quick oats instead of rolled oats?
Yes, but the texture will be slightly different. Rolled oats give a heartier, more defined crumble, while quick oats create a finer topping.
Do I have to use parchment paper?
It’s strongly recommended. Parchment makes it much easier to lift the bars out of the pan cleanly and slice them neatly.
Can I double the recipe?
Yes, but you’ll need a larger baking pan or two pans, and the baking time may need a slight adjustment depending on the thickness.
Can I use other fruit in this recipe?
Absolutely. This base works well with many berries and even fruit combinations like strawberry-rhubarb or mixed berry.
Why is my topping too soft instead of crumbly?
That usually happens if the butter was too warm or the bars were stored before they were fully cooled. Cold butter and full cooling time are key.
Can I make these gluten-free?
You can experiment with a good one-to-one gluten-free flour blend and certified gluten-free oats, but the texture may vary slightly.
Should these be stored in the fridge?
Not necessarily. Room temperature is usually best for the texture if you’re eating them within a couple of days. Refrigeration is helpful if your kitchen is very warm.
Are these more like a crumble bar or a shortbread bar?
They’re a little bit of both. The base has that buttery, sturdy feel of a shortbread-style bar, while the oat topping gives them more of a fruit crumble vibe. That combination is part of what makes them so good.

FREE Baking Bootcamp
All the best tips, tricks, recipes and tutorials you need to become a successful home baker! If you’ve ever wanted to learn how to bake the BEST muffins, bread, cookies, cakes, buns and MORE, this Baking Bootcamp is for YOU!
If you made this, share a photo!
Are you trying this recipe? Use the comment form below to share your take; now with support for image uploads and comment voting!
Strawberry Oat Bars
Recipe: Equipment
Recipe: Ingredients
- 2 1/2 cups all purpose flour
- 1 cup rolled oats
- 1 cup granulated sugar
- 1 teaspoon baking powder
- 1/4 teaspoon salt
- 3/4 teaspoon cinnamon
- 1 cup unsalted butter cold from the fridge
- 1 egg
- 4 cups fresh strawberries diced
- 3/4 cup granulated sugar
- 4 teaspoons cornstarch
- 2 teaspoons freshly squeezed lemon juice
Recipe: Instructions
- Preheat your oven to 350°F (175°C) and prepare a 9-inch by 13-inch rectangular baking dish, greasing it with butter or baking spray and lining it with parchment paper.
- In a large bowl combine the flour, oats, sugar, baking powder, salt, and cinnamon with a wire whisk.
- Add the cold butter to the flour mixture in chunks, blending it in with a pastry cutter or a fork until the mixture resembles coarse crumbs.
- Beat the egg in a small bowl and add it to the flour and butter mixture, mixing just until combined.
- Press about 2/3 of this mixture tightly into the bottom of the prepared baking pan and set the other part aside.
- In a separate bowl, combine the fresh diced strawberries, white sugar, cornstarch, and lemon juice and toss well.
- Pour the fruit mixture over the bottom crust you’ve just pressed into the baking pan.
- Pour the remaining flour mixture over the strawberry layer.
- Bake at 350°F (175°C) for about 40-45 minutes, or until the top crust is just barely golden brown.
- Let the bars cool completely in the pan before cutting into them or trying to remove them from the pan – they’ll continue to bake a little after you’ve removed them from the oven and they’ll need to cool in order to maintain their shape.
- Once cool, cut them into 24 bars and serve.
Recipe: Notes
Recipe: Nutrition
Notice: Nutrition is auto-calculated, using Spoonacular, for your convenience. Where relevant, we recommend using your own nutrition calculations.