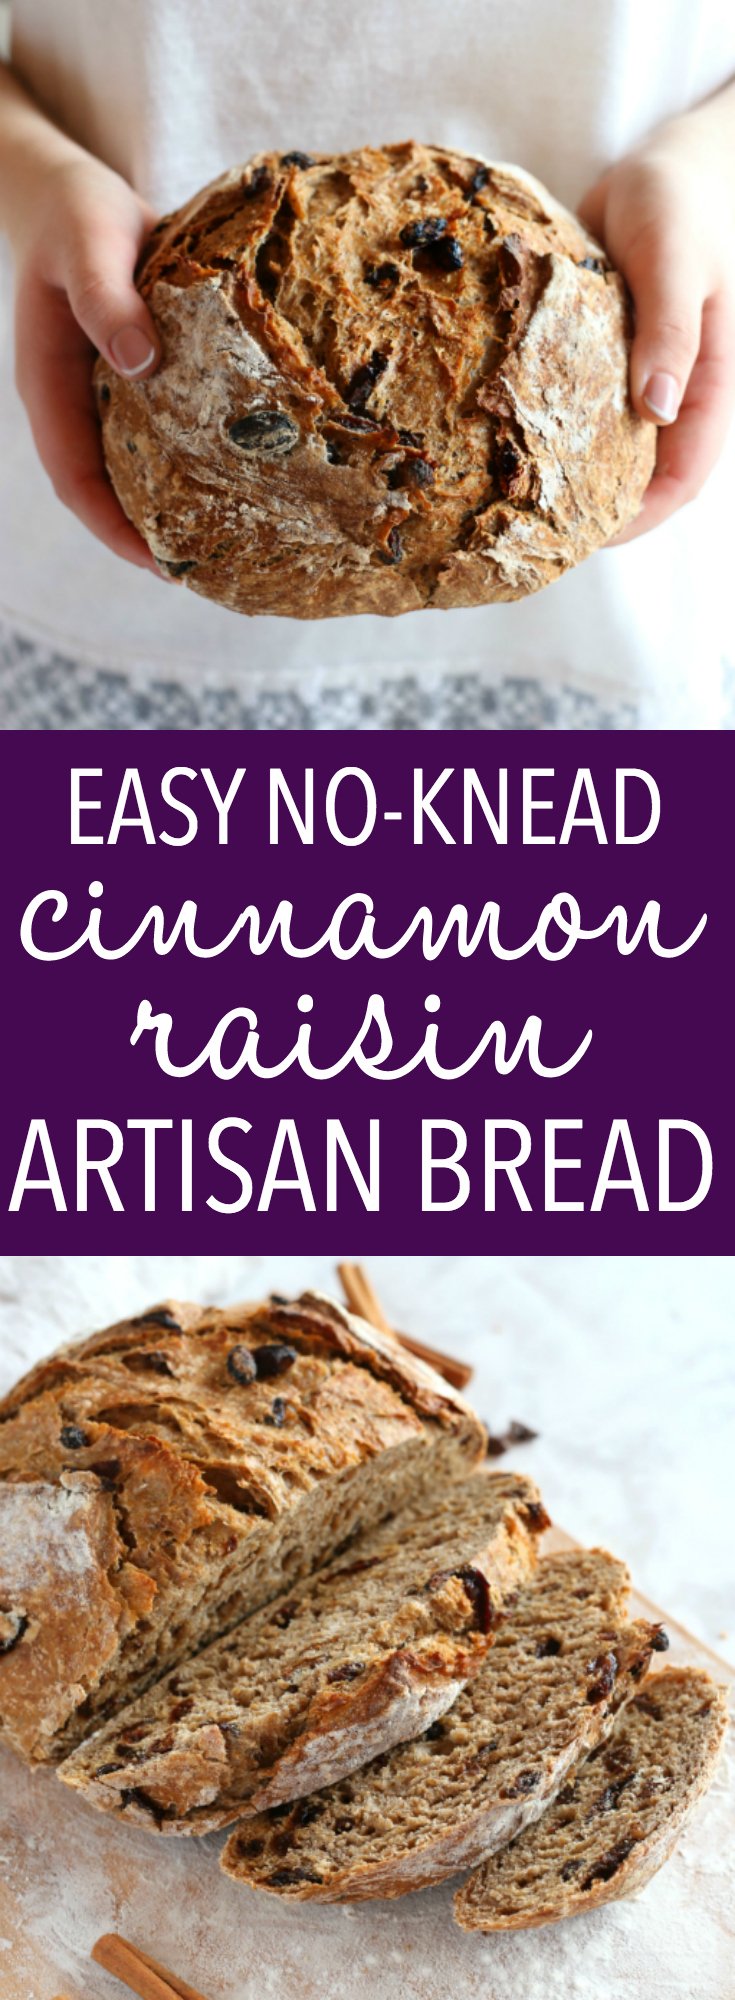
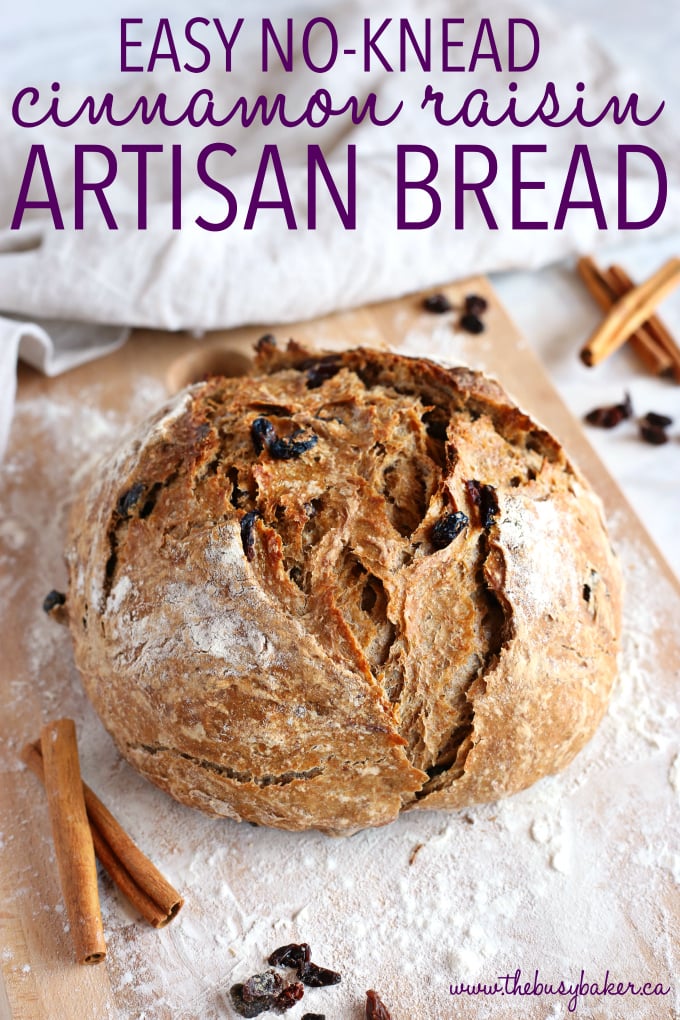
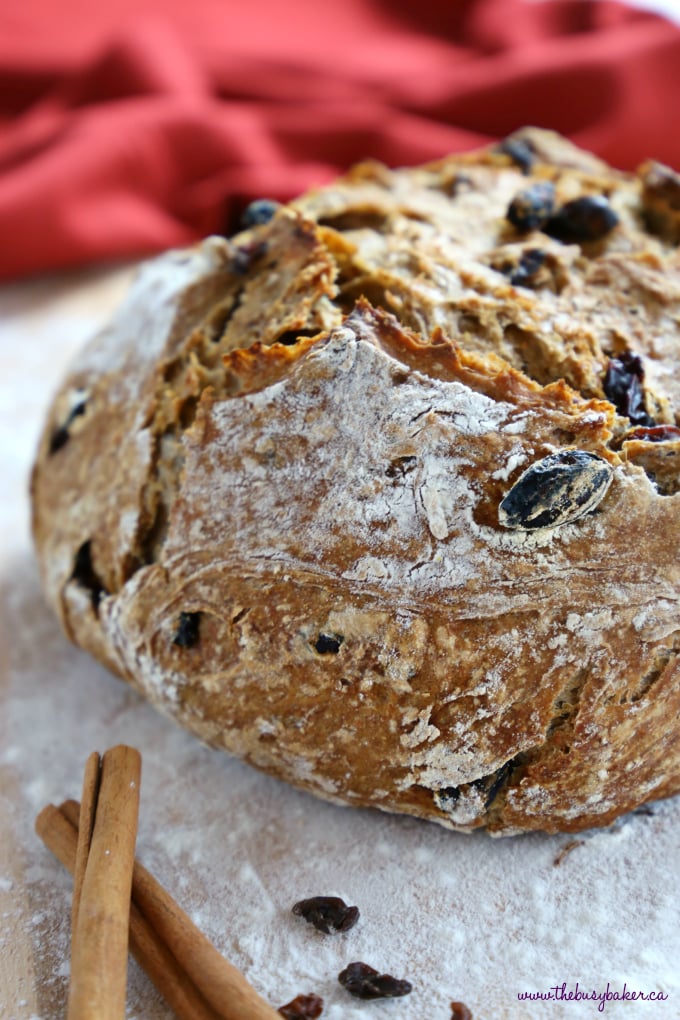
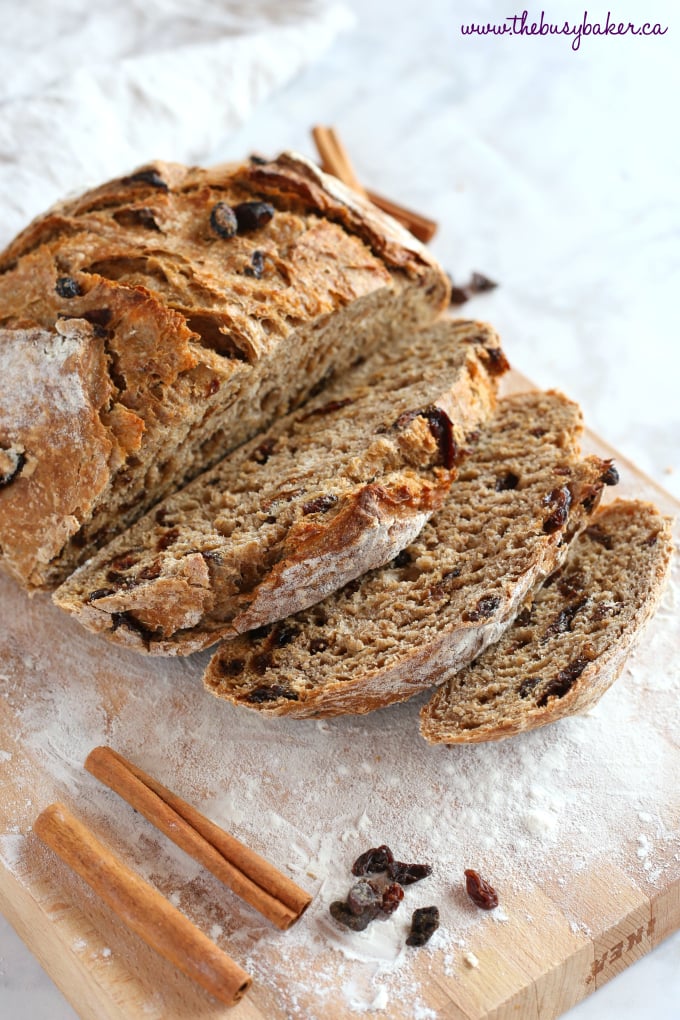
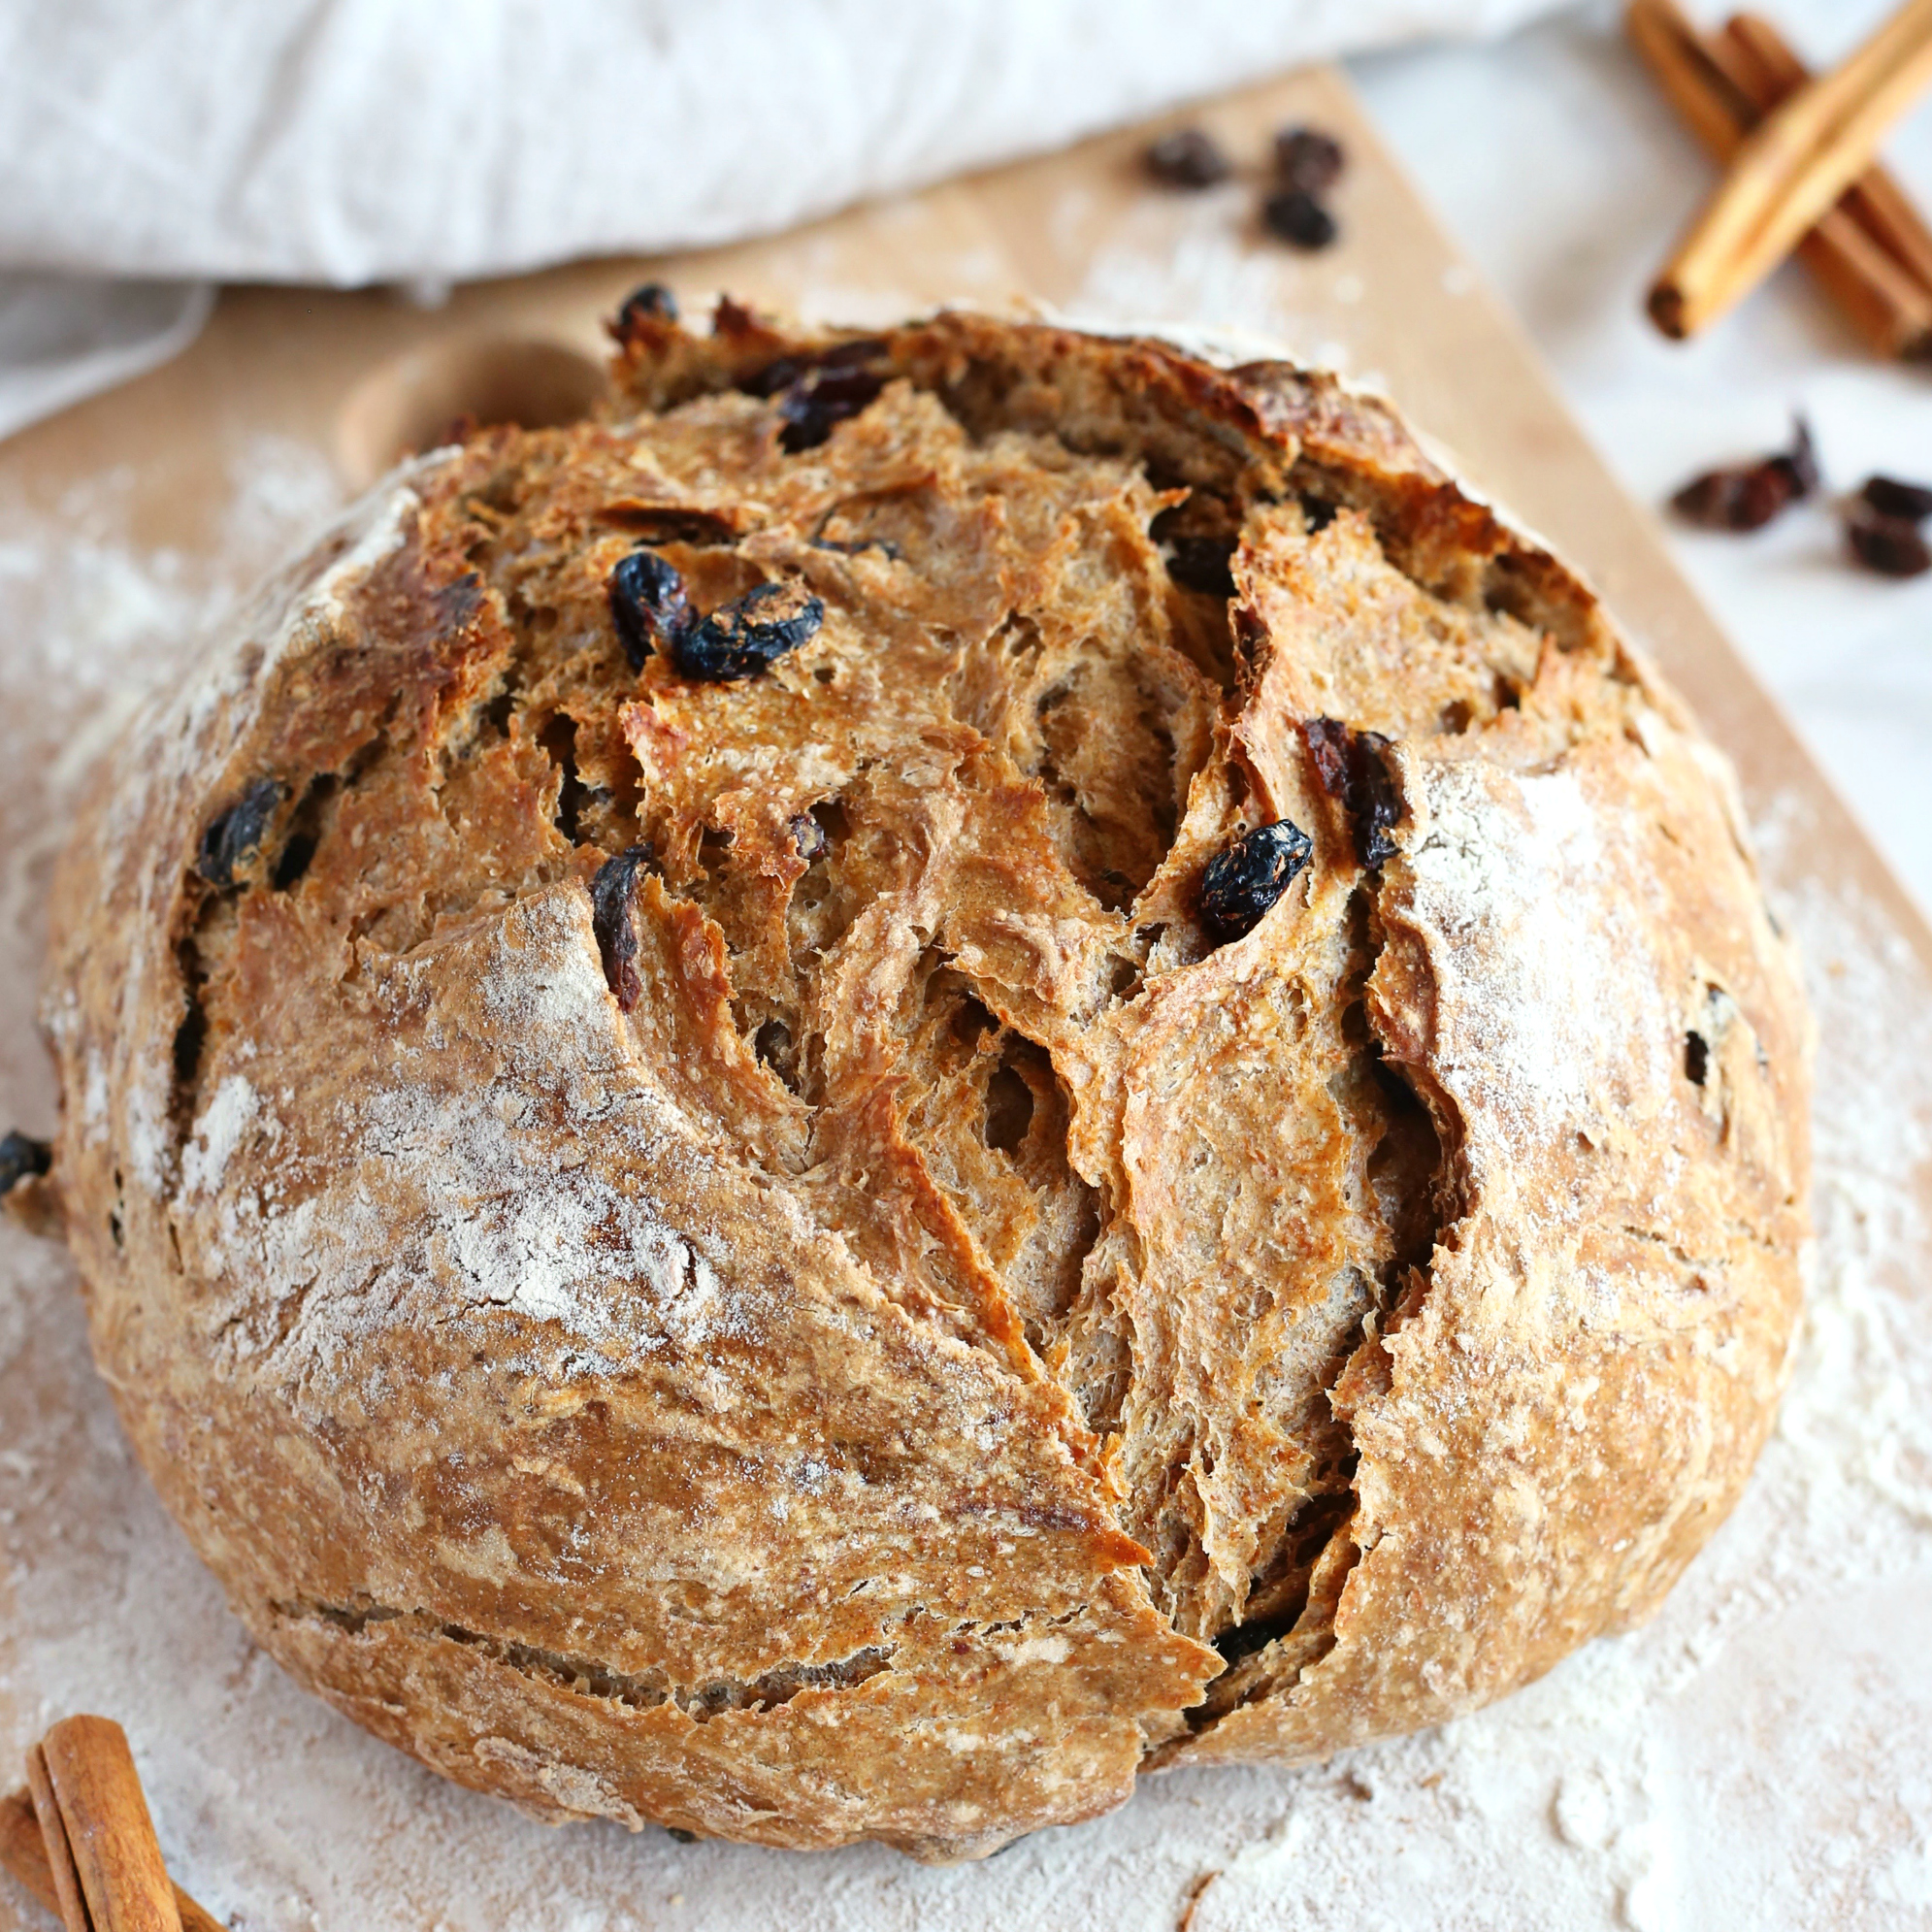
This Easy No Knead Cinnamon Raisin Artisan Bread is one of the best bread recipes I’ve ever made. It’s crusty on the outside, tender and fluffy on the inside and packed with sweet cinnamon flavour and juicy raisins. And it’s SO easy to make this bakery-style loaf at home in your own kitchen! No one will ever know it didn’t come from a bakery! Follow my Pro Tips for the perfect loaf!
NEVER MISS A POST! FOLLOW ME ON:
FACEBOOK | PINTEREST | INSTAGRAM | TWITTER
I don’t know about you but I absolutely LOVE making bread at home. We live in Romania, the land where people eat bread with every single meal and more. We’ve never been quite as into bread as the Romanians, but every now and then we love a good homemade loaf to dunk in homemade soup or a slice with some fresh butter. Since bakeries are a dime a dozen here it’s easy enough to grab a bakery-style loaf of crusty french bread, but there’s just something so satisfying about making a homemade loaf yourself, don’t you think?
 Way back when I first started my blog I shared this Easy No Knead Artisan Bread recipe with you and it’s a recipe I’ve made more than a hundred times I’m sure. One of my favourite things about that recipe is how easy it is to customize – I’ve been making this Easy No Knead Cinnamon Raisin Artisan Bread from the base recipe and it has quickly become one of our family’s favourites!! It’s delicious for breakfast or with a cup of tea in the afternoon, and it is a simply gorgeous loaf of bread that everyone will love.
 This Easy No Knead Cinnamon Raisin Artisan Bread is such a classic recipe and if you follow my pro tips below, you’ll be able to make this gorgeous loaf of bread at home in your own kitchen too! I know you can do it!!
Pro tip#1: Pre-heat your Dutch Oven pot before baking.
This bread is baked in an oven-safe Dutch Oven pot which traps in steam, making the crust of the loaf extra crispy. Pre-heating the pot before baking helps make the crust even more crispy and golden brown! If you’re looking for a great Dutch Oven pot, I will tell you that it’s one of the best investments you can ever make for your kitchen. Mine is a total beauty from Le Creuset (affiliate link) and I use it at least weekly throughout the year for soups, stews, sauces, curries, and of course for baking bread (if you want my original Dutch Oven Crusty Bread recipe, find it HERE!). A pot like this one is definitely a financial investment, but considering how much I use mine and considering its high quality, it’s definitely a worthy investment. I’ve also used similar cast iron pots from other brands, like THIS ONE from KitchenAid and THIS ONE from Lodge Cast Iron (both affiliate links) if you’re looking for something a little less expensive but still high quality.

 Looking for more?
EASY NO-FAIL HOMEMADE BREAD RECIPES AND BAKING TIPS
Get my easy no-fail bread baking e-cookbook!
Click here to learn more!
EASY NO-FAIL HOMEMADE BREAD RECIPES AND BAKING TIPS
Get my easy no-fail bread baking e-cookbook!
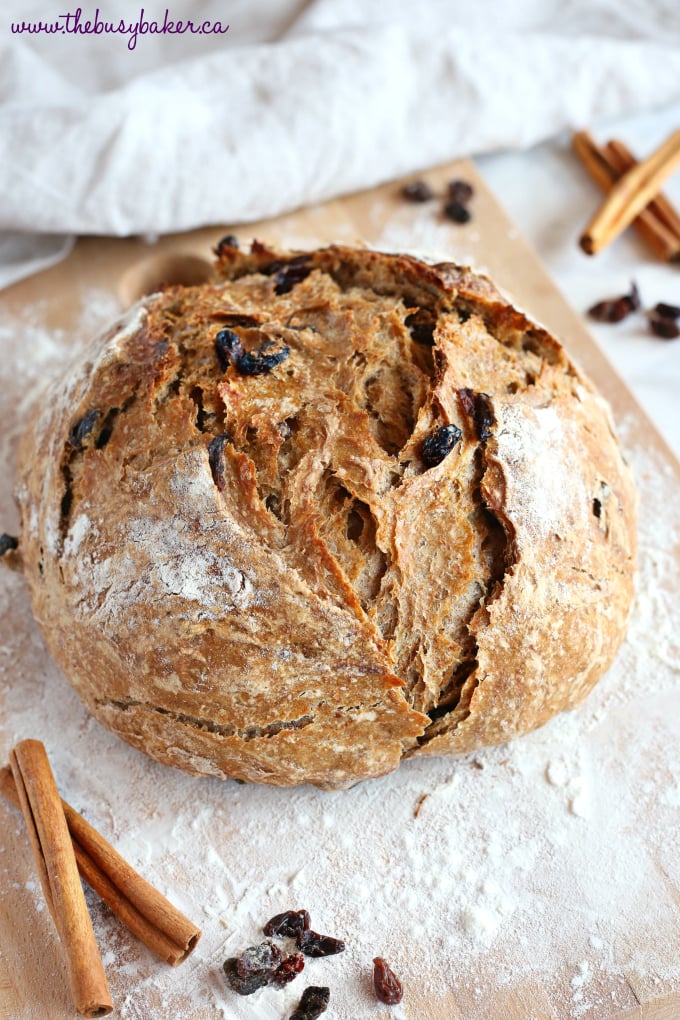
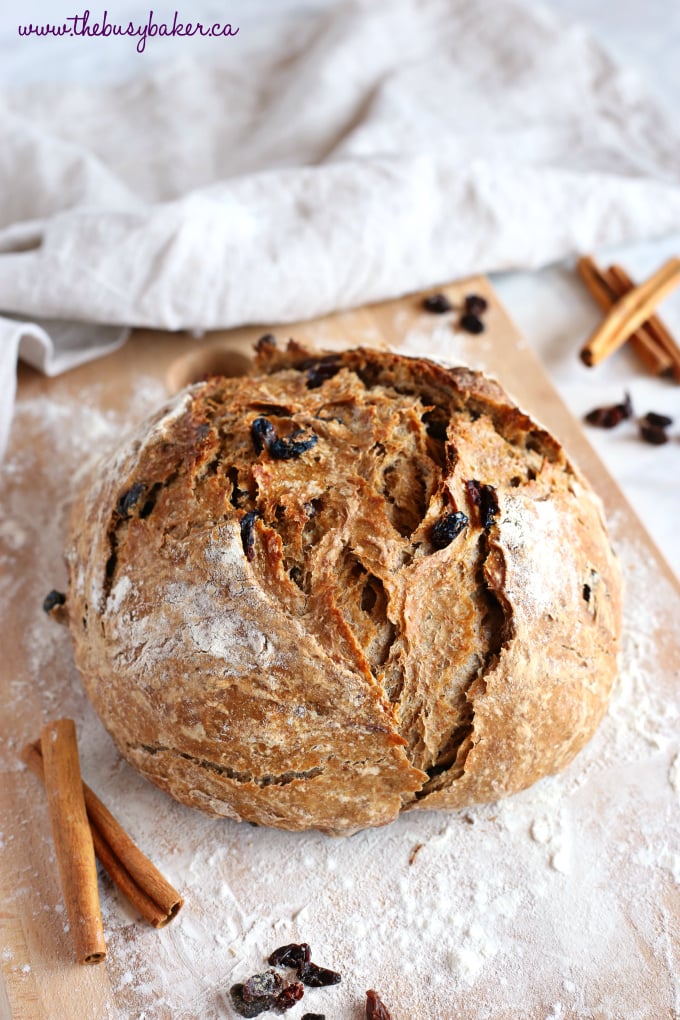
Pro Tip #2: Shape your loaf firmly but gently and dust the top of the loaf with flour.
Creating a round shape will help the loaf bake evenly and dusting the top with flour will create that gorgeous, bakery-style appearance that everyone loves!
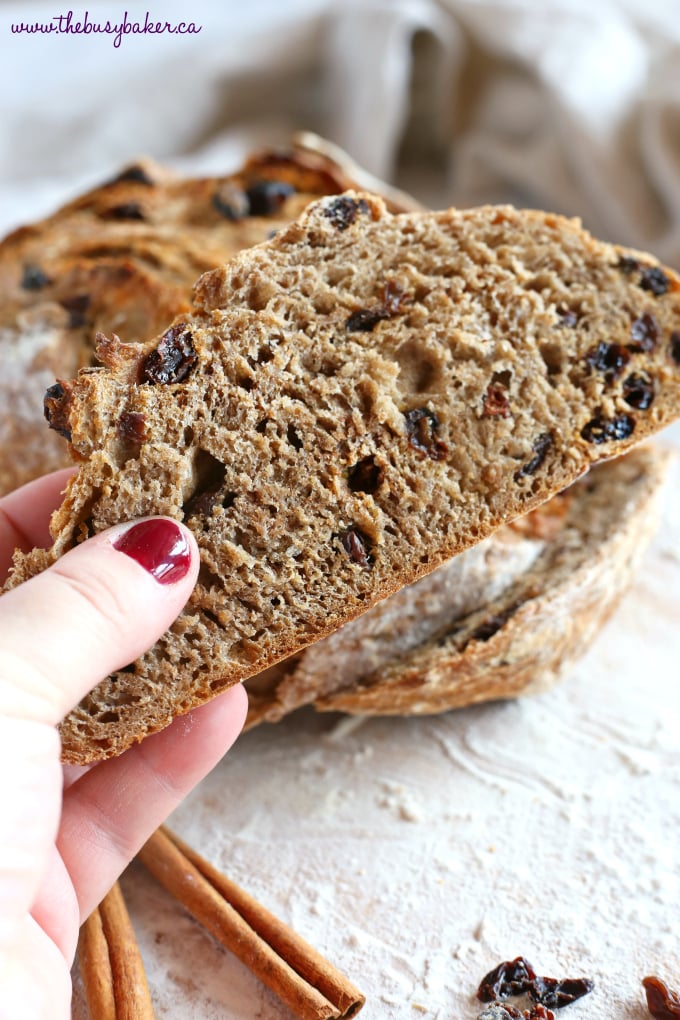
Pro Tip #3: Let the loaf cool completely before cutting into it!!
Resist the urge to slice the bread while it’s hot. Did you know that after removing a loaf of bread from the oven it continues to bake inside as it cools?? Slicing into this gorgeous loaf too early will cause the inside of the loaf to be under-cooked and gummy. Letting the loaf cool completely before slicing ensures the perfect fluffy texture when you slice into it!
NEVER MISS A POST! FOLLOW ME ON:
FACEBOOK | PINTEREST | INSTAGRAM | TWITTER
 I hope you enjoy this Easy No Knead Cinnamon Raisin Artisan Bread recipe and my top 3 Pro Tips to making the perfect crusty artisan bread at home! Let me know in the comments below, do you have a favourite artisan bread you’d like to see on thebusybaker.ca?
KITCHEN PRODUCTS I RECOMMEND:
Looking for even more delicious bakery-style recipes? Before you grab the recipe for this delicious Easy No Knead Cinnamon Raisin Artisan Bread below, check out these delicious recipes!!
Looking for more?
EASY NO-FAIL HOMEMADE BREAD RECIPES AND BAKING TIPS
Get my easy no-fail bread baking e-cookbook!
Click here to learn more!
EASY NO-FAIL HOMEMADE BREAD RECIPES AND BAKING TIPS
Get my easy no-fail bread baking e-cookbook!
Recipe Video
Watch the video below to see exactly how I make this quick snack. You can find more delicious recipe videos on my YouTube channel
If you made this, share a photo!
Are you trying this recipe? Use the comment form below to share your take; now with support for image uploads and comment voting!
Easy No Knead Cinnamon Artisan Bread
Recipe: Ingredients
- 2 cups all purpose flour (plus 1-2 tablespoons if necessary)
- 1 cup whole wheat flour
- 3/4 cup raisins
- 1/2 teaspoon active dry yeast
- 1 1/2 teaspoons sea salt
- 2 teaspoons ground cinnamon
- 3 tablespoons brown sugar
- 1 1/2 cup room temperature water (plus 1-2 tablespoons if necessary)
- a few tablespoons extra flour for shaping the loaf
Recipe: Instructions
- Add the flours, raisins, yeast, salt, cinnamon, and brown sugar to a large bowl. Be sure to add the yeast and the salt to separate sides of the bowl.
- Stir the dry ingredients together well.
- Add the water and stir until a thick, rough dough forms. Add 1-2 more tablespoons of water or flour if needed.
- Flour your hands and shape the dough into a ball, placing it into the bottom of the bowl and covering the bowl with plastic wrap.
- Place in a warm spot in your kitchen and let rise for 12-18 hours. When I make this bread, I prepare the dough in the evening and bake the next morning. For quick rise instructions, see the Recipe Notes below.
- After the rising time, preheat your oven to 450 degrees Fahrenheit.
- Place an oven-safe Dutch Oven pot in the cold oven and let it preheat with the oven.
- Flour your hands well and shape the dough into a round ball and set it on a piece of parchment paper on the counter dusted with flour.
- Dust the top of the dough ball with flour and cover with a clean kitchen towel, letting it rise for 25 minutes.
- After the dough has risen remove the Dutch Oven pot from the oven and using the parchment paper, pick up the dough and place it carefully in the bottom of the Dutch Oven. Make two very shallow slices in the top of the risen loaf in the shape of an X.
- Replace the lid of the Dutch Oven, place it back into the hot oven, and bake for 30 minutes.
- After 30 minutes of baking time, remove the lid from the Dutch Oven and continue baking for an additional 10 minutes uncovered.
- After the baking time, remove the pot from the oven and transfer the loaf to a cooling rack using the parchment paper.
- Cool completely before slicing.
Recipe: Notes
Quick rise method:
- Add 2 1/2 teaspoons of active dry yeast instead of the amount listed in the recipe.
- Rise for 2 hours and follow the recipe directions after the rise time as written.
No Knead Bread Troubleshooting Tips:
- If your dough seems too fluid after the first rise, simply add 1/3 cup of flour to the top of the dough and mix it in, shaping the loaf into a round shape to rise again while the oven pre-heats.
- If your loaf falls or flattens during the second rise, simply re-shape before baking into as tight a ball as possible (creating surface tension should prevent the dough from falling).
- Add 1 tablespoon of Vital Wheat Gluten to the dough with the flour to create a very voluminous dough that rises beautifully every single time and isn't too dense.
- If the bottom crust of your bread burns or becomes too hard or tough, it's likely that the bottom burner of your oven is too hot OR you're using a pot that's black on the inside (these conduct heat more efficiently than one that's a light colour on the inside). Try lowering your oven temperature by 25 degrees, using the convection setting, or using a different pot that's light in colour on the inside.
- Use an oven thermometer to make sure your oven temperature is correct. If your oven runs hot, lower the temperature of your oven by 25 degrees to be sure you don't burn the bread.
Recipe: Nutrition
Notice: Nutrition is auto-calculated, using Spoonacular, for your convenience. Where relevant, we recommend using your own nutrition calculations.
I’ve made this bread a handful of times and always with great success. However, I do have one question… Is it safe to double or triple the ingredients, bulk rise, then shape into individual loaves/boules for baking?
Thank you for taking the time to leave your feedback! Yes, it’s safe.
Excellent recipe. My dough had to sit for a solid 24hrs and that wasn’t a negative at all. Delicious. Perfect texture. Great crust. Will be making this again.
Thank you for taking the time to leave your feedback!
Is it possible to do a cold rise in the refrigerator? Would there be any changes to the recipe?
Yes, you would just need to give it another raise when you take it out of the fridge. 30-45 minutes until the dough reaches room temperature.
Easy and delicious! Thanks!
Thank you for your feedback!
Can you use bread flour instead of AP flour?
Yes!
Absolutely delicious! Can’t wait to try more of your recipes!
Thanks!
I’m wondering if anyone has tried putting cinnamon chips in the dough instead of raisins? Would this ruin it at all? I’m looking for a good cinnamon chip artisan style bread recipe and hoping this one will suffice…
Hello! This recipe looks delicious and I would love to give it a shot. Although I was wondering: Does it freeze well? Thank you!
Yes it does!
No need to use a cast iron dutch oven!! Started to make 2 loaves at once and I only have one DO. Took forever as I had to wait for the DO to finish its first loaf before I could bake the second.
One day I decided to bake using a Corningware type casserole that was about the same size as the DO and, if anything, the bread might come out even better. NOTE: If you find that the crust isn’t crisp all the way around I have found that by removing the entire loaf / parchment combo and placing on the rack for 10-15 minutes the loaf will be perfect.
I do preheat with a couple inches of hot tap water.
Finally, for a treat I add 4 sticks of cheddar cheese in the shape of an “X” on the top of the bread when I remove the lid. I have played around with a bunch of different sizes but four slices that are about 1/2-3/4″ square is plenty. Hope that helps.
Thanks for telling us about your variations! We’re happy that you’re enjoying our recipe.
Hi, love the recipe. Have been making no knead bread since the pandemic and I love it. For those recipes that call for preheating cast iron Dutch Ovens I was always cautious as the manufacturer, Staub, said not to do that.
So, here’s what I do and it works every time. I add a 3-4 inches of hot tap water to the Dutch Oven, cover and preheat. Pour the water out when preheating is complete and a quick wipe with a towel and I add the bread / parchment paper.
I think that will solve the “don’t preheat empty cast iron” problem.
We’re so happy that you enjoyed our recipe.Thanks for the tips. Thank you for taking the time to leave your feedback!
Is the dough normally sticky? It’s my first time to make bread
Yes, the dough is supposed to be a bit sticky. If it’s too sticky, feel free to add a couple more tablespoons of flour. Hope this helps ☺️
SOOO GOOD! I have loved cinnamon raisin bread since I was a child, but won’t pay the money for the loaves out there. Not only are they tasteless, they’re stingy with the raisins and the cinnamon. Now I can get fat making my own and eating it all!! yeah…what a way to live my later years. Glad to have run across this recipe. So easy. I didn’t want to wait, so used the 2.5 tsp of yeast (or a whole packet). Added walnuts and a band of maple syrup and folded and smooshed into a round (I cannot find where I saw that!! but I remembered and tried it…don’t know if it added to the loaf).
Thanks for your feedback Christine!
Wonderful recipe! I tweeked a few things: used only AP flour (and closer to 4 cups), the 2 1/2 tsp yeast which I put into the water for a couple minutes before adding to flour, 1 tsp salt, and also added an egg and scrambled it in the flour well before adding the water/yeast. Mixed everything with my hand. Did not use parchment. Baked about 20 minutes before removing lid, then about 7-8 minutes more (had gotten too brown on bottom with 30 minutes). Been making this now every few days for the past couple of weeks!!
We’re so happy you enjoyed our recipe! Thank you for taking the time to leave your feedback!
I’m trying to eliminate white flour . . .can this be made with rye or some other flour. . . thanks
Unfortunately we didn’t test this recipe with a different flour ratio so I couldn’t advise you to eliminate the white flour completely, however you could try our whole wheat bread https://thebusybaker.ca/no-knead-whole-wheat-artisan-bread/#wprm-recipe-container-14612 Hope this helps!☺️
Hi there! I have a dehydrator with a bread setting. Do you suggest to put the bowl in there for 12-18 hours or just leave in the dehydrator for turned off for the 12-18h?
Thanks!
I would just leave it in there turned off. Room temp is just fine for the raise of this bread.
This sounds delicious. It looks like a bread I’ve tried that has apples, dates, raisins and pecans. Do you think I could add apples and if so, do you think I would need to alter anything?
You could add about 1 cup of cubbed apples without needing to adjust anything as long as you add them in with the flour.
Thank you very much!
I’m curious, my Dutch Oven directions say not to preheat without something in it. Apparently, you can crack the enamel and then it cannot be used. If I don’t do this step, do I need to cook the bread longer?
Yes, you’ll probably have to bake your bread for a bit longer. I’m sorry I can’t tell you exactly by how much longer as I have never tried baking this bread in a cold dutch oven before but if you try, please let us know the new baking time. Happy baking!
Can I plump the raisins before adding them to the flour or would that add too much moisture to the dough?
It should work if you’re careful not to add more liquid with them than what they absorbed already.
Just made this and it is delicious. Used to make a 40 min round trip for a similar white raisin bread. This one has more nutrition, tastes better and saved me gas and money for the other bread. Thanks for the recipe!
Question would you ever use whole wheat pastry flour in a bread?
We’re so happy you are enjoying it! Thank you for taking the time to leave your feedback! We’ve never tried that substitution so we couldn’t tell you for sure, but if you wanna try you could start substituting 1/3 of the flour with whole wheat pastry flour and then slowly increase the amount you substitute. Hope this helps! let us know how it turns out.
Hi,
This recipe looks great! Can I use bread flour instead of AP flour?
Sure! Happy baking ☺️