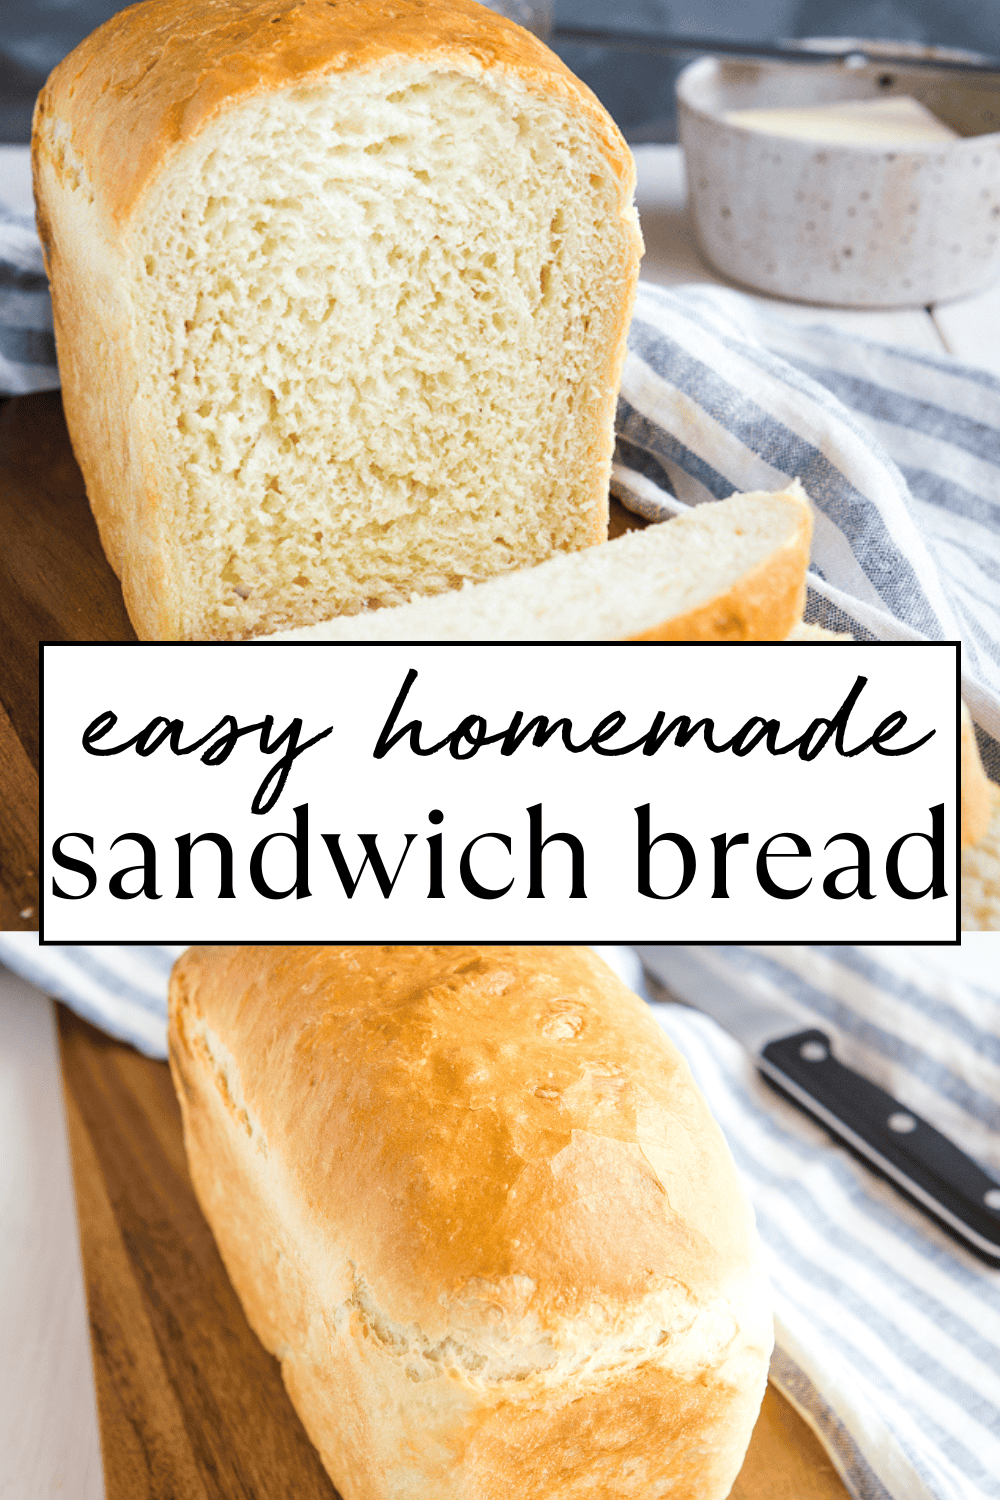
This Easy Sandwich Bread is soft, fluffy, and perfectly sliceable for sandwiches and toast. A simple homemade sandwich bread recipe made with pantry ingredients and easy enough for beginners. It’s perfect for sandwiches or for dipping in soups or stews!
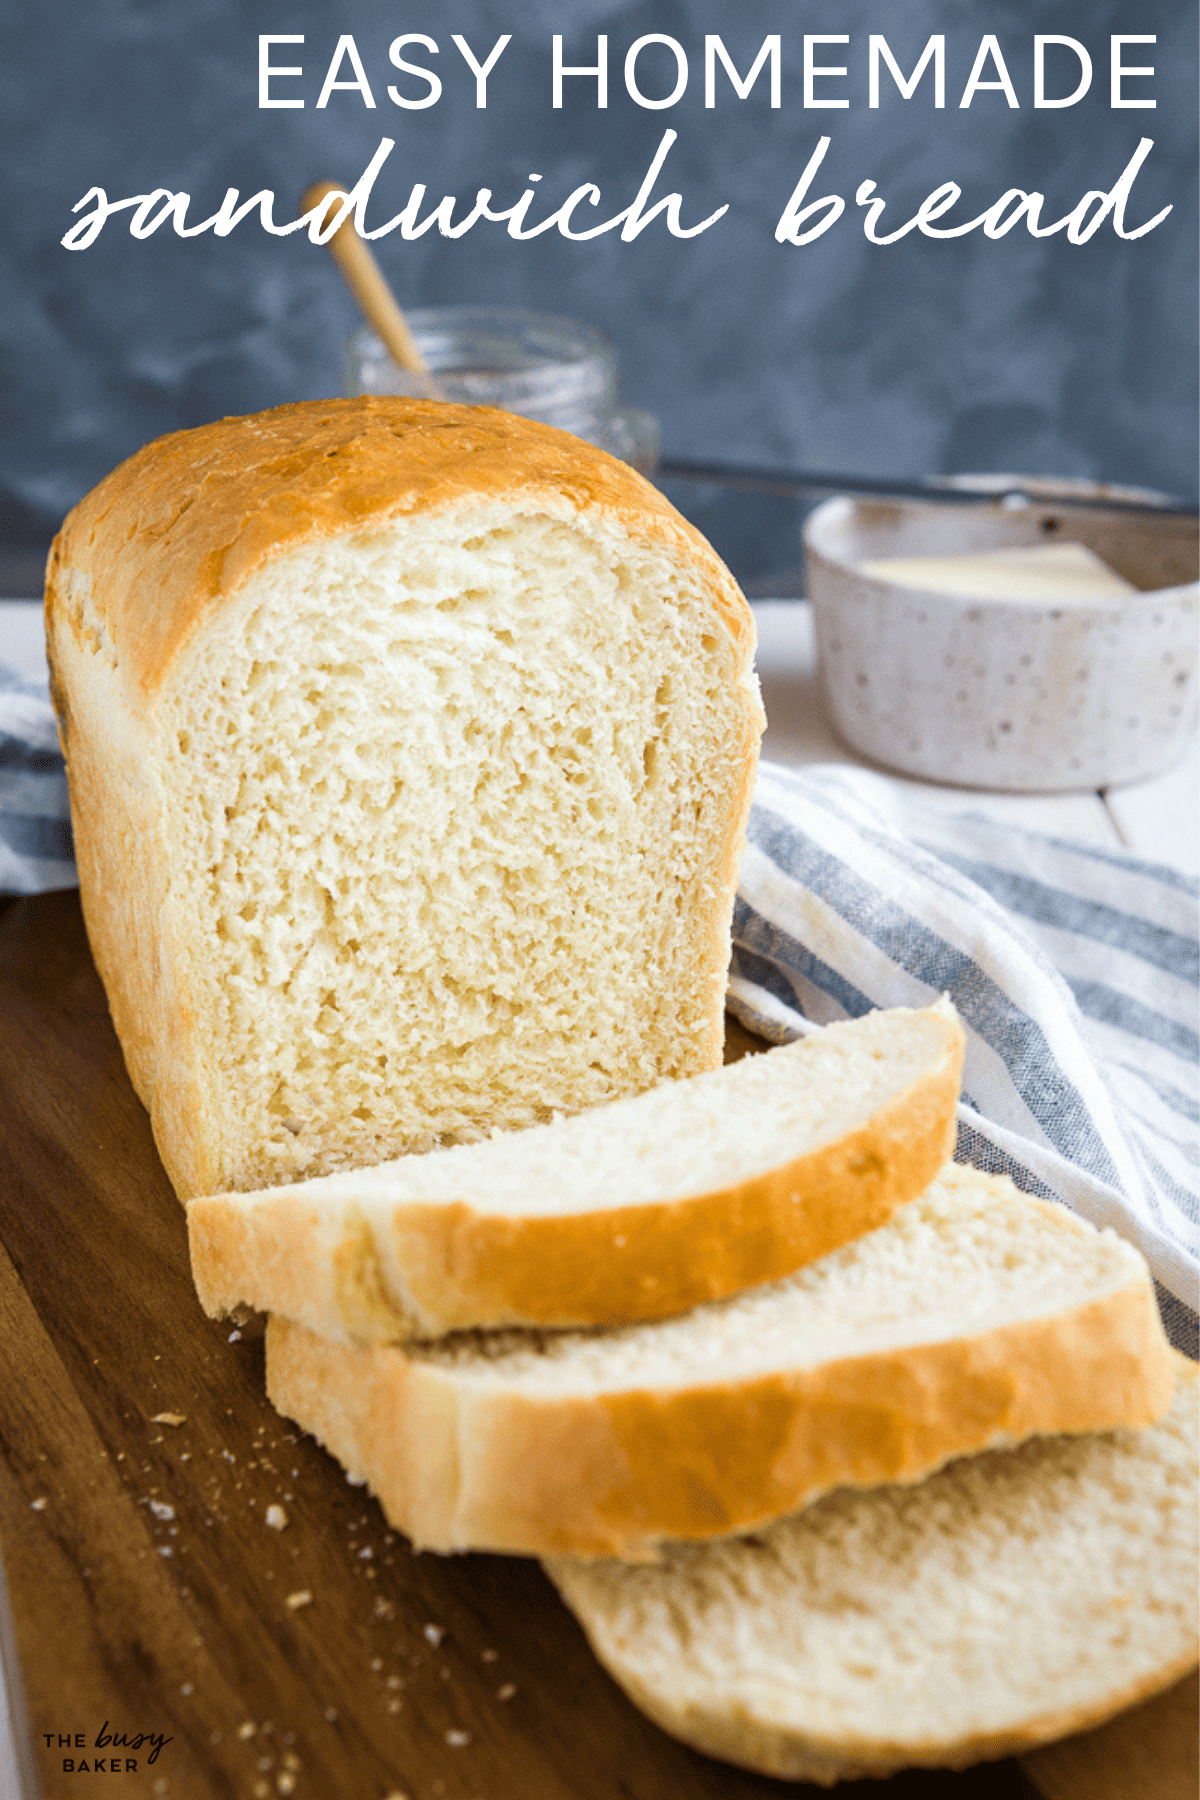
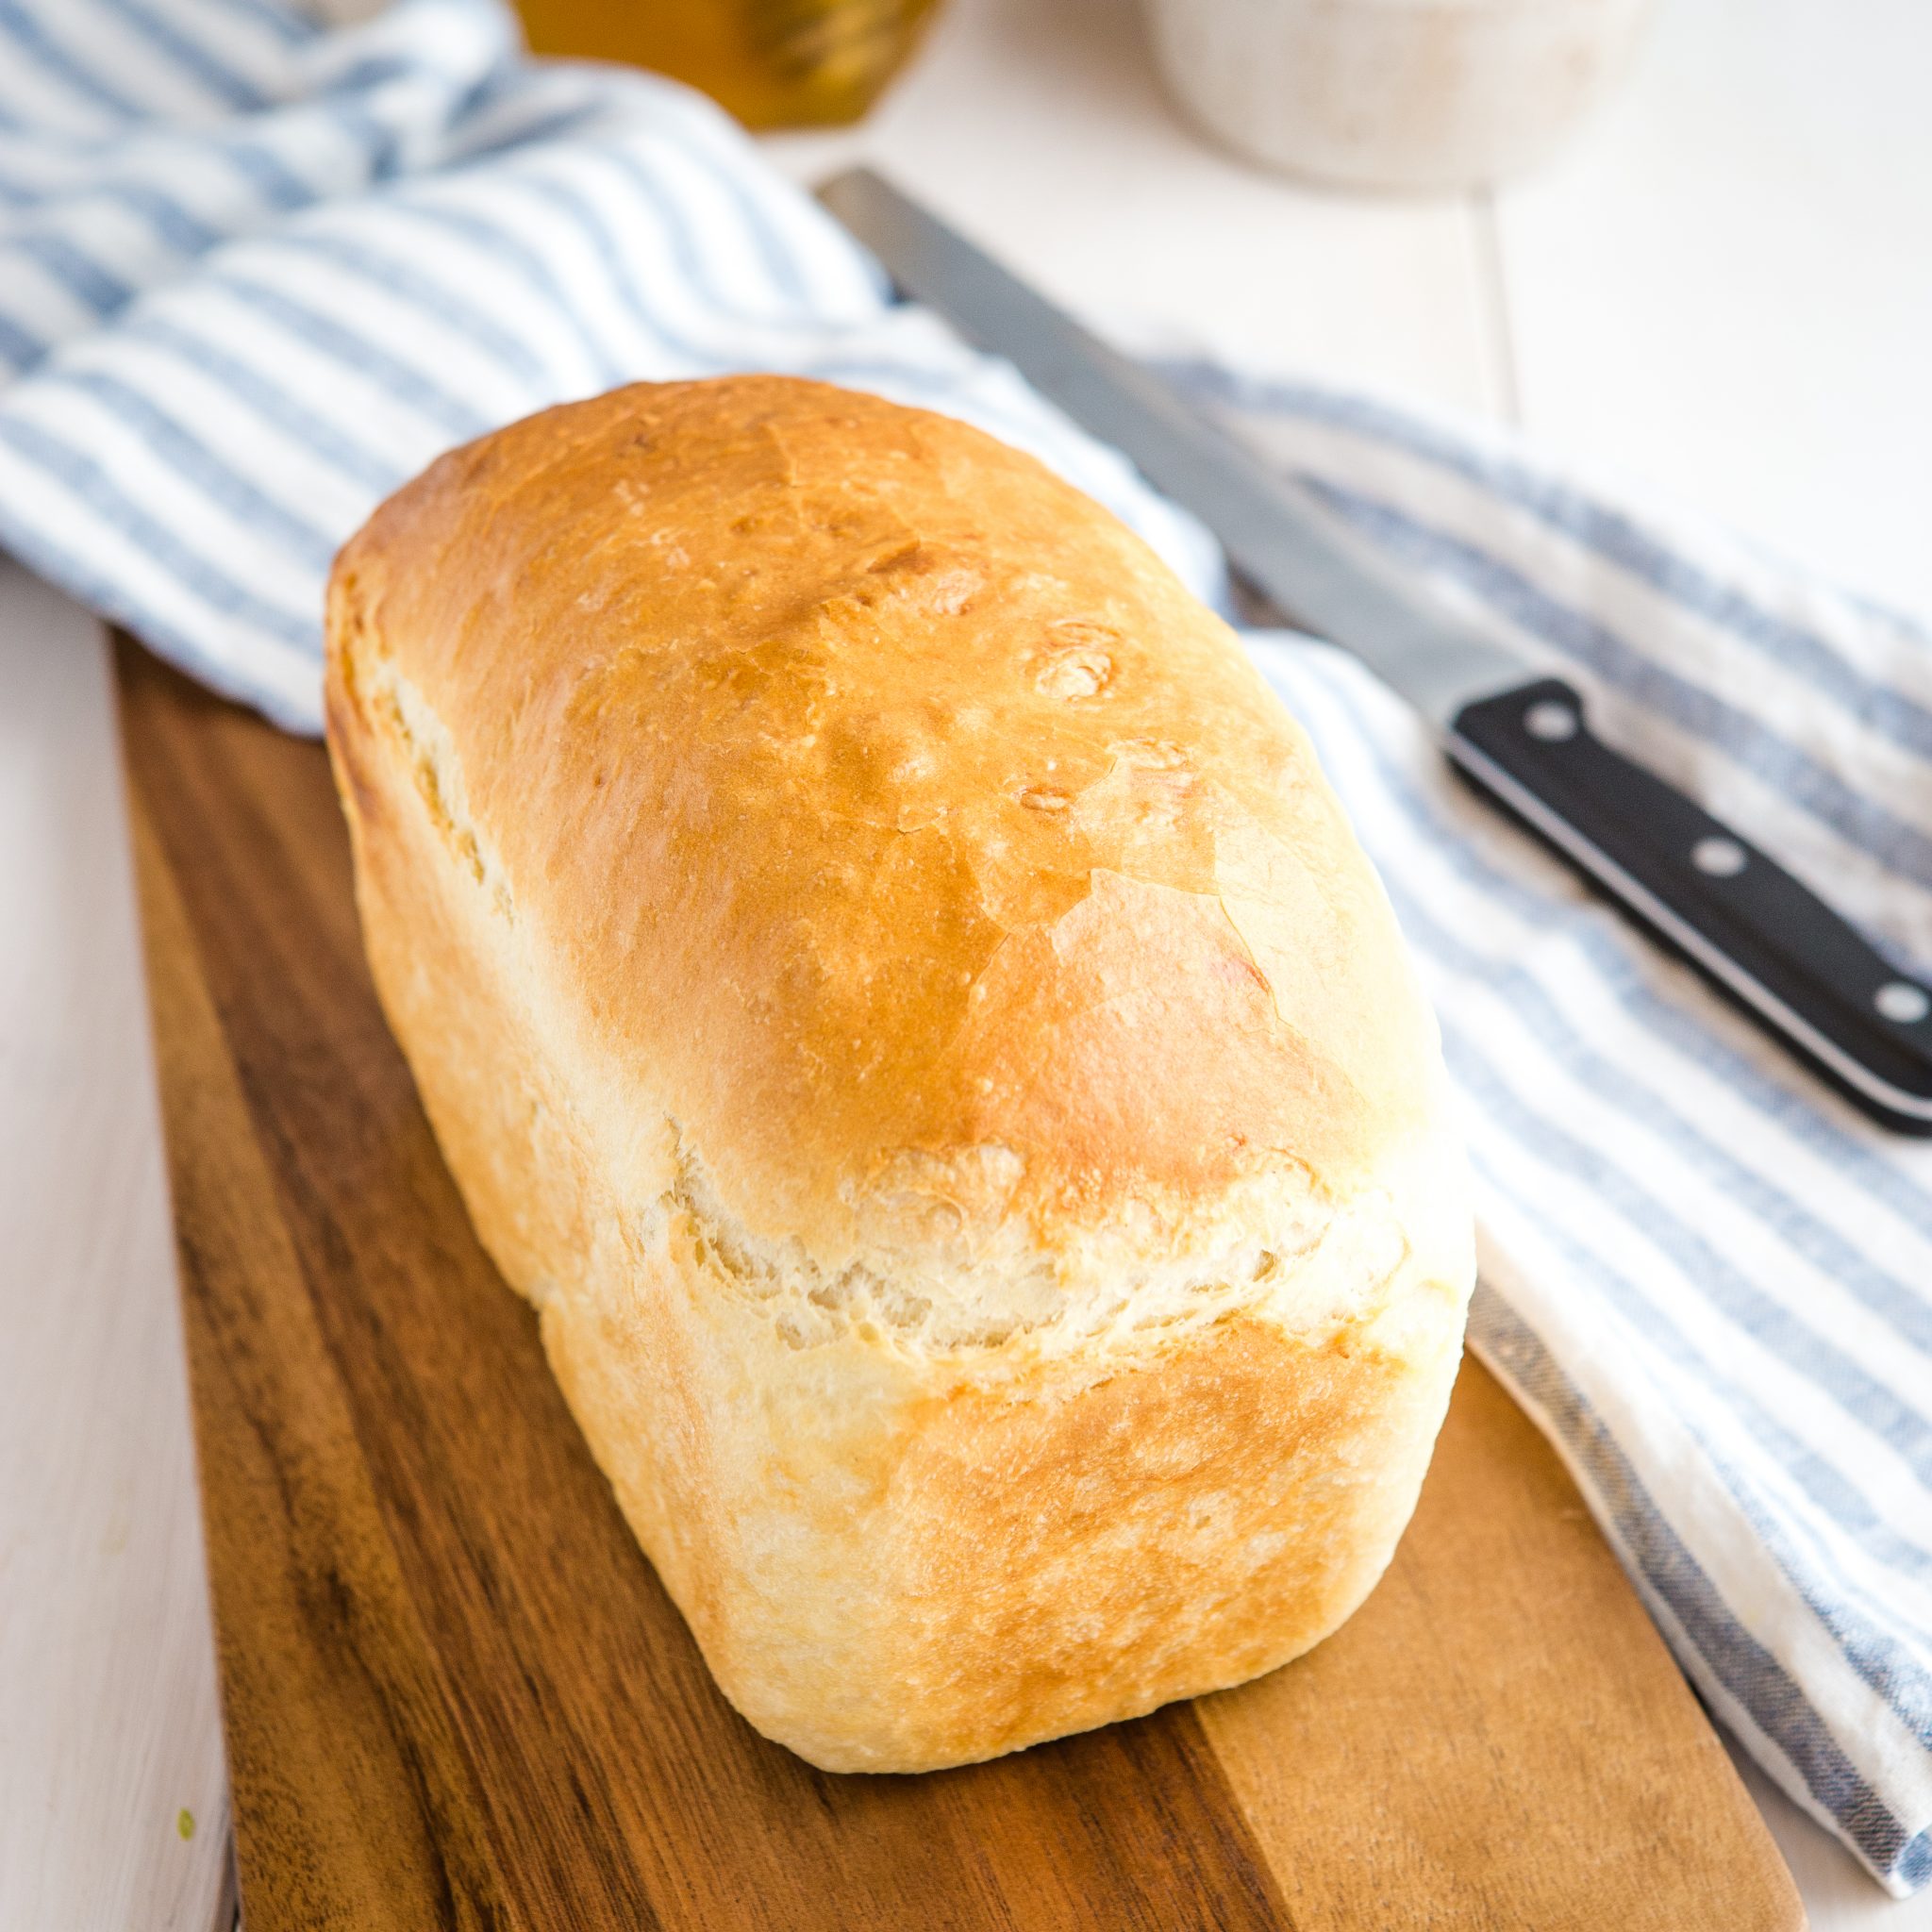
A good loaf of sandwich bread is one of the most useful things you can learn to bake at home. This Easy Sandwich Bread recipe makes the PERFECT soft, fluffy, and structured sandwich bread. It’s great for everyday meals, whether you’re making toast in the morning for breakfast before work, packing school lunches, or serving slices alongside soup or pasta. It has a tender crumb, a light golden crust, and slices beautifully for sandwiches.
What makes this recipe especially great is how easy and approachable it is for beginning bakers. The ingredients are simple pantry staples, the dough is soft and easy to work with, and the results are consistently reliable. This homemade sandwich bread is designed to be softer and more flexible than heartier, crusty artisan loaves so it holds sandwich fillings without tearing and stays tender for days on the counter, so you can use it throughout the week. Once you start baking your own sandwich loaves, it’s hard to go back to store-bought bread!
Looking for more sandwich bread? You’ll LOVE our Whole Wheat Sandwich Bread recipe and our Whole Grain Sandwich Bread recipe!

This easy sandwich bread recipe makes a classic soft sandwich loaf because it balances structure and moisture
Yeast breads like this one rely on gluten development to create their structure. As the dough is mixed and kneaded, the proteins in flour form a network that traps the gases produced by yeast. This is what helps the dough rise and creates the light, airy crumb filled with those small bubble holes inside the finished loaf.
The hydration level of the dough also plays an important role. A well-balanced dough is soft enough to rise easily but structured enough to hold its shape in a loaf pan. This creates the even-looking crumb texture and soft slices that make sandwich bread ideal for serving as toast and in sandwiches.
The slight sweetness from honey (or sugar) feeds the yeast and helps with browning in the oven as the bread bakes. Combined with proper kneading and rising time, it creates a loaf that’s perfectly tender, evenly textured, very easy to slice, and holds its shape even after slicing. It’s truly an AMAZING homemade sandwich bread in every way!

The secret to soft sandwich bread comes down to a few simple principles:
Too much flour is the most common cause of dense, dry bread. Spoon flour into your measuring cup and level it off instead of scooping it directly from the bag or container. Weighing your flour in grams is also a great way to ensure you don’t add too much or too little – aim for 125 grams of flour per cup the recipe calls for.
Warm liquid helps activate yeast, but if the water is too hot it can damage the yeast and prevent the dough from rising. Aim for water that’s just about body temperature.
Bread develops flavour and structure during rising. If the dough hasn’t doubled in size during the first OR the second rise, give it more time.
Proper kneading develops the gluten that gives sandwich bread its soft structure. Most of the time people under-knead homemade bread dough. Use a stand mixer to make it easier, or knead by hand for several minutes until the dough is smooth and very elastic.
The dough should feel soft and slightly tacky. Adding too much flour can make the loaf dry.
Cutting into warm bread releases steam too quickly and can make the crumb gummy. The bread continues to bake after it comes out of the oven so for the BEST texture, let it cool completely before slicing.

Time needed: 2 hours
- Activate the yeast.
Combine the warm water, yeast, and honey or sugar and allow the yeast to dissolve. This step helps ensure the yeast is active before mixing the dough.
- Build the dough.
Add the flour and salt gradually and mix until a soft dough forms. The dough should pull together but remain slightly soft.
- Knead, then knead some more.
Knead the dough until it becomes smooth and elastic. This step strengthens the gluten structure that allows the bread to rise properly.
- Allow the first rise.
Place the dough in a lightly greased bowl and let it rise until doubled in size. This stage develops both flavour and structure.
- Shape the loaf.
Gently shape the dough into a loaf that fits your pan. Shaping helps create an even crumb and consistent slices. Follow the guide provided below for exactly how to shape the perfect sandwich bread loaf.
- Let it rise again.
Allow the shaped loaf to rise until it crowns just above the rim of the pan.
- Bake until golden.
Bake until the loaf is golden brown and sounds hollow when tapped on the bottom.
There’s one trick I always use when making sandwich bread that makes it SO easy to shape the loaves to look just like sandwich bread from a bakery. When you punch down the dough after the first rise, lightly flour your work surface and let the dough rest on the work surface in a ball for about 5-10 minutes. This will allow the gluten in the dough to relax, and it’ll make the dough SO much softer and easier to shape! It’s a simple trick that works every time!
To shape the loaf perfectly for sandwiches, follow these steps:
- After letting it rest, shape the dough into a rectangle (with the short end about the same length as the long side of your loaf pan, and the longer length about 3-4 times the width of your loaf pan).
- Fold one short end into the middle and press with your fingers to seal.
- Fold the other short end into middle and press with your fingers to seal.
- Pinch the sides and pull them in slightly.
- Flip the whole thing over and tuck the ends under again.
- Place the loaf into the greased loaf pan and let rise a second time.
After making homemade bread for so many years I’ve learned that using the right loaf pan makes all the difference. A large, high-sided loaf pan like this one is ideal for sandwich bread (paid link). It’s non-stick, easy to clean, and it has high sides which creates the perfect loaf shape for sandwiches.

- Add whole wheat flour. Substitute up to half of the flour with whole wheat flour for a heartier loaf. Try my favourite Whole Wheat Sandwich Bread for the BEST whole wheat variation on this original recipe.
- Make a cinnamon raisin version. This cinnamon raisin swirl bread is my favourite variation of this easy sandwich bread with a simple cinnamon swirl!
- Add seeds and grains. Sunflower seeds, sesame seeds, or flax seeds add texture and nutrition. Try my favourite Whole Grain Sandwich Bread for a high-fibre version of this orginal recipe.
- Turn it into dinner rolls. Divide the dough into small portions and bake in a baking dish for soft rolls.

At room temperature: Store the loaf wrapped or in a bread bag for up to three days.
Refrigerator: Refrigeration can dry bread out, so room temperature storage is usually best.
Freezer: Slice the bread first, then freeze slices in a sealed bag for up to three months.
Reheating: Frozen slices can go straight into the toaster.

Why didn’t my bread dough rise?
Your yeast may have been expired, or the liquid may have been too hot and damaged the yeast, preventing it from rising.
Why is my sandwich bread dense?
Dense bread usually happens when you add too much flour or don’t knead it long enough.
Can I make this bread without a stand mixer?
Yes. The dough can easily be kneaded by hand.
Can I let the dough rise overnight?
Yes, but be sure to rise the dough in the fridge only for the first rise. A slower rise in the refrigerator can improve flavour, but rising the loaves in the fridge once you’ve formed them can cause the loaves to be misshapen with large holes throughout.
Why is my crust too hard?
Over-baking at too high a temperature or baking too long can create a thicker, harder crust. To soften the crust, brush with a little melted butter right after baking.
What pan size should I use?
A standard 2-pound loaf pan works best for sandwich bread to create even slices.
Why did my loaf collapse in the oven?
This usually means the dough rose too long before baking. Over-proofed dough loses strength and collapses.
Why is my bread gummy inside?
The bread may have been sliced too soon or slightly underbaked. Always allow the loaf to cool completely before cutting.
Watch the video below to see exactly how I make this recipe. You can find more delicious recipe videos on my YouTube channel
If you made this, share a photo!
Are you trying this recipe? Use the comment form below to share your take; now with support for image uploads and comment voting!
Easy Sandwich Bread
Recipe: Equipment
Recipe: Ingredients
- 2 1/2 cups lukewarm water
- 1 tablespoon instant yeast (or use active dry yeast)
- 1 tablespoon honey or other vegan honey substitute, or sugar
- 6 1/4 cups all purpose flour
- 1 teaspoon salt
Egg Wash (optional):
- 1 egg
- 1 tablespoon water
Recipe: Instructions
- Add the water, yeast, and honey to the bowl of your stand mixer and mix with a fork just until the yeast is moistened and the honey is dissolved.
- Let sit for about 4-5 minutes.
- Add the flour to the bowl of the stand mixer on top of the water and yeast mixture and then add the salt.
- Turn the mixer on low speed and mix until a soft dough forms.
- Continue mixing on medium-low speed and let the mixer knead the dough for about 4 minutes. The dough should have formed a soft ball and the sides of the bow should be clean. Only if the dough is too wet and sticking to the side of the bowl, add a tablespoon or two more flour as it kneads.
- Shape the dough with your hands into a ball and place it back into the bowl (oil the bowl, if you wish). Cover the bowl with plastic wrap and let rise for 60 minutes in a warm, draft-free place.
- Grease 2 loaf pans with butter or a high-quality non-stick baking spray.
- After the dough rises, punch it down and turn it out onto a floured work surface and divide it in half.
- Roll each piece of dough into a ball with your hands, eventually shaping it into an oblong round shape.
- Place each piece of dough into one of the greased loaf pans and cover the pans with a clean kitchen towel.
- Let them rise again in a warm, draft-free place for about 20 minutes.
- Preheat your oven to 400℉ (200℃).
- Whisk together the egg and water to make the egg wash (if using).
- Brush the egg wash over the tops of the loaves and bake at 400℉ (200℃) for about 25-35 minutes, until the tops of the loaves are a deep golden brown colour.
- After baking, remove from the pans and place the loaves on a wire rack to cool completely.
- Slice after the loaves have cooled completely to room temperature and use to make your favourite sandwiches or serve alongside soups or stews.
Recipe: Notes
To shape the loaf perfectly for sandwiches, follow these steps:
- After letting it rest, shape the dough into a rectangle (with the short end about the same length as the long side of your loaf pan).
- Fold one short end into the middle and press with your fingers to seal.
- Fold the other short end into middle and press with your fingers to seal.
- Pinch the sides and pull them in slightly.
- Flip the whole thing over and tuck the ends under again.
- Place the loaf into the greased loaf pan and let rise a second time.
Recipe: Nutrition
Notice: Nutrition is auto-calculated, using Spoonacular, for your convenience. Where relevant, we recommend using your own nutrition calculations.

EASY NO-FAIL HOMEMADE BREAD RECIPES AND BAKING TIPS
Get my easy no-fail bread baking e-cookbook!
Do you always bake both at once, or have you had success with keeping half in the fridge or freezer for baking a loaf another day?
I always bake both at once but sometimes I freeze one of the already baked loaves. Hope this helps ☺️
Can you do a slow rise with this bread? Using less yeast and letting it ferment overnight?
I’ve never done that with this recipe, but my instincts say it should work. Please do let me know how it goes!
Would this recipe work with white wheat flour?
If you’re looking for a sandwich bread using whole wheat flour I’d suggest using my Whole Wheat Sandwich Bread recipe (find it here: https://thebusybaker.ca/easy-whole-wheat-sandwich-bread/)
The perfect sandwich bread!
Wow. I’ve made bread for years and I was never able to get it to rise like this. It’s perfect! It looks just like the pictures!
Thanks so much for your feedback Bekah!!🙂
Hi Chrissie, could you please explain step 4 of shaping the loafs more detailed? What do you mean by pulling the sides in slightly? Thank you!
Hey Christina! You should pinch the short sides together and pull them in to the middle. Turn the whole loaf upside down so the top is smooth and the pinched part is at the bottom. Make sure all the ends are tucked in. You should have a pretty loaf now that is ready to rise and bake. Enjoy!
What if I add more salt? Also, if I wanna make only 1 loaf, should i just measure the ingredients in half?
yes, and yes!
Hi
I absolutely love your bakes, I’m not so good myself but I’m starting to believe I can thanks to your recipes. I’m trying the bread just now!
I’m so glad!! Thanks for taking the time to comment!! 🙂
Is your loaf pan 9×5 or 9×4? Excited to try this recipe, just wanting to make sure I get the most rise from the bread.
I use 9×4 pans.
Turned out perfect! Thank you for such a simple recipe !
So happy to hear that! Thank you for taking time to give me a feedback on the recipe!🙂
I have made this several times and it has turned out perfectly. I was only wondering if I could turn this recipe into dinner rolls, or would the texture not be good for that?
Thanks so much!! Happy to hear you enjoyed the bread recipe 🙂. I haven’t tried to do that, instead you could try out my Easy Homemade Garlic Butter Dinner Rolls: https://thebusybaker.ca/easy-homemade-garlic-butter-dinner-rolls/ !
I have used this recipe for rolls many times, and for me anyways it turns out perfect 🙂
Thanks so much Emily!!
Not sure what I am doing wrong but I have tried this recipe 3 times and I cannot get it to rise like your picture. I’m in Canada, maybe my yeast is not right. It is Fleischmann’s quick-rise instant yeast. I have followed your recipe to a “T” all three times.
The first hour of rising it does great, then when I cut it apart it falls flat. Do you think I could put it right into the loaf pans, let it rise for 80 min. Then cook it?
Thanks for your question. I also use Fleischmann’s quick rise instant yeast, so that can’t be the issue. Is the dough overly sticky? Is it possible you’ve mis-measured the liquid? Also, could your loaf pans be too large? Mine are standard loaf pans with high sides, which may be the reason for the appearance of the rise.
Thank you for replying ,
I follow the recipe to a “T”.
When I mix it in my stand mixer
(on low), the bowl and spiral head comes out completely clean every time. (If it didn’t I would add a little flour).
My pans are not large at all.
The bread comes out very dense, unlike your picture.
What would happen if I put it right into the loaf pans, let it rise for 80 mins and then baked them?
Would they blow up?
I could never understand it, let it rise, pound the rise out of it, then do it over again. (Obviously there is a reason)
I will try going straight to the pan and let you know how they come out.
My mother always made bread the typical way, let it rise, then knead it, then rise again, too much work for me since I am the “bread” earner in my family. (pun intended) lol
Anyway I’ll let you know.
Thanks
The reason for the double rise (and punching it down) is that it helps the gluten develop in the bread, which gives it the soft, chewy texture. If you rise the dough only once it would likely be an uneven bake (some places soft and others dense) and it would likely be full of large holes.
I ran into this problem when using all purpose flour … when i use bread flour i never have any problems on the second rise
I was looking for a quick, easy sandwich bread. This is perfection. I never use a mixer, just my danish dough spoon and elbow grease. This turned out beautifully. Thank you.
Great! So glad it turned out perfect!!☺️
Homemade bread is always the best! This would be perfect for fall baking and will pair perfectly with soup or alongside pasta.
Yesss, we also love it with soups. Thanks Jacquelyn!😊
So good, the crumb is so perfectly tender!
This is such an amazing bread recipe! Easy to follow! Thank you!
Thank you! So happy you liked it!😊
Homemade bread is the best! Absolutely perfect!
Yes, it is! Thanks for your comment.☺️
I don;t have a jamie Oliver bread pan what size would work?
Maureen Hemphill
Any standard loaf pan will work 🙂
Will this recipe work with gluten-free flour? Thanks!
I’ve never tried this recipe with gluten free flour, so I can’t comment on how this will work.
What size are the loaf pans?
Standard 9-inch loaf pans 🙂
9×5 in
Nothing better than homemade! So fresh!
And that smell filling the house…YAM!