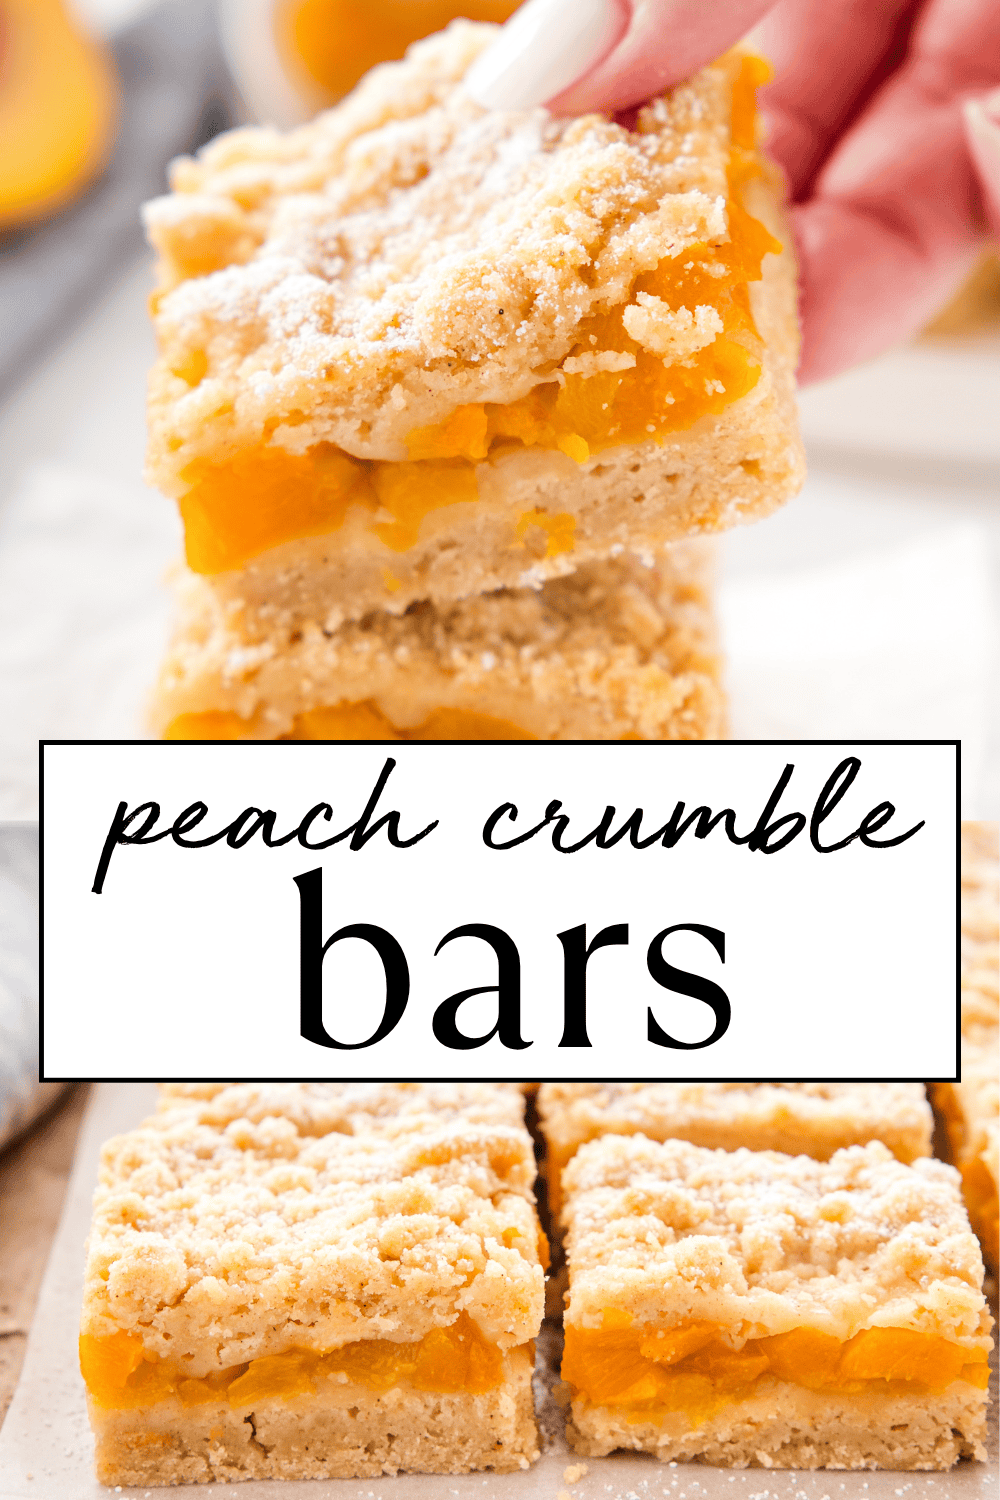
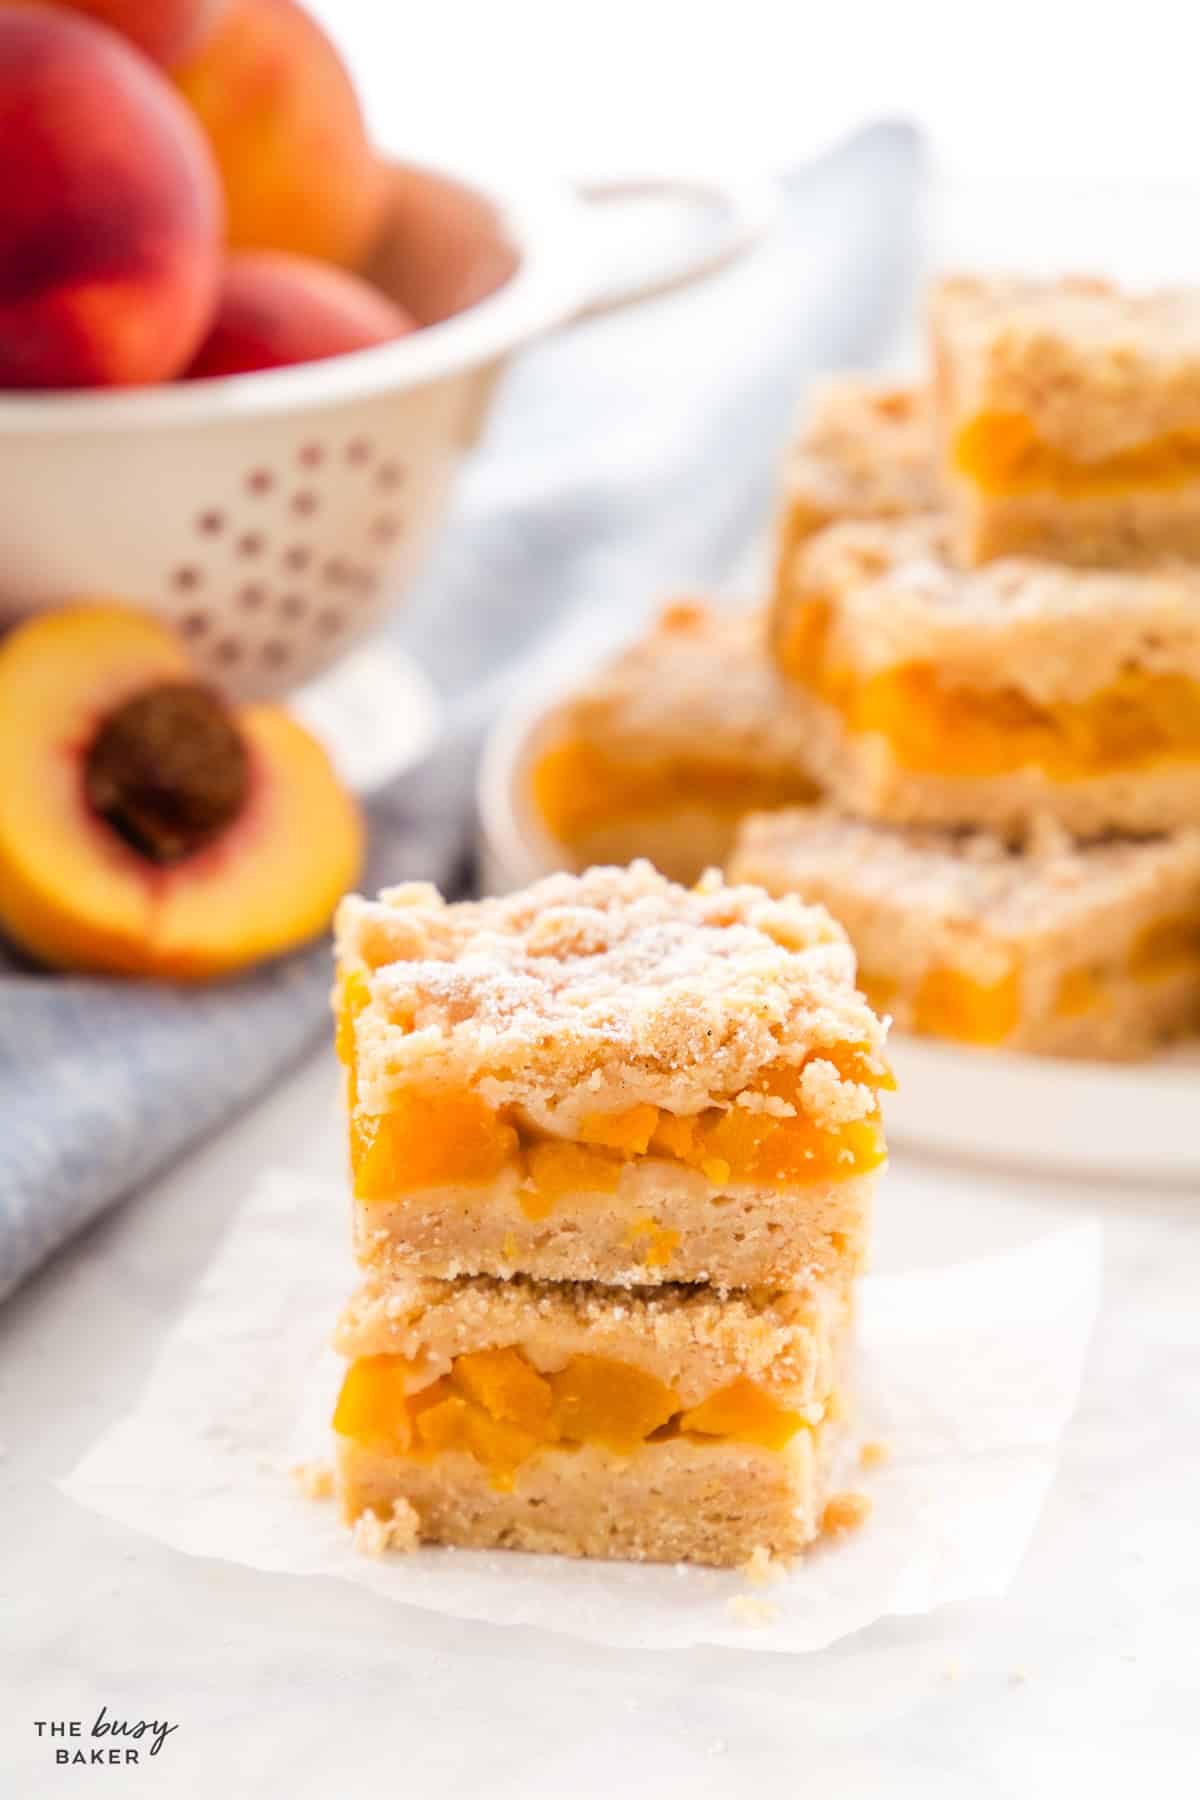
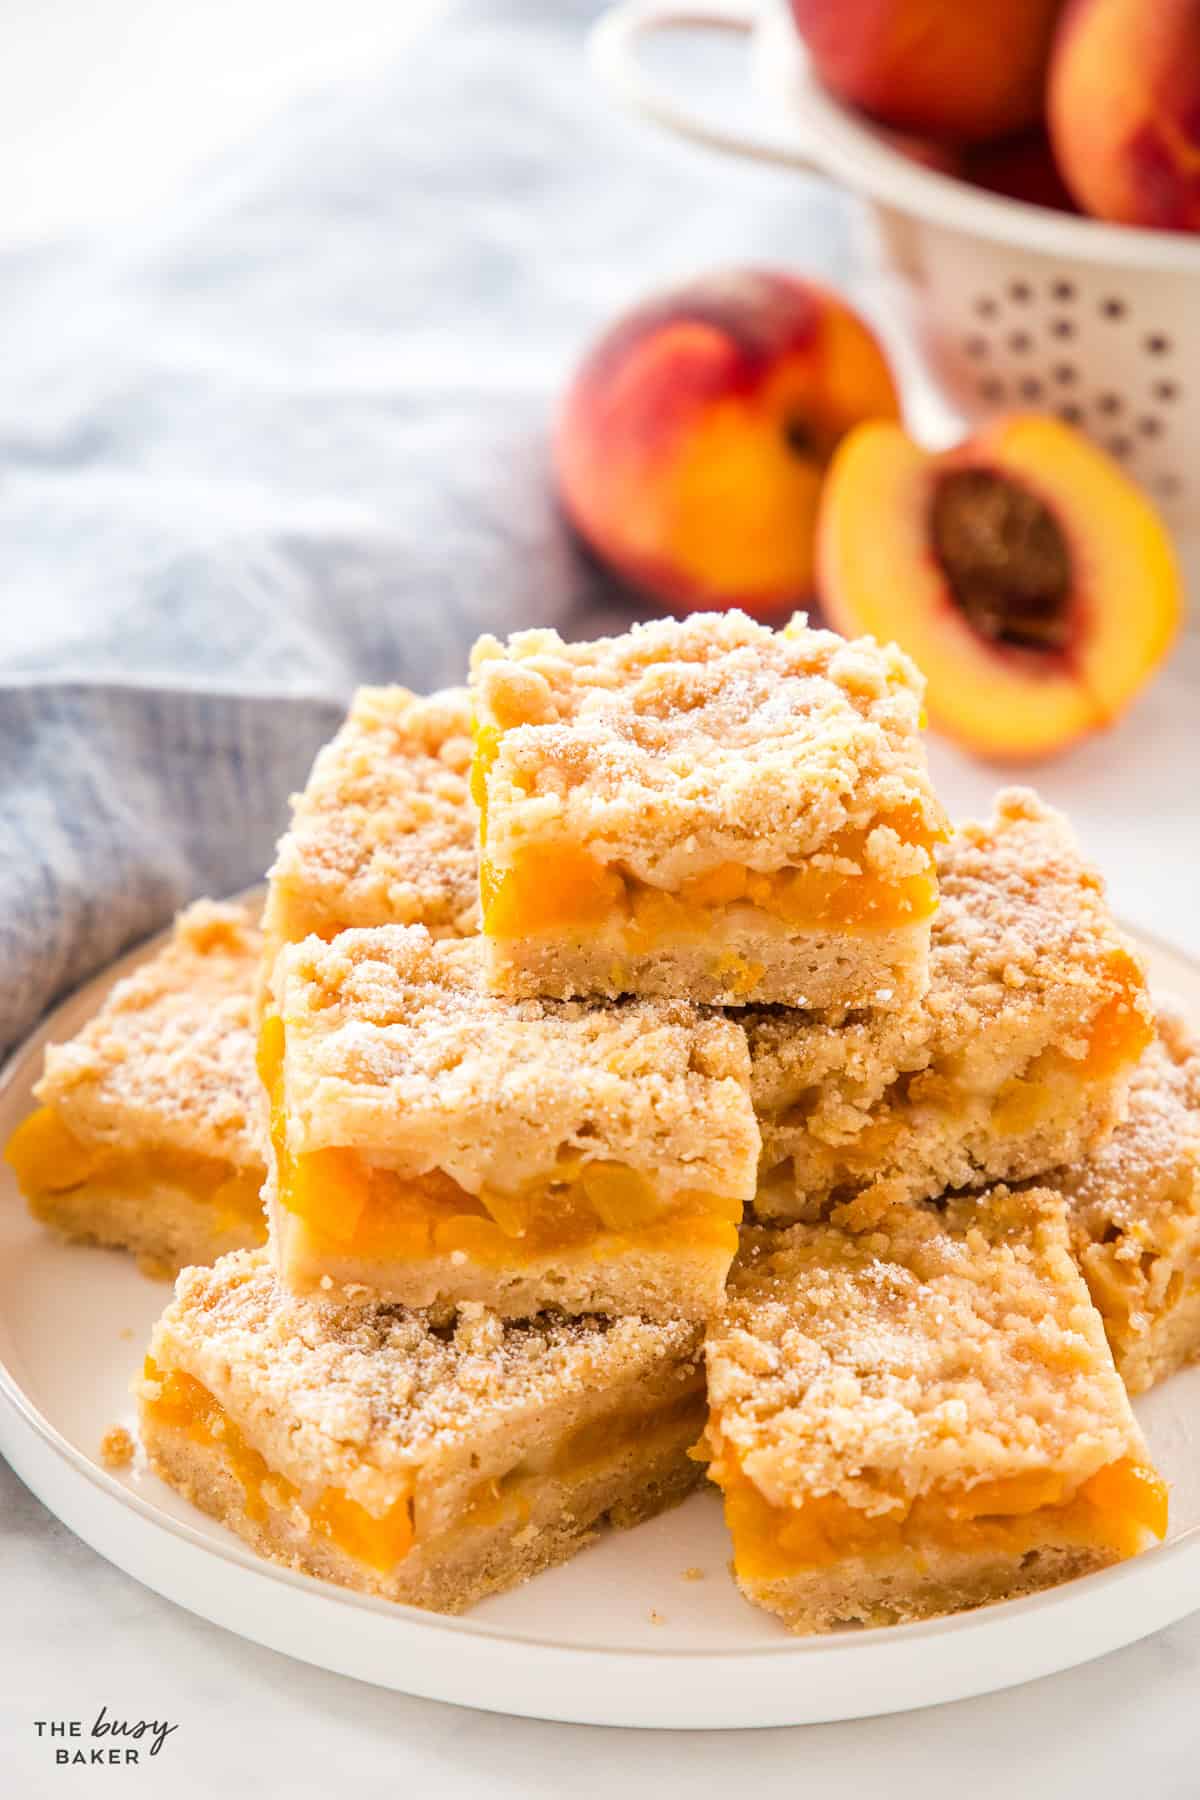
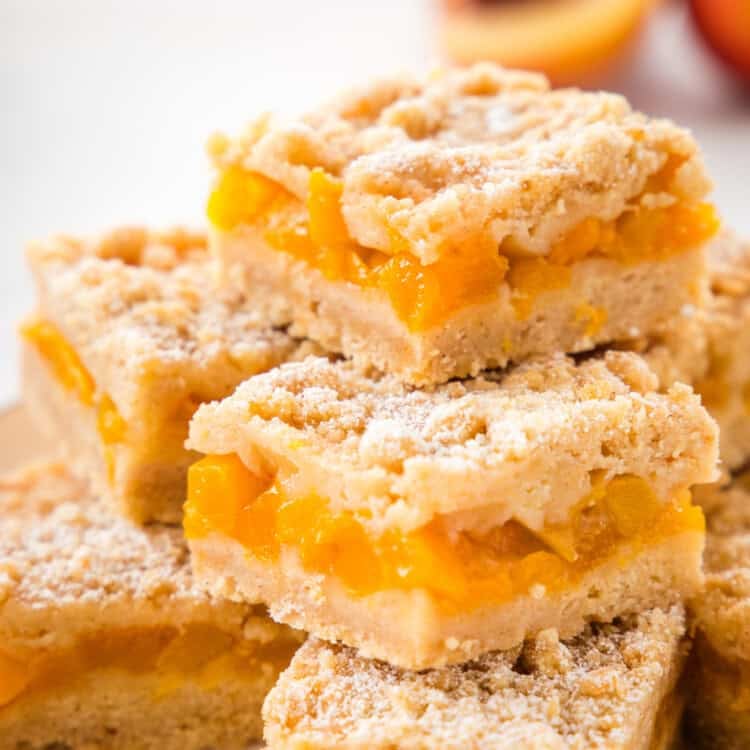
These Peach Crumb Bars are buttery, sweet, and packed with juicy peaches. An easy peach bar recipe with a tender shortbread-style crust, sweet peach filling, and a soft crumbly topping that’s perfect for summer baking, family barbecues, and any time you’ve got peaches to use up!
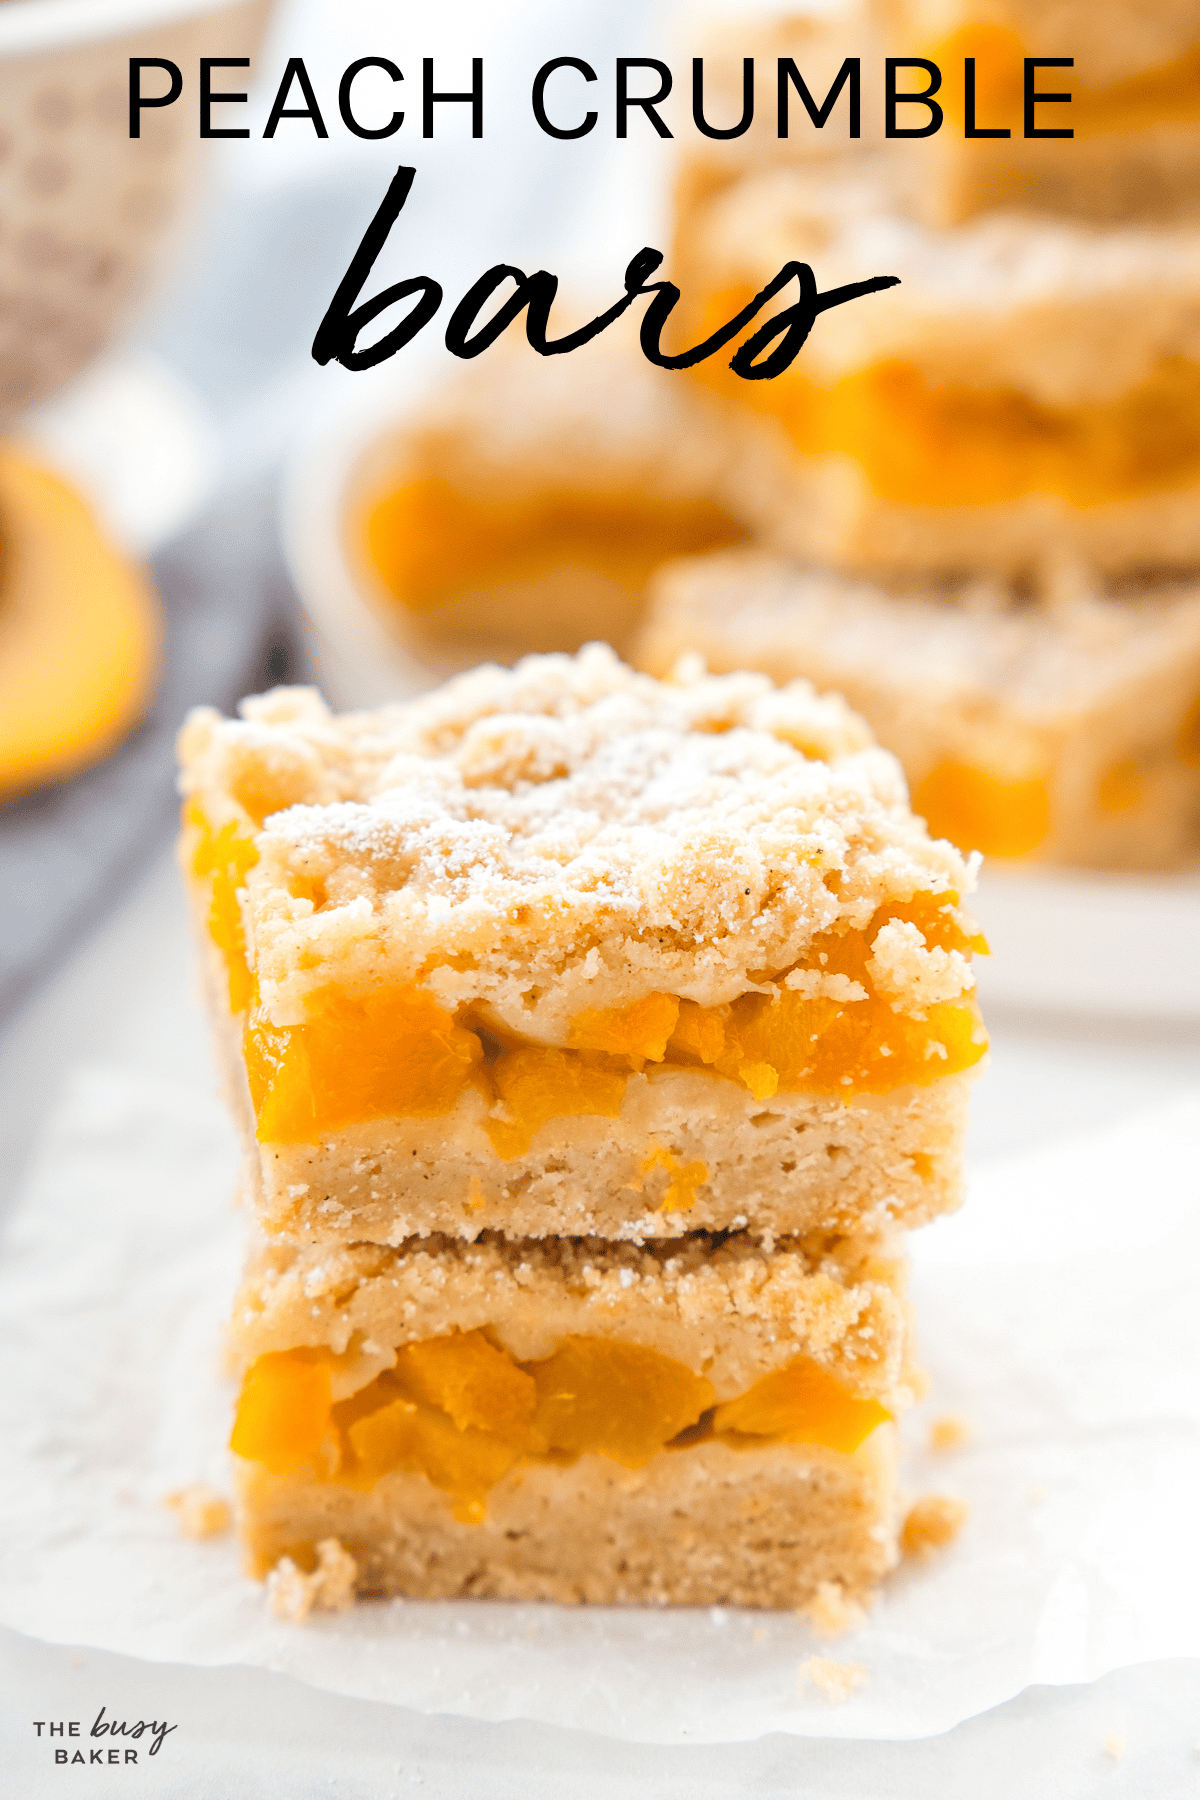
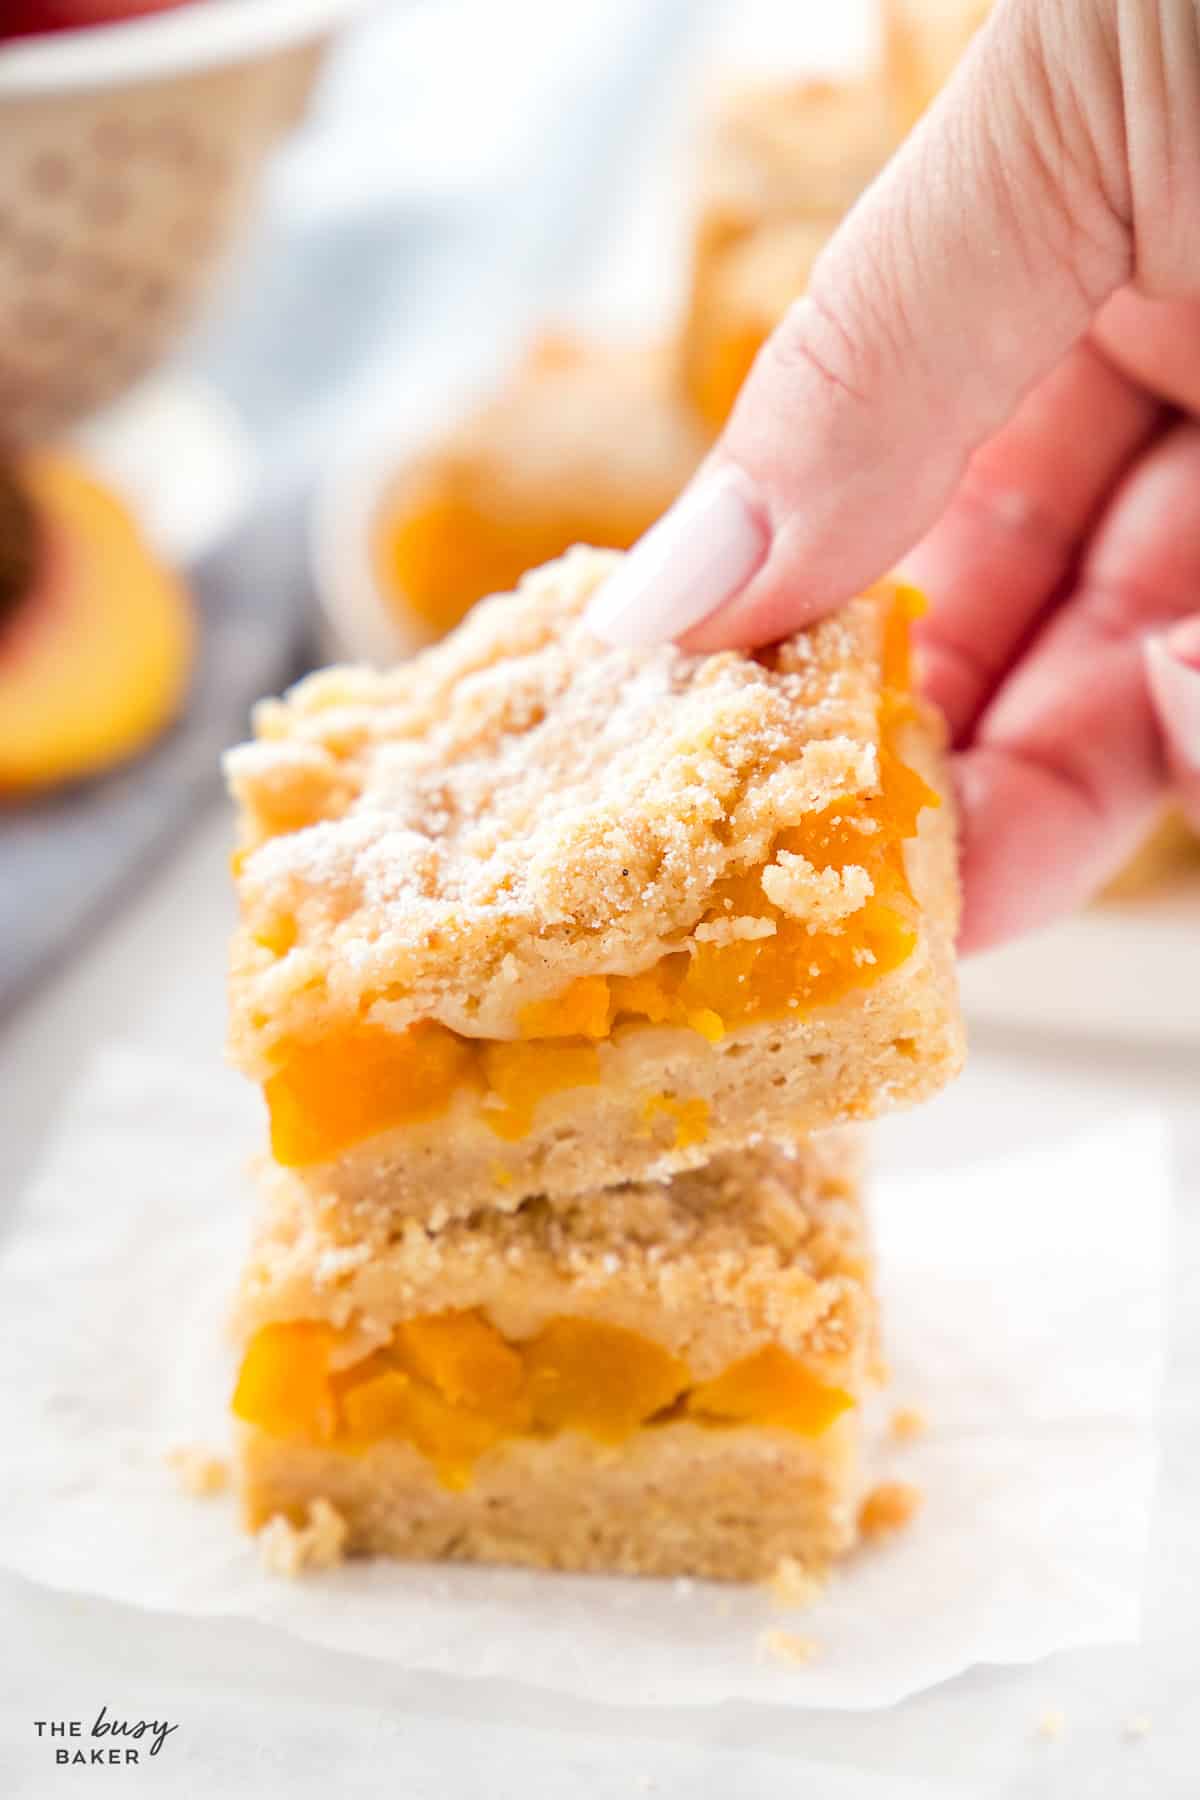
These Peach Crumb Bars are the kind of simple, fruity dessert your family is going to ask for again and again. They’ve got a buttery, tender base, a sweet peach filling that bakes up soft and juicy, and a crumbly topping that turns just lightly golden in the oven. They’re easy to make, easy to slice, and exactly the kind of recipe that feels a little bit special without being any trouble at all.
What makes them so great is how easy they are to put together. You make one simple buttery crumb mixture for both the base and the topping, layer it with a quick peach filling, and bake everything in one pan. The result is somewhere between a peach pie and a fruit crumble bar – a recipe that’s perfect for everyday family baking, but pretty enough to bring to a summer picnic, family barbecue, or potluck. And because this recipe works with both fresh and canned peaches, it’s one you can come back to year-round.
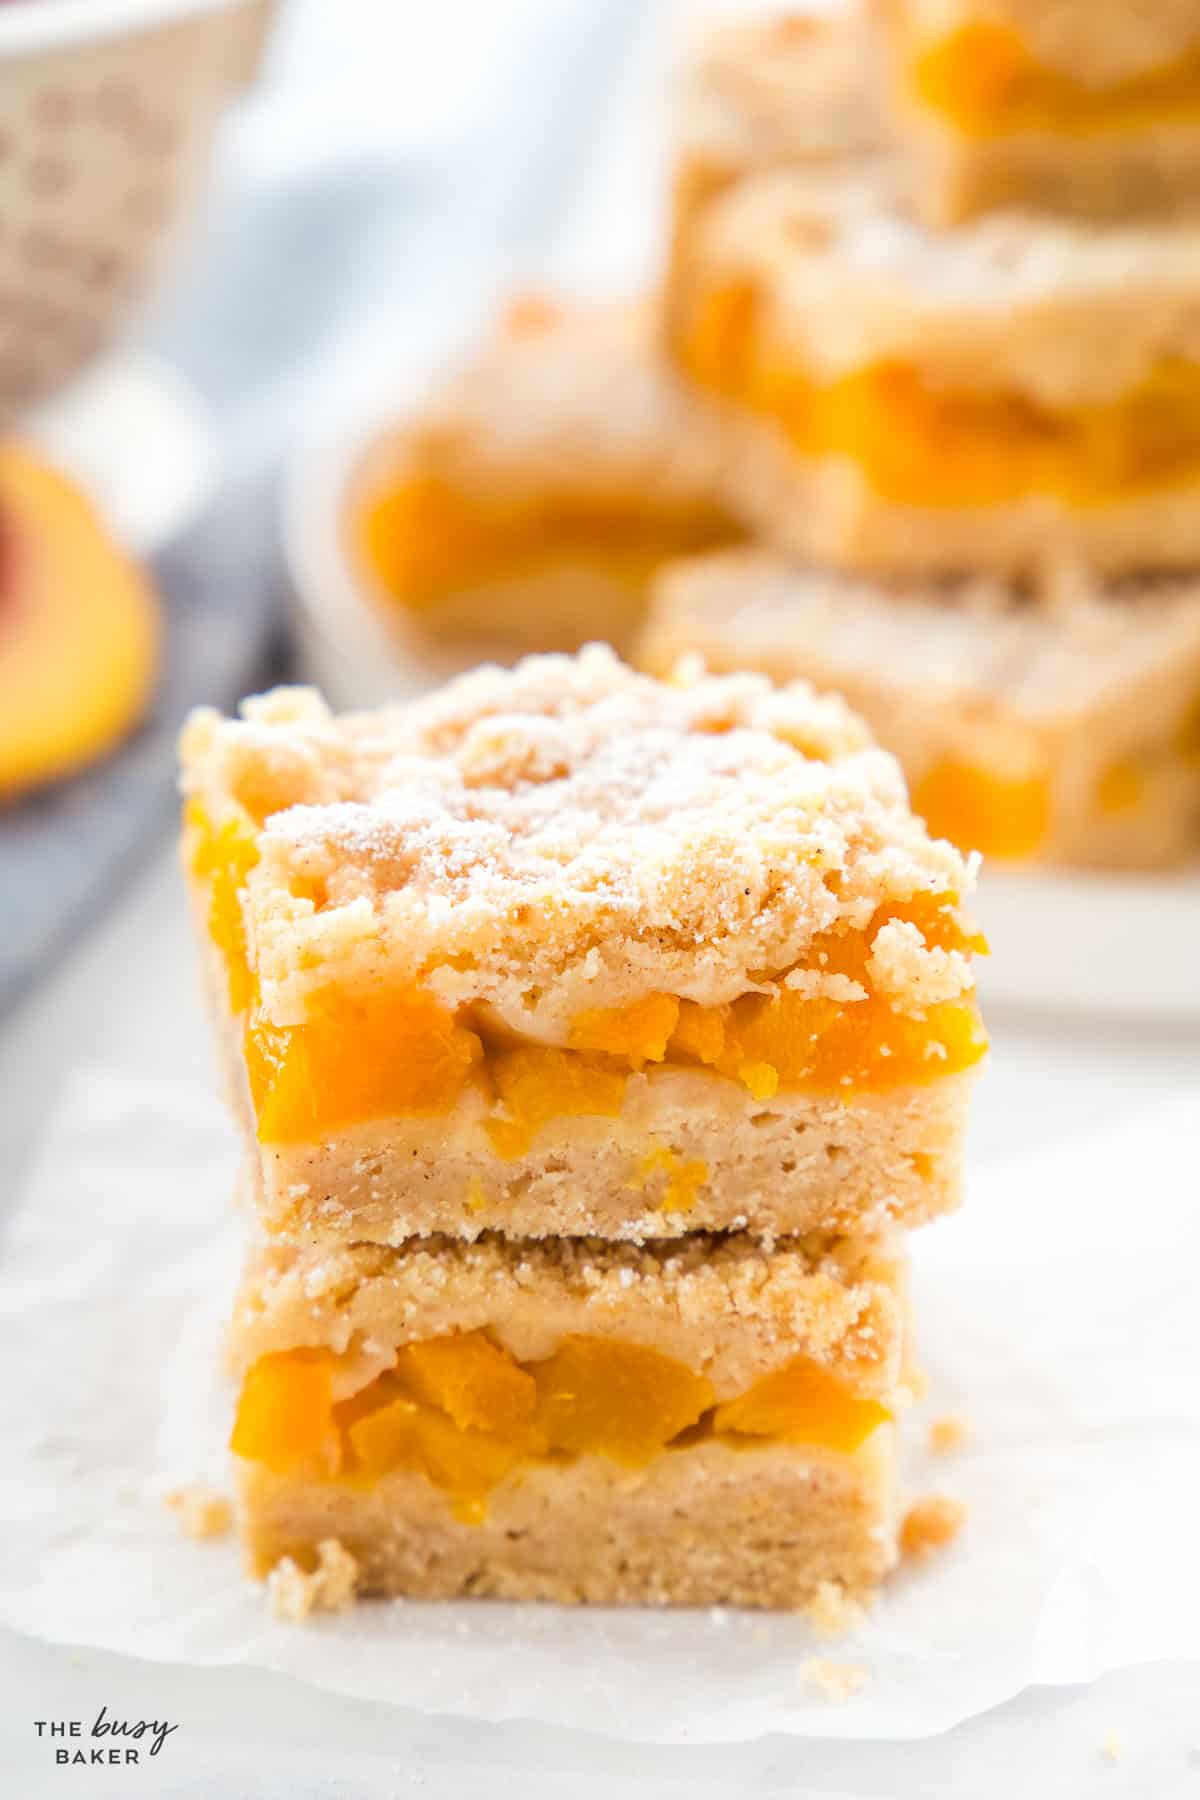
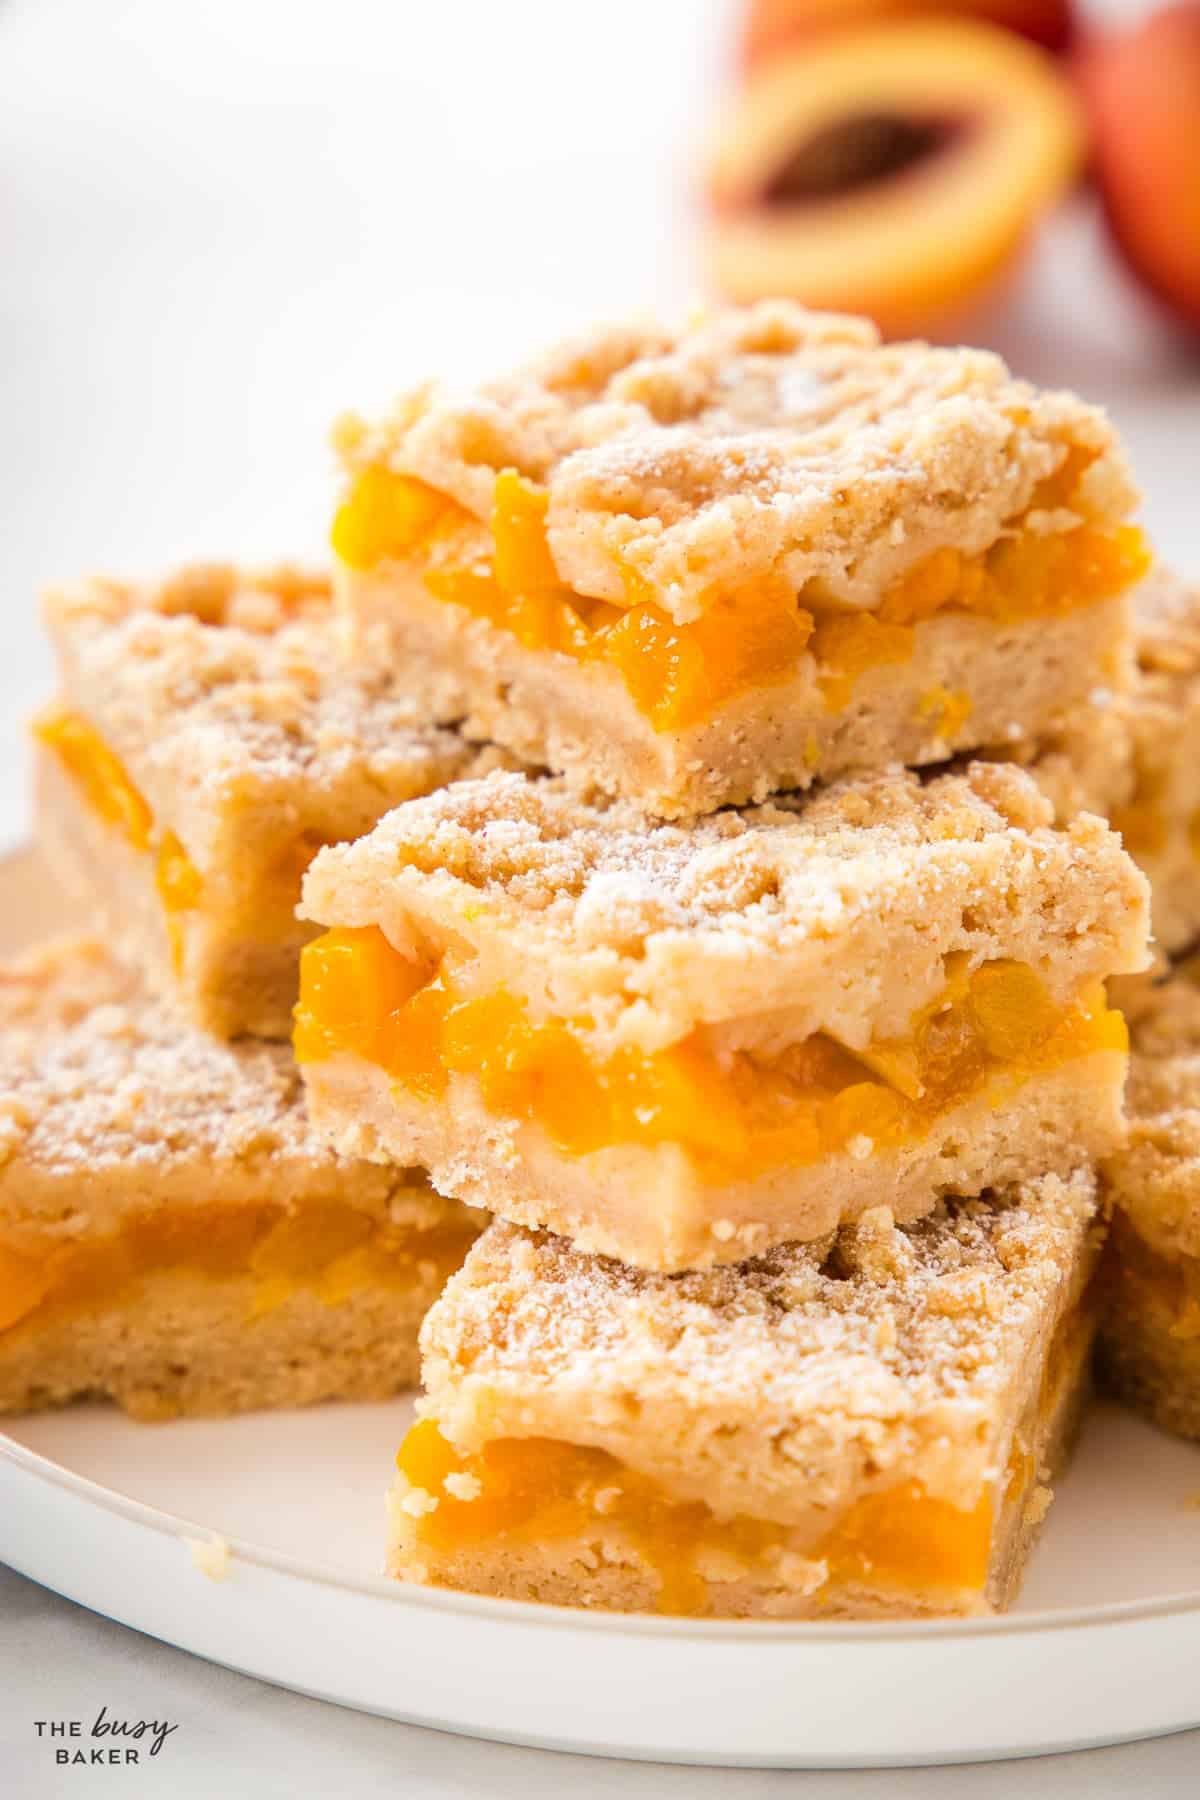
This recipe works because every part of it is doing its job. The crust and crumble topping are made from the same simple buttery mixture, which keeps the recipe straightforward and gives the bars a consistent, tender texture from bottom to top. It’s sturdy enough to hold the fruit when pressed firmly into the bottom of the pan, but still soft and crumbly when you bite into it.
The little hit of cinnamon in the crumb mixture is what really sets these apart from a regular fruit bar. It adds a warm, cozy quality that’s perfect with the sweet peaches and gives the bars a subtle homemade quality you don’t get from a plain shortbread base.
The peach filling is just as important. The sugar helps the peaches release their juices, the lemon juice keeps the peach flavour fresh and bright, and the cornstarch thickens everything as the bars bake so they slice cleanly instead of falling apart into a runny mess. That balance is what gives you a fruit layer that feels juicy and full of peach flavour without making the base soggy and crumbly.
It’s also such an easy recipe to make any time of year. Fresh peaches are wonderful when they’re in season, but canned peaches work beautifully too, and frozen peaches do the trick in a pinch, as long as they’re thawed and drained. It’s the kind of dessert recipe that becomes a real family favourite – simple enough for everyday baking, but special enough for entertaining.
If you love these, you’ll also love my Strawberry Oat Bars and Lemon Crumb Bars – two of the most-loved bar recipes on the blog and the inspiration behind these.
A few small things make a real difference between bars that hold together beautifully and ones that fall apart when you try to slice them.
Cold butter is what gives the crust and topping that tender, crumbly texture. If the butter is too soft, the mixture turns pasty instead of crumbly and the bars lose their best quality.
Try to dice your peaches into similar-sized pieces (around 1/4 to 1/2 inch) so the filling bakes evenly and the bars are easier to slice neatly once they cool.
Both canned and frozen peaches hold a lot of moisture. Draining them really well before tossing them with the sugar and cornstarch keeps the filling from getting watery and prevents soggy bars.
Cornstarch is what thickens the peach juices as the bars bake. Without it, the filling will be runny and the bars won’t slice cleanly.
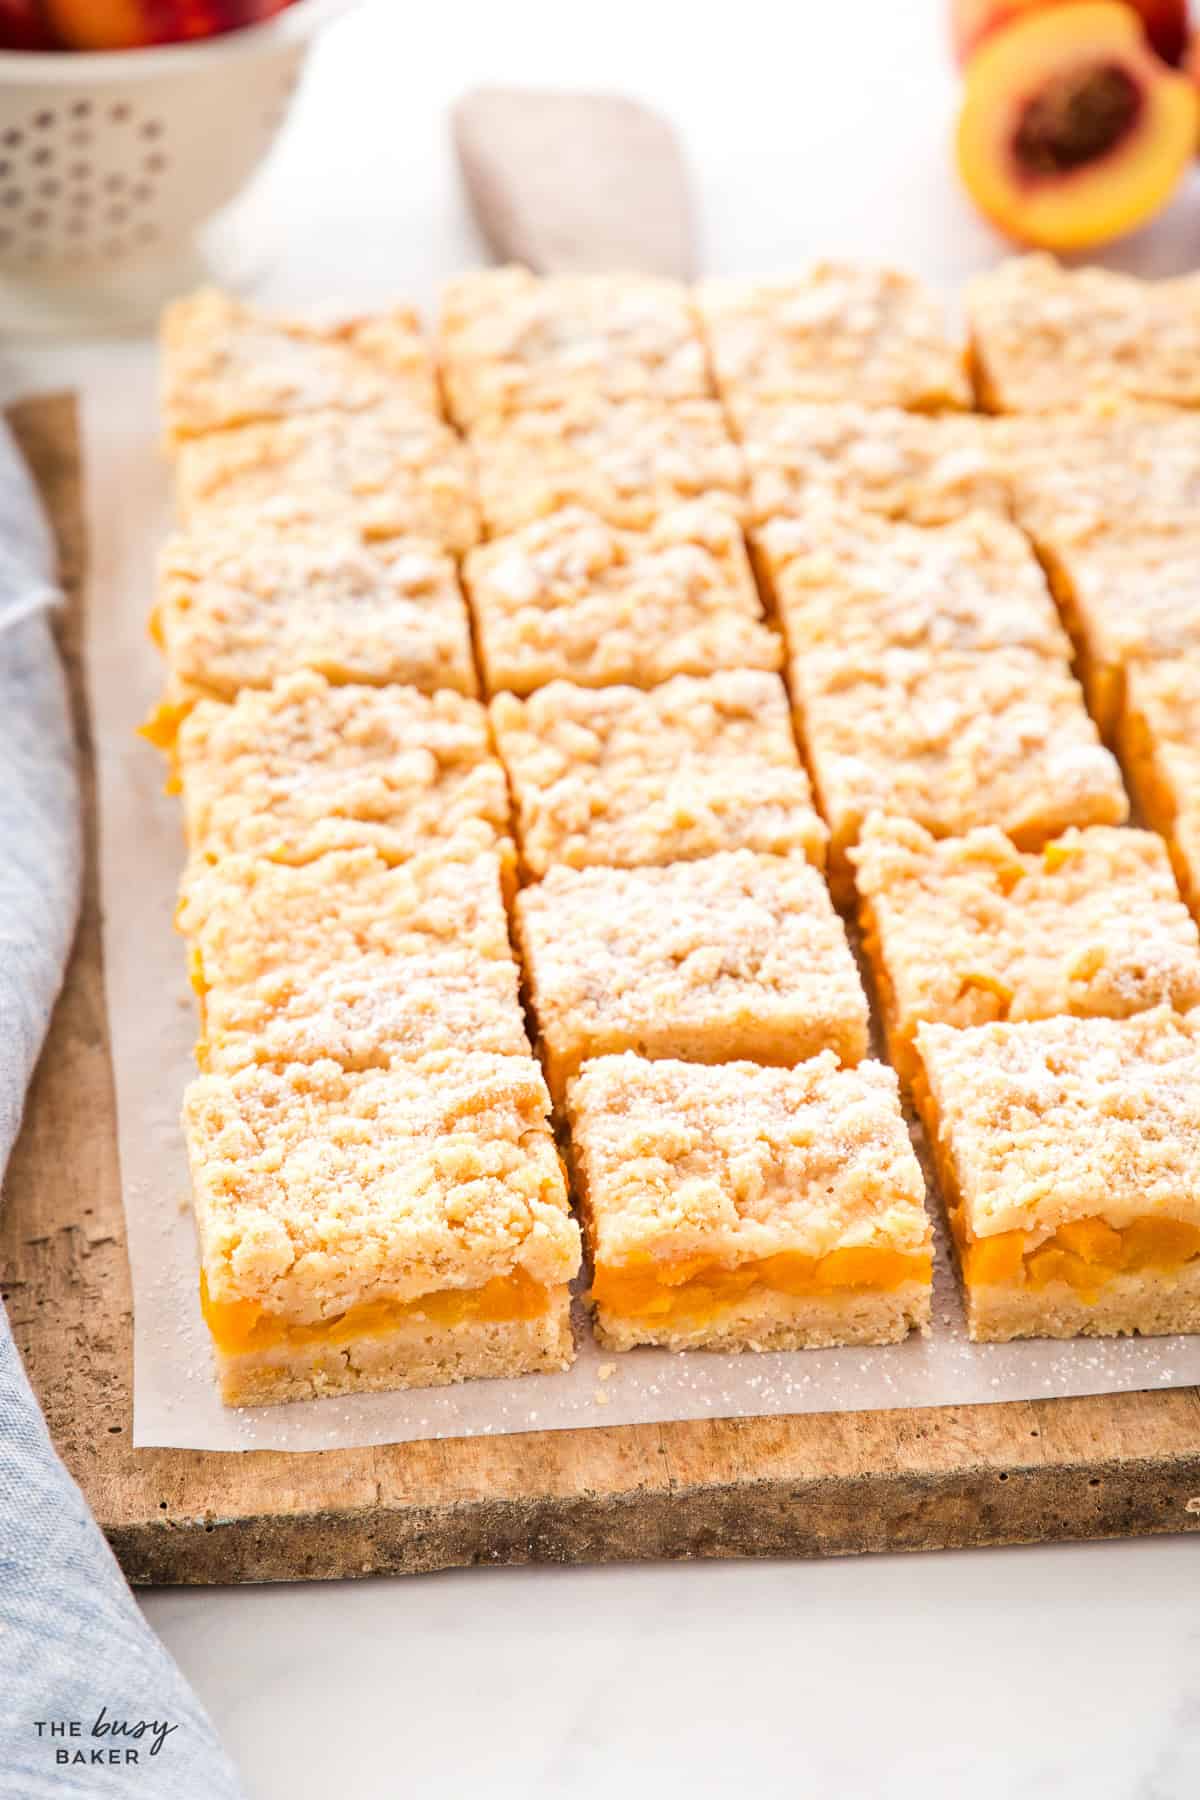
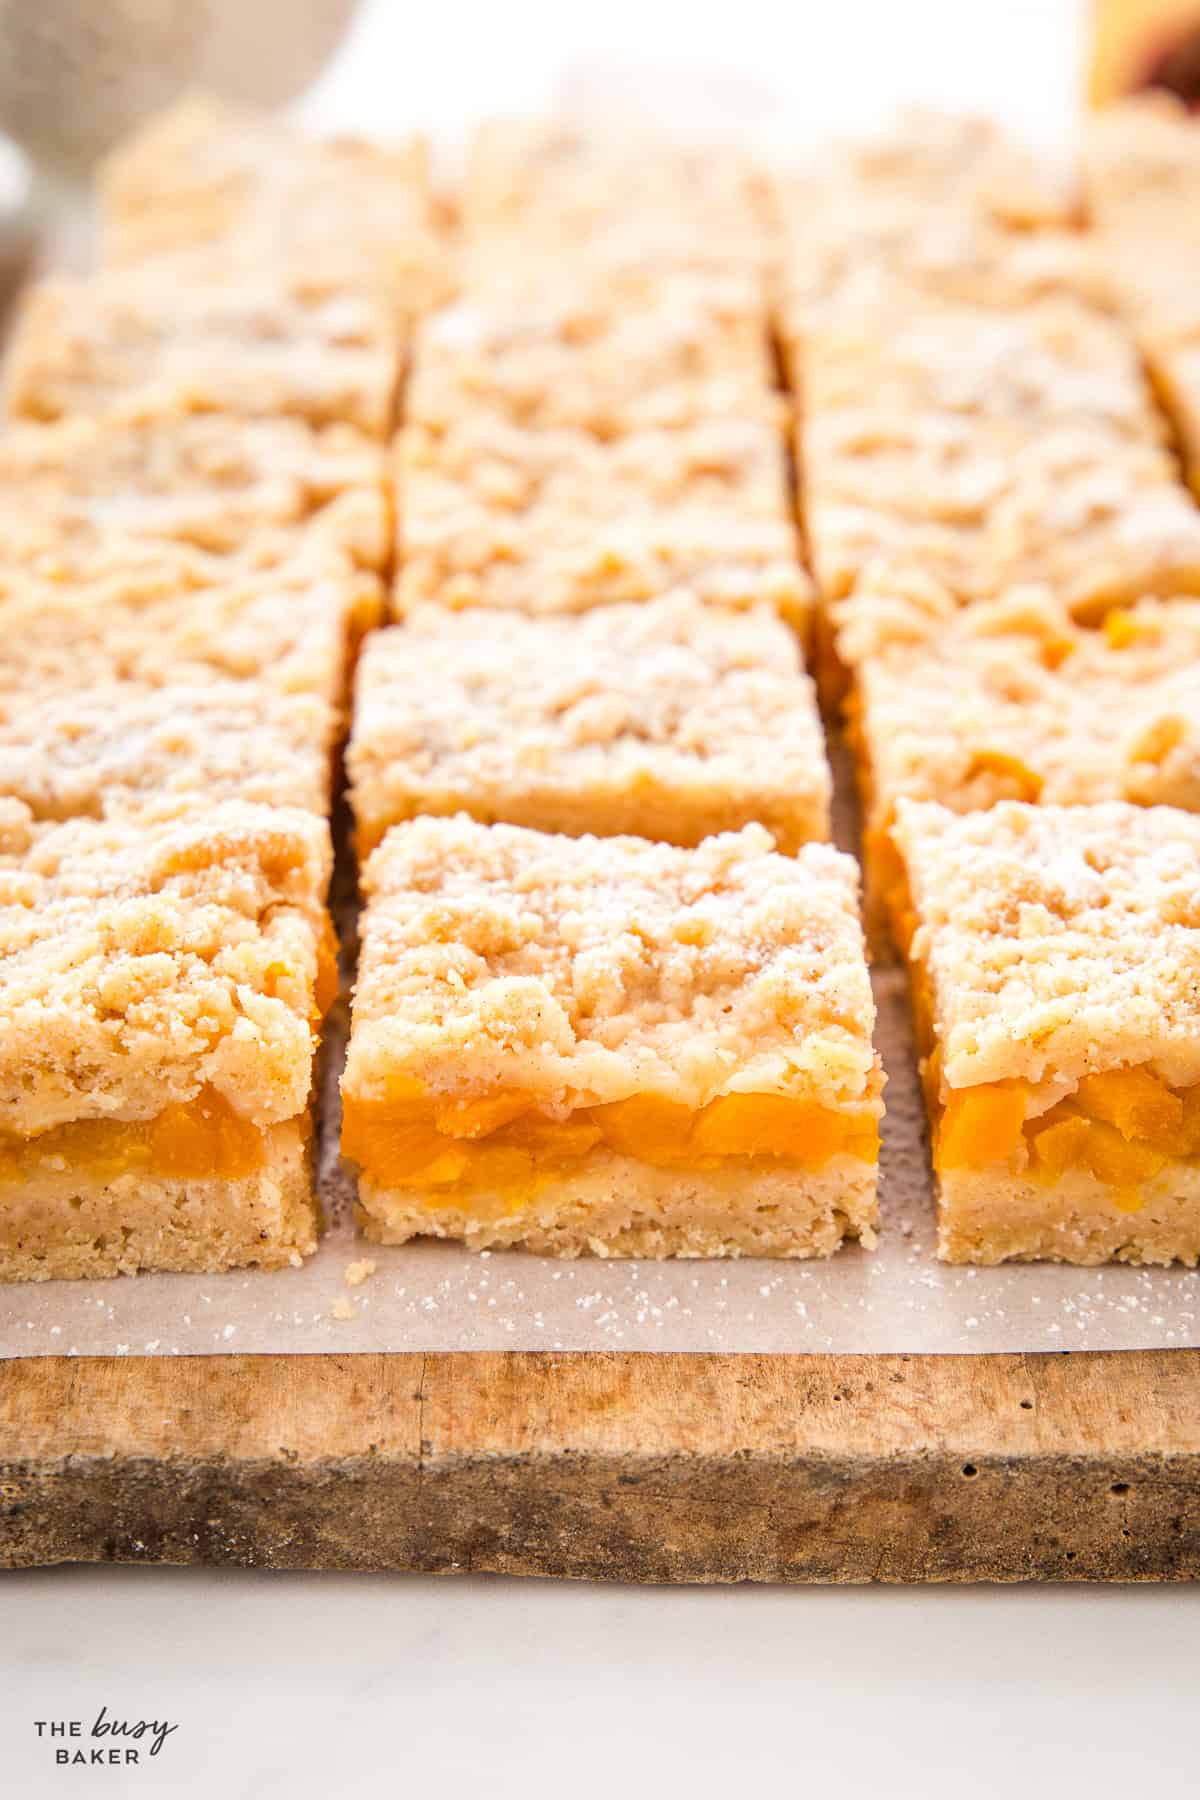
Take a minute to really pack the base into the pan, right into the corners. A well-pressed crust is what holds everything together when you cut the bars.
Don’t press the top crumb layer down into the peaches. Just let it fall naturally over the fruit – that loose crumble is what gives the bars their beautiful golden top after baking.
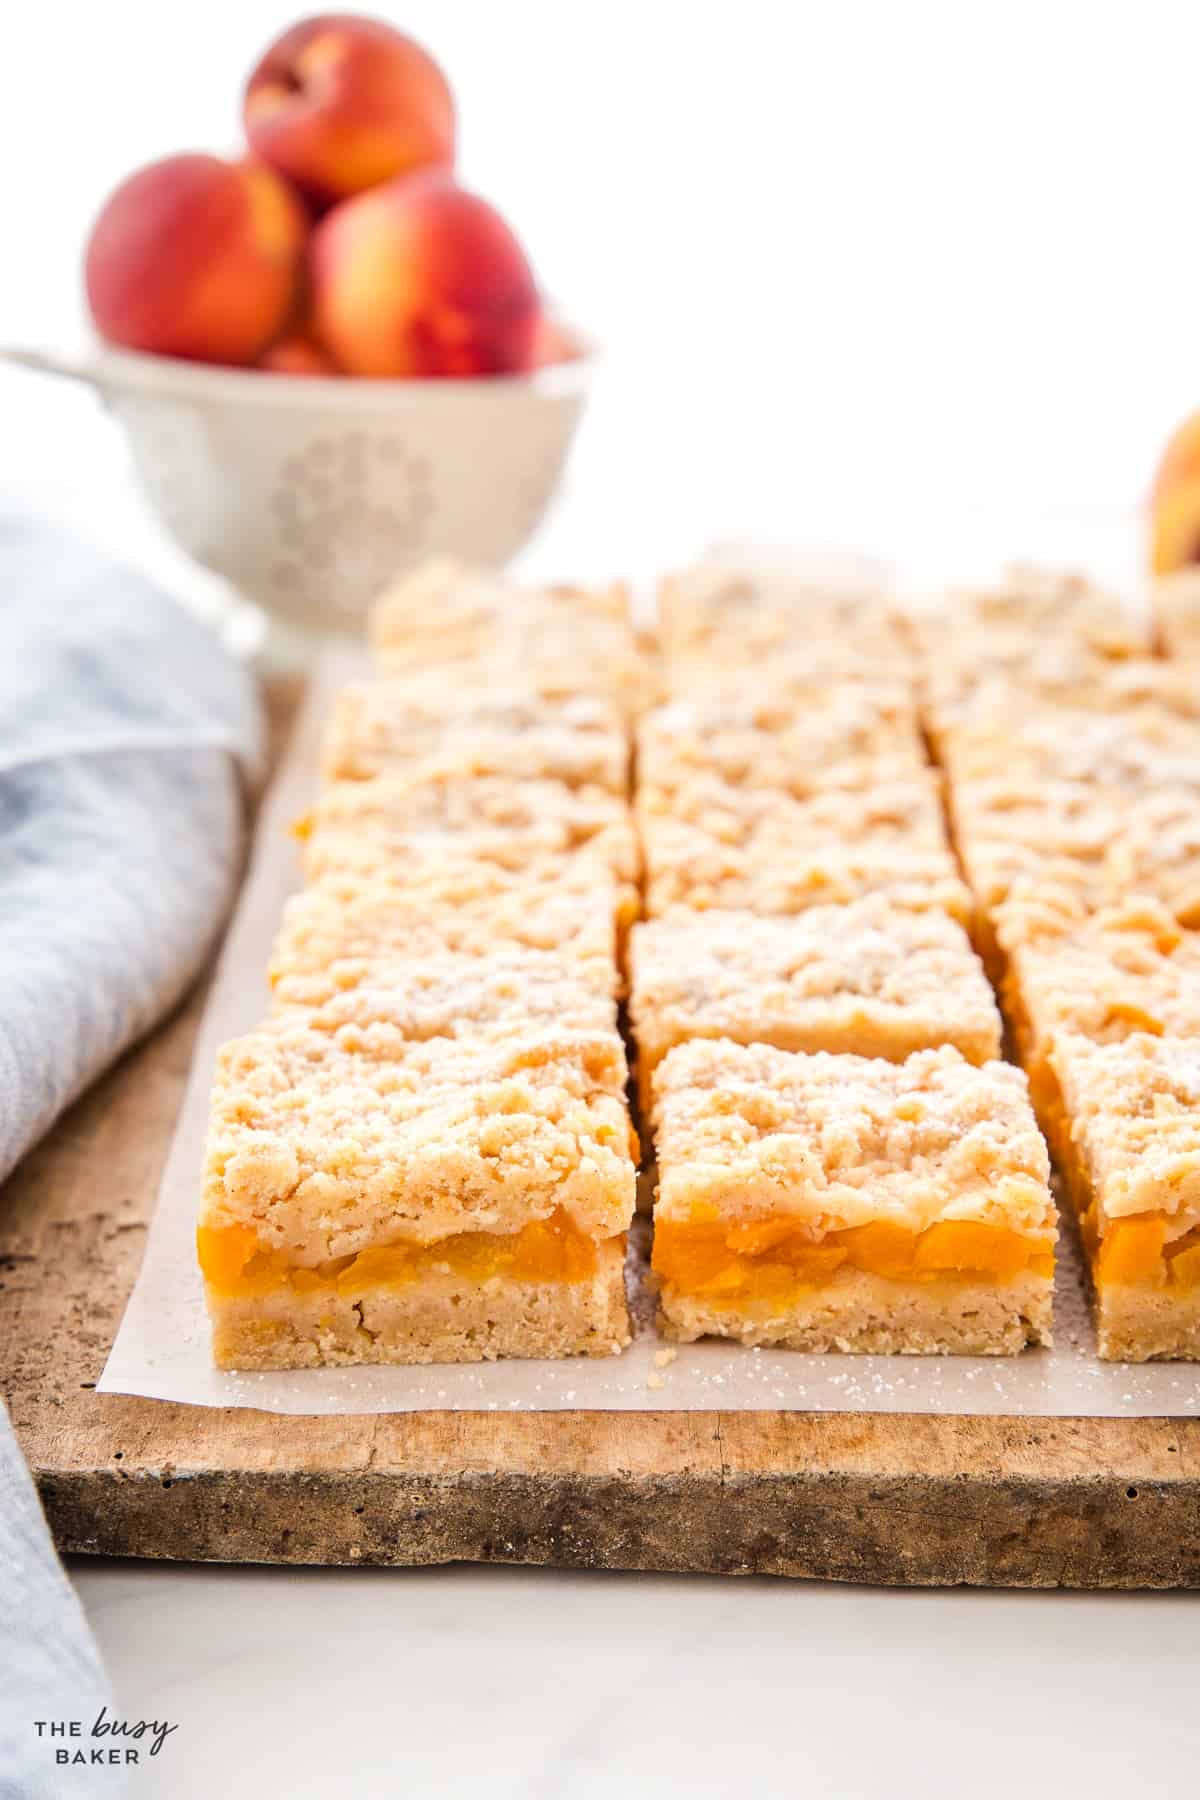
This is the most important step. Warm bars will be soft and hard to slice cleanly. Let them cool fully in the pan, then cut them into bars and serve.
Time needed: 1 hour (15 minutes prep, 40-45 minutes baking, plus cooling).
- Start with the crumb mixture. Whisk the flour, sugar, baking powder, salt, and cinnamon together really well so the cinnamon and baking powder are evenly distributed throughout.
- Cut in the butter until crumbly. Add the cold butter in chunks and cut it in with a pastry cutter or fork until the mixture looks like coarse crumbs. A few slightly larger buttery bits are just fine.
- Add the egg just until the mixture comes together. Once the egg is mixed in, the mixture should still look crumbly but should hold together when pressed together in your hand.
- Press the base in firmly. Press about 2/3 of the crumb mixture into the bottom of your prepared pan, pushing it firmly into all the corners. Set the rest aside for the topping.
- Toss the peaches with the sugar, cornstarch, and lemon juice. Make sure every piece of peach is well coated so the filling thickens evenly and the sweetness is balanced throughout.
- Layer everything into the pan. Spread the peach filling evenly over the base, then sprinkle the remaining crumb mixture loosely over the peaches.
- Bake until just golden. Bake at 350 degrees Fahrenheit (175 degrees Celsius) for 40-45 minutes, until the top is just barely golden brown and the filling is bubbling around the edges.
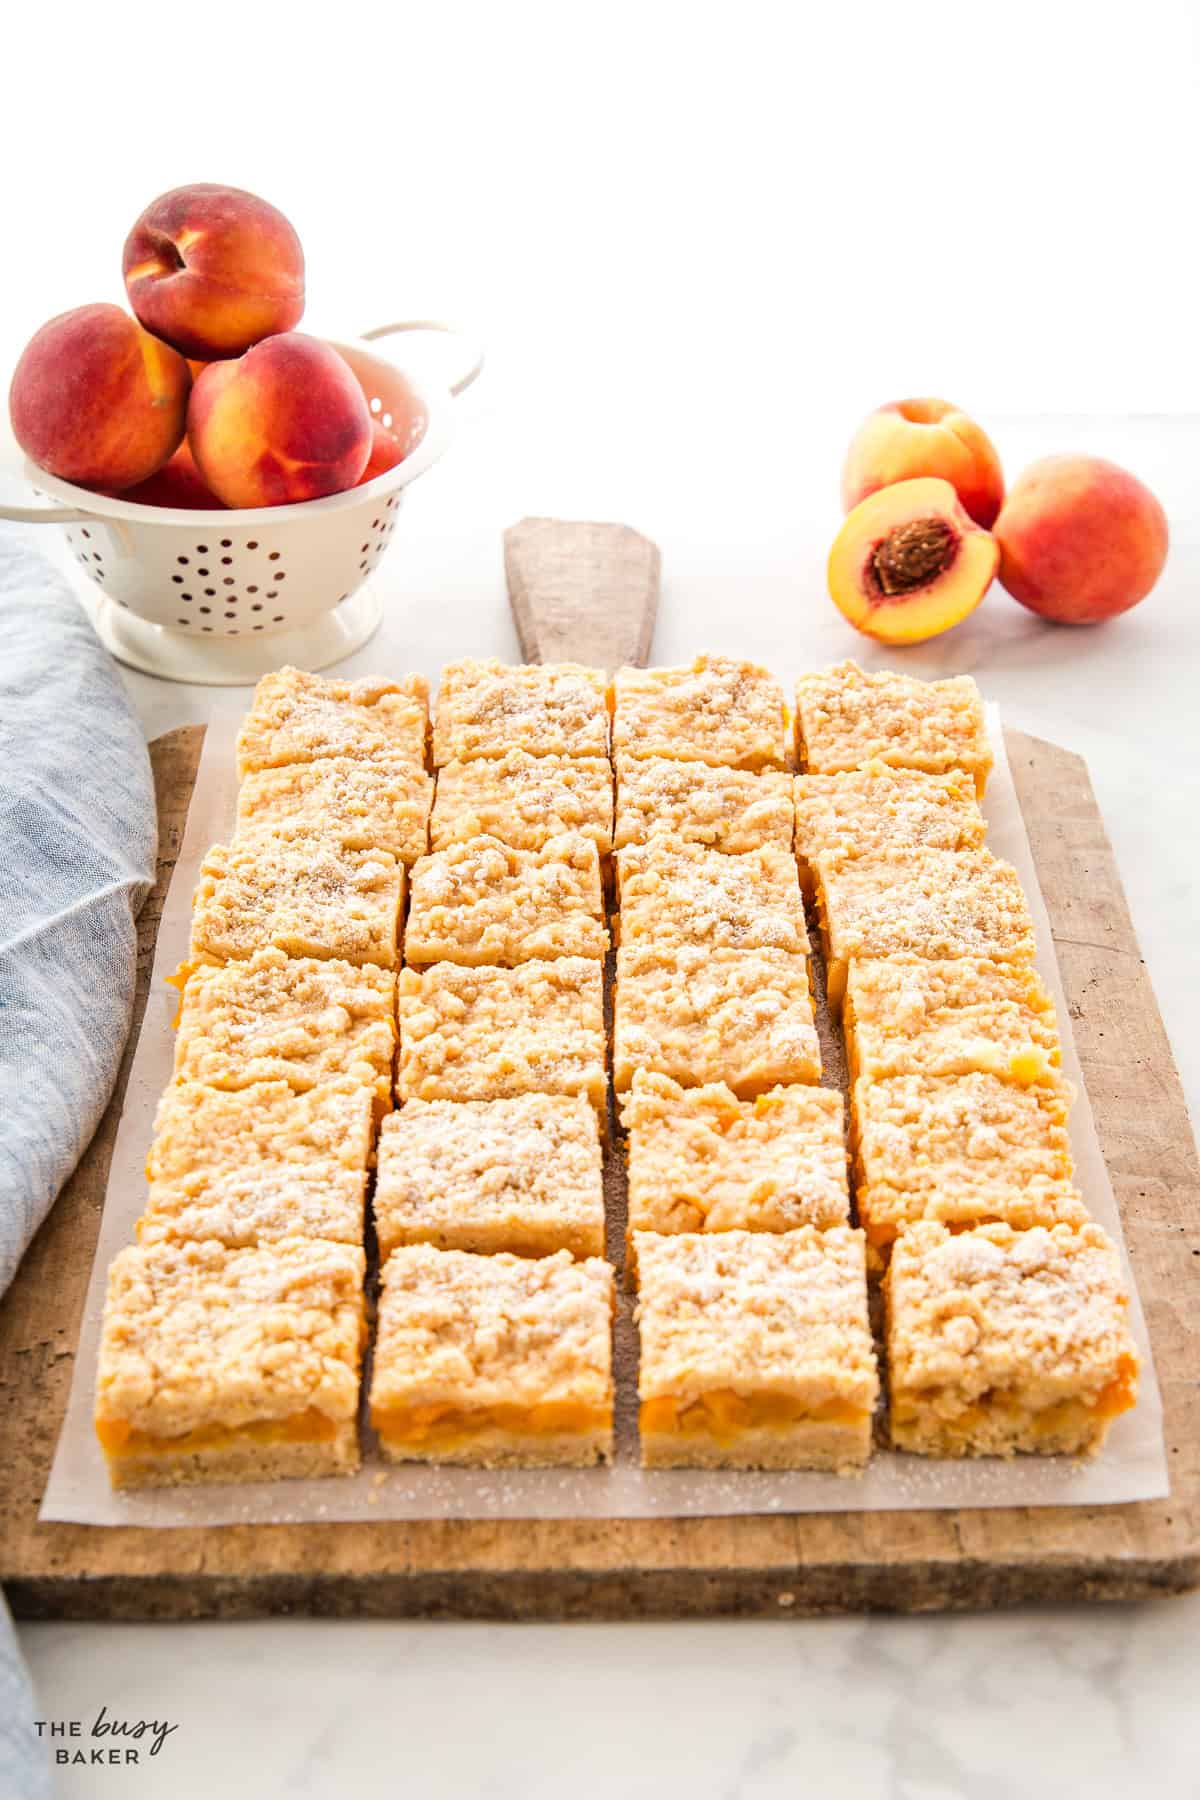
- Be patient while they cool. Let the bars cool completely in the pan before cutting. This is what helps them hold their shape and slice cleanly. Once they’ve cooled completely to room temperature, cut them into 24 bars and serve.
These bars are wonderfully adaptable. Here are some of my favourite ways to switch them up:
- Use frozen peaches. Frozen peaches work in this recipe too. Thaw them first, drain off any extra liquid, and add an extra teaspoon of cornstarch if they still seem too juicy.
- Try nectarines. Nectarines work beautifully in this recipe and can be swapped right in for the peaches with no other changes needed.
- Add berries. A handful of fresh raspberries, blueberries, or blackberries mixed in with the peaches adds beautiful colour and a little tartness that pairs perfectly with sweet peaches.
- Add a splash of almond extract. Peaches and almond are a classic pairing. A 1/2 teaspoon of pure almond extract added to the peach filling adds a really lovely flavour.
- Use brown sugar in the crumb mixture. Replacing up to half of the white sugar with brown sugar gives the crust and topping a slightly deeper, more caramel-like flavour.
- Add more warm spice. A pinch of nutmeg or ginger added with the cinnamon makes these bars a little cozier – especially good for fall baking. You can even add ground ginger and ground cinnamon to the filling for extra warmth.
- Make a peach-strawberry version. Replace half the peaches with diced strawberries for a peach-strawberry combo that’s amazing in summer!
These bars are perfect on their own with a cup of coffee or tea, but they’re also so easy to dress up for a special occasion. Try them:
- Slightly warmed and topped with a scoop of vanilla ice cream
- With a dollop of fresh whipped cream and a drizzle of caramel sauce
- Alongside a fresh fruit salad for a summer picnic
- Packed in lunches as an easy after-school treat
- Plated with a glass of Healthy Lemonade or Peach Iced Tea at a backyard barbecue
At room temperature – Once the bars have cooled completely, store them in an airtight container at room temperature for up to 2-3 days. Make sure they’re fully cool before covering – if you put them away while still warm, the topping will get soggy from the trapped steam.
In the refrigerator – If your kitchen is very warm, you can store the bars in the fridge instead. They’ll keep for up to 4-5 days. The crust gets a little firmer when chilled, so let them sit at room temperature for about 15-20 minutes before serving for the best texture.
To freeze – These bars freeze beautifully for up to 1-2 months. Cut the cooled bars and layer them with parchment paper in an airtight container or freezer bag so they don’t stick together. Thaw at room temperature before serving, or warm them slightly in the microwave or toaster oven for that freshly-baked feel.
Can I use canned peaches in peach crumb bars?
Yes! Canned peaches work beautifully and make this a great year-round recipe. Drain them really well before dicing so the filling doesn’t get watery. If they’re packed in heavy syrup, you can reduce the sugar in the filling slightly.
Do I need to peel fresh peaches?
Not necessarily. If the skins are thin and tender, you can leave them on – they soften beautifully as the bars bake. If you prefer a smoother filling or your peaches have thicker skins, go ahead and peel them first.
Why did my peach bars fall apart when I cut them?
The most common reason is cutting them before they’ve cooled completely. The filling needs time to set, and the crust firms up as the bars cool. Be patient and let them cool fully – chilling them in the fridge for 30 minutes before slicing also helps for really clean cuts.
Why are my bars soggy on the bottom?
This usually happens when the peaches release too much liquid or the bars are slightly underbaked. Draining canned or thawed frozen peaches well, using enough cornstarch, and baking until the filling bubbles around the edges all help prevent a soggy base.
Can I make these bars ahead of time?
Yes, they’re a great make-ahead dessert. They actually slice best after they’ve cooled completely (and even better after a few hours in the fridge), so making them a day ahead works really well.
Are these more like a peach pie bar or a peach crumble?
They’re a little bit of both. The base has that buttery, sturdy feel of a shortbread or pie-style bar, while the soft, lightly cinnamon-spiced topping gives them more of a peach crumble vibe. That combination is what makes them so good.

More Easy Bar and Dessert Recipes You’ll LOVE
If you love these peach crumb bars, you’re going to want to try these other easy family-favourite recipes:
- Strawberry Oat Bars
- Lemon Crumb Bars
- Peach Cobbler Muffins
- Peach Streusel Cake
- Peach Cake
- Best Ever Double Chocolate Muffins
- Old Fashioned Cinnamon Sugar Baked Cake Donuts
- Easy No Bake Oreo Cheesecake
- Best Ever Blueberry Crumb Bars
FREE Baking Bootcamp
All the best tips, tricks, recipes and tutorials you need to become a successful home baker! If you’ve ever wanted to learn how to bake the BEST muffins, bread, cookies, cakes, buns and MORE, this Baking Bootcamp is for YOU!
If you made this, share a photo!
Are you trying this recipe? Use the comment form below to share your take; now with support for image uploads and comment voting!
Peach Crumb Bars
Recipe: Equipment
Recipe: Ingredients
- 3 cups all purpose flour
- 1 cup granulated sugar
- 1 teaspoon baking powder
- 1/4 teaspoon salt
- 3/4 teaspoon cinnamon
- 1 cup unsalted butter cold from the fridge
- 1 egg
- 4 cups fresh or canned peaches diced
- 3/4 cup granulated sugar
- 4 teaspoons cornstarch
- 2 teaspoons freshly squeezed lemon juice
Recipe: Instructions
- Preheat your oven to 350°F (175°C) and prepare a 9-inch by 13-inch rectangular baking dish, greasing it with butter or baking spray and lining it with parchment paper.
- In a large bowl combine the flour, sugar, baking powder, salt, and cinnamon with a wire whisk.
- Add the cold butter to the flour mixture in chunks, blending it in with a pastry cutter or a fork until the mixture resembles coarse crumbs.
- Beat the egg in a small bowl and add it to the flour and butter mixture, mixing just until combined.
- Press about 2/3 of this mixture tightly into the bottom of the prepared baking pan and set the other part aside.
- In a separate bowl, combine the diced peaches, white sugar, cornstarch, and lemon juice and toss well.
- Pour the fruit mixture over the bottom crust you’ve just pressed into the baking pan.
- Pour the remaining flour mixture over the peach layer.
- Bake at 350°F (175°C) for about 40-45 minutes, or until the top crust is just barely golden brown.
- Let the bars cool completely in the pan before cutting into them or trying to remove them from the pan – they’ll continue to bake a little after you’ve removed them from the oven and they’ll need to cool in order to maintain their shape.
- Once cool, cut them into 24 bars and serve.
Recipe: Notes
Recipe: Nutrition
Notice: Nutrition is auto-calculated, using Spoonacular, for your convenience. Where relevant, we recommend using your own nutrition calculations.
TRY OUR MEAL PLAN BUNDLE!
Let us do the work for you with 11 WEEKS of deliciously easy family dinners, grocery lists, meal prep guides and so much MORE!
11 weeks of done-for-you family meal plans for only $9.99!