
This Easy Pizza Dough is the only homemade pizza dough recipe you’ll ever need. Five simple ingredients, a quick-rise or overnight rise option, and the kind of chewy, bubbly crust that makes Italian wood-fired style pizza right in your own kitchen. You’ll LOVE this complete tutorial for baking real artisan pizza in a regular oven or an outdoor electric pizza oven – your choice!
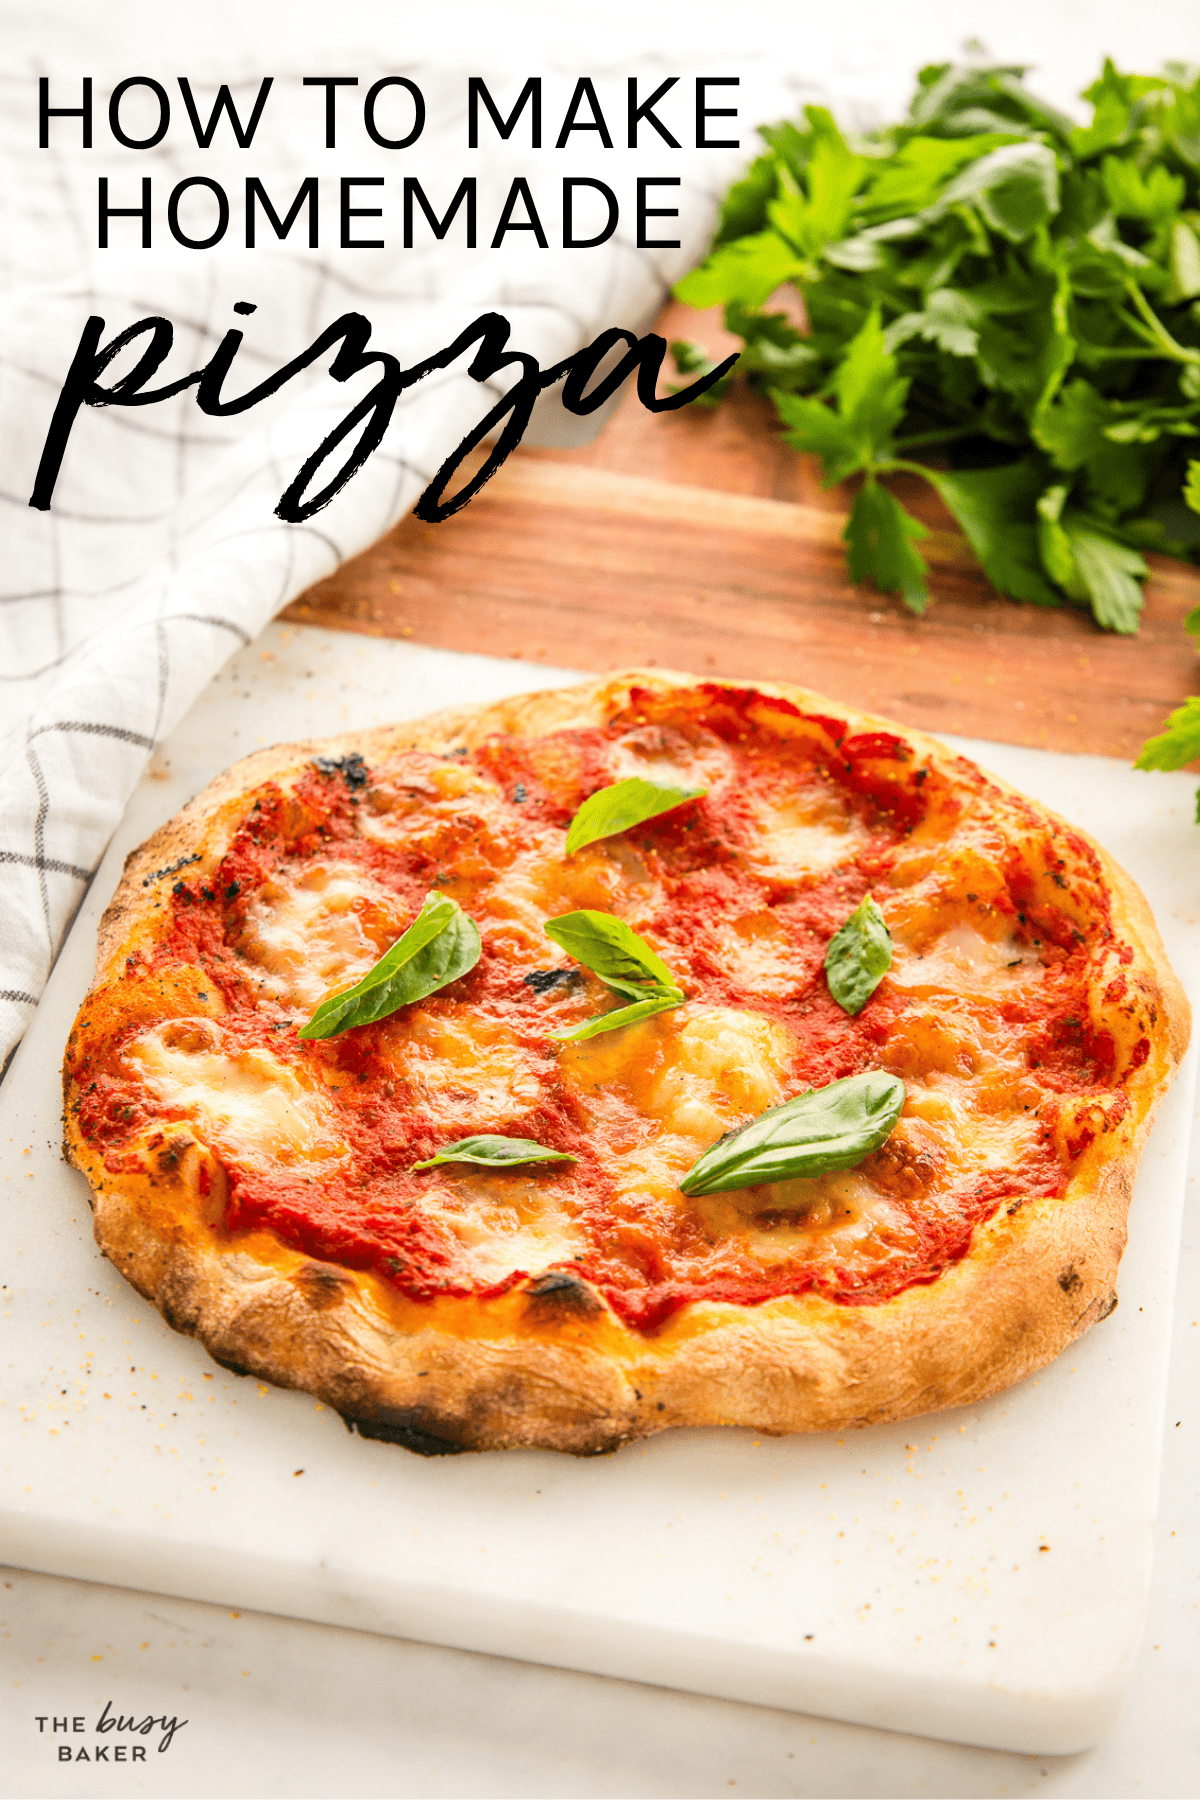
This Easy Pizza Dough is going to change your pizza nights for good!
Just 5 simple ingredients — flour, water, yeast, salt, and a tiny bit of honey. Mix it up, let it rise, top it, bake it. The result is a chewy, bubbly, pizzeria-quality pizza, made right in your own kitchen.
I tested this recipe with all-purpose flour, bread flour, and different varieties of Italian “00” pizza flour. Believe it or not, all-purpose won every single time. Bread flour made the dough too tough. “00” flour made it too crispy and MUCH harder to work with (I see you, beginners!). All-purpose flour gave me the most reliable, chewy, bubbly result every single time, and it’s the easiest to find at any grocery store. That’s the recipe!
This tutorial also covers how to bake the pizza, which is the part most pizza recipes online get wrong. With the right setup in your regular kitchen oven, OR using an electric outdoor pizza oven, you can make real wood-fired-style pizza at home. I’ll walk you through exactly how to do it!

Three things make this recipe so so good. The flour. The hydration. And the rise.
All-purpose flour is the secret to consistent results – I tested it against bread flour and “00” pizza flour and it won every time. It gives you a chewy, bubbly crust without the toughness of bread flour or the crispness of “00.” And anyone can find it at any grocery store, on a budget.
The hydration of this dough is slightly higher than most home pizza doughs (that’s the ratio of water to flour in the dough), which is what gives you that open, airy crumb you see at real Italian pizzerias or European restaurants. The dough will feel a little stickier than your average bread dough, but that’s exactly what we’re going for. Don’t add more flour to fight it, just oil your hands instead.
The yeast and rise method is the third secret of this recipe. You’ve got two options: a quick rise (2 hours at room temperature with 2 1/4 teaspoons of yeast), or an overnight rise (18-24 hours in the fridge with just 1/2 teaspoon of yeast). The overnight method is how real pizzerias do it — the long, slow ferment develops a much deeper flavour and a more open crumb in the dough. The quick rise is great when you want pizza tonight, but the overnight rise is the real winner. There’s more on choosing between these two options below.
Here’s my honest answer: overnight is significantly better! But quick rise is great when you need pizza tonight and you forgot to plan ahead.
Overnight rise (the artisan way): Mix the dough the night before. Cold-ferment it in the fridge for 18-24 hours. Pull it out the next day. The long, slow ferment develops a deep, slightly tangy flavour you can’t get any other way — and a more open, bubbly crumb because the gluten has time to fully develop. This is how wood-fired pizzerias make their dough and it makes the pizza SO good.
That’s also why the overnight version uses only 1/2 teaspoon of yeast instead of a full 2 1/4 teaspoons. With 18-24 hours to work, the yeast has plenty of time. Using more yeast would over-proof the dough and give you a flat, deflated mess by the next day.
Quick rise: Mix the dough, let it rise at room temperature for 2 hours, use it. Still great pizza. The flavour just won’t be as developed and the crumb won’t be quite as open. Perfect for a weeknight where you didn’t plan ahead.
My recommendation: If you can think one day ahead, go for the overnight rise every time. Mix the dough at night while you clean up after dinner…it’s actually less work in the moment because most of the rise happens while you sleep. And the difference it makes is real!
A few simple things make a HUGE difference in how this recipe turns out.
Stir the yeast and honey into the warm water. Let it sit for 5-10 minutes until foamy. If no foam forms, the yeast is dead. Start over with fresh yeast.
About 43°C (110°F), warm but not hot. If you don’t have a thermometer, it should feel comfortably warm on the inside of your wrist, like a baby’s bath. Too cold and the yeast won’t activate. Too hot and you’ll kill it.
This dough needs serious kneading — 6-8 minutes in a stand mixer with a dough hook, or 10 minutes by hand. The stand mixer is much easier and more reliable.
The dough will be sticky. That’s ok! Oil your hands and your work surface instead. Adding flour to fight the stickiness gives you a tougher, denser crust.
Keeps the dough from sticking as it rises. For overnight rises, an oiled gallon zip-top bag is genius — it takes up less fridge space and the dough is easy to scoop out the next day.
Cold dough doesn’t stretch well and bakes unevenly. This is non-negotiable for the overnight version.
This relaxes the gluten in the dough and makes stretching it out way easier.

Time needed: 2 hours 30 minutes for quick rise, or 18-24 hours for overnight rise (most of which is hands-off).
- Bloom the yeast. In a small bowl, combine the warm water and honey. Sprinkle the yeast over top (2 1/4 teaspoons for quick rise, OR 1/2 teaspoon for overnight rise — the only difference between the two methods). Let sit for 5-10 minutes until it’s foamy. You can also bloom the yeast in the bowl of the stand mixer instead of a separate bowl.
- Combine the dry ingredients. In the bowl of a stand mixer fitted with a dough hook, whisk together the flour and salt.
- Mix the dough. Pour in the bloomed yeast mixture. Mix on low to bring it together, then knead on medium-low for 6-8 minutes, until the dough is smooth, stretchy, and pulls away from the sides. It will be a little sticky (If you’re kneading by hand, work on a lightly oiled surface with oiled hands for about 10 minutes).
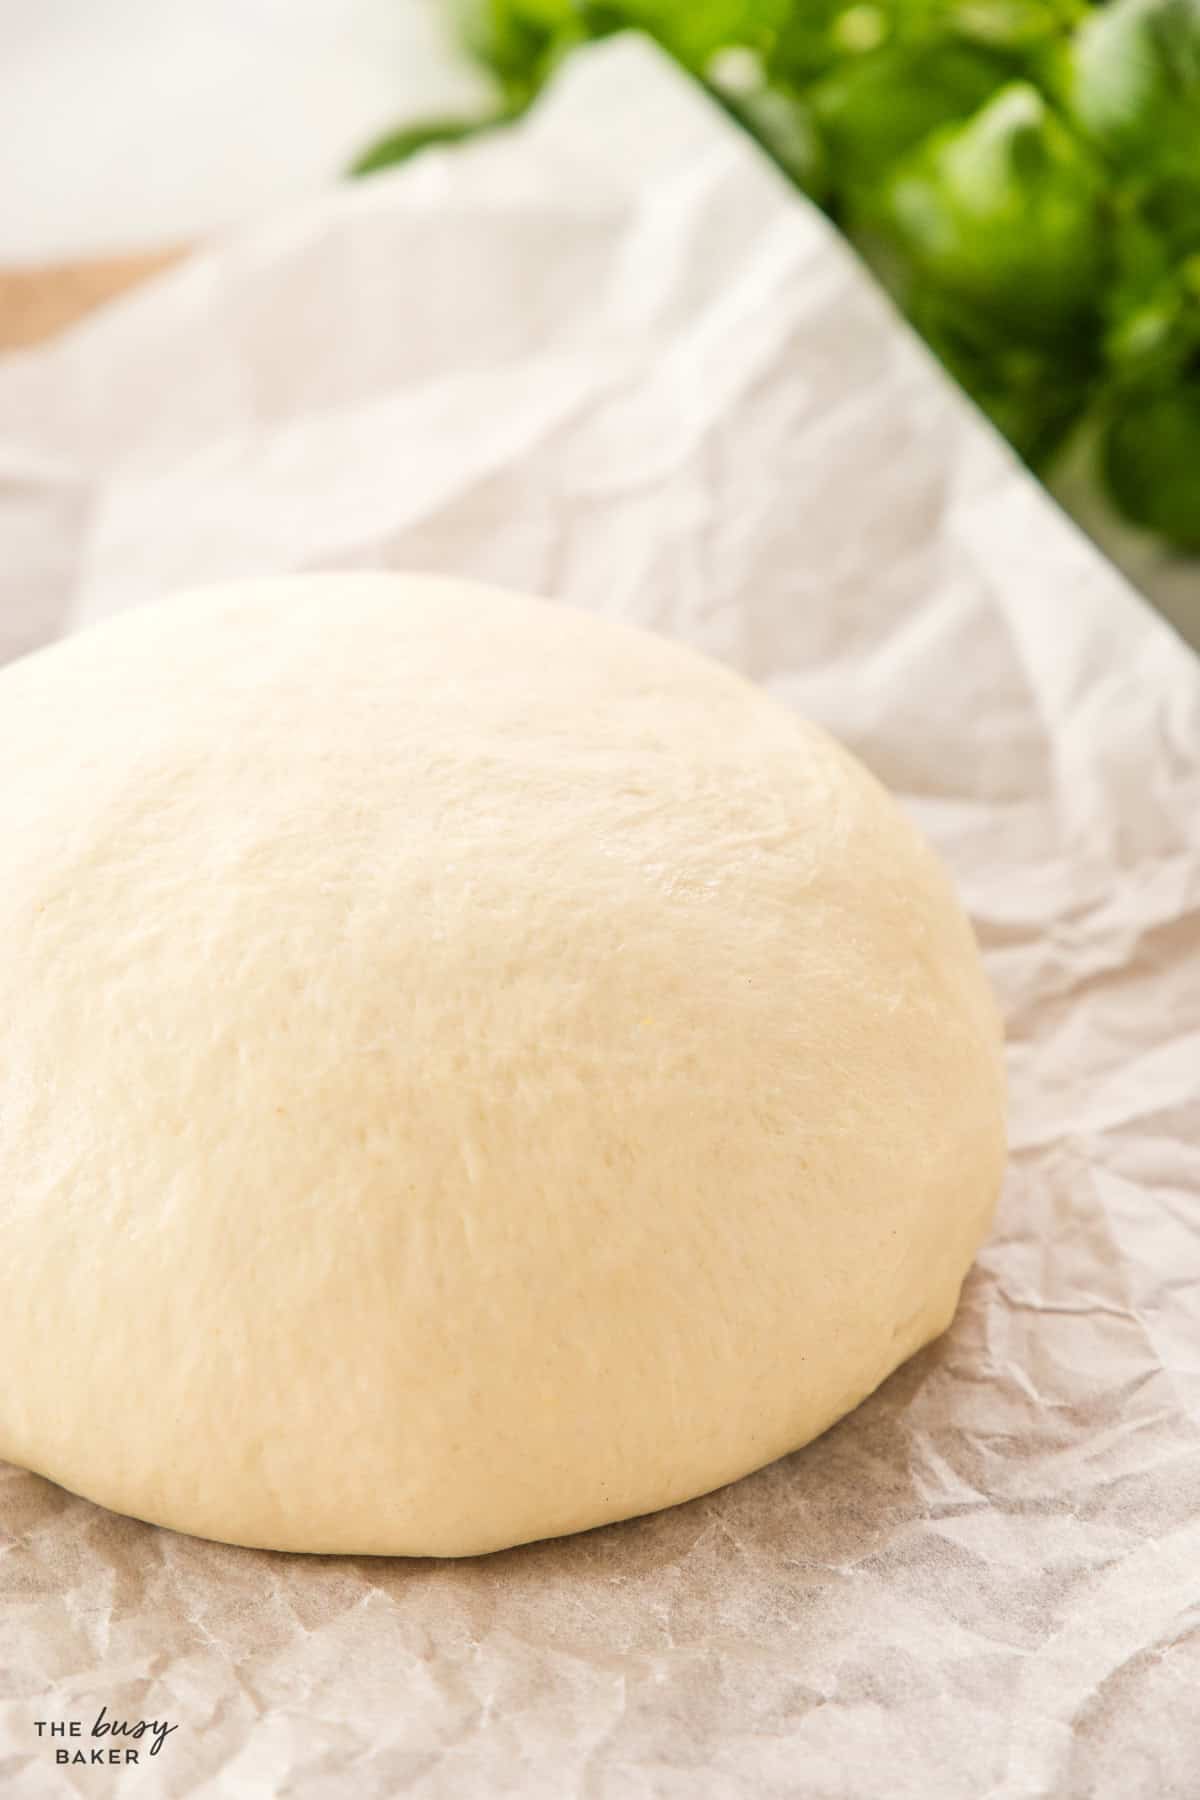
- First rise. Lightly oil a large bowl. Place the dough in, turn to coat, and cover with plastic wrap or a damp tea towel. Quick rise: let it rise at room temperature for at least 2 hours, until roughly doubled. Overnight rise: transfer to an oiled gallon zip-top bag, seal, and refrigerate for 18-24 hours.
- Bring overnight dough to room temperature. Take the dough out of the fridge 1 hour before you plan to bake the pizza (let it rest, covered, for an hour at room temperature).
- Divide and rest. Turn the dough out onto a lightly oiled surface. Divide into 2 portions for large pizzas or 3-4 for mediums. Form each into a smooth ball by tucking the edges underneath. Cover with a damp tea towel and let rest for 20 minutes – this is what makes the dough easy to stretch.
- Stretch, top, and bake. See the sections below for how to make the BEST homemade pizza!
Stretching pizza dough is a learned skill, and it’s not as hard as it looks. The trick is to never use a rolling pin. A pin presses out the air bubbles you spent hours developing as the dough was rising. Stretch the dough by hand instead.
Step 1: Flour your work surface very lightly – just enough to prevent sticking. You can also oil your hands slightly.
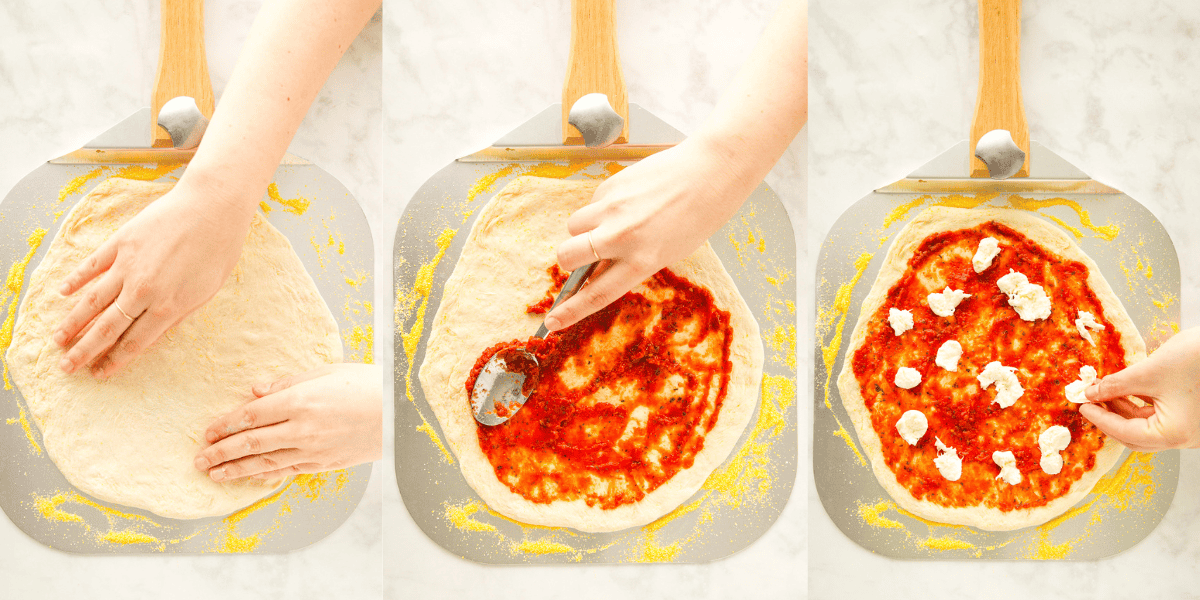
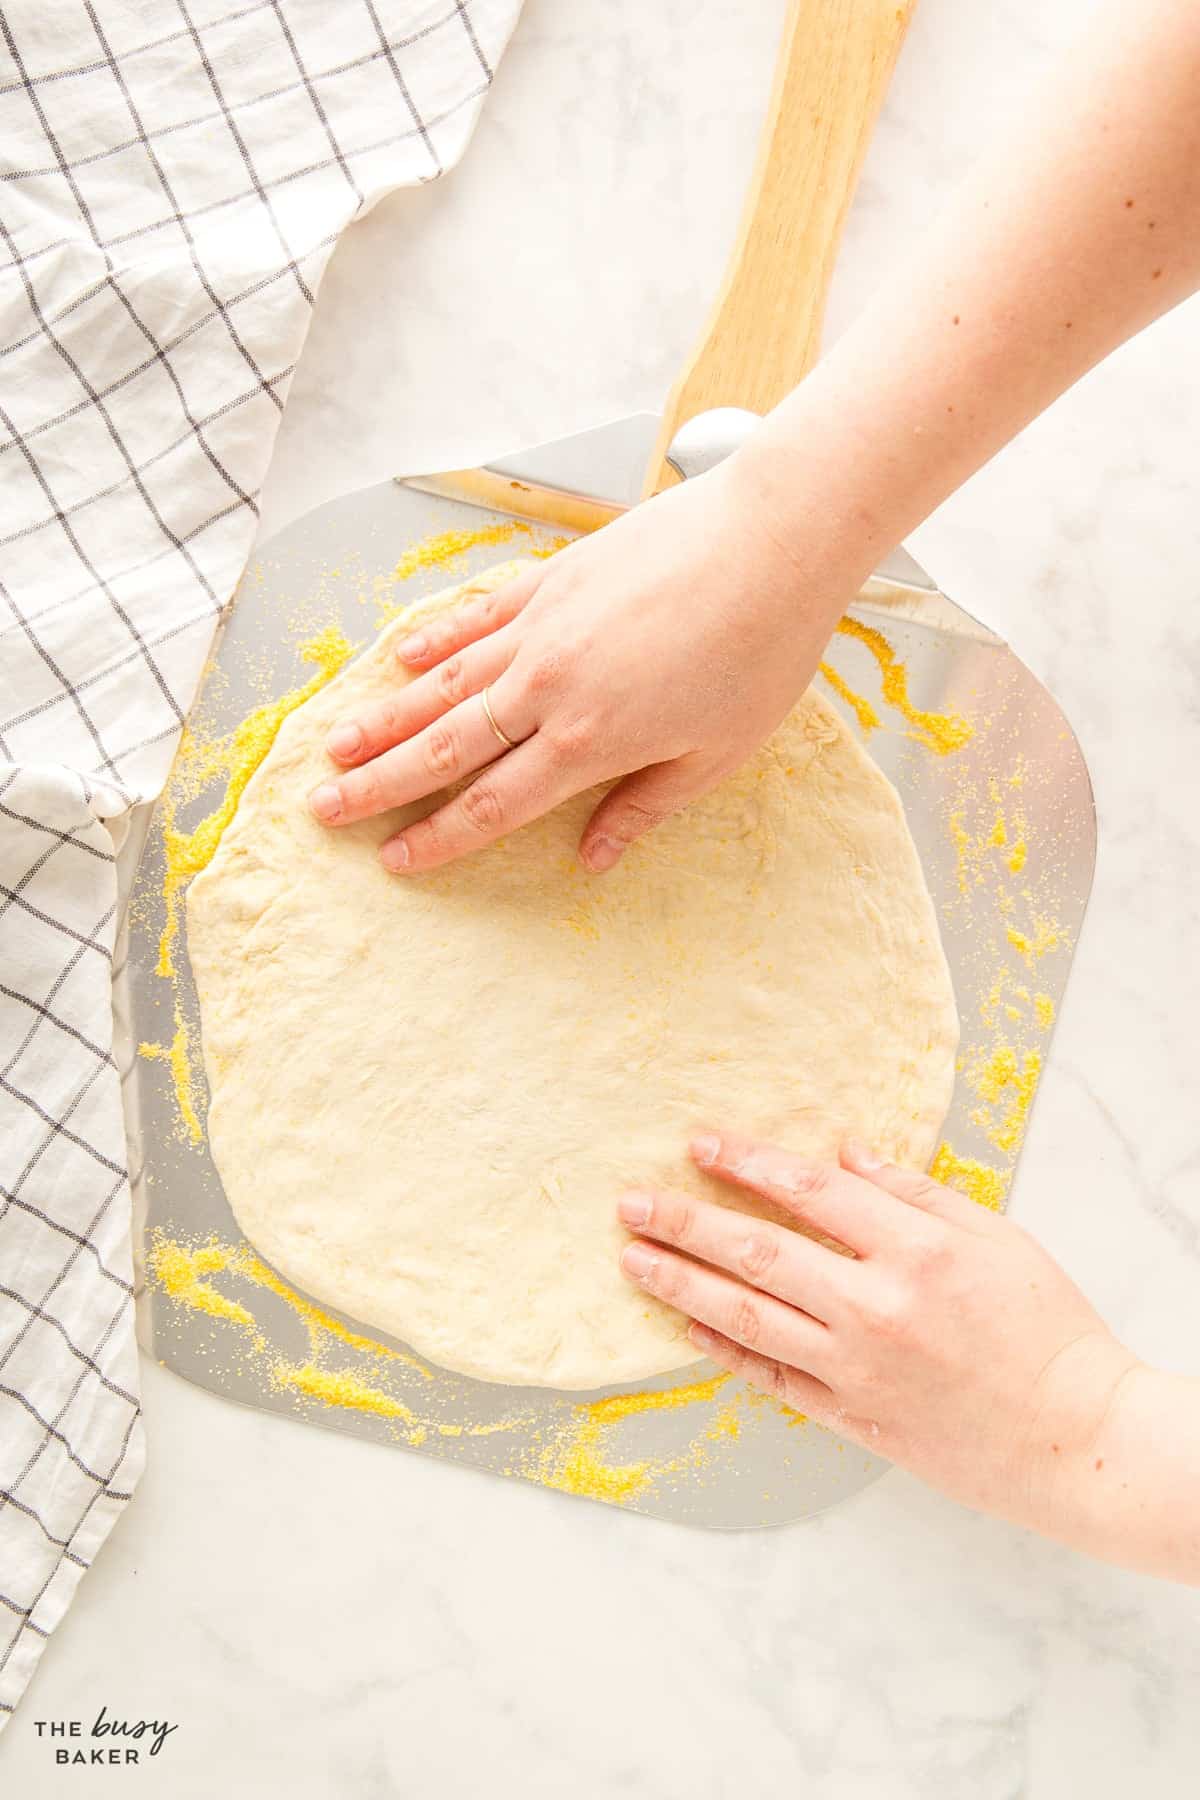
Step 2: Press out from the centre. Use your fingertips to press the dough down from the centre outward, leaving a 1/2-inch rim around the edge untouched. Work in a circle, pressing and rotating the dough around and around.
Step 3: Pick it up and stretch it out. Drape the dough over the backs of your hands (your knuckles, not your fingertips, because fingertips can poke holes through the dough). Rotate it like a steering wheel, letting gravity stretch it as you turn it. If it resists or springs back, set it down for another 5 minutes to rest and try again.
Step 4: Transfer to your pizza peel or board. Move the stretched dough (typically 10-12 inches for a medium pizza) to a pizza peel or board that’s been generously dusted with semolina or cornmeal. The semolina or cornmeal helps the pizza slide off cleanly. Don’t use flour – it burns at high temperatures and can taste bitter.
Step 5: Top the dough quickly. Have your sauce, toppings, and cheese ready before you stretch the dough. The longer the dough sits on the peel, the more likely it is to stick.
This is the part most pizza recipes get wrong. To make real pizzeria-style pizza in a regular oven, you need to set it up to deliver the kind of heat your pizza needs.
A pizza stone is the single best investment for homemade pizza. They’re cheap ($20-30), widely available in most grocery stores and homeware stores, and the difference between a pizza stone and a metal pan is night and day. Stones absorb and hold heat in a way metal pans can’t, transferring it straight into the dough so the bottom crisps up while the top bakes.
If you don’t have a pizza stone, a non-enamelled cast iron pan works almost as well, and you can preheat it the same way you would a pizza stone. Just be sure to shape your pizzas so they’re slightly smaller than the base of the cast iron pan.
A pizza peel makes moving and retrieving pizzas from the oven easier. Wooden pizza peels are great for launching (the dough doesn’t stick as easily to wood), and metal pizza peels are great for retrieving (they slide under the crust easily). A sturdy cutting board or inverted baking sheet works as a substitute if you don’t have a pizza peel, and a bench scraper is also handy for portioning dough cleanly (paid links).
Place your pizza stone on the top rack of your oven. This might seem counterintuitive…most pizza recipes will tell you to use the middle rack, but the top rack with the broiler is the magic combination for home pizza. Pizza needs heat from above (to brown cheese and toppings) and heat from below (to crisp the crust) at the same time. The top rack with the broiler delivers both.
Preheat your oven for at least 45 minutes at maximum temperature, usually 260-290°C (500-550°F). This is non-negotiable. When your oven hits 260°C, the air is at 260°C. The stone needs at least 45 minutes, ideally 45 minutes to an hour, to soak up that heat. A stone preheated for 60 minutes transfers heat to the dough twice as fast as one preheated for 20. This will reduce the baking time for your pizza, giving you a result that’s as close as possible to a wood-fired pizza.
Just before launching the pizza, switch the oven from bake to broil. Launch the pizza onto the screaming-hot stone. The broiler blasts heat from above while the stone handles the bottom. Bake for 4-6 minutes, watching closely the whole time. This is fast cooking, and pizza can go from perfect to burnt in just seconds.
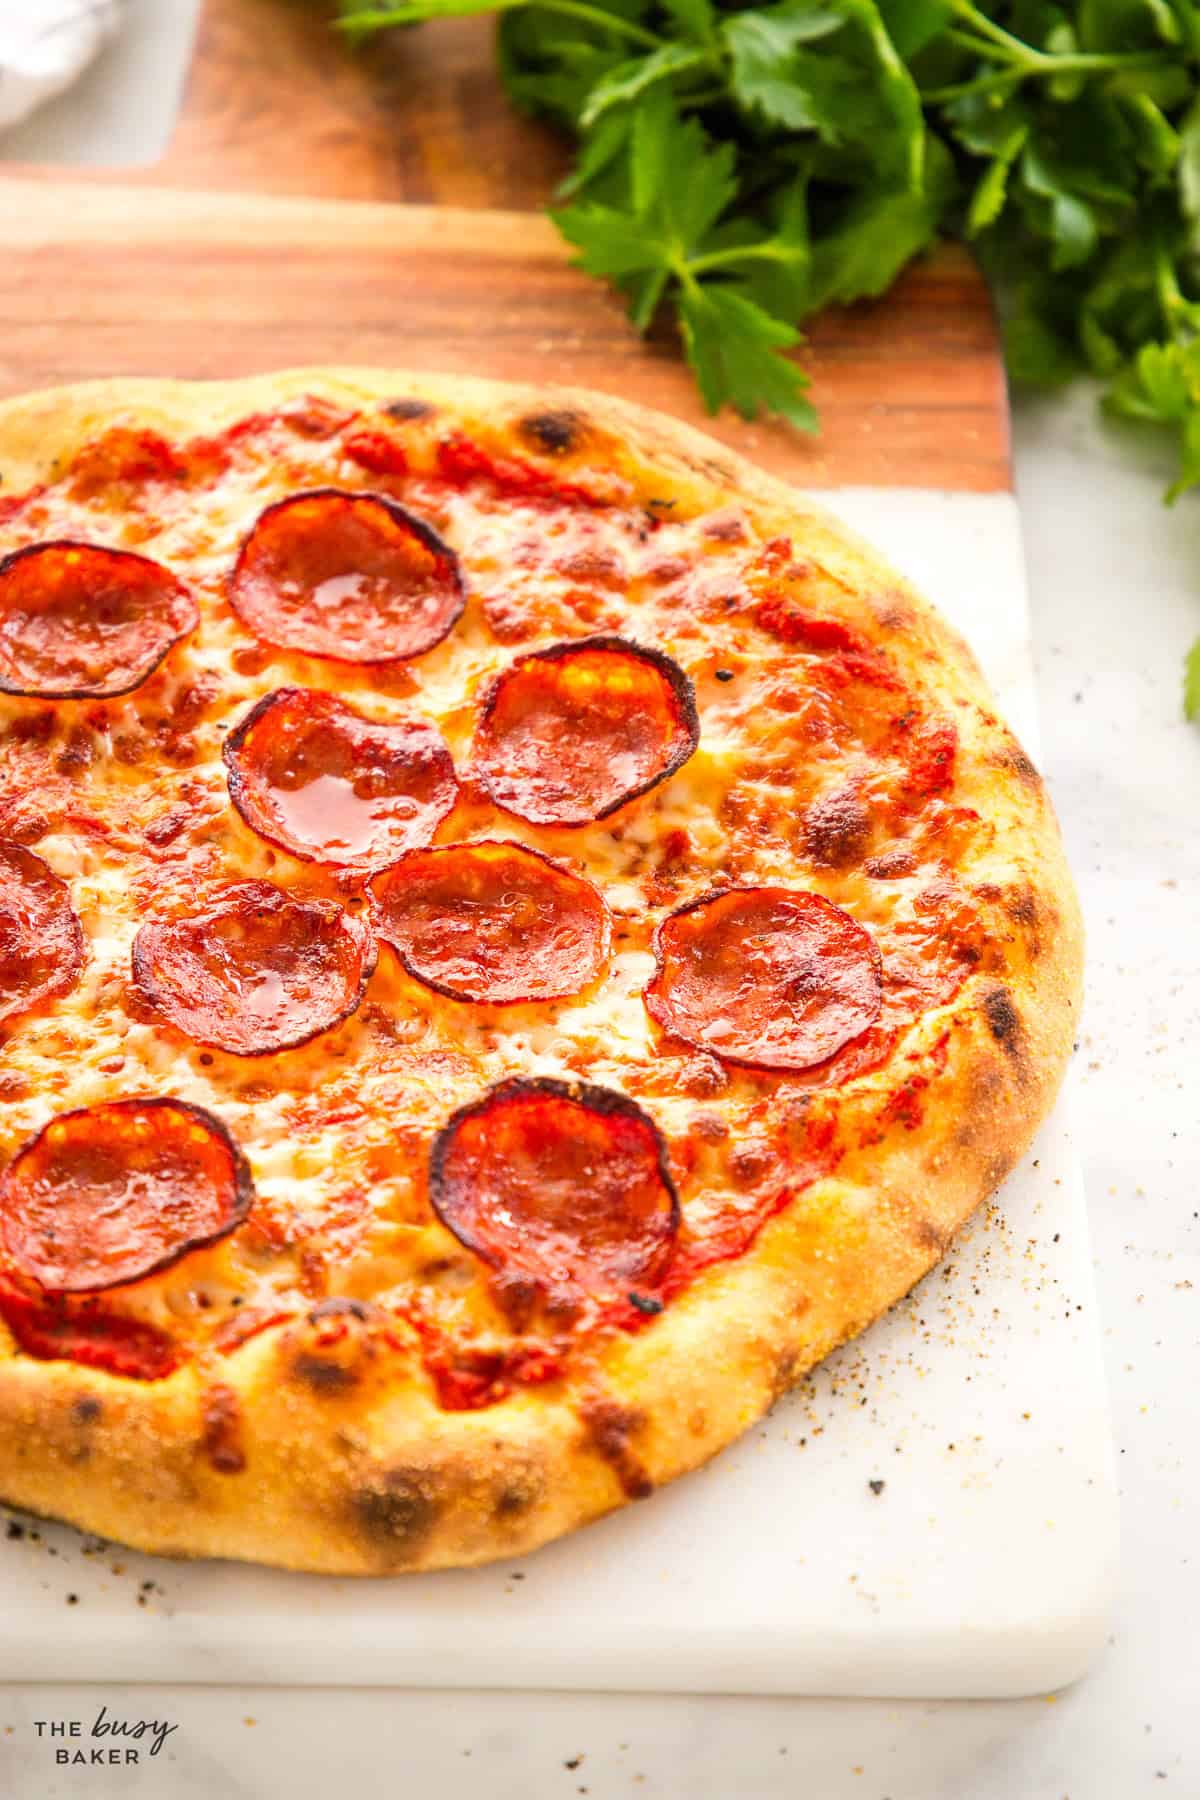
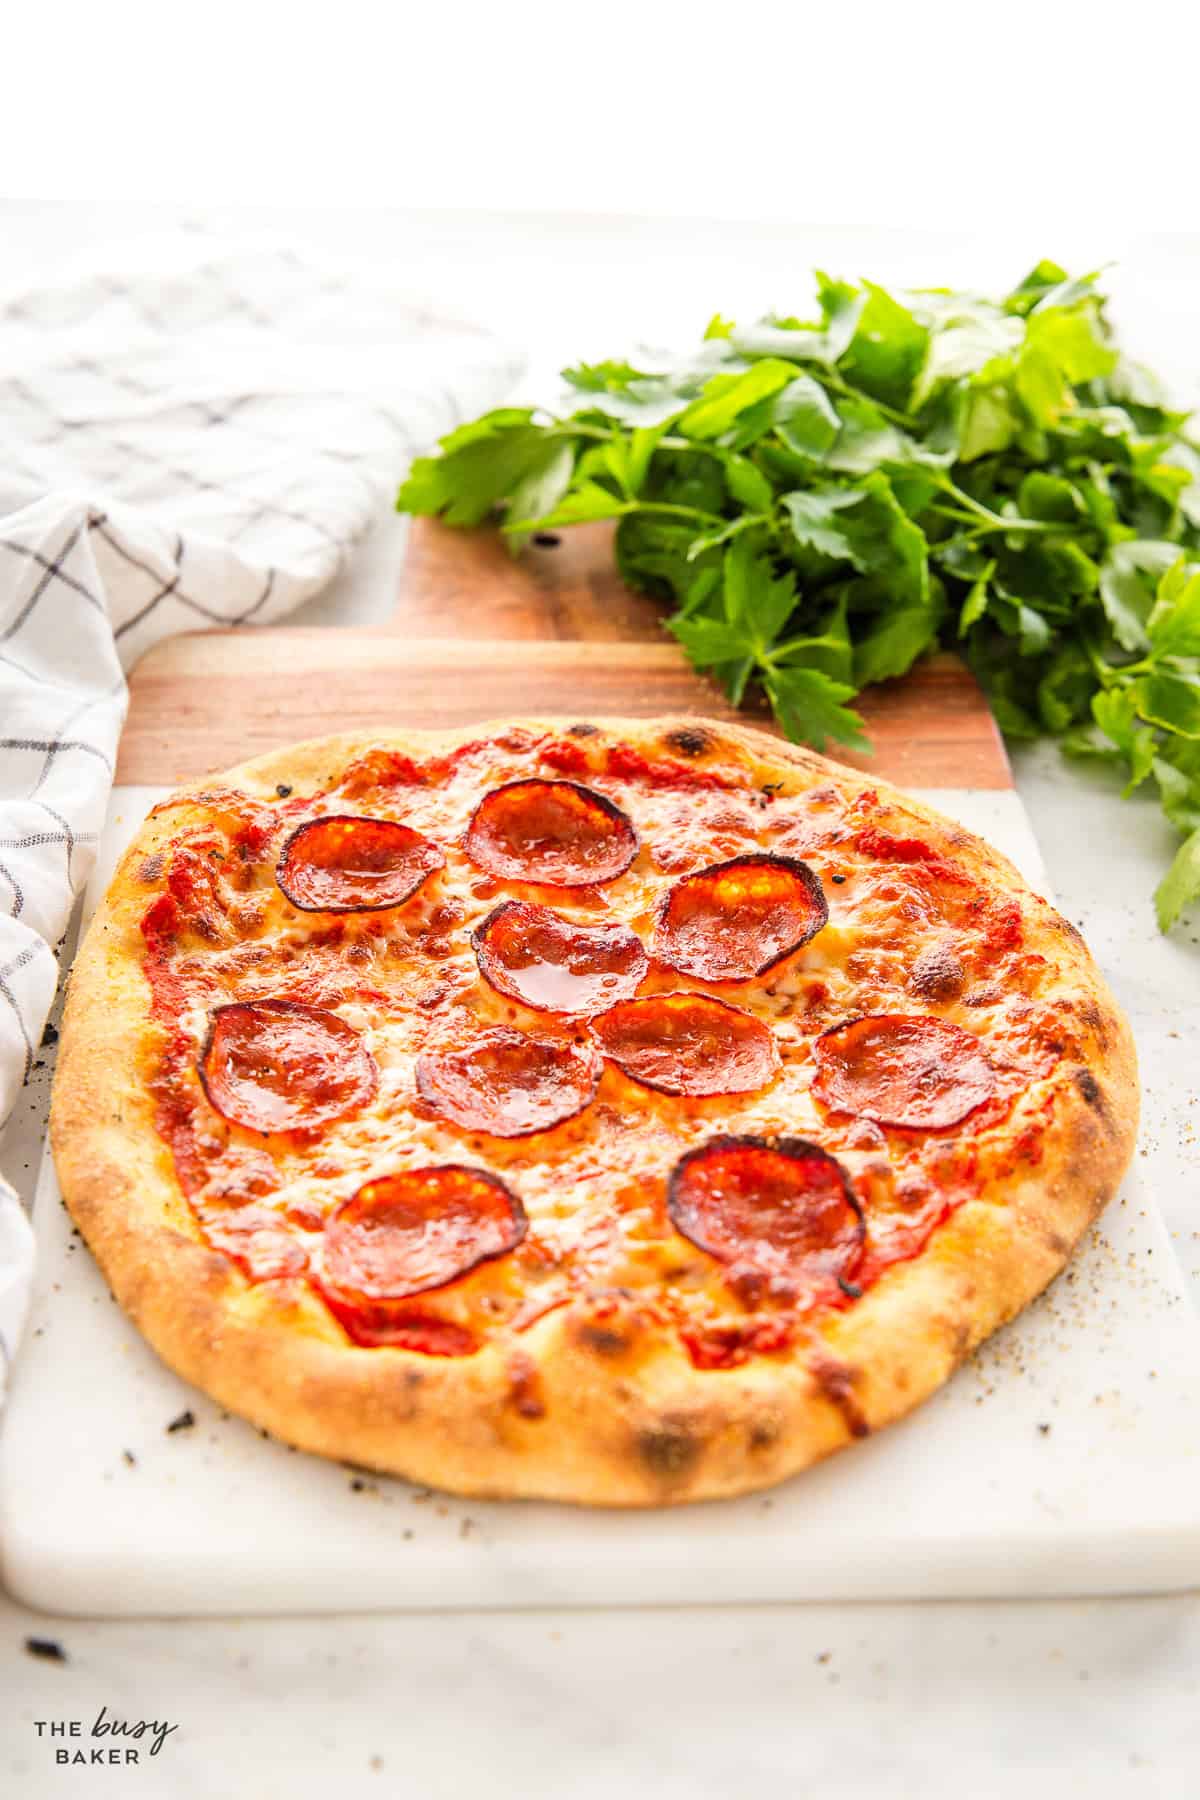
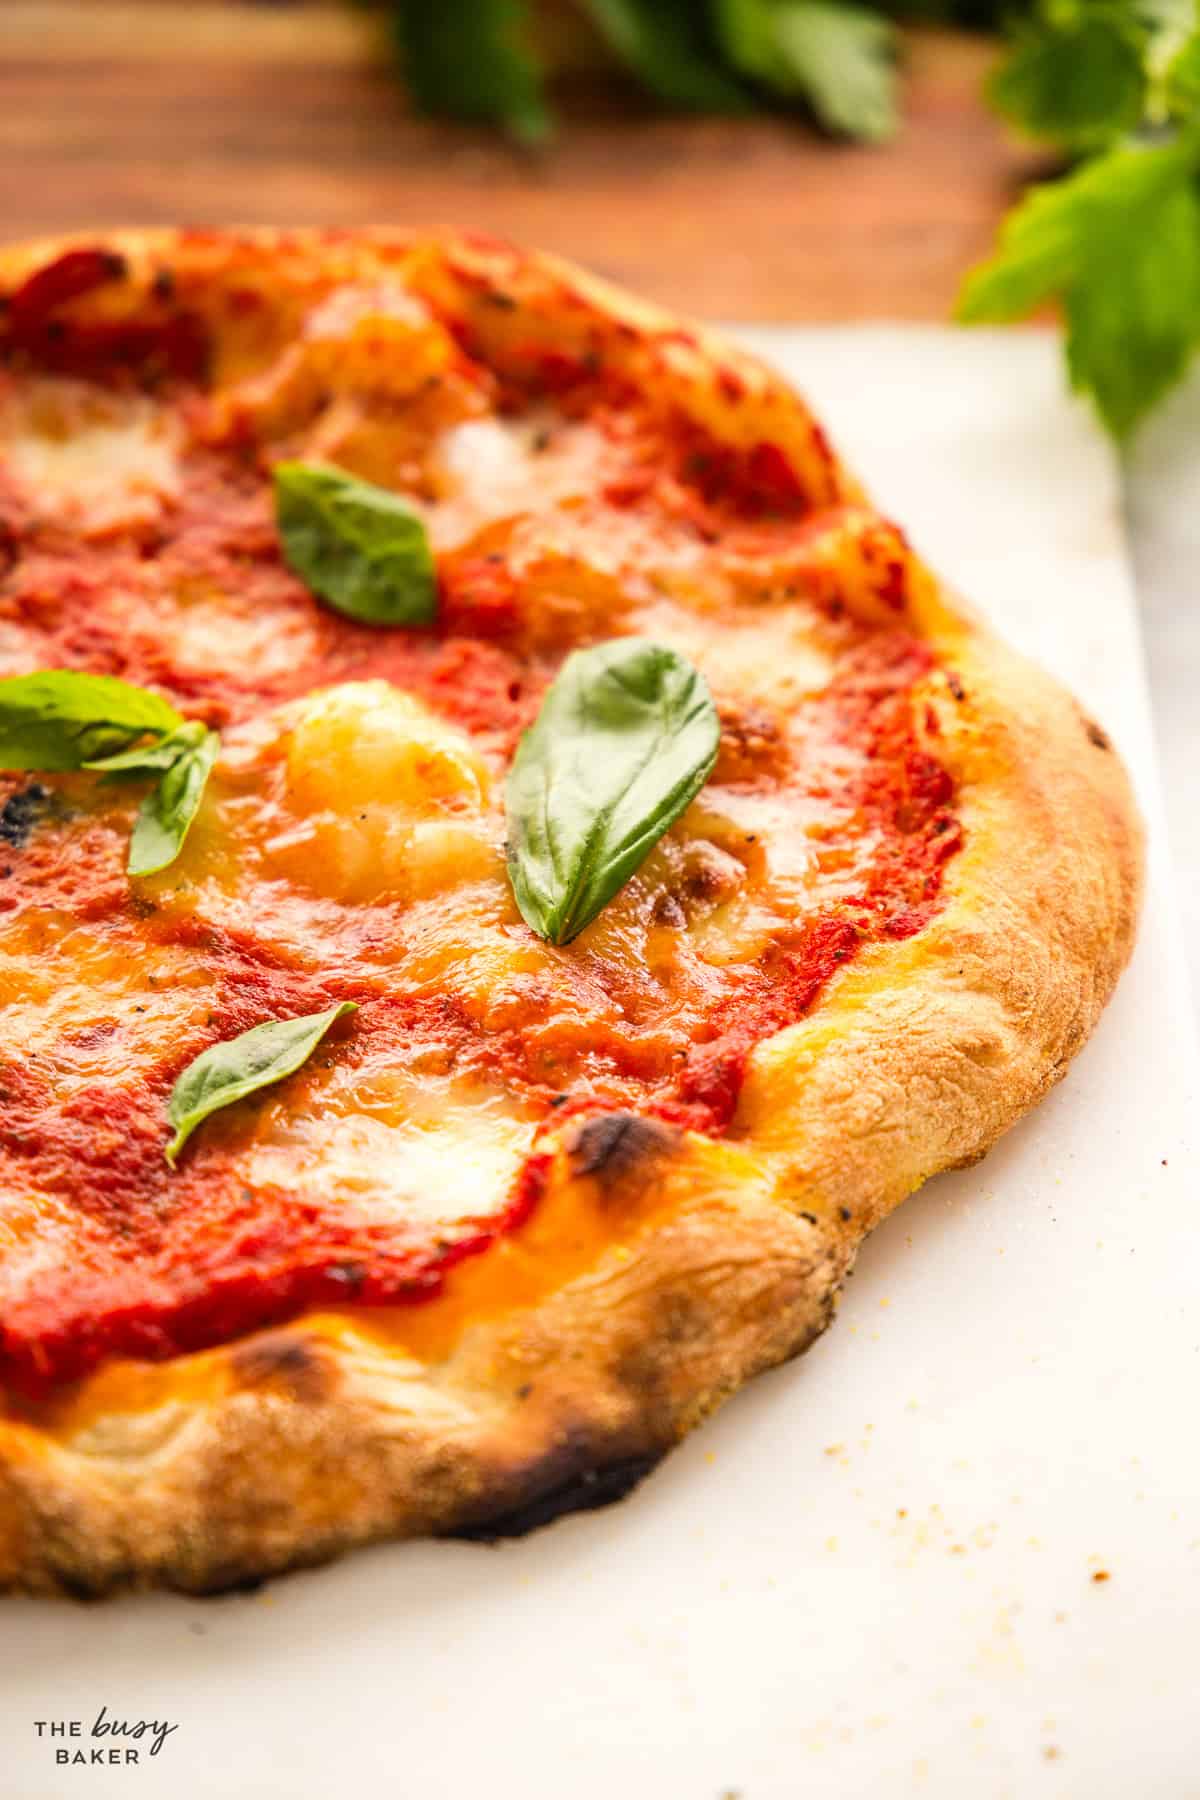
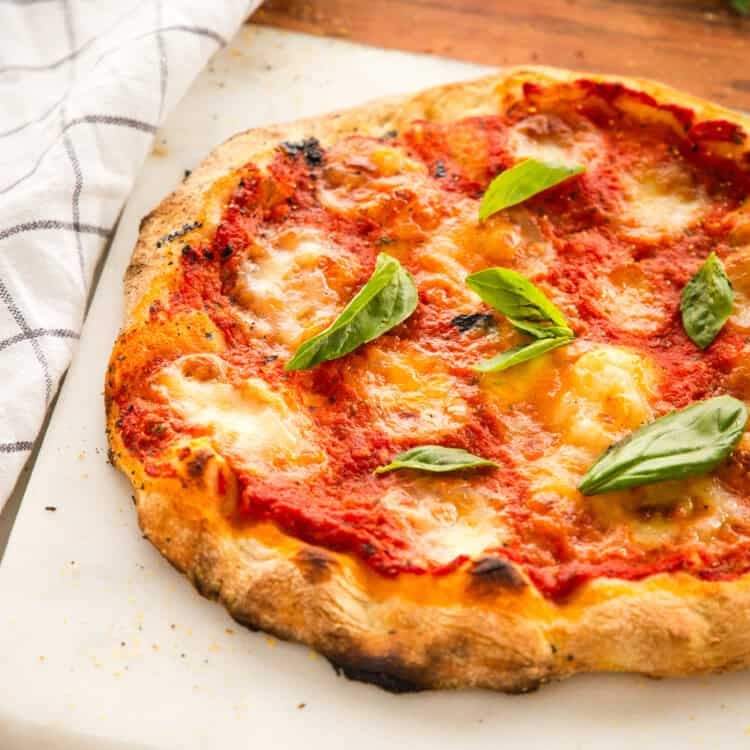
Pull it out when the crust is well-spotted (some leopard-style brown spots are exactly what you want) and the cheese is bubbly and lightly browned. Let it rest for 1-2 minutes before slicing so the cheese sets.
The biggest mistake home pizza-makers make is adding too many toppings – especially too much sauce and too much cheese. About 1/3 to 1/2 cup of sauce per 12-inch pizza, spread very thin. About 1 cup of shredded cheese, maximum. Overloading either makes the bottom soggy and the top watery. Less really is more.
This goes for toppings like mushrooms, tomatoes, peppers and onions too, all of which contain water that gets released as the pizza bakes. If you want to avoid a watery pizza, add fewer toppings or saute your veggies first to dehydrate them before baking.
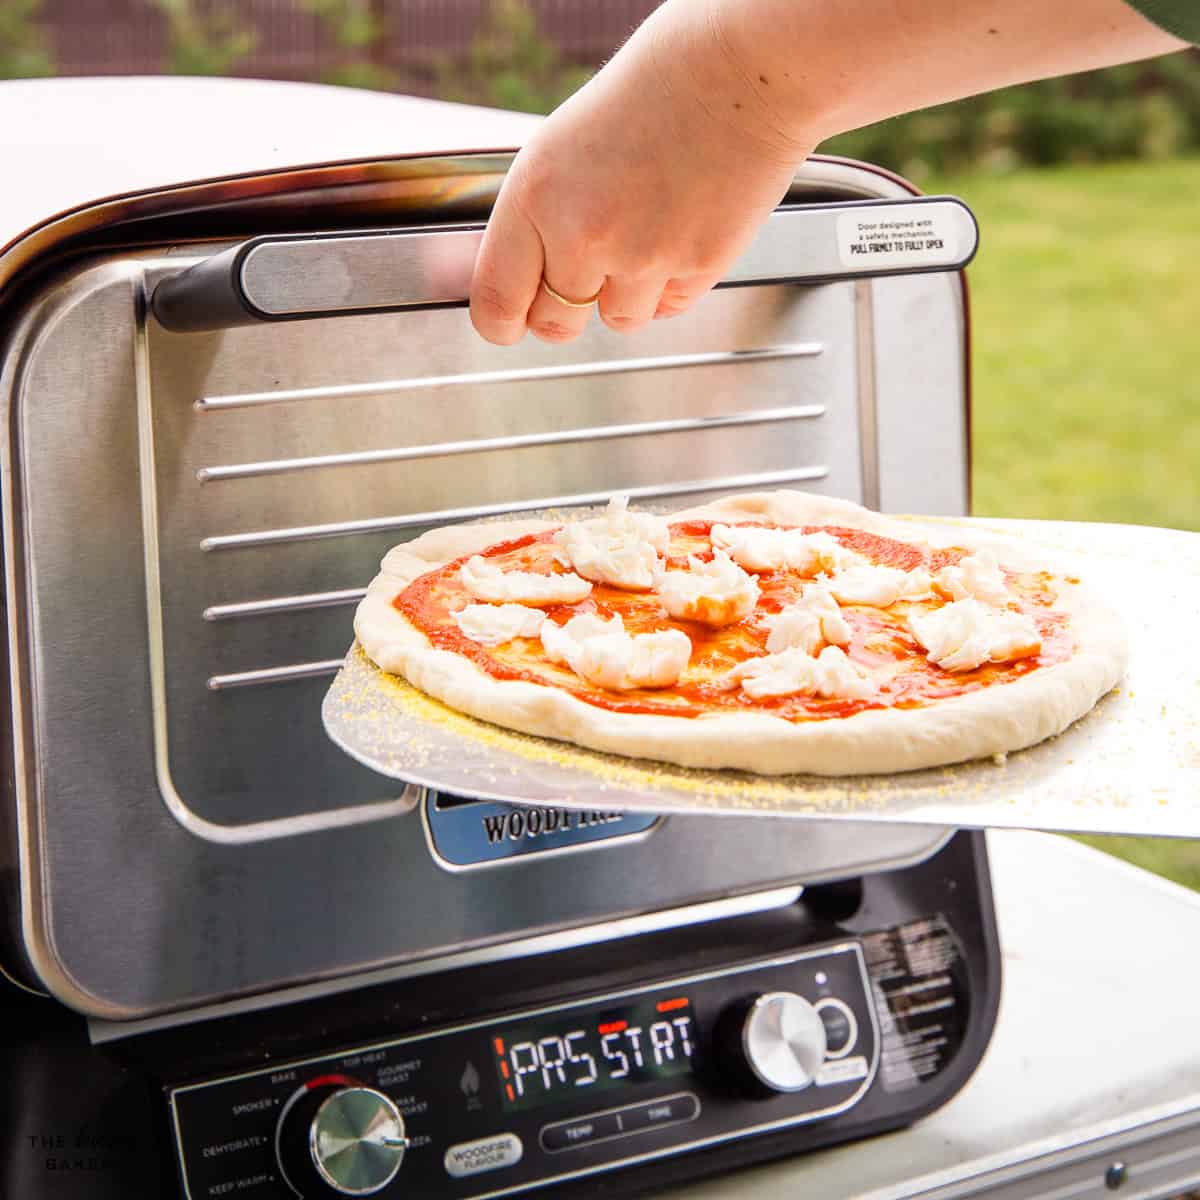
If you’ve got an outdoor pizza oven, like an Ooni, a Ninja, or any of the budget options that have taken over the last few years, you’ve already done the hard work. These ovens hit 370-480°C (700-900°F), temperatures impossible to reach in a regular kitchen oven. That’s what creates true wood-fired-style pizza at home.
We bought a Ninja outdoor pizza oven last year and it’s been one of the BEST kitchen purchases we’ve ever made! The pizzas it makes are no different from what we order from our favourite local wood-fired pizza restaurant, and it’s already paid for itself a few times over with all the money we’ve saved ordering pizza!! (paid link)
Preheat the pizza oven according to the manufacturer’s instructions. This usually takes 15-20 minutes at the highest setting. Stretch and top your pizza on a peel dusted with semolina or cormmeal. Slide the pizza onto the hot stone in the oven. Bake for about 3 minutes seconds. No need to rotate the pizza halfway through – you’ll get better colour on the crust if you leave the oven door shut. Pull it out after 2 and a half to 3 minutes and the crust should be well-spotted and perfect!
The pizzas cook FAST. Don’t walk away. Stand right at the oven with the peel in your hand and watch the whole time. At these temperatures, you can go from perfect to burnt in 30 seconds.
Reduce baking time the longer you’re cooking. If you’re making 3, 4, 5 or more pizzas, you can likely reduce the baking time to 2 and a half minutes instead of 3 since the oven usually gets a little hotter the longer it’s on.
Use less sauce, less cheese, and less of everything. The fast bake doesn’t give as much time for liquid to evaporate off the surface of the pizza, so heavy sauce and watery ingredients makes the pizza soggy. Keep it light when it comes to toppings!
Smaller pizzas work better. Most outdoor pizza ovens are designed for 10-12 inch pizzas. This recipe makes enough dough for 4 at this size – perfect for a pizza party!

The basic dough and my basic pizza sauce recipe work with whatever toppings you love. Here are a few family favourites we enjoy:
- Classic Margherita. Pizza sauce, sliced fresh mozzarella, fresh basil leaves, and a drizzle of good olive oil after baking.
- Pepperoni and cheese. Pizza sauce, shredded mozzarella, lots of pepperoni. The classic nobody complains about.
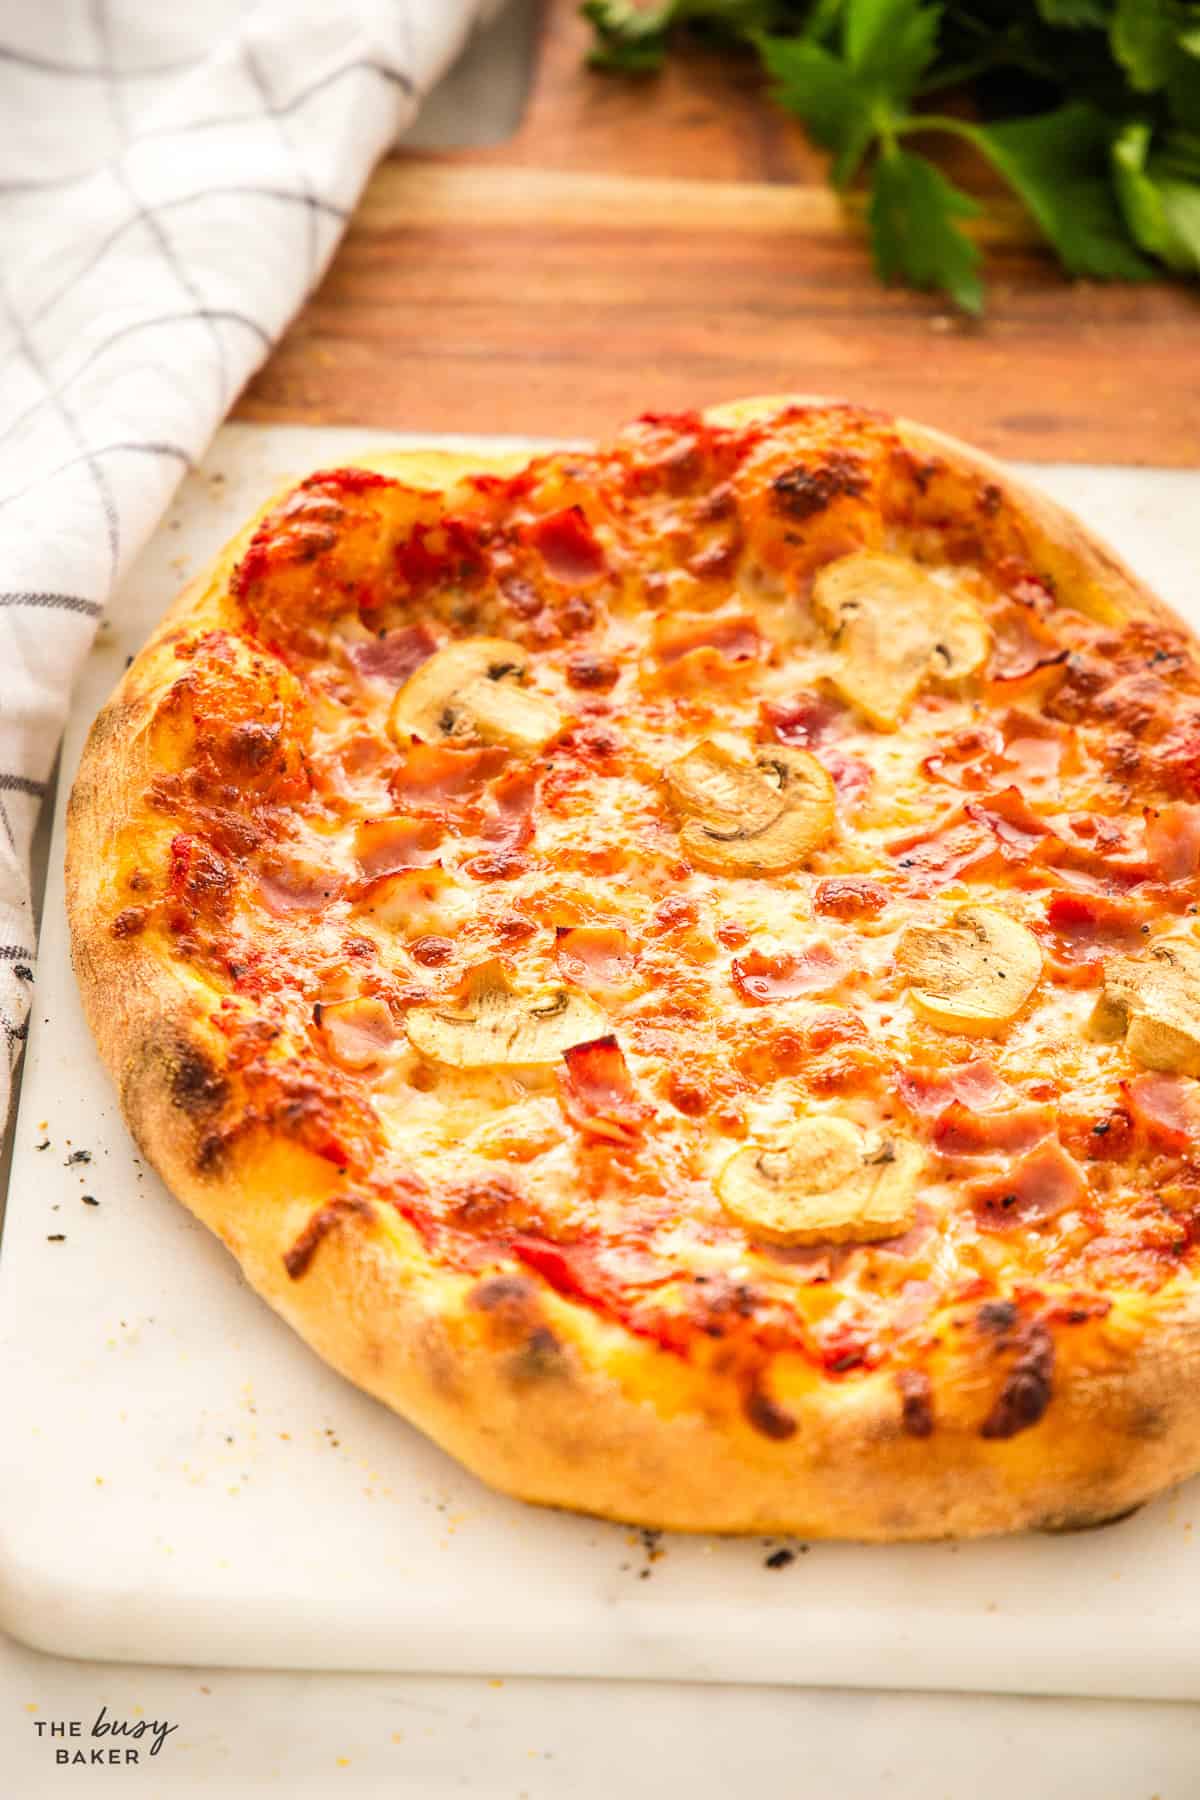
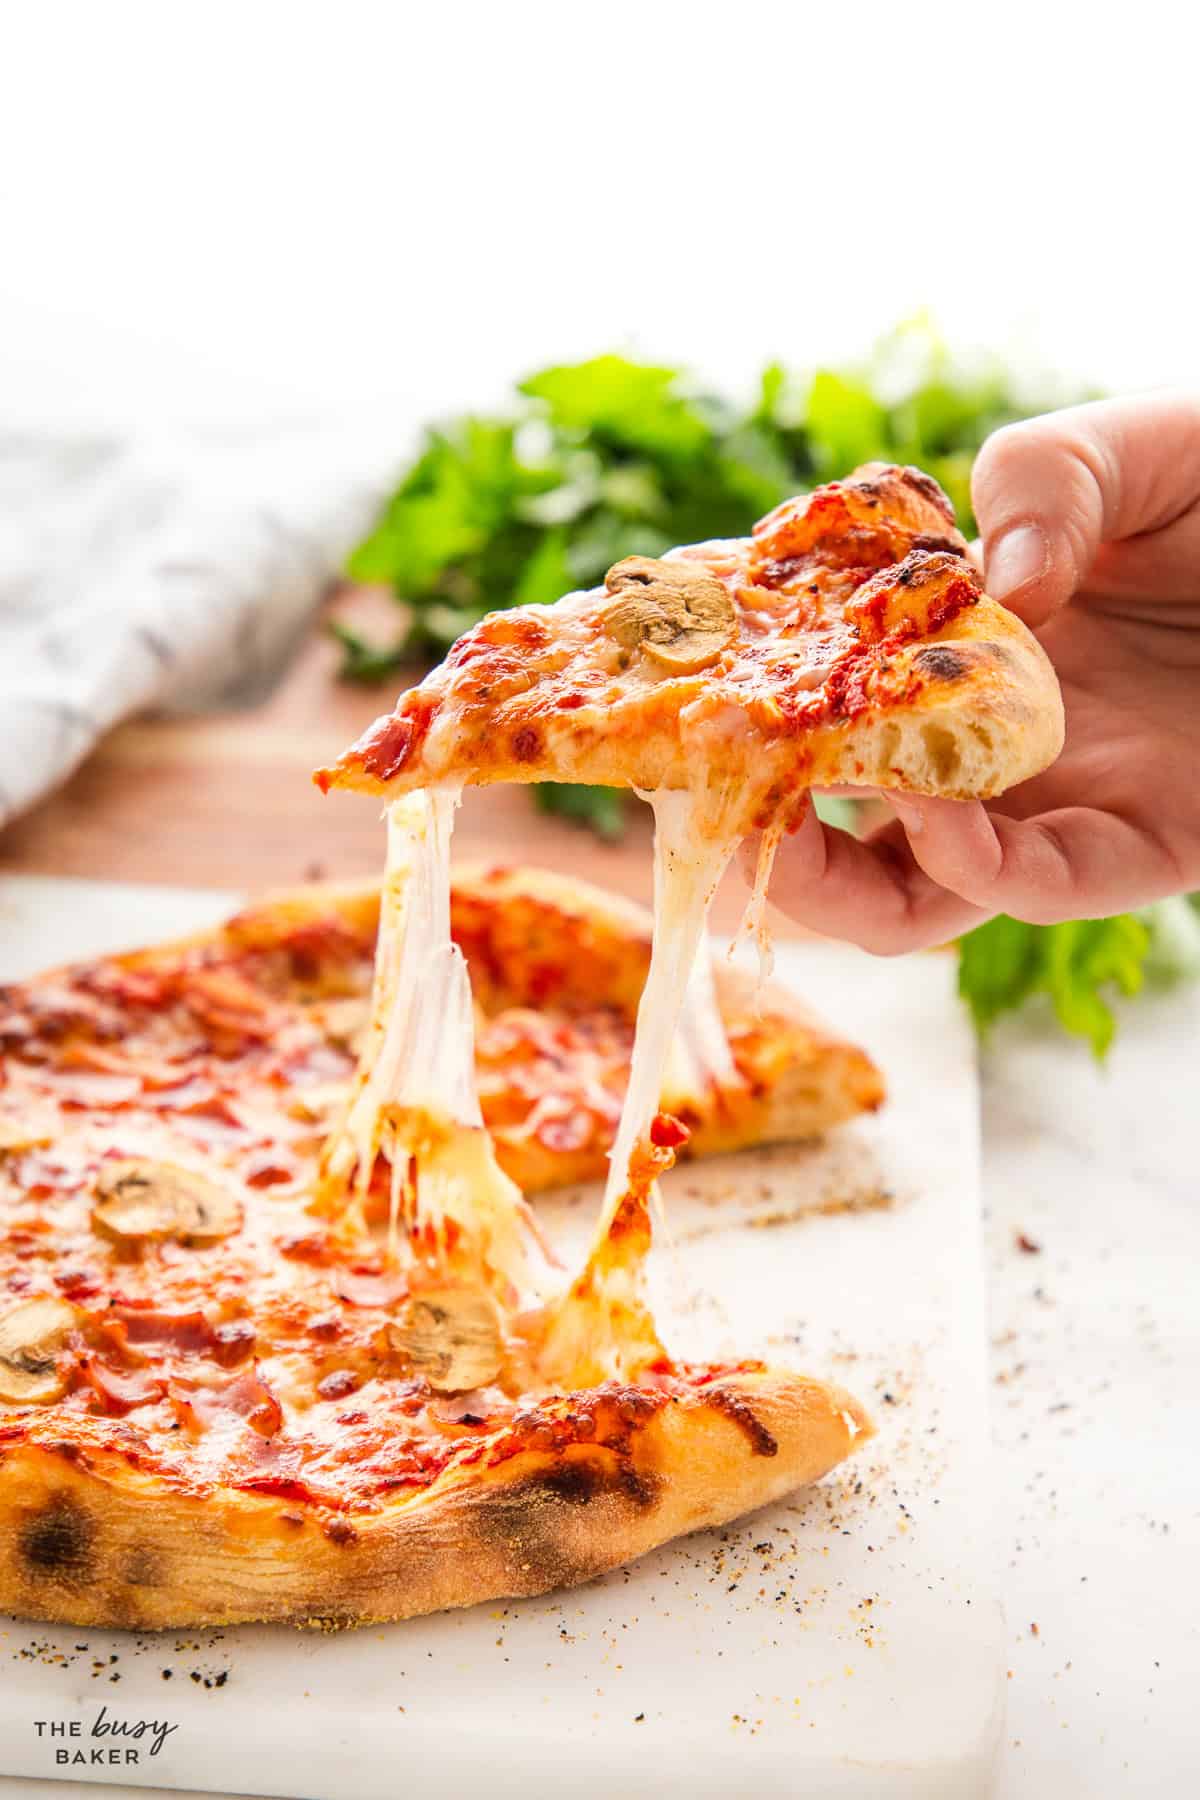
- Ham and mushroom. Our kids’ favourite pizza keeps it simple – chop some of your favourite ham and slice fresh mushrooms.
- BBQ chicken. A thin layer of pizza sauce mixed with BBQ sauce, cooked shredded chicken, red onion, mozzarella, fresh cilantro after baking.
- Veggie supreme. Pizza sauce, mozzarella, bell peppers, mushrooms, red onion, black olives.
- Hawaiian. Pizza sauce, mozzarella, ham or Canadian bacon, pineapple chunks.
- White pizza. Skip the red sauce. Brush the dough with olive oil, top with garlic, mozzarella, dollops of ricotta, and finish with fresh arugula, sliced cherry tomatoes, and a drizzle of balsamic after baking.
- Meat lovers. Pizza sauce, mozzarella, pepperoni, cooked sausage, ham, bacon.
- Buffalo chicken. Buffalo wing sauce mixed with a bit of pizza sauce, cooked shredded chicken, mozzarella, crumbled blue cheese or ranch drizzle after baking.
Pizza is a meal on its own, but a few simple sides turn pizza night into a real Italian-restaurant-at-home spread everybody is going to love!
A fresh Olive Garden Salad with Classic Creamy Italian Salad Dressing is the perfect light addition to all that cheese and dough. Easy Homemade Garlic Bread is amazing alongside pizza, especially with extra pizza sauce for dipping. An Easy Classic Italian Pasta Salad is another great make-ahead side. For drinks, Healthy 3-Ingredient Lemonade is a hit with the kids, and a glass of red wine pairs beautifully for the adults.
For dessert, lean into the Italian theme with our favourite Easy Tiramisu. This Olive Oil Cake is a beautifully simple Italian classic, or a slice of Easy No Bake Cheesecake with fresh berries is always a great choice to round out the meal!
This recipe is built for batch-making and freezing, which is just one more reason why I love it SO much!
In the refrigerator: After the first rise, store the dough in the fridge in an airtight container or oiled zip-top bag for up to 3 days. Bring to room temperature for 1 hour before using.
To freeze: Divide the dough into pizza-sized portions after the first rise. Shape each into a ball, wrap tightly in plastic wrap, then place all the wrapped balls into a freezer-safe zip-top bag. Label and freeze for up to 3 months.
To thaw: Move from the freezer to the fridge the night before, then bring to room temperature for 1 hour before baking.
Make-ahead tip: Make a triple batch on Sunday afternoon. Use one batch fresh that night. Refrigerate one for pizza later in the week. Freeze the third. You’ll have homemade pizza dough ready for spontaneous pizza nights all month long!
Can I use bread flour or “00” pizza flour instead of all-purpose?
You can, but I really recommend sticking with all-purpose. I’ve tested all three extensively. Bread flour made the dough too tough. “00” flour made it too crispy and harder to work with. All-purpose gives the best result every time.
What if I don’t have a stand mixer?
Kneading by hand works too! Plan on about 10 minutes on a lightly oiled surface with oiled hands. The dough will be sticky — that’s correct. Don’t add more flour. Just keep oiling.
Why didn’t my dough rise?
Usually dead yeast or wrong water temperature is the reason dough doesn’t rise. Always check that the yeast gets foamy in the warm honey-water before adding to the flour. If it doesn’t foam after 10 minutes, the yeast is dead and you need fresh. Aim for water at 43°C (110°F) – warm but not hot.
What if I don’t have a pizza stone?
The next best option is a cast iron skillet, but if you don’t have one of those either, just flip a heavy-duty baking sheet upside down and preheat it the same way you would a pizza stone. The flat surface and heat conductivity are way better than baking on a cold pan placed in a cold oven. A pizza stone is still a better investment (they’re budget-friendly!), but the inverted-baking-sheet trick works in a pinch.
Can I freeze leftover baked pizza?
Yes. Cool completely, wrap individual slices in plastic wrap, freeze for up to 1 month. Reheat at 200°C (400°F) for 8-10 minutes, or in the air fryer until heated through. Don’t microwave — it makes the crust soggy.
Can I use this dough for breadsticks or calzones
Absolutely! For breadsticks, roll into ropes, brush with garlic butter, bake at 220°C (425°F) until golden. For calzones, stretch the dough, fill half with sauce, cheese, and toppings, fold over and seal, bake at 230°C (450°F) until golden.
Can I use this dough for focaccia?
For focaccia, press into an oiled pan, dimple with your fingers, top with olive oil and salt, bake at 220°C (425°F) until golden. But even better? Try my amazing focaccia recipe!

More Easy Italian and Family-Favourite Recipes You’ll LOVE
If you love this pizza dough, you’ll love these other easy Italian and family-favourite recipes:
- Easy Pizza Sauce
- Easy Homemade Garlic Bread
- Olive Garden Salad
- Easy Classic Italian Pasta Salad
- Easy Tiramisu
- Olive Oil Cake
- Easy No Bake Cheesecake
- Easy Mushroom Risotto
- Slow Cooker Spaghetti Sauce
- Classic Creamy Italian Salad Dressing
If you made this, share a photo!
Are you trying this recipe? Use the comment form below to share your take; now with support for image uploads and comment voting!
Easy Homemade Pizza Dough
Recipe: Equipment
- Stand Mixer with dough hook (or a large bowl for hand-kneading)
- Pizza Peel (or sturdy cutting board / inverted baking sheet)
- Large bowl (for the rise)
- Plastic wrap, damp tea towel, or oiled gallon-sized zip-top bag
Recipe: Ingredients
- 1 1/3 cups warm water slightly warmer than room temperature
- 1 teaspoon honey
- 2 1/4 teaspoons active dry yeast for quick rise OR 1/2 teaspoon active dry yeast (for overnight rise)
- 3 cups all-purpose flour
- 2 1/2 teaspoons salt
- Olive oil for oiling the bowl, hands, and work surface
- Semolina or cornmeal for dusting the pizza peel
Recipe: Instructions
For the Dough:
- In a small bowl or measuring cup, combine the warm water and honey. Sprinkle the yeast over top (use 2 1/4 teaspoons for the quick rise OR 1/2 teaspoon for the overnight rise). Let sit for 5-10 minutes, until foamy.
- In the bowl of a stand mixer fitted with a dough hook, whisk together the flour and salt.
- Pour the bloomed yeast mixture into the flour. Turn the mixer on low speed to bring everything together, then increase to medium-low and knead for 6-8 minutes, until the dough is smooth, stretchy, and pulls away from the sides of the bowl. The dough will be a bit sticky – that’s correct. (If kneading by hand, knead on a lightly oiled surface with oiled hands for about 10 minutes.)
- Lightly oil a large bowl, place the dough in the bowl, and turn it over to coat in oil. Cover with plastic wrap or a damp tea towel.
- For the quick rise: let the dough rise at room temperature for at least 2 hours, until roughly doubled in size. For the overnight rise: transfer the oiled dough to a lightly oiled gallon-sized zip-top bag, seal, and refrigerate for 18-24 hours.
- For the overnight rise only: take the dough out of the fridge 1 hour before you plan to bake, leaving it covered, to come to room temperature.
- Turn the dough out onto a lightly oiled surface and divide into your desired number of portions (2 for large pizzas, 3-4 for mediums). Form each portion into a smooth ball by tucking the edges underneath. Cover with a damp tea towel and let rest for 20 minutes.
- Stretch each ball into a 10-12 inch round by hand (don’t use a rolling pin). Transfer the stretched dough to a pizza peel generously dusted with semolina or cornmeal. Top quickly with sauce, cheese, and toppings.
To Bake in a Conventional Oven:
- Place a pizza stone on the top rack of your oven and preheat the oven to its highest setting (usually 260-290°C / 500-550°F) for at least 45 minutes – ideally a full hour.
- Just before launching the pizza, switch the oven from bake to broil.
- Slide the topped pizza off the peel and onto the hot pizza stone in one smooth motion.
- Bake for 4-6 minutes, watching closely the whole time. Pull the pizza out when the crust is well-spotted with brown spots and the cheese is bubbly and lightly browned.
- Let the pizza rest for 1-2 minutes before slicing and serving.
To Bake in an Outdoor Pizza Oven (Ninja, Ooni, etc.):
- Preheat your pizza oven according to the manufacturer’s instructions, usually 15-20 minutes at the highest setting (370-480°C / 700-900°F).
- Slide the topped pizza off the peel and onto the hot stone in the pizza oven.
- Bake for 60-90 seconds total, rotating the pizza 180 degrees at the 30-45 second mark to ensure even cooking. Watch the pizza the entire time – it cooks fast.
- Pull the pizza out when the crust is well-spotted and the cheese is bubbly. Let rest for 1-2 minutes before slicing and serving.
Recipe: Notes
Recipe: Nutrition
Notice: Nutrition is auto-calculated, using Spoonacular, for your convenience. Where relevant, we recommend using your own nutrition calculations.