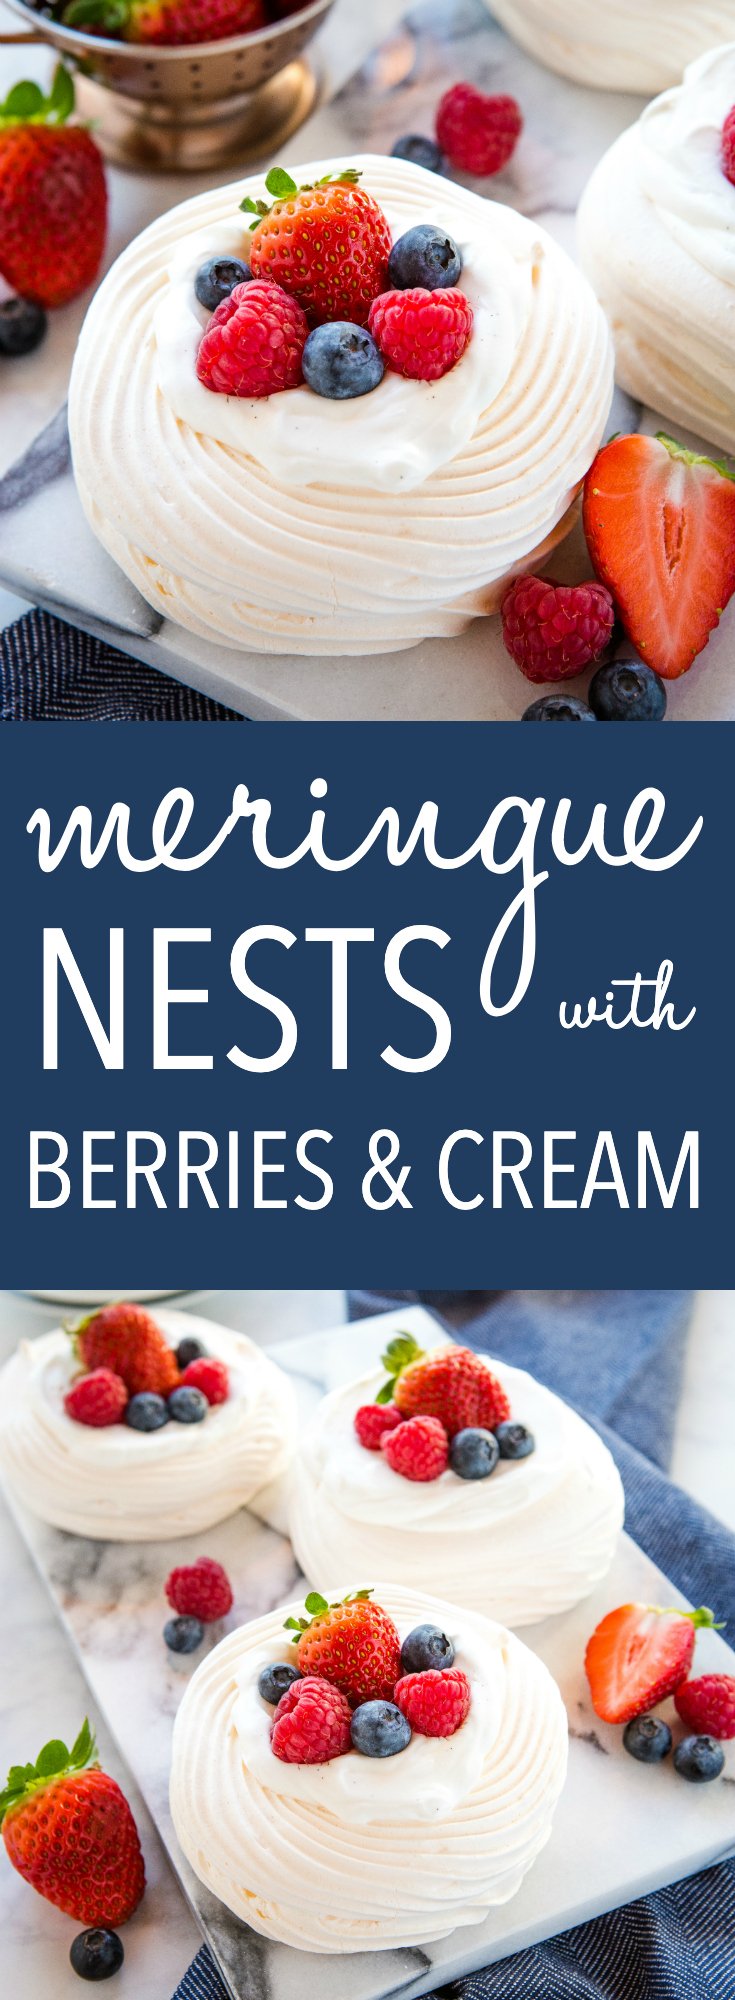
These Meringue Nests make the perfect light-tasting summer dessert that’s gluten-free and packed with fresh fruit and vanilla whipped cream!

Estimated reading time: 11 minutes
Fresh berry season is our favourite time of year! There’s almost nothing better than bringing home fresh berries from the farmer’s market and using them almost right away in an amazing summer dessert recipe while they’re fresh and ripe and almost as sweet as candy. This Meringue Nests recipe is one of our favourite ways to enjoy fresh summer berries right now, and it’s an impressive dessert that’s so much easier to make than it looks!
There are so many reasons we love this meringue dessert recipe. Here are just a few!
- It’s made with only a FEW SIMPLE INGREDIENTS. If you’ve never made meringue before, these Meringue Nests are a great recipe to start with – only a few basic ingredients and supplies are required to make the meringue.
- It’s SUPER VERSATILE. Make the meringue nests and fill them with whatever flavoured cream and fruit you want! We love fresh berries, but lemon curd, chocolate ganache, or tropical fruits are also great options for this dessert.
- It’s LIGHT and DELICIOUS. The meringue nests are light and airy and made with simple ingredients that are deliciously enjoyed with whatever filling you want.
- It’s super IMPRESSIVE. There’s nothing like a dessert that’s easy to make but looks like it’s from a professional bakery! These meringue nests are perfect for entertaining!
Meringues are light and airy desserts made by whipping egg whites with sugar until stiff peaks form. The mixture has a sweet and very fluffy texture, and it’s sometimes served as a topping for desserts (like lemon meringue pie) or baked and then served as the dessert itself (like pavlova or these meringue nests). It can be made by mixing egg whites with granulated sugar, powdered sugar, or even a hot sugar syrup that cooks the egg whites as they whip, making it safe to eat without baking.

Be sure to follow these PRO tips and tricks to make the best no-fail meringue nests!
Make sure your bowl is extra clean and dry. Any leftover oil in the bowl from previous recipes or even from oily dish soap will prevent the egg whites from getting to full volume and it can cause your meringue to collapse while baking. Be sure your bowl is perfectly clean and dry, and better yet, use a glass or metal bowl for best results.
Wait until the egg whites have whipped to a nice foamy texture before adding the sugar slowly in a steady stream. Any harsh movements can deflate the air bubbles you’re working so hard to build into the meringue to give it structure as it bakes.
Be patient! Nobody likes a browned, burnt, or collapsed meringue. Bake at a low temperature for a long period of time so the meringues can dry out sufficiently, but don’t let them become brown – this will cause them to taste burnt!
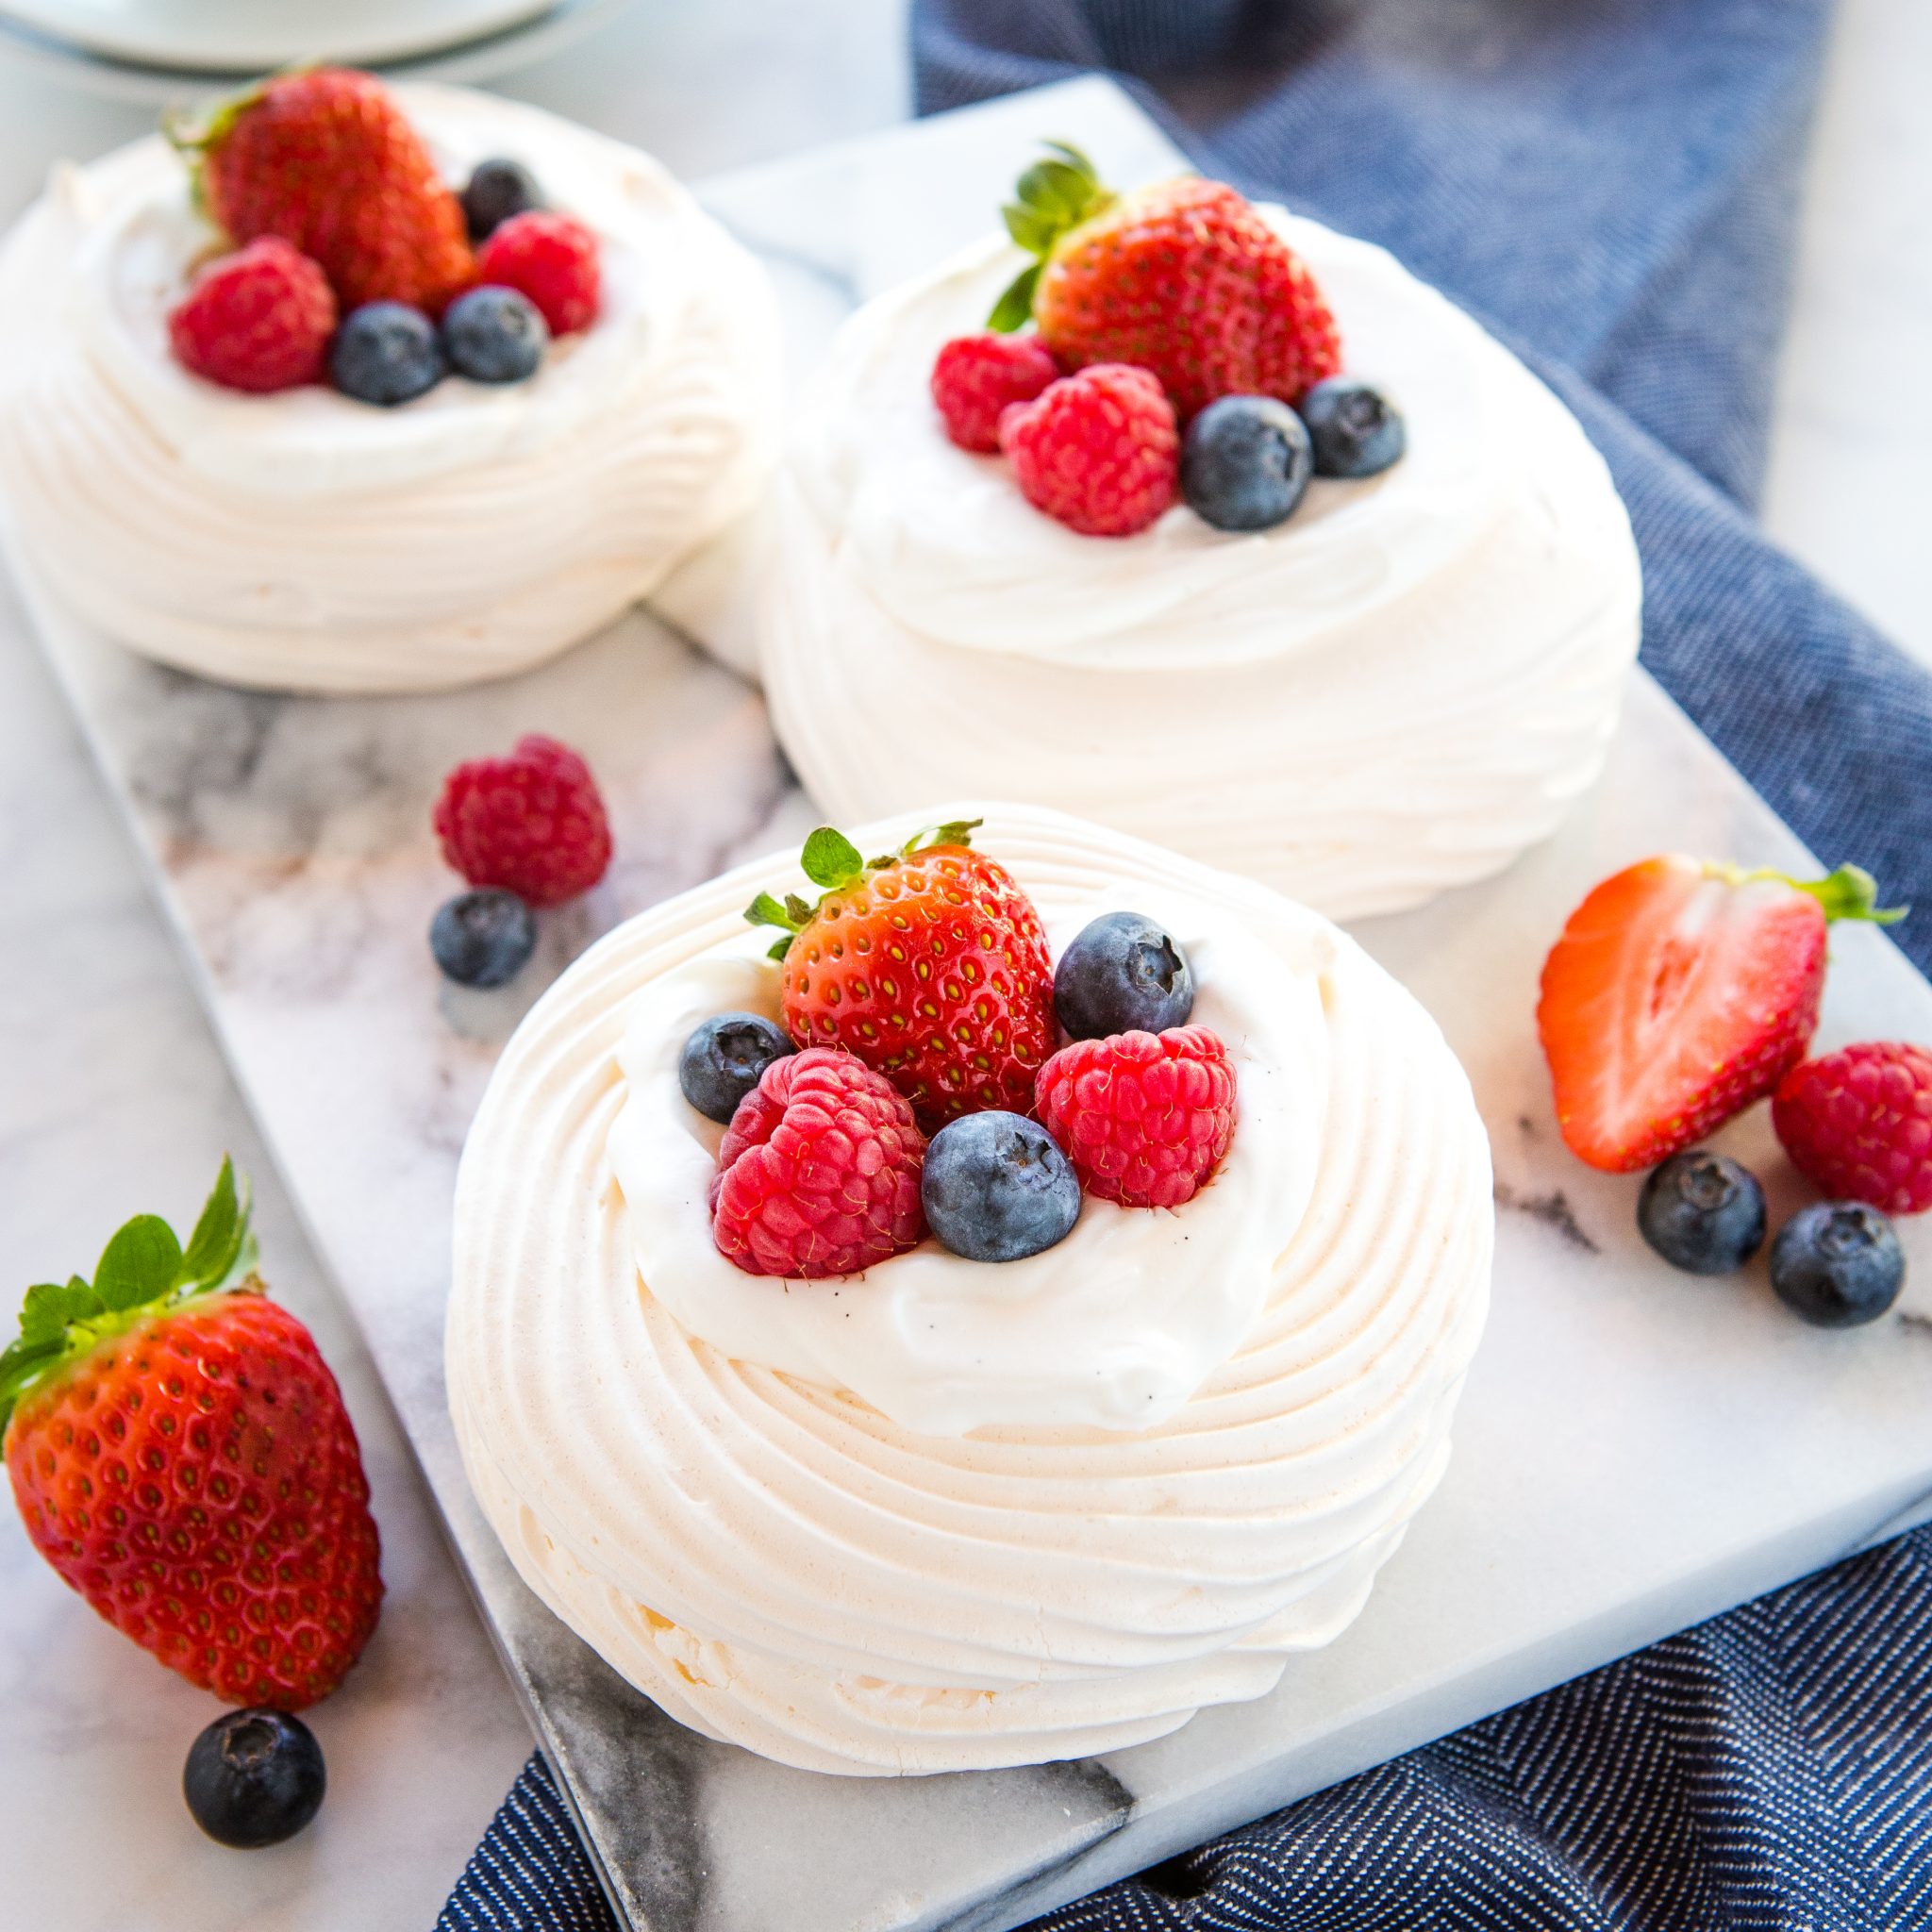
Once your meringues are baked and cooled completely, fill them with whipped cream or whipped topping and top with the fruit of your choice – we love berries, but almost any fruit works! On their own meringues aren’t too flavourful – they need the addition of a filling and fruit to make them something special.

Follow all my BEST TIPS for how to work with Meringue!
Room temperature egg whites whip a lot more easily than cold ones, and they give more volume. It’s easier to separate the eggs while they are cold then allow the whites to sit on the counter to come to room temperature before whipping (approx. 30 mins).
Using a mixer with a whisk attachment is quicker, it creates a consistent texture, and it helps achieve stiff peaks much more easily than whipping by hand or with a paddle attachment.
Use an acid to help the whites maintain their shape and keeps them glossy. We use cream of tartar, but other recipes may use a teaspoon of lemon juice or white vinegar.
Gradually add the sugar to the bowl while mixing. This helps keep the meringue stay light and fluffy. Be patient.
Test for graininess with your fingers by rubbing your thumb and fingers together to determine if the sugar has been completely dissolved. Keep whipping until the mixture is completely smooth, with no grains of sugar left.
Heat low and slow as the meringue nests only need to dry out, not bake. You can even leave them to cool with the oven door open to cool slowly. This will help prevent the nests from cracking.

The Done-For-You SUMMER BUNDLE + BONUS Menu Guide!
5 complete recipe guides for effortless summer hosting. The invisible work of summer? Done for you.
If you are having trouble with this meringue dessert recipe, follow the solutions we recommend below.
The meringue nests can crack or split if the oven is too hot or if they cool off too quickly. Follow the recipe for bake times and oven temperature, and cool the meringues in the oven with the door propped open so they cool slowly.
Your meringue nests can lose their shape if the egg whites are under-whipped or if the sugar is added too early. Make sure to to whip the mixture until stiff peaks form, add the sugar slowly, and stop mixing once it is thick and the grains of sugar have completely dissolved.
The meringue nests can have a grainy texture and crack easily if the sugar does not dissolve in the mixture. Add the sugar slowly and mix until smooth. Feel the mixture with your fingers to check for smoothness before you form them into nests.
The meringue nests can be sticky if they do not dry out completely which can happen if they do not stay in the oven long enough or if they are not stored in an airtight container once cooled.
Meringue absorbs moisture so add the filling right before serving so the nests do not become soggy. You can make the meringues ahead of time, but wait to fill them until right before serving.
Dumping the sugar in all at one will crush the air out of the egg white mixture and can make the nests dense. It is important to add the sugar slowly to keep the meringue light and airy.

You need only a few items to make these fruit meringue nests (paid links):
- large mixing bowl
- Stand Mixer or Hand Mixer
- measuring cups and spoons
- Piping bags
- large baking sheet
- Parchment Paper

To make this meringue dessert recipe, you will need these ingredients on hand (paid links):
- 4 egg whites at room temperature
- 1/2 teaspoon cream of tartar
- 1 cup granulated sugar
- 1 1/2 cups whipping cream (or use 2 to 2 1/2 cups whipped topping)
- 2 teaspoons powdered sugar (leave out if using whipped topping)
- 1 vanilla bean
- 1 1/2 cups fresh raspberries, strawberries, and/or blueberries washed and dried
When it comes to modifying this recipe, we suggest you proceed with caution. Desserts made with whipped egg whites are notoriously easy to mess up and one wrong move can cause the whole cake to deflate or prevent it from rising in the first place. We recommend leaving the base recipe the same, baking the meringues as directed, and adding different flavours by switching up the fillings and toppings.
- Lemon: Serve with lemon curd and whipped cream, and add some candied lemon slices and raspberries for serving.
- Matcha: Fold a small amount of Matcha powder into the whipped cream filling for a green tea twist! Serve with fresh raspberries.
- Almond Cream: Add some almond extract to flavour your whipped cream. Serve with some fruit and slivered almonds.
- Chocolate: Fold some chocolate ganache into the whipped cream and top with more shaved chocolate and strawberries.

Time needed: 1 hour and 5 minutes
Follow these steps to make the BEST Meringue Nest dessert!
- Prepare your work station.
Preheat your oven to 275 degrees Fahrenheit (135 degrees Celsius) and line a baking sheet with parchment paper.
- Trace circles to help space out your nests.
Turn the parchment paper over and trace 6-8 small circles with a dark permanent marker, spaced evenly and apart from one another. Turn the parchment paper back over again so you can see the circles through the paper, but the ink won’t transfer to the meringues. Set aside.
- Whip the egg whites.
In a large bowl with a hand mixer, or in the bowl of your stand mixer, whip the room temperature egg whites on medium speed until foamy (about 2-3 minutes).
- Add in cream of tartar.
Once foamy, add the cream of tartar and continue whipping on medium high speed.
- Add sugar slowly.
Add the sugar slowly in a steady stream while the egg whites continue whipping and begin to turn white and glossy. Adding the sugar slowly ensures that the egg white mixture stays fluffy and light (dumping the sugar in all at one would crush the air out of the egg white mixture).
- Whip until stiff peaks.
Whip on high speed until the mixture reaches stiff peaks. You’ll know the peaks are stiff when you remove the beater attachment, turn it upside down, and the meringue mixture stands almost straight up.
- Add to piping bag.
Add the meringue mixture to a piping bag with a large round opening.
- Pipe the nests.
Pipe the meringues onto the prepared baking sheet starting in the middle of the circle and piping around until you reach the outside of the circle. Then, pipe one more layer just around the outside of the circle to create the “nest” effect.
- Make until dry.
Bake at 275 degrees Fahrenheit (135 degrees Celsius) for about 45 to 50 minutes, or until the meringues appear dry on the outside and inside of the nests, but haven’t browned at all on the bottom or sides.
- Let them cool.
Let the meringues cool completely to room temperature on the baking sheets.
- Whip the whipping cream.
In the meantime, whip the whipping cream and add the sugar as it whips to soft but slightly stiff peaks.
- Scrap out the vanilla bean seeds.
Scrape the seeds from the vanilla bean and add them into the cream as it whips.
- Add whipped cream to the nests.
Dollop a portion of the cream into each of the meringue nests after they have cooled completely.
- Garnish and serve.
Top with the fresh berries and serve immediately.
How do I store this meringue dessert recipe?
Store the nests in an airtight container until ready to serve.
How do I bake this meringue dessert recipe?
Bake the meringue nest desserts on a low oven temperature of 275 degrees Fahrenheit (135 degrees Celsius) on a parchment lined baking tray for 45-50 minutes until the nests have dried out. Don’t let them turn brown as they bake.
Can I make the fruit meringue nests ahead of time?
Yes, to make them ahead of time, prepare the meringue nests and store under a light kitchen towel for up to 18 hours ahead of serving. Assemble with whipped cream and fruit directly before serving.
What do I do with the egg yolks?
We almost always make our homemade vanilla pastry cream with the leftover yolks! You can find the recipe the vanilla pastry cream recipe HERE – it’s another great filling for these meringue nests!
How do I know when I have achieved stiff peaks?
You’ll know the peaks are stiff when you remove the beater attachment, turn it upside down, and the meringue mixture stands almost straight up.
Why do the Meringue desserts taste burnt?
If the meringue turns brown at all it will taste burnt. Don’t rush the baking process. Be patient and slowly let them dry out in the oven at a low temperature.
We hope you enjoy these Meringue Nests as much as we do! Let us know in the comments below, what’s your favourite summer dessert featuring fresh berries? We’d love to know!

Looking for more delicious desserts? You’ll LOVE these!
- Vanilla Bean Cupcakes with Mascarpone Buttercream
- Double Chocolate Cupcakes
- Black Forest Icebox Cake
- Chocolate Mocha Tiramisu Icebox Cake
- Strawberry Cheesecake Fruit Dip
- Easy No Bake Oreo Cheesecake
- Lemon Raspberry Glazed Bundt Cake
- Angel Food Cake
- Vanilla Bean Custard Fruit Tarts with Honey Glazed Fruit
- Vanilla Bean Angel Food Cake Trifles with Fresh Berries
Watch the video below to see exactly how we make this fresh dessert. You can find more delicious recipe videos on our YouTube channel
If you made this, share a photo!
Are you trying this recipe? Use the comment form below to share your take; now with support for image uploads and comment voting!
Meringue Nests
Recipe: Equipment
Recipe: Ingredients
- 4 egg whites at room temperature
- 1/2 teaspoon cream of tartar
- 1 cup granulated sugar
For serving:
- 1 1/2 cups whipping cream (or use 2 to 2 1/2 cups whipped topping)
- 2 teaspoons powdered sugar (leave out if using whipped topping)
- 1 vanilla bean
- 1 1/2 cups fresh raspberries, strawberries, and blueberries washed and dried
Recipe: Instructions
- Preheat your oven to 275°F (135°C) and line a baking sheet with parchment paper.
- Turn the parchment paper over and trace 6-8 small circles with a dark permanent marker, spaced evenly and apart from one another. Turn the parchment paper back over again so you can see the circles through the paper, but the ink won’t transfer to the meringues. Set aside.
- In a large bowl with a hand mixer, or in the bowl of your stand mixer, whip the room temperature egg whites on medium speed until foamy (about 2-3 minutes).
- Once foamy, add the cream of tartar and continue whipping on medium high speed.
- Add the sugar slowly in a steady stream while the egg whites continue whipping and begin to turn white and glossy. Adding the sugar slowly ensures that the egg white mixture stays fluffy and light (dumping the sugar in all at one would crush the air out of the egg white mixture).
- Whip on high speed until the mixture reaches stiff peaks. You’ll know the peaks are stiff when you remove the beater attachment, turn it upside down, and the meringue mixture stands almost straight up.
- Add the meringue mixture to a piping bag with a large round opening.
- Pipe the meringues onto the prepared baking sheet starting in the middle of the circle and piping around until you reach the outside of the circle. Then, pipe one more layer just around the outside of the circle to create the "nest" effect.
- Bake at 275°F (135°C) for about 45 to 50 minutes, or until the meringues appear dry on the outside and inside of the nests, but haven't browned at all on the bottom or sides.
- Let the meringues cool completely to room temperature on the baking sheets.
- In the meantime, whip the whipping cream and add the sugar as it whips to soft but slightly stiff peaks.
- Scrape the seeds from the vanilla bean and add them into the cream as it whips.
- Dollop a portion of the cream into each of the meringue nests after they have cooled completely.
- Top with the fresh berries and serve immediately.
Recipe: Notes
Make Ahead Instructions
To make ahead of time, prepare the meringues and store under a light kitchen towel for up to 18 hours ahead of serving. Assemble with whipped cream and fruit directly before serving.Storage Instructions
Store the meringue dessert in an airtight container.Recipe: Nutrition
Notice: Nutrition is auto-calculated, using Spoonacular, for your convenience. Where relevant, we recommend using your own nutrition calculations.
The Done-For-You SUMMER BUNDLE + BONUS Menu Guide!
5 complete recipe guides for effortless summer hosting. The invisible work of summer? Done for you.
Recipe states that a round piping tip should be used. What tip was used for your photographs. Doesn’t look to be a round tip. As well, online cooking tips says that meringue nests can be stored at room temperature for 3 weeks or even frozen. Is there some reason your recipe can’t keep? I want to cook ahead for guests. Thanks.
We used a wilton #8B for the nests pictured. In theory you could keep meringue nests for longer and freeze them, however, we’ve never tried freezing and defrosting them ourselves so we couldn’t personally recommend that.
This looks like an awesome recipe! My question is: can I use vanilla extract in place of the vanilla bean? If so, how much? I happened to have egg whites leftover to use, but no vanilla bean or bean paste…..
You can use 1-2 tsp of vanilla extract, depending on your preference. Let us know how it turns out ☺️
These look really good! I could eat a whole batch!
😆 Yeah, I know the feeling! Glad you liked the recipe!
This is fabulous! I’m craving for this right now, looking forward to trying this!
Thank you! Let me know how it went😊
This looks absolutely delicious! Yummy!
Thank you so much!!☺️
Love this idea! Such a light and refreshing dessert!
So glad you like it!! 🙂
This was exactly what I needed to cure my sweet tooth! So delicious and easy too!
Yes, delicious yet so elegant in a way! Thank you!😊
What a beautiful dessert! Loved how it turned out; worthy of a restaurant recipe, indeed!
Oh Sara, thank you so much!!☺️