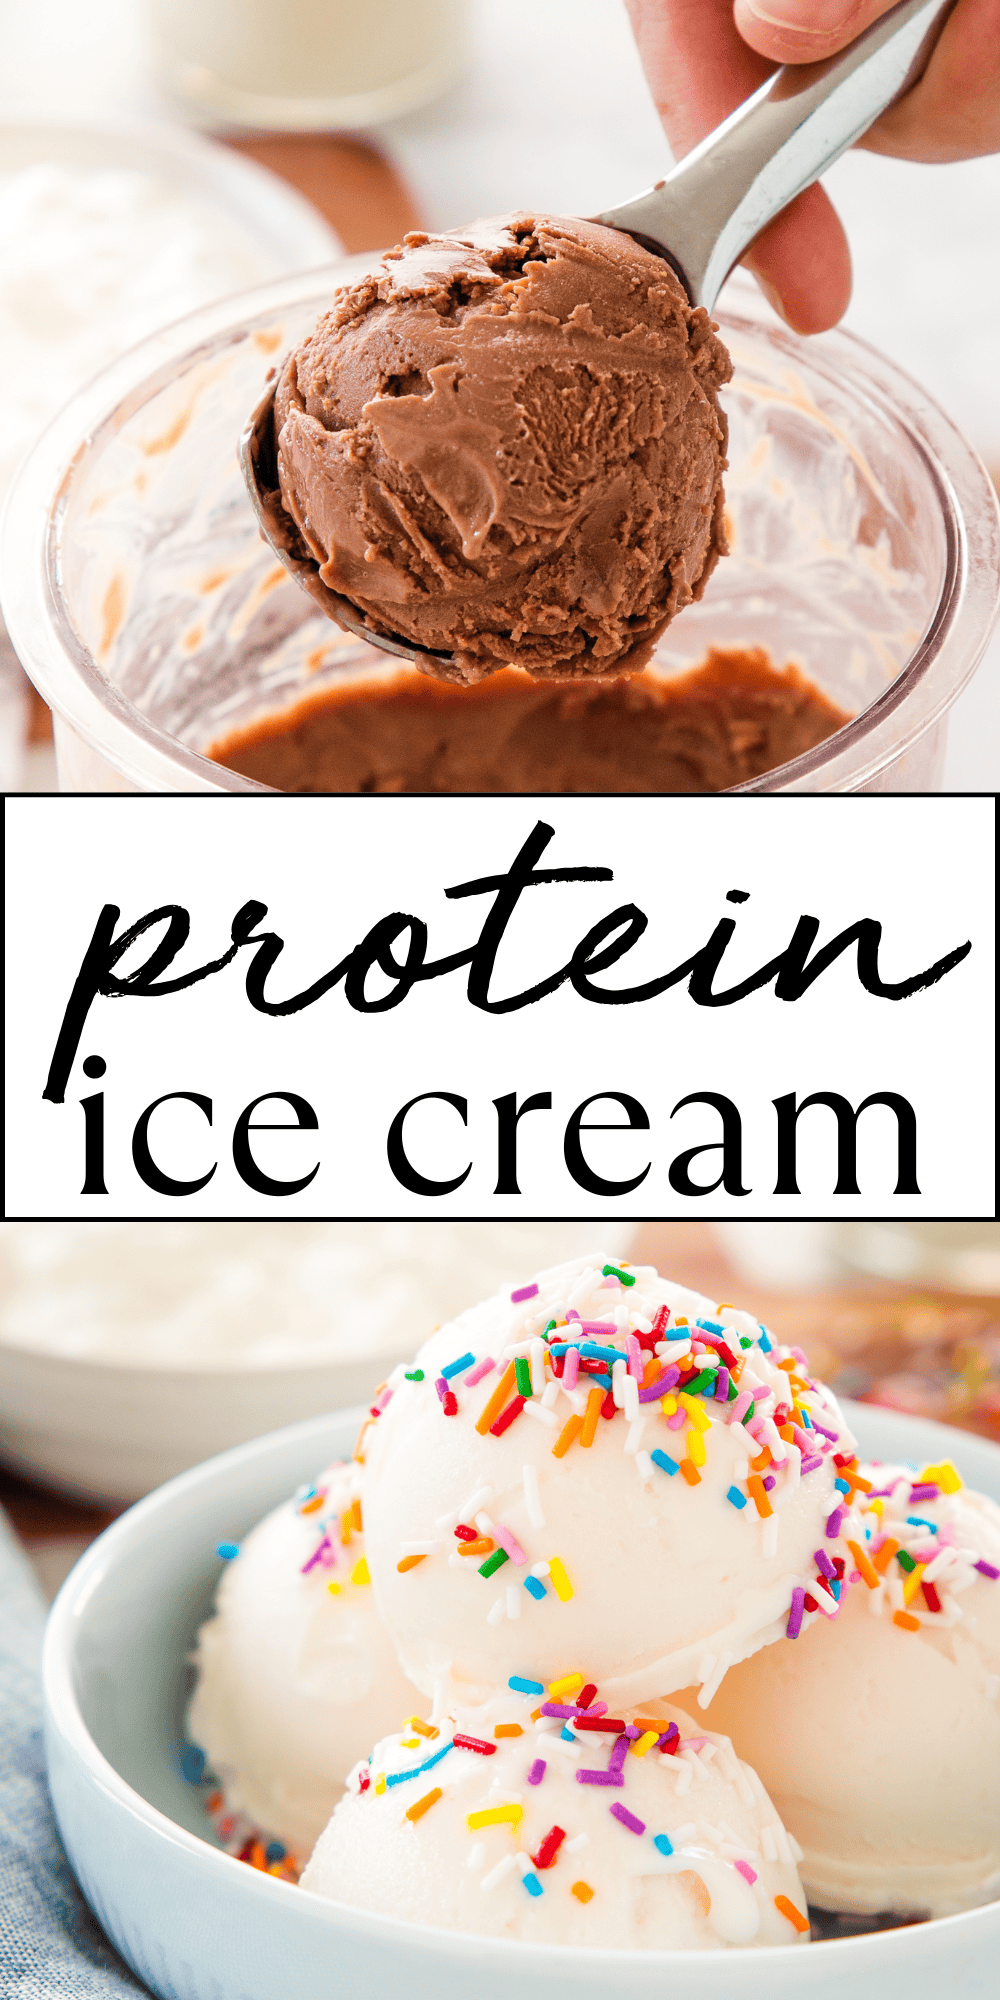
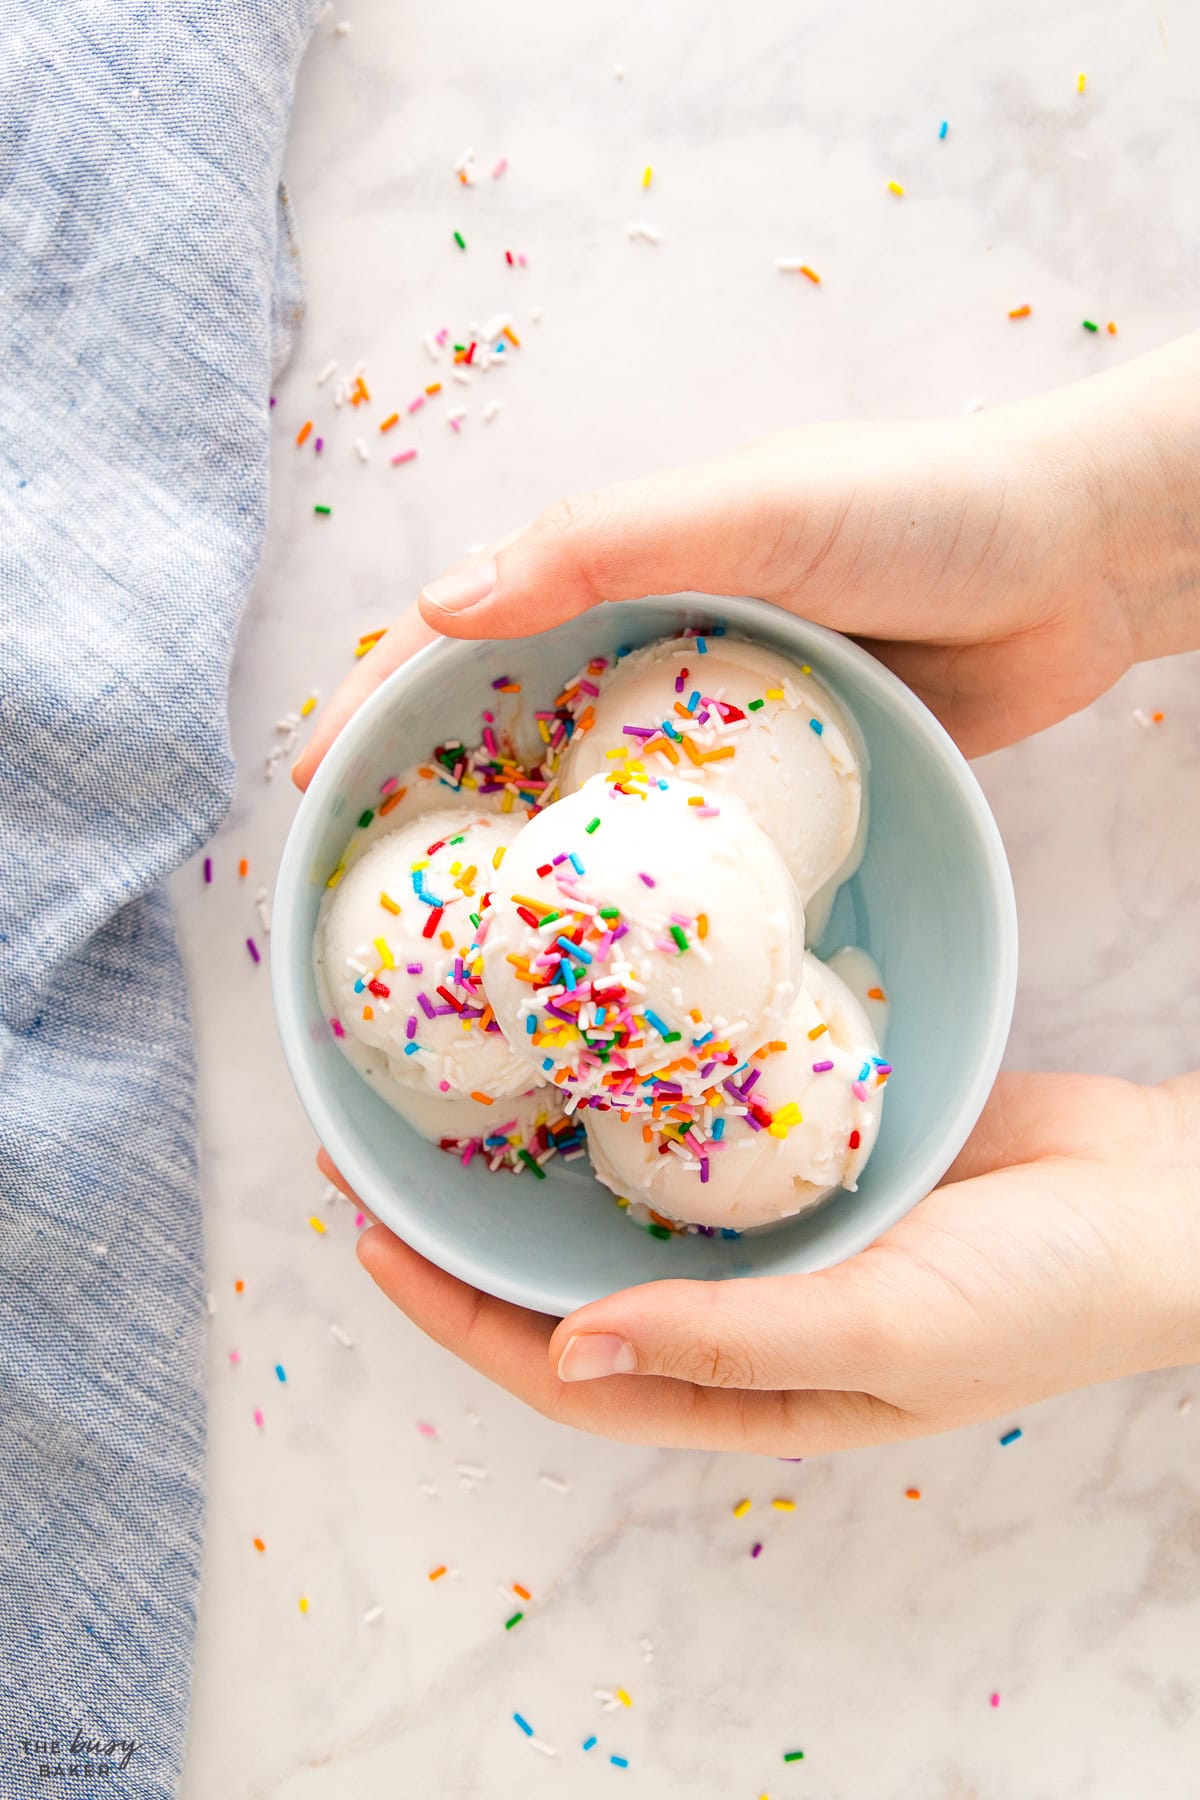
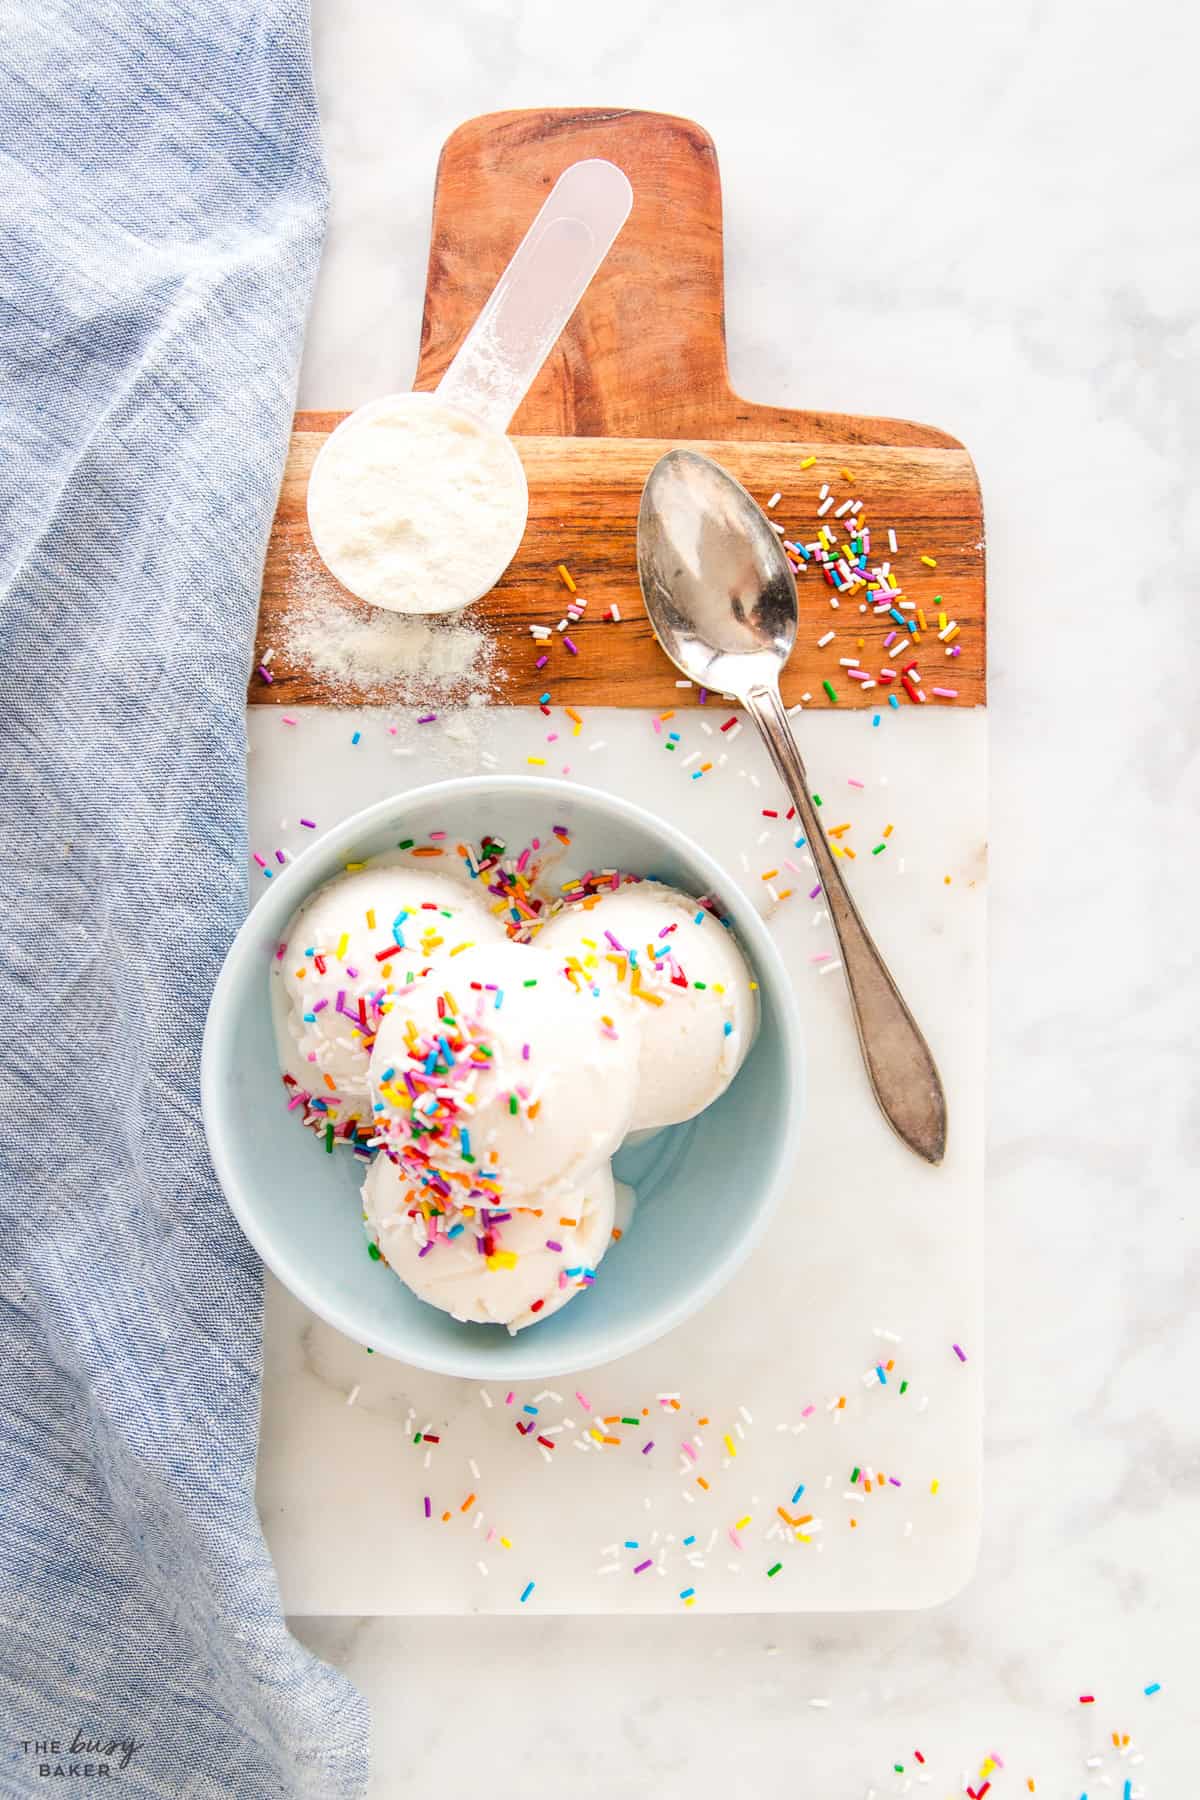
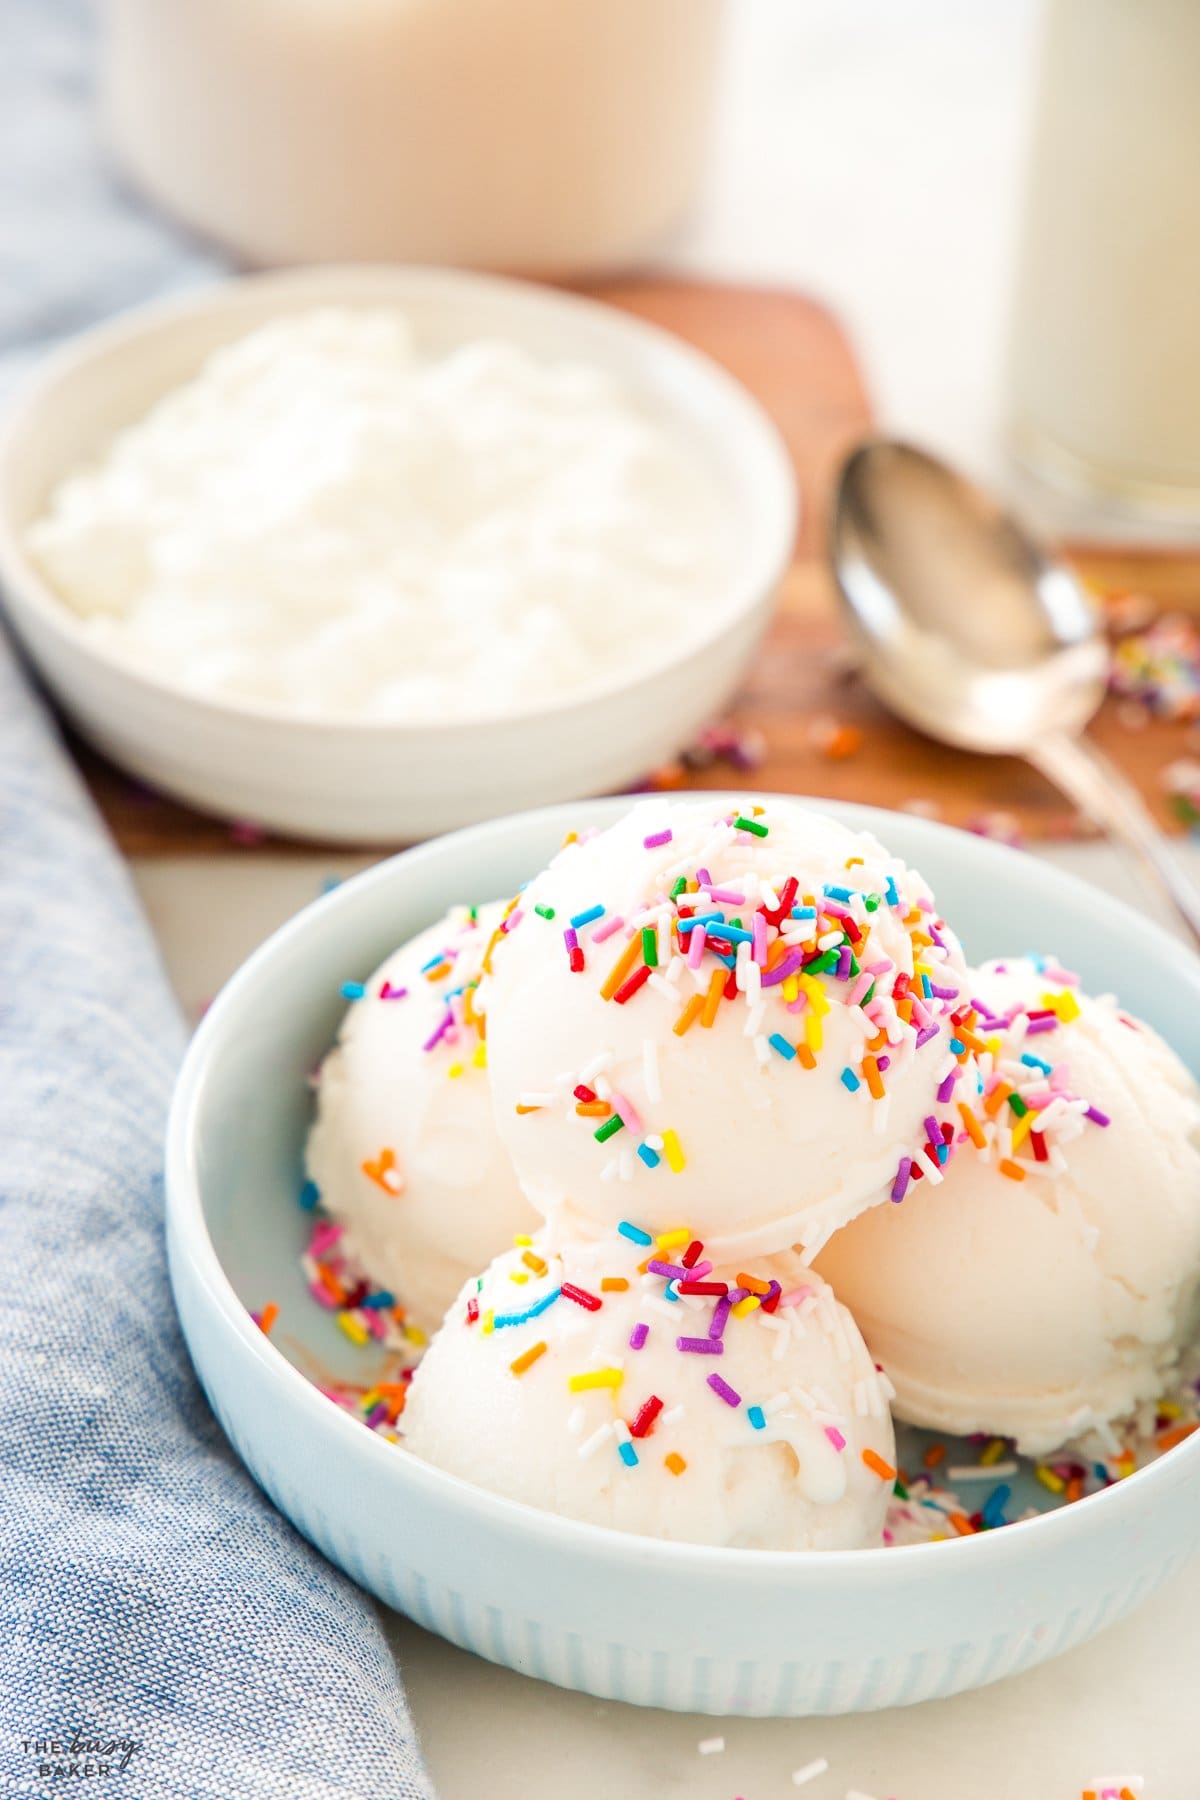
This Protein Ice Cream recipe is an easy, healthy dessert with 45 grams of protein per serving! It’s the best cottage cheese protein ice cream made with protein powder – make it with OR without the Ninja Creami!

Estimated reading time: 17 minutes

Ice cream is one of our favourite sweet treats, and we’ve shared several of our favourite homemade ice cream and sorbet recipes here on The Busy Baker over the years. We’re always looking for new ways to enjoy our favourite recipes that make them just a bit healthier, so when we saw the viral cottage cheese ice cream on Instagram and TikTok, we knew we had to give it a try. Spoiler alert: we LOVED it!!
Similar to traditional ice cream, this Protein Ice Cream recipe is super creamy and smooth, thanks to our new favourite kitchen appliance, the Ninja Creami (but don’t worry, we’ll give you instructions for how to make it if you don’t have a Creami or an ice cream maker). It’s very high in protein, it’s sweet, and it makes the BEST refreshing treat for summer that will help you reach your protein goals!
There are so many reasons we love this protein ice cream recipe. Here are just a few!
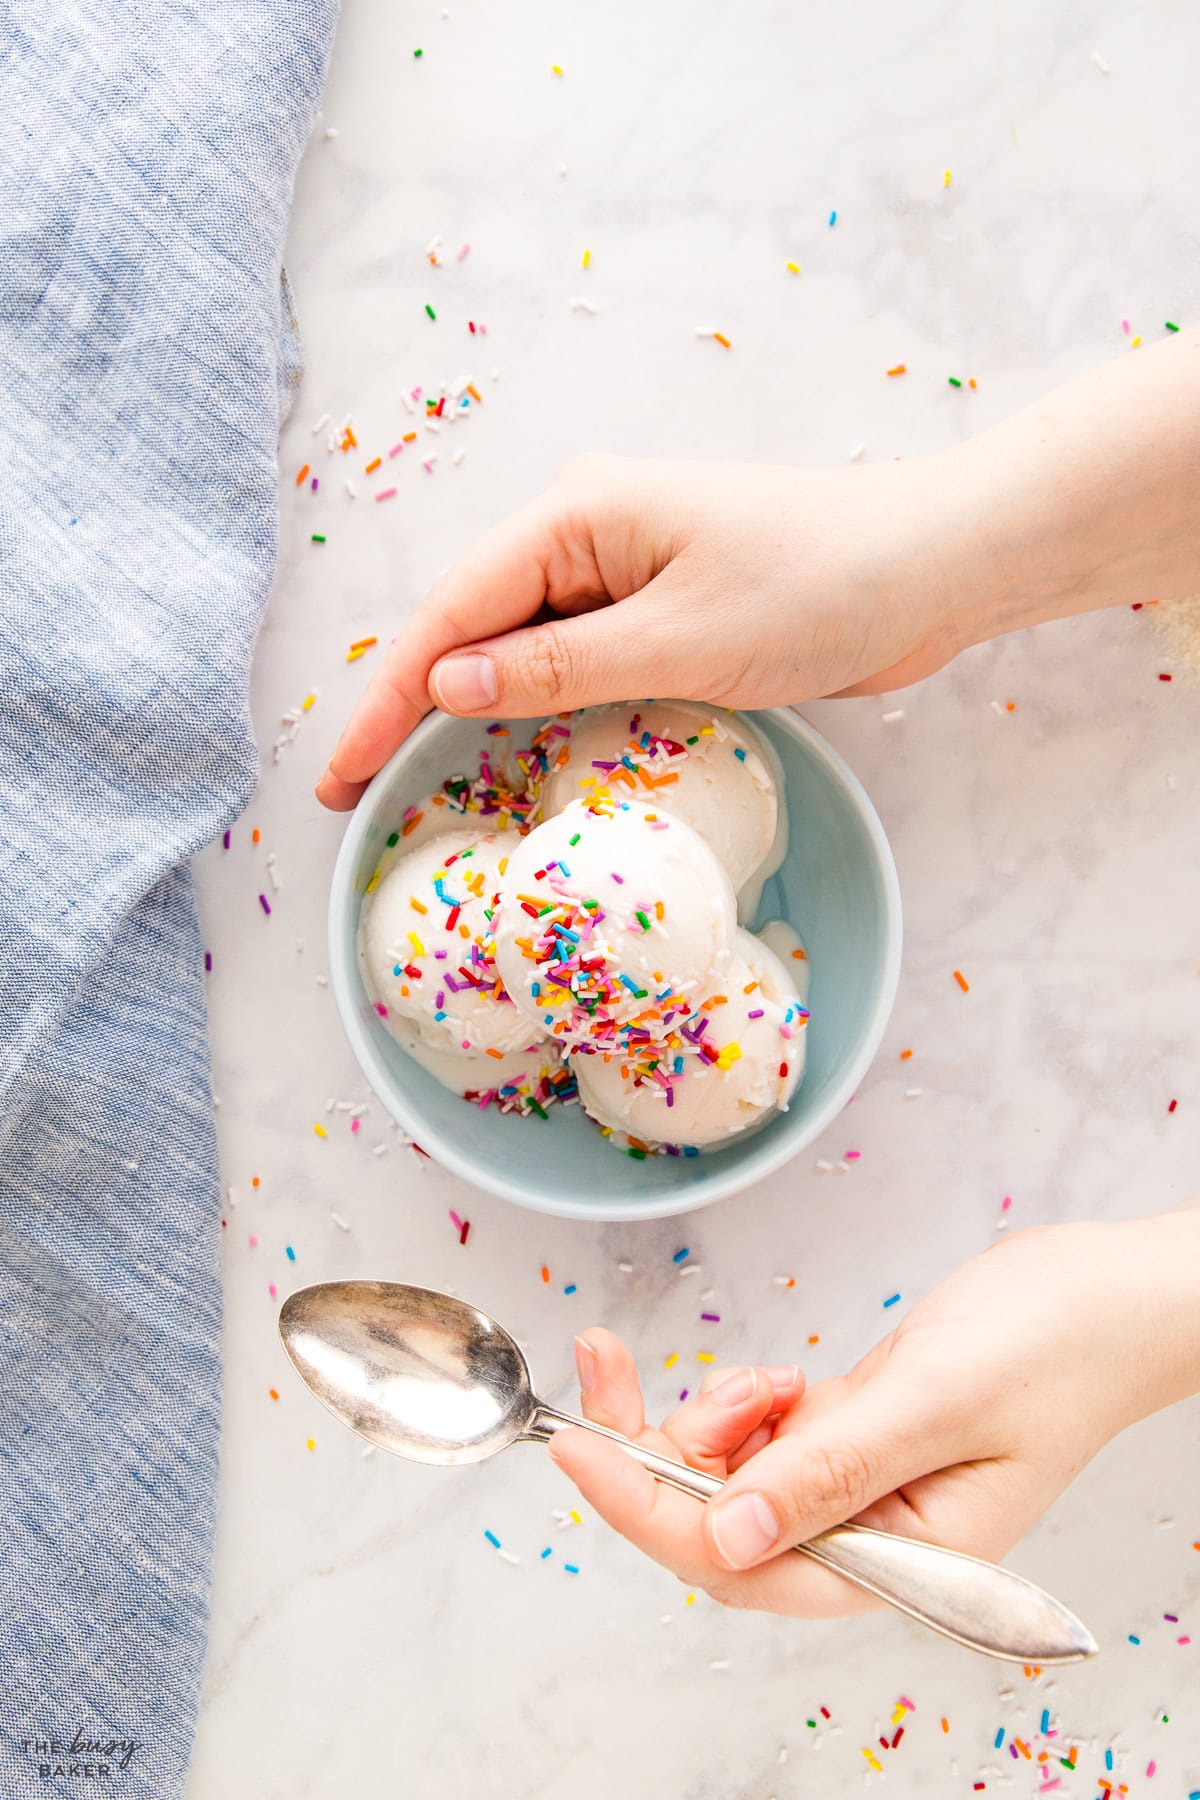
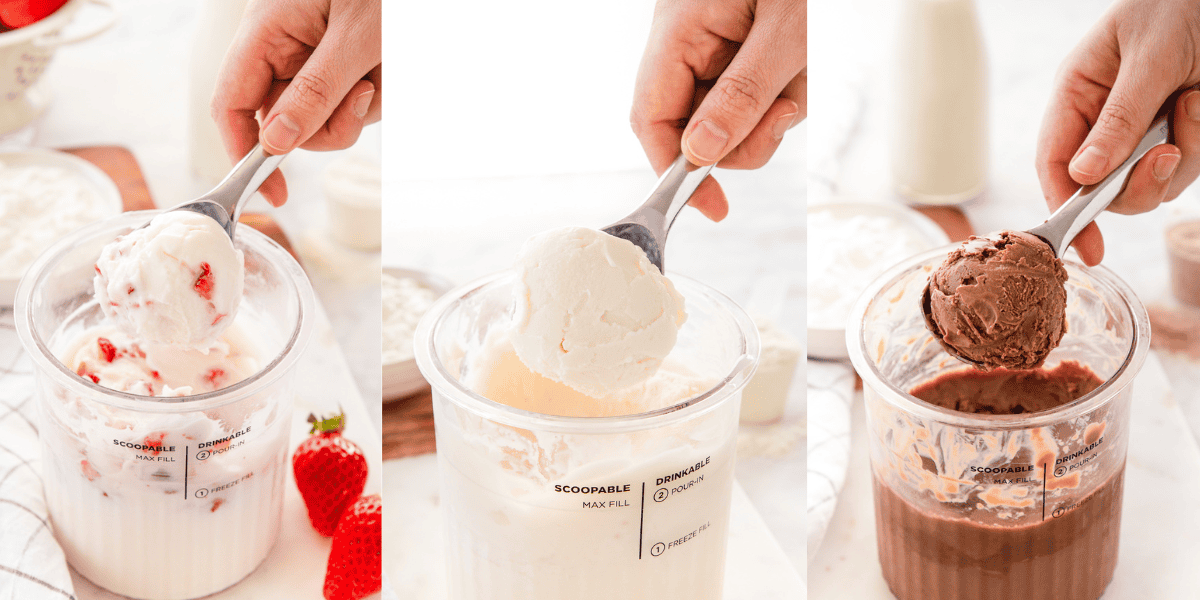
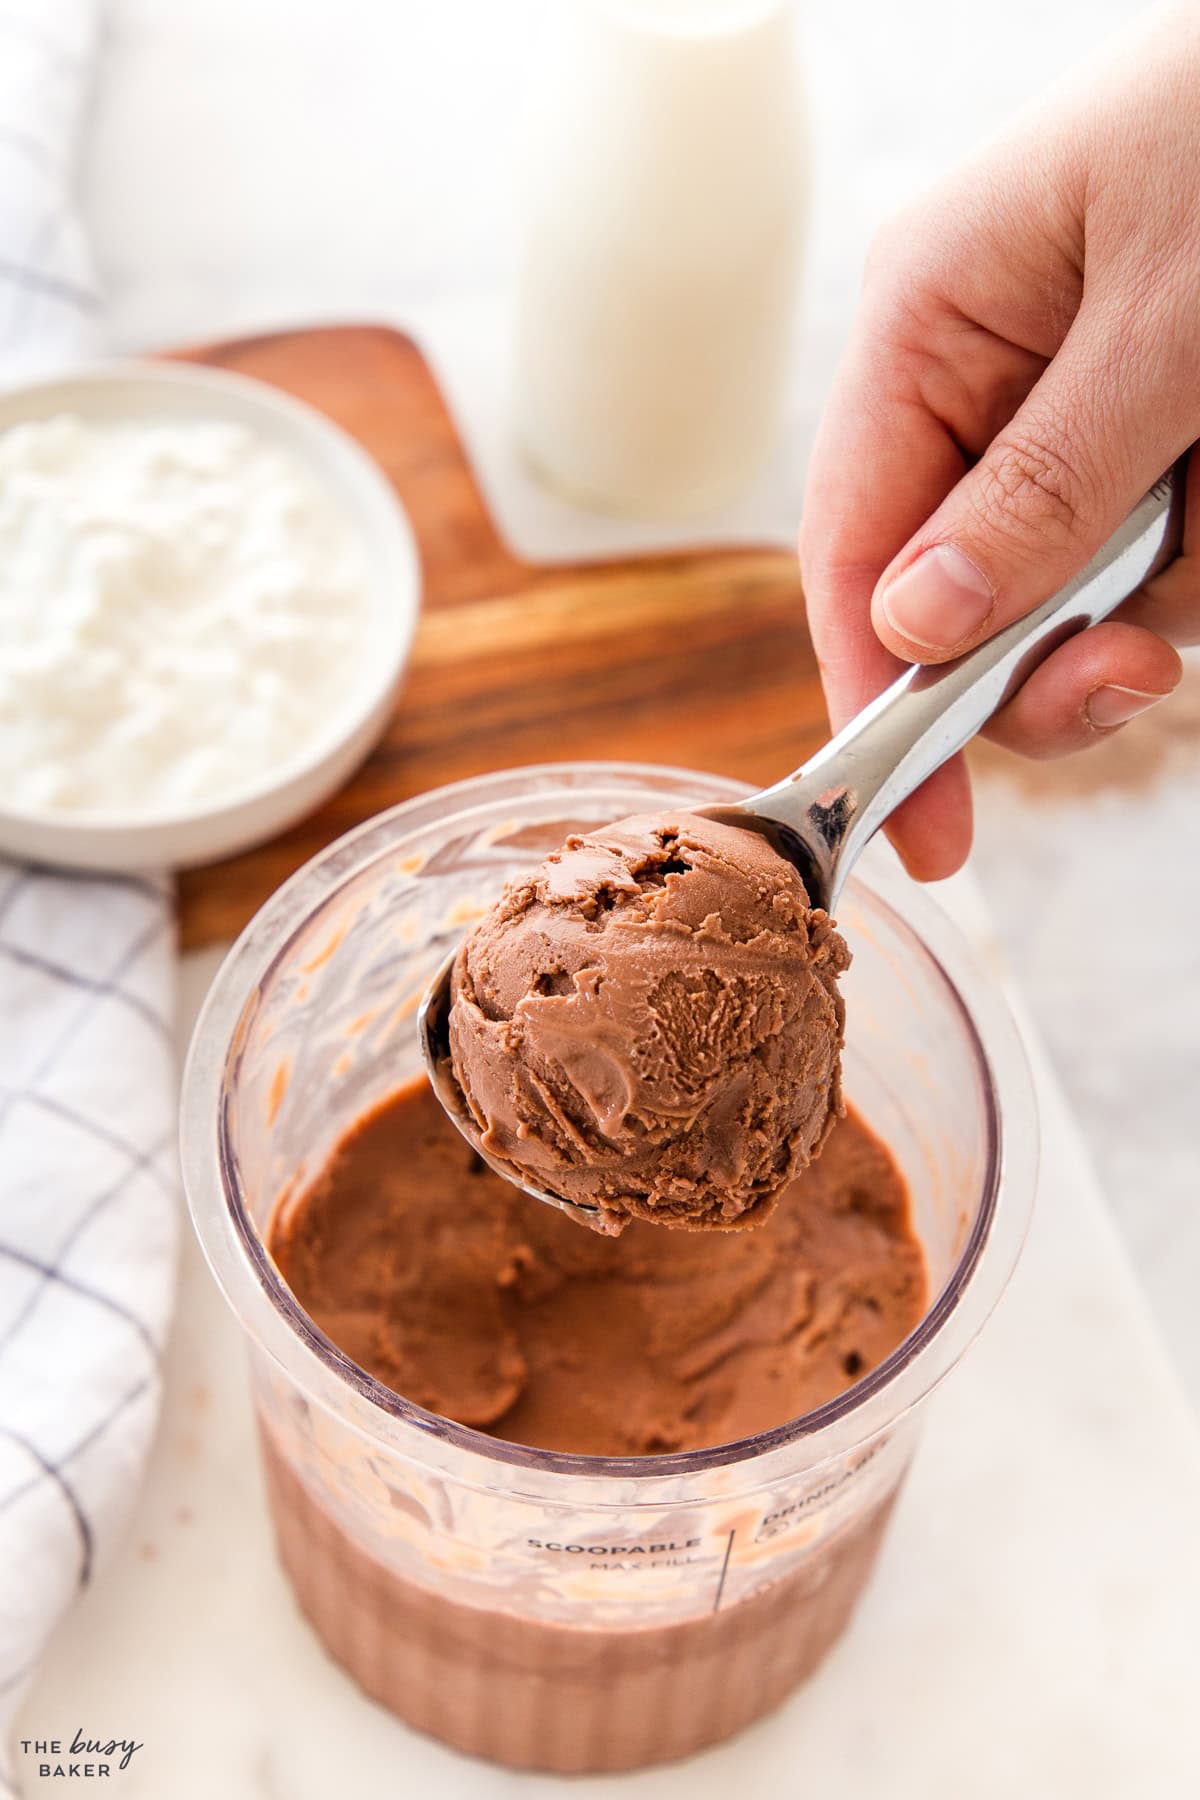
- It’s super VERSATILE. We love making it in different flavours like chocolate, strawberry cheesecake, vanilla, and even cinnamon!
- It’s absolutely DELICIOUS. It’s so creamy and smooth, just like regular ice cream, and it’s so tasty!
- It’s SO high in PROTEIN. With over 45 grams of protein per serving, it’s a great way to get your protein in and enjoy a treat at the same time!
- It’s made with only a FEW SIMPLE INGREDIENTS. Made with only protein powder, milk and cottage cheese, plus added flavour (like cocoa powder, vanilla extract, etc.), it’s our go-to simple recipe for a treat!
- It’s a great HEALTHY ALTERNATIVE to ice cream! If you’re tracking macros or just trying to eat foods that help you reach your health or fitness goals, this protein ice cream is the perfect alternative to other frozen treats!

Protein ice cream is a sweet treat that’s often on the healthier side – especially when compared to conventional ice cream. It’s usually made with protein powder, but it’s almost always made with high protein dairy ingredients like Greek yogurt, cottage cheese and milk. Because of this, it’s sometimes called “cottage cheese ice cream.”
Protein ice cream that you an buy at the supermarket is often made with a lot of ingredients and preservatives, but when you make it yourself at home it can be made with just a few simple ingredients and tailored to your taste and health preferences.
Since protein is having a moment right now, especially for those of us who are focused on our health and fitness, protein ice cream and other homemade high protein snacks and treats are super popular on social media and often feature recipes that have been given a makeover from a high-fat, high-calorie version to a version with more nutrients, as a way to help people enjoy the foods they love while still focusing on their health.

Here are a few of our other favourite homemade frozen treats we know you’ll love!
- This Easy Sorbet recipe is SO easy to make with a food processor!
- This Ice Cream Cake is such a great recipe for a summer birthday party!
- This Easy No Churn Lemon Ice Cream is a refreshing treat for summer.
- Try this Easy No Churn Snickers Ice Cream for an indulgent treat.
- This Keto Ice Cream is a sugar-free treat you’ll love!
This blog post is NOT sponsored by Ninja Creami – we just love our Ninja Creami so much for making delicious protein ice cream like this that we HAD to share this recipe with you. However, not everyone has a Ninja Creami or an ice cream maker and maybe you’re not in the market for yet another appliance to add to your kitchen. So, we want to share another delicious way you can make this Protein Ice Cream with just a blender, an airtight container or loaf pan, and a freezer. Here’s how to do it:
- Adjust the ingredient amounts. We recommend adding an extra 1/2 cup to 2/3 cup of cottage cheese (or add Greek yogurt instead, in the same measurement), to make your homemade ice cream more creamy in texture. The Ninja Creami does a great job of blending ice cream that has a higher content of liquid ingredients that have been frozen, but homemade ice cream with a high amount of liquid turns to ice more easily and is much harder to scoop. Adding between 1/2 and 1 cup of another creamy or more solid ingredient like blended cottage cheese, yogurt or even frozen fruit like blueberries, or a banana, can help the ice cream become more scoop-able once it’s frozen. The thicker it is before it’s frozen, the more scoop-able it will be after it’s frozen because the ice crystals will be easier to break up.
- Use full fat dairy. Adding full-fat cottage cheese or yogurt and full fat milk will increase the fat content but decrease the water content, making the ice cream more scoop-able once it’s frozen. If you’re using a Ninja Creami, the fat content doesn’t matter as much, but without one it makes a big difference.
- Use a high-speed blender or an immersion blender to blend the cottage cheese, milk, and protein powder (plus anything extra you add in) until it’s creamy and smooth.
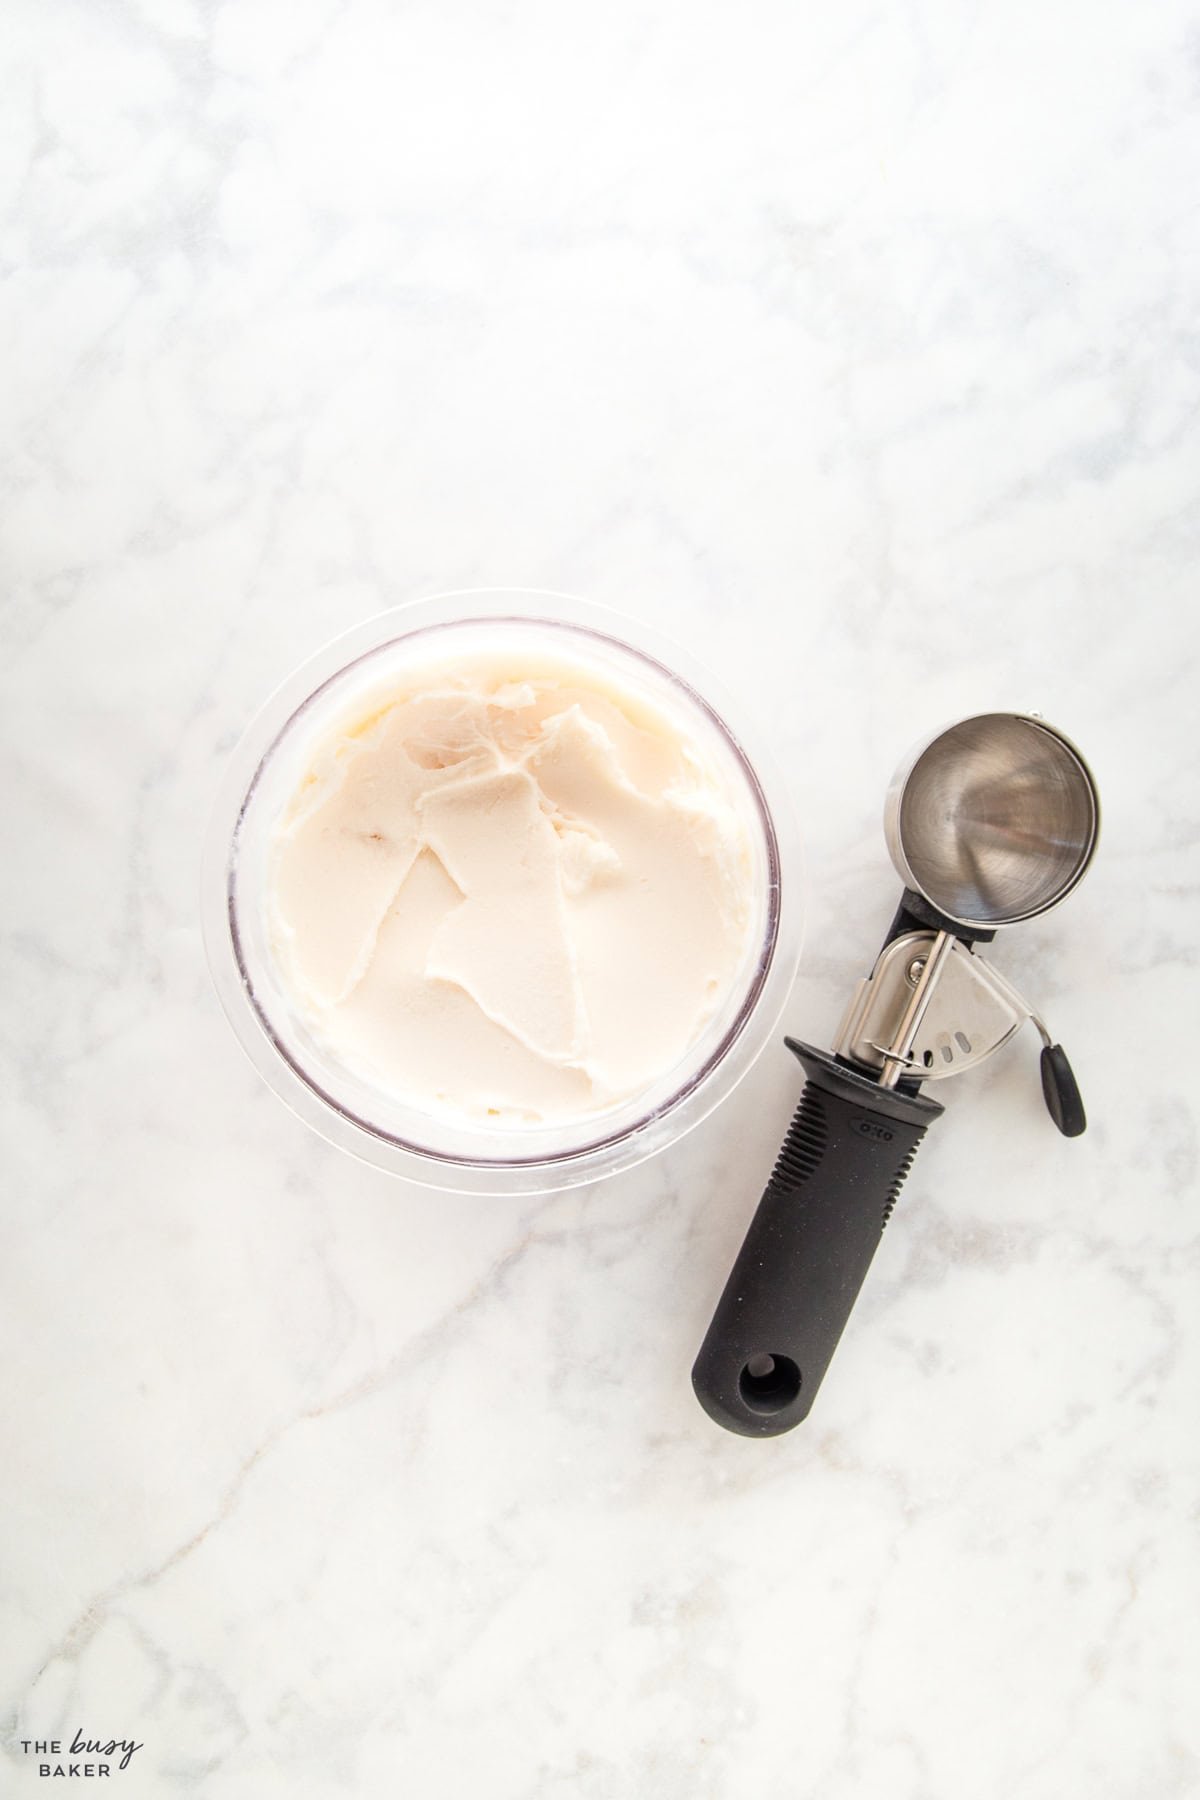
- Add the blended mixture to an airtight container or loaf pan covered with plastic wrap and freeze for about 2-6 hours, or until the mixture is the texture of ice cream. Stir in any add-ins like chopped fruit, sprinkles, chocolate chips, etc. before freezing.
- If you freeze the mixture too much and it becomes too hard to scoop after freezing, let it thaw out at room temperature for 20-30 minutes before scooping and serving.
The Ninja Creami definitely makes this protein ice cream more creamy and smooth because it’s a high powered blender that cuts through the ice crystals that form when the ice cream mixture freezes. Sometimes adding a quarter teaspoon of Xanthan gum and blending that in to the ice cream mixture before freezing can help it remain a little softer and give it a more scoop-able texture.
Making your own protein ice cream at home allows you to prepare it with minimal ingredients and no additives or preservatives, so our personal preference is to avoid adding Xanthan gum or other ingredients that affect the texture, but it’s up to you.
Here are all our best tips for making this cottage cheese ice cream recipe the best it can be!
If you would drink the protein powder in a protein shake, go ahead and use it in this recipe. If you don’t like the taste of the protein powder, you probably won’t like the ice cream either, so go ahead and choose one you enjoy!
Dairy that’s low in fat has a higher water content, making it freeze differently than dairy that’s higher in fat. For this recipe, choose a higher-fat cottage cheese (at least 2%, but 4% is even better) and a higher fat milk (at least 1%, but 2 or 3% is better). This will help the protein ice cream have a better texture once it’s frozen.
Be sure to read the instructions for using your Ninja Creami and follow them carefully.
Allow the ice cream mixture to freeze completely before you blend it in the Ninja Creami. We like to make the mixture the night before and blend it right before servings.
Try a chocolate protein powder, stick with the standard vanilla, or use any other flavour you like! Some of our favourites are cake batter flavour, white chocolate peppermint, and even eggnog flavour with some added cinnamon).
To help the Ninja Creami do its job, let the frozen container of ice cream mixture sit out at room temperature for about 10 minutes before mixing. Alternatively, you can run the sides of the contain under hot running water for a few minutes to loosen the sides for better blending.
The NInja Creami creates the perfect texture to enjoy right away, so be sure to serve the protein ice cream right after you blend it.

Here are some issues you might encounter when making this Ninja Creami Protein Ice Cream, and how we recommend fixing them or preventing them!
If you’ve blended the ice cream in the Ninja Creami and it appears dry and powdery, don’t worry. This is totally normal! Simply add 1-2 teaspoons of milk and use the “re-spin” feature to make it right and creamy.
This shouldn’t happen, since the Ninja Creamy almost always blends it too dry instead of too wet, but if it does, simply add it back to the freezer for it to firm up for about 30 minutes or so, before scooping and serving.
If you don’t enjoy the taste of your protein powder, you probably won’t like the ice cream you make with it. Be sure to choose a protein powder you enjoy, and consider adding a few drops of stevia for some extra flavour.
In this case, simply use the “re-spin” feature to soften it up again so you can scoop and serve it.

To make this cottage cheese ice cream you’ll need to have this kitchen equipment on hand (paid links):
- Ninja Creami Deluxe or a standard Ninja Creami
- Blender or Immersion Blender
- measuring cups and spoons
- liquid measuring cups
After years of making ice cream at home, testing several different ice cream makers, the Ninja Creami is a clear winner. We love using it for making homemade frozen yogurt, homemade sorbet from smoothies, and this high protein cottage cheese ice cream (paid links below).
We have the Ninja Creami Deluxe, because we’re a family of 4 and enjoy the 24-ounce tubs, but the standard Ninja Creami is also great.
If you’re using this recipe to make protein ice cream with the Ninja Creami standard device with 16-ounce tubs, you’ll have to cut this recipe in half (so 1/2 cup milk, 1/2 cup blended cottage cheese, and one scoop of protein powder) and make one serving at a time.
Here are all our BEST TIPS for using the Ninja Creami to its full potential:
If you’ve never used a Ninja Creami before and you’re tempted to wing it – don’t. Each Ninja Creami recipe is designed to develop a scoopable texture.
Don’t skimp on dairy (or an equally creamy dairy replacement like coconut cream or soy yogurt). Dairy makes your Ninja Creami creations nice and creamy!
It should go without saying, you have to use the ice cream containers provided with the Ninja Creami. Be sure to freeze your mixture in the containers provided.
The top of the mixture when frozen needs to be flat in order for the machine to process it properly. Be sure to place the containers in the freezer on a flat surface.
Be sure to freeze the mixture for 24 hours or until frozen solid. The machine will blend it to the perfect creamy texture only if it’s frozen solid.
Be sure to use the “light ice cream” setting when making protein ice cream that’s lower in fat and sugar than traditional ice cream.
It’s totally normal for your mixture to appear dry and crumbly after the first mixing. Just add it back into the machine (with a teaspoon or two of milk, if you want) and hit the “re-spin” function and it will be nice and creamy.
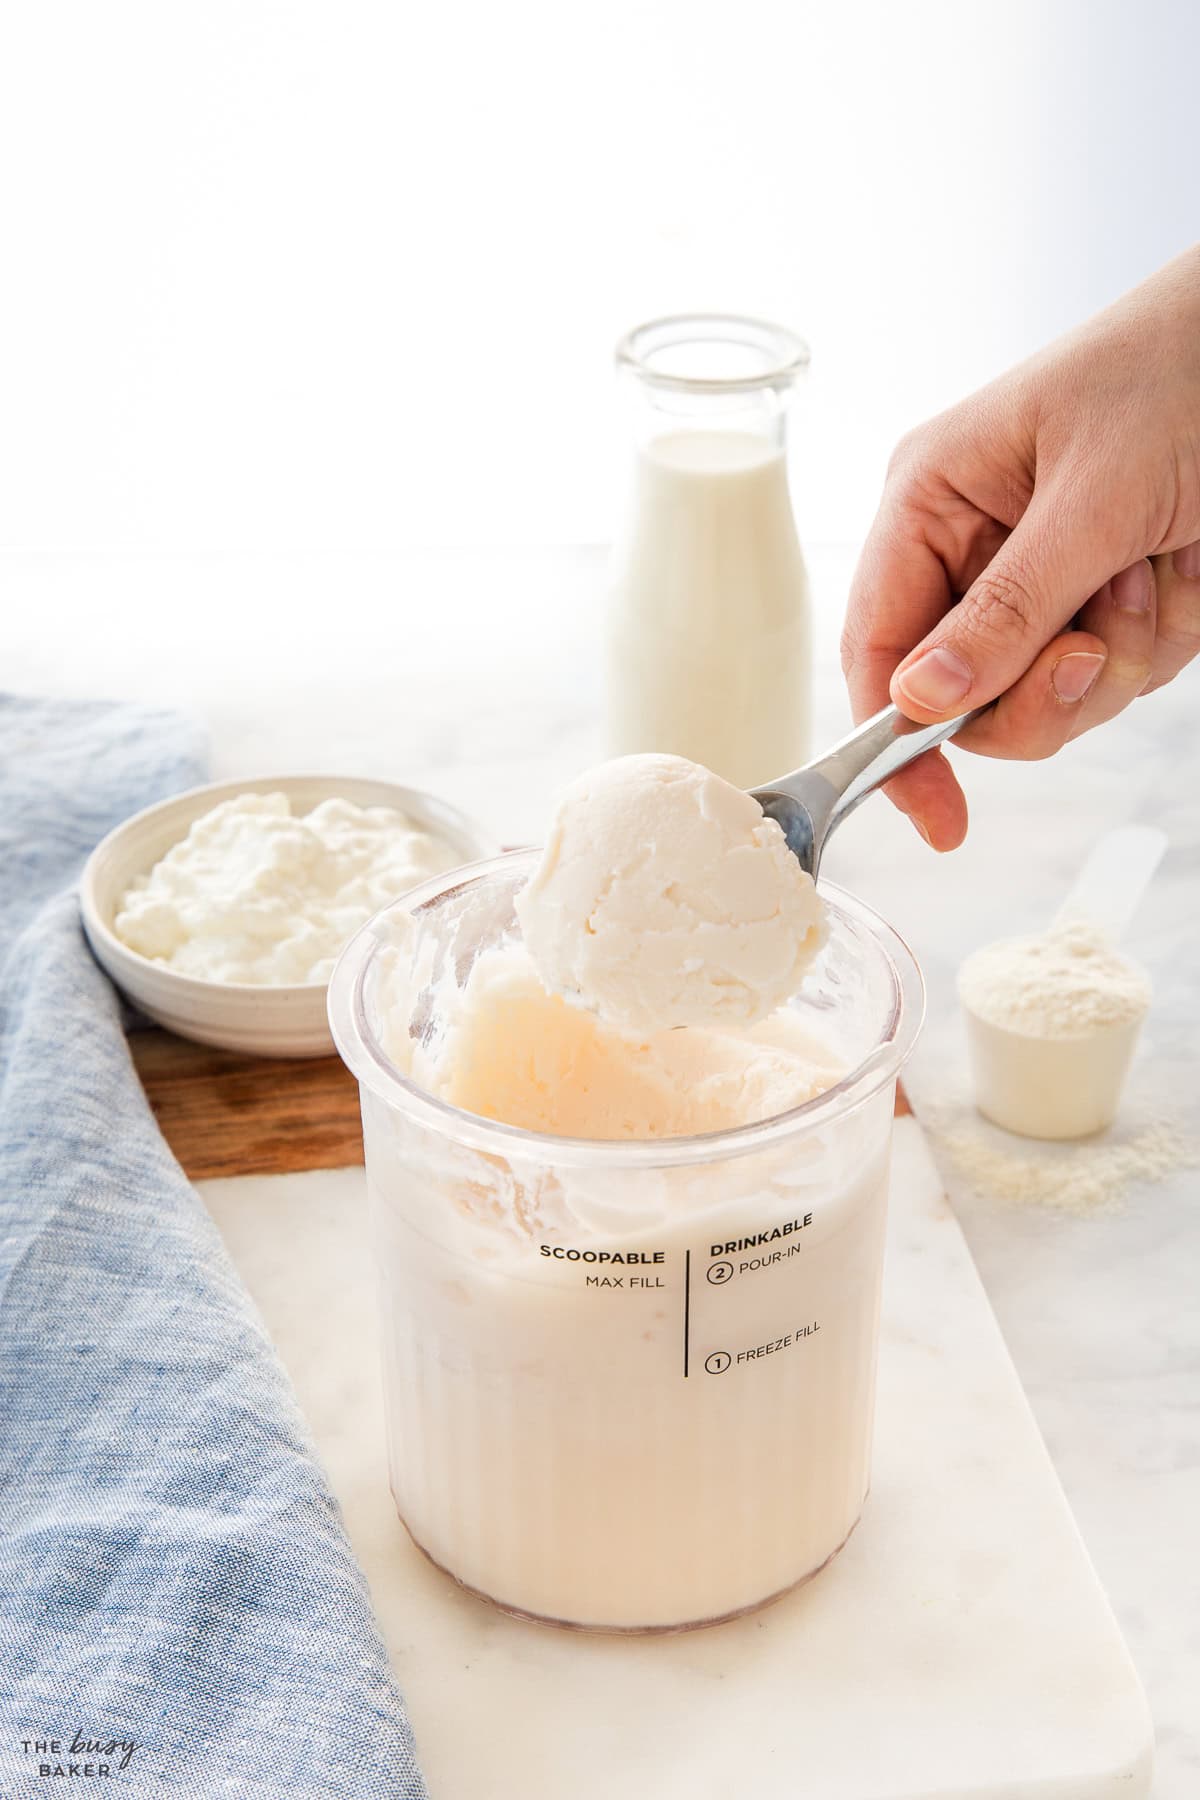
Here are the simple ingredients you’ll need to make this basic protein ice cream recipe with the Deluxe or larger Ninja Creami (paid links):
- 1 cup cottage cheese
- 1 cup high protein milk
- 2 scoops protein powder
If you have a smaller Ninja Creami, simply halve the recipe and add these ingredients:
- 1/2 cup cottage cheese
- 1/2 cup high protein milk
- 1 scoop protein powder
You may also want to add 2-3 drops of stevia, or a tablespoon of cocoa powder (if you’re making chocolate ice cream) into the base mixture, depending on the flavour you’re making.
There are SO many ways you can make this Protein Ice Cream recipe your own and use the base recipe as a formula for your own creations. Here are some of our favourite ways to switch it up and create different flavours!
Mix the ice cream as normal, then add 2 tablespoons of almond butter or peanut butter for extra protein, along with some dark chocolate chips, cacao nibs, or cocoa powder and use the mix-in function.
Replace the milk with a chocolate protein shake and use the mix-in function to add chocolate chunks.
Use cookies and cream protein powder and then after blending, add 2-3 oreo cookies using the mix-in function.
This variation is our favourite! Use a vanilla or eggnog flavoured protein powder and add in 3/4 teaspoon or cinnamon. Don’t forget to add a few drops of stevia or other sweetener (even honey!), as this brings out the cinnamon flavour even more!
Replace some of the milk and cottage cheese with blended bananas, frozen berries, mangoes, fresh strawberries or raspberries, or other fruit.
Add some vanilla extract and maple extract to the vanilla protein ice cream recipe made with vanilla protein powder, and then add maple syrup and pecans with the mix-in function.
Use caramel flavoured protein powder and then using the mix-in function, add flaky sea salt and caramel sauce.
Use an unflavoured protein powder, add some green food colouring and peppermint extract, then add chocolate chips or chunks with the mix-in function.
Use cheesecake flavoured protein powder or instant pudding mix, and use the mix-in function to swirl in some graham cracker crumbs for some added crunch, along with fresh strawberries and even some strawberry jam for extra sweetness and strawberry flavour.
Use cake batter protein powder and add sprinkles before serving.
Time needed: 1 day and 10 minutes
Here’s how to make the BEST protein ice cream using the Ninja Creami!
- Blend the cottage cheese.
Blend the cottage cheese until smooth using a hand blender or high powered blender.
- Blend in the other ingredients.
Next, blend in the high protein milk, protein powder, and stevia (if using). If you’re planning to make chocolate ice cream, this is where you should add in cocoa powder, nut butter, or any other ingredients you want incorporated fully into the ice cream mixture (not add-ins like cookies or chocolate).
- Use the Ninja Creami containers.
Blend until smooth, then pour the mixture into the Ninja Creami container and smooth out the surface of the mixture until smooth. Add the lid, then freeze for about 24 hours until frozen solid, making sure the container is on a flat surface.
- Prepare to spin.
Once the mixture is completely frozen, add it to the Ninja Creami according to the manufacturer’s instructions provided with the machine.
- Process it.
Process on the “Lite Ice Cream” setting, according to the directions provided with the machine.
- Re-spin, if necessary.
If the mixture after processing appears powdery instead of smooth and creamy, simply add a teaspoon or two of milk, and process on the “re-spin” setting, according to the manufacturer’s instructions.
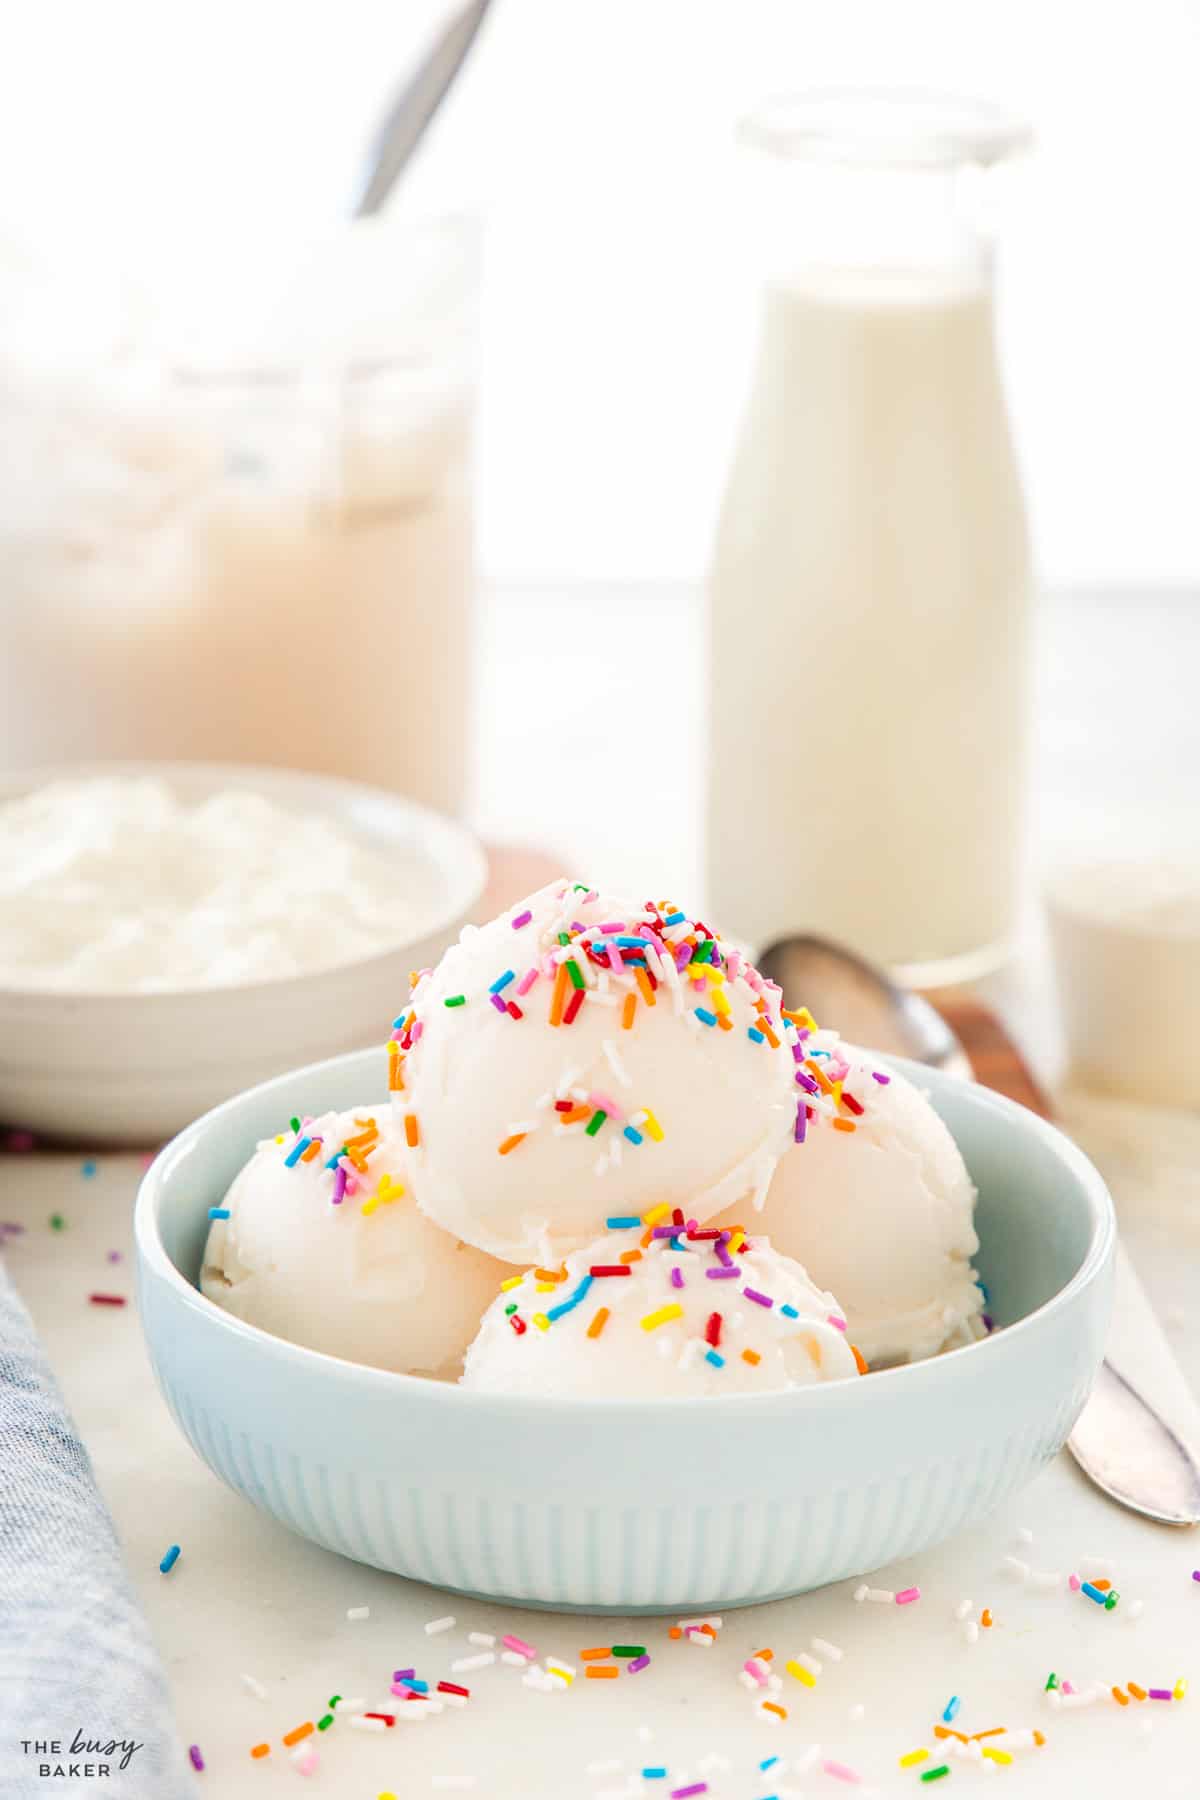
- Serve.
Serve in bowls with your favourite toppings, or add mix-ins and process on the “mix-in” setting according to the manufacturer’s instructions.
Can I substitute the cottage cheese for Greek yogurt in this protein ice cream recipe?
Yes! We’ve tested this recipe with both blended cottage cheese and Greek yogurt, and it works with both. We’ve found using blended cottage cheese gives it a higher protein content, but using Greek yogurt makes it just a little bit creamier.
Do I have to use protein powder in this protein ice cream?
The protein powder in this recipe is what gives it the high protein content, the sweetness, and the flavour. We suggest trying a different recipe without protein powder if you’d prefer it without.
What kind of protein powder should I use to make protein ice cream?
We recommend choosing a whey protein powder that you enjoy regularly and like the taste of. If you don’t like how the protein powder tastes, you won’t enjoy the ice cream. We love Clean Simple Eats protein powder because of the range of flavours available and because it has the best flavour, in our opinion.
Do I need to use a Ninja Creami machine for this recipe?
We recommend using a Ninja Creami for best results, but we’ve given instructions in the blog post above for making this ice cream without a Ninja Creami.
Can I make this recipe dairy-free or vegan?
Yes, you can make protein ice cream with dairy-free yogurt that’s high in fat (we like coconut yogurt) and add coconut milk, soy milk or unsweetened almond milk along with vegan protein powder.
What kind of high protein milk should I use to make protein ice cream?
If you live in North America, Fairlife protein milk is a great choice. Here in Europe we like the Olympus brand, but there are many different brands of high protein milk available in most grocery stores.

We hope you love this protein ice ream recipe as much as we do! Let us know in the comments below, what’s your favourite high-protein sweet treat? We’d love to know!

More High Protein Recipes
- Protein Bagels
- Greek-Style Turkey Meatballs
- Keto Burgers in a Bowl
- Greek Yogurt Marinated Chicken
- Protein Pancakes
- Egg Bites
- Healthy Green Protein Smoothie
- Grilled Chicken
- Blueberry Cheesecake Protein Smoothie
- Easy Healthy Turkey Veggie Meatballs
Watch the video below to see exactly how we make this recipe. You can find many more deliciously simple recipe videos on our YouTube channel!
If you made this, share a photo!
Are you trying this recipe? Use the comment form below to share your take; now with support for image uploads and comment voting!
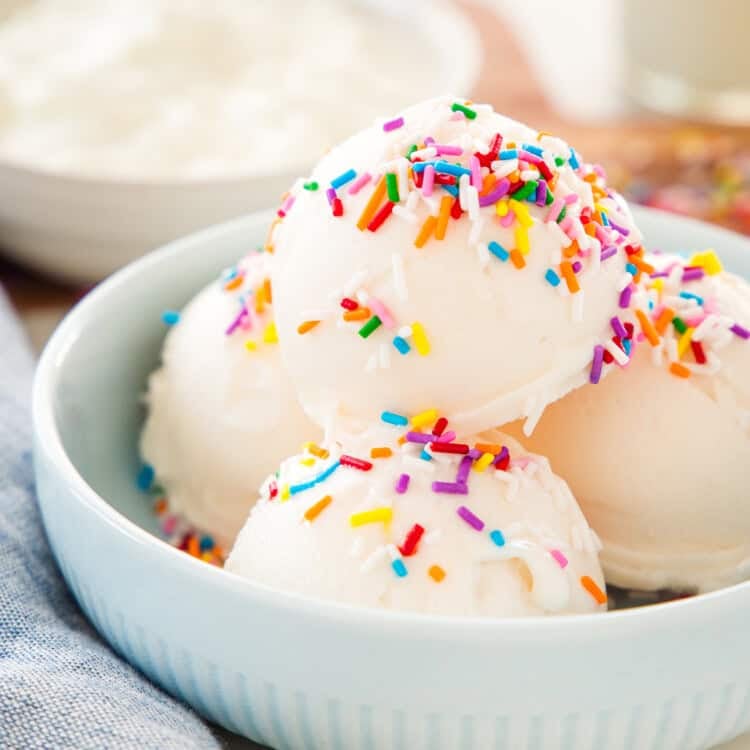
Protein Ice Cream
Recipe: Ingredients
- 1 cup cottage cheese
- 1 cup high protein milk
- 2 scoops protein powder
- 2-3 drops stevia optional
Recipe: Instructions
- Blend the cottage cheese until smooth using a hand blender or high powered blender.
- Next, blend in the high protein milk, protein powder, and stevia (if using). If you're planning to make chocolate ice cream, this is where you should add in cocoa powder, nut butter, or any other ingredients you want incorporated fully into the ice cream mixture (not add-ins like cookies or chocolate).
- Blend until smooth, then pour the mixture into the Ninja Creami container and smooth out the surface of the mixture until smooth. Add the lid, then freeze for about 24 hours until frozen solid, making sure the container is on a flat surface.
- Once the mixture is completely frozen, add it to the Ninja Creami according to the manufacturer's instructions provided with the machine.
- Process on the "Lite Ice Cream" setting, according to the directions provided with the machine.
- If the mixture after processing appears powdery instead of smooth and creamy, simply add a teaspoon or two of milk, and process on the "re-spin" setting, according to the manufacturer's instructions.
- Serve with your favourite toppings, or add mix-ins and process on the "mix-in" setting according to the manufacturer's instructions.
Recipe: Notes
Storage Instructions
Store any leftover protein ice cream in the freezer after mixing, but make sure to smooth out the top so it’s flat before re-freezing. Follow the manufacturer’s instructions for re-processing using the re-spin feature when you’re ready to enjoy the leftovers.Recipe: Nutrition
Notice: Nutrition is auto-calculated, using Spoonacular, for your convenience. Where relevant, we recommend using your own nutrition calculations.
TRY OUR MEAL PLAN BUNDLE!
Let us do the work for you with 11 WEEKS of deliciously easy family dinners, grocery lists, meal prep guides and so much MORE!
11 weeks of done-for-you family meal plans for only $9.99!