
This Lemon Meringue Pie recipe is the BEST classic dessert made with an easy homemade lemon pie filling and fluffy meringue! Follow our full tutorial with PRO tips for a no-fail lemon pie that turns out perfectly every single time!
Estimated reading time: 17 minutes
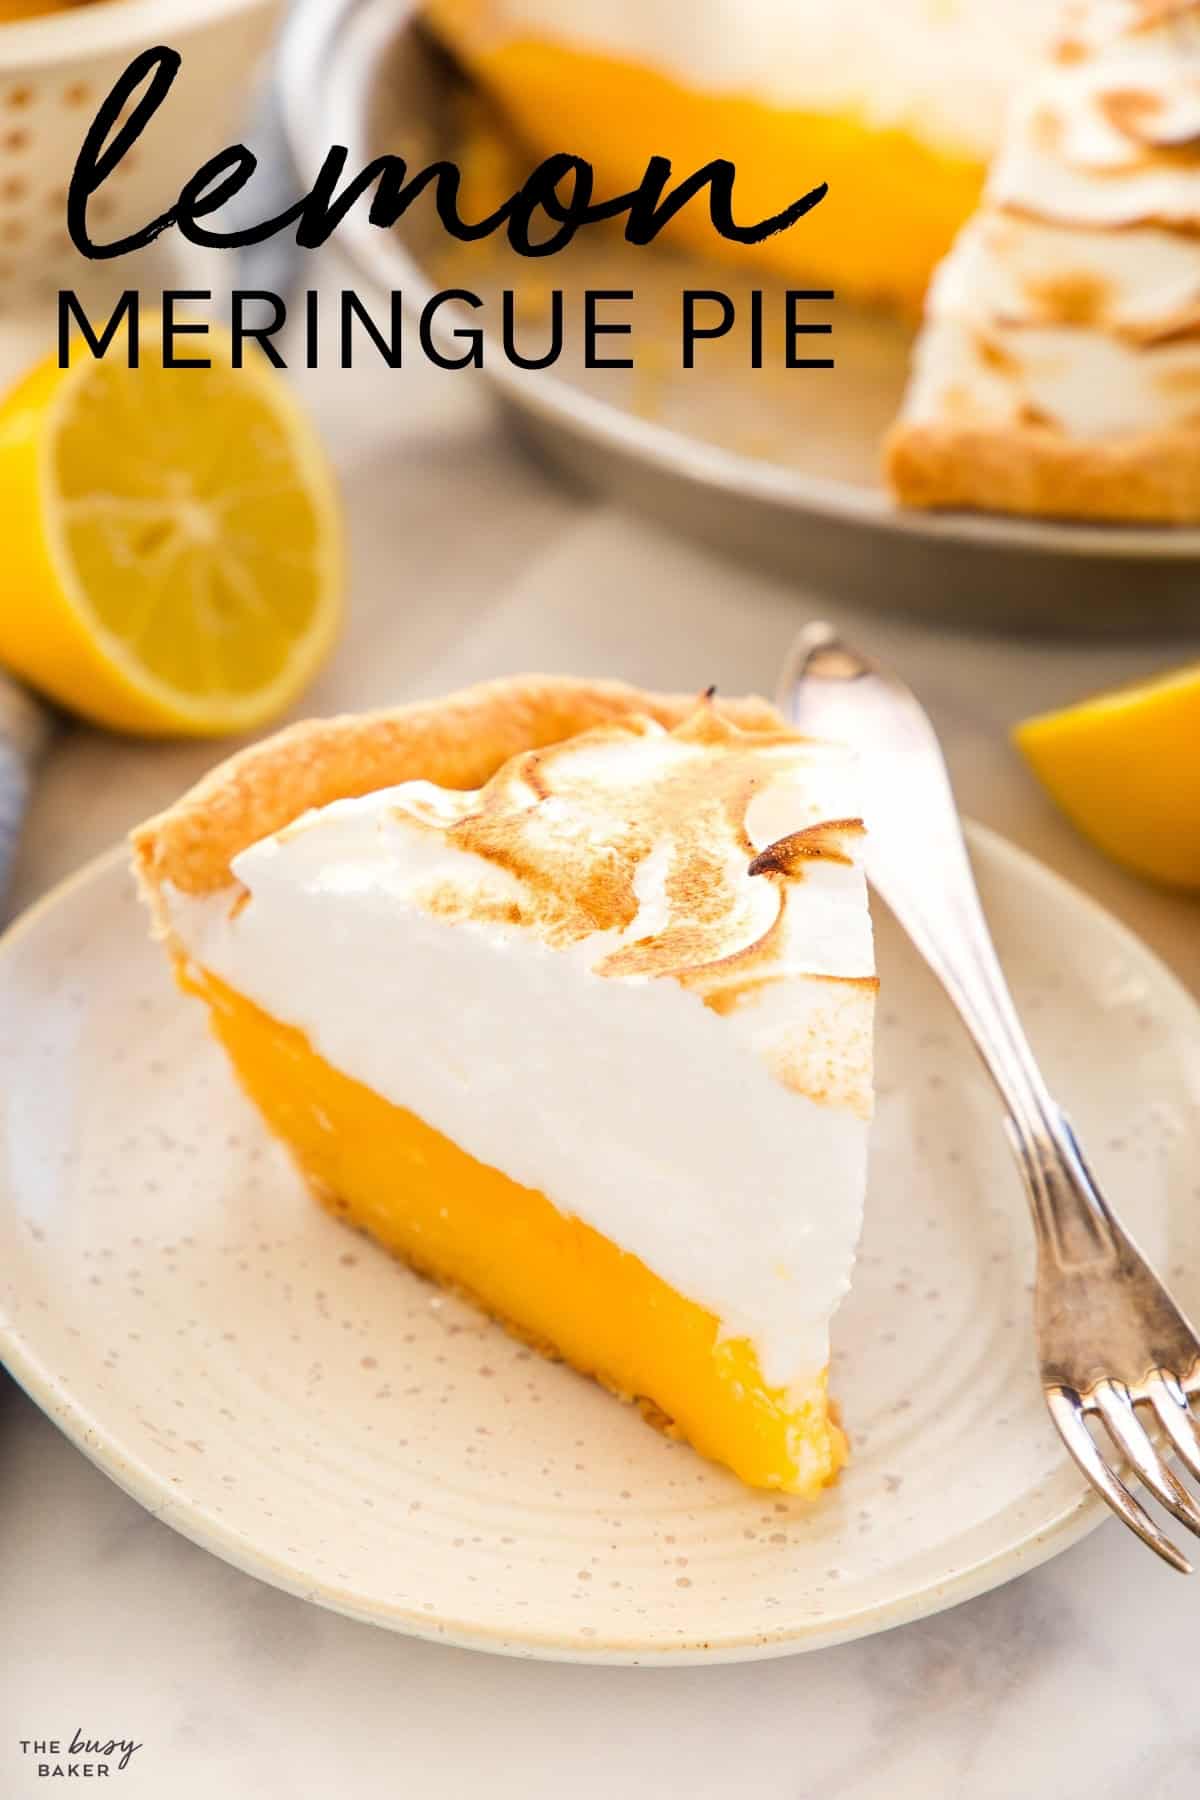
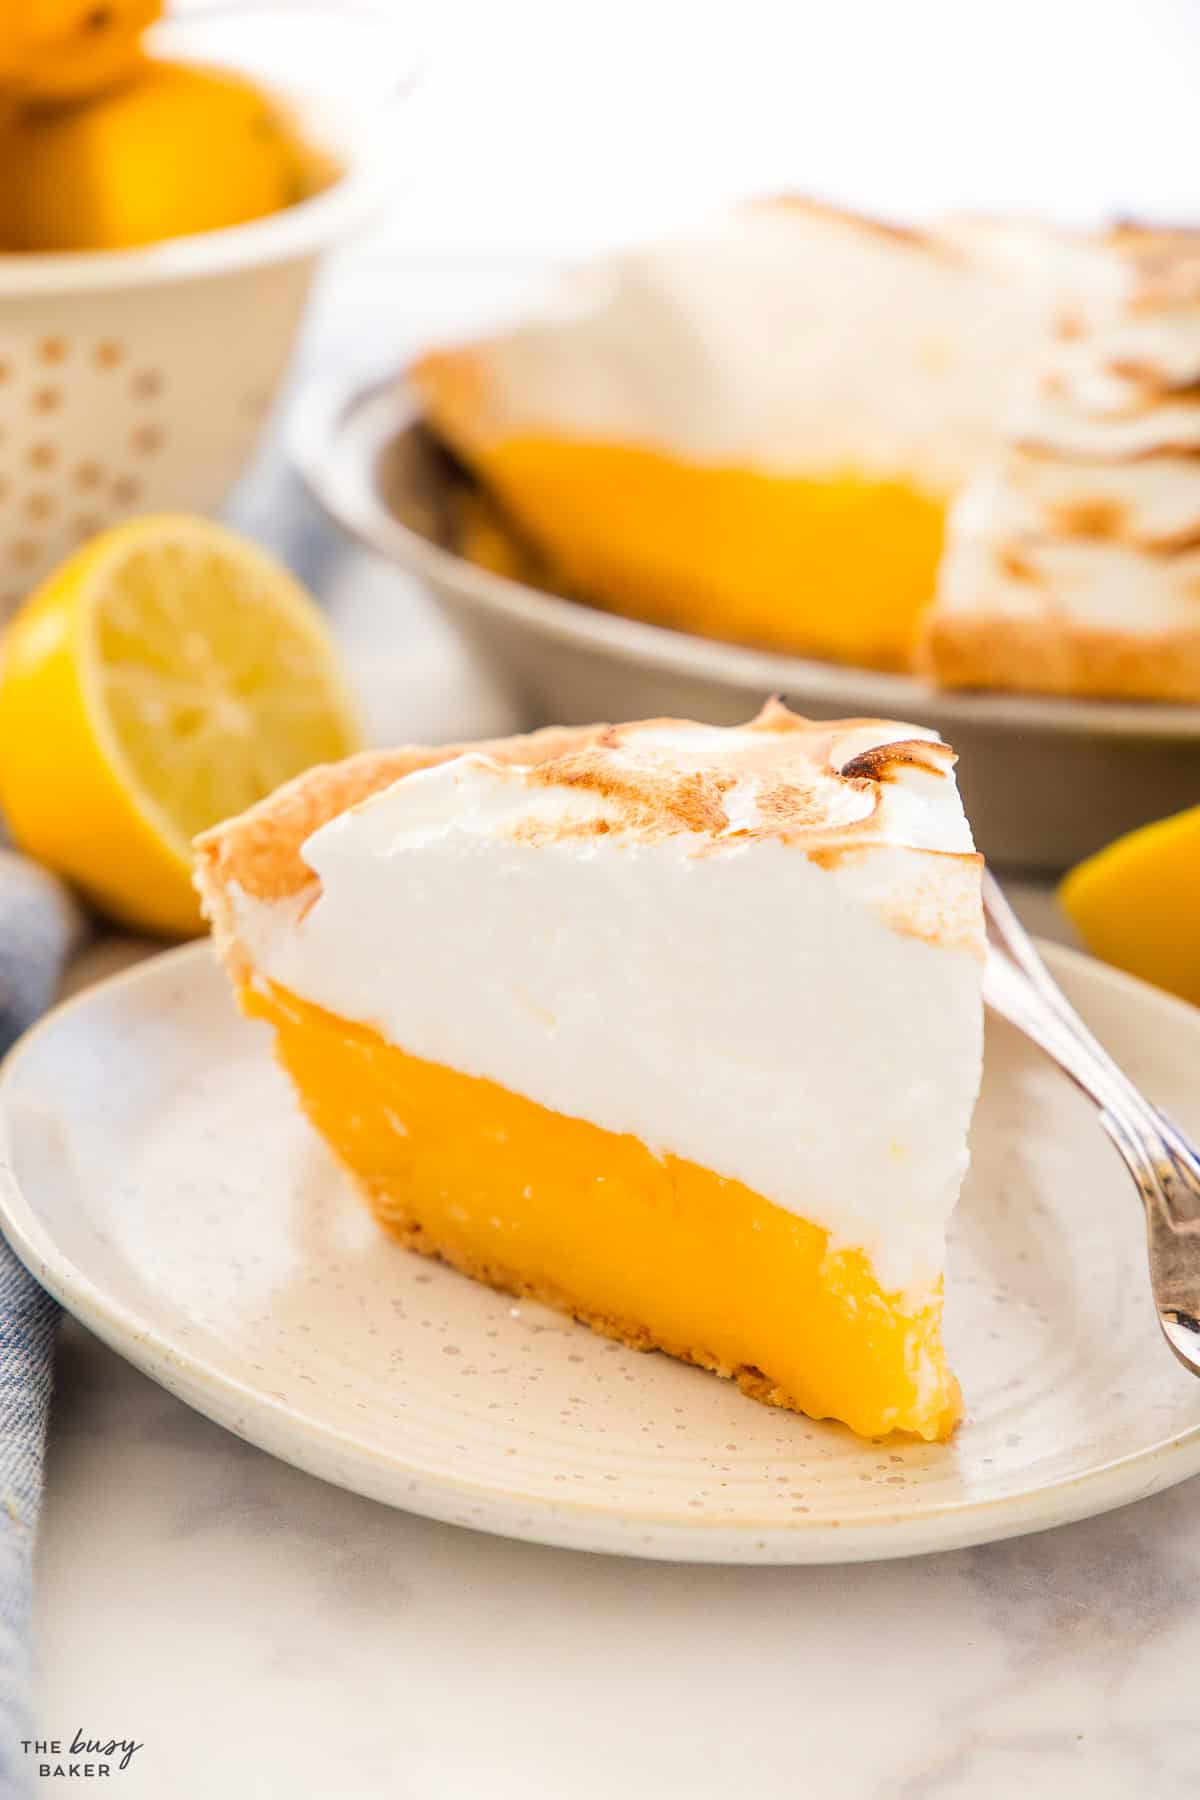
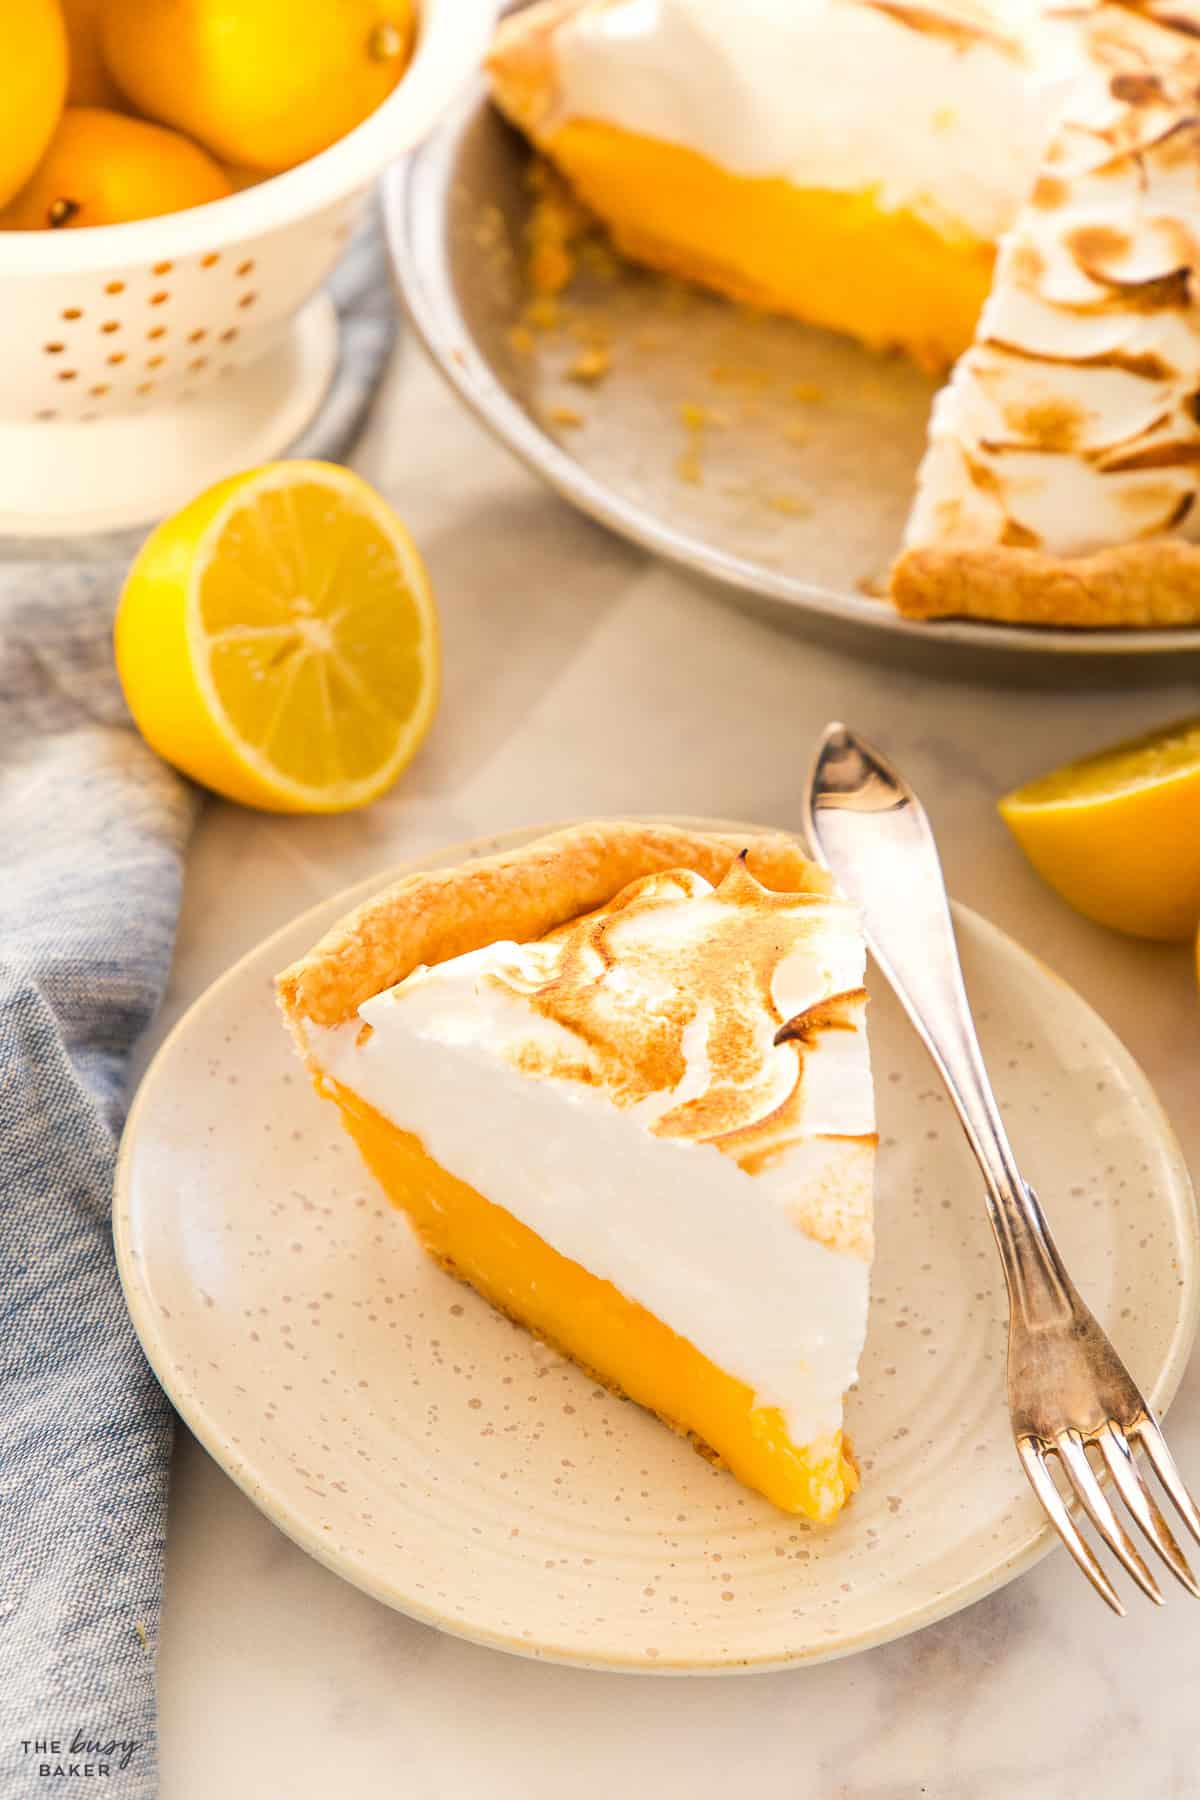
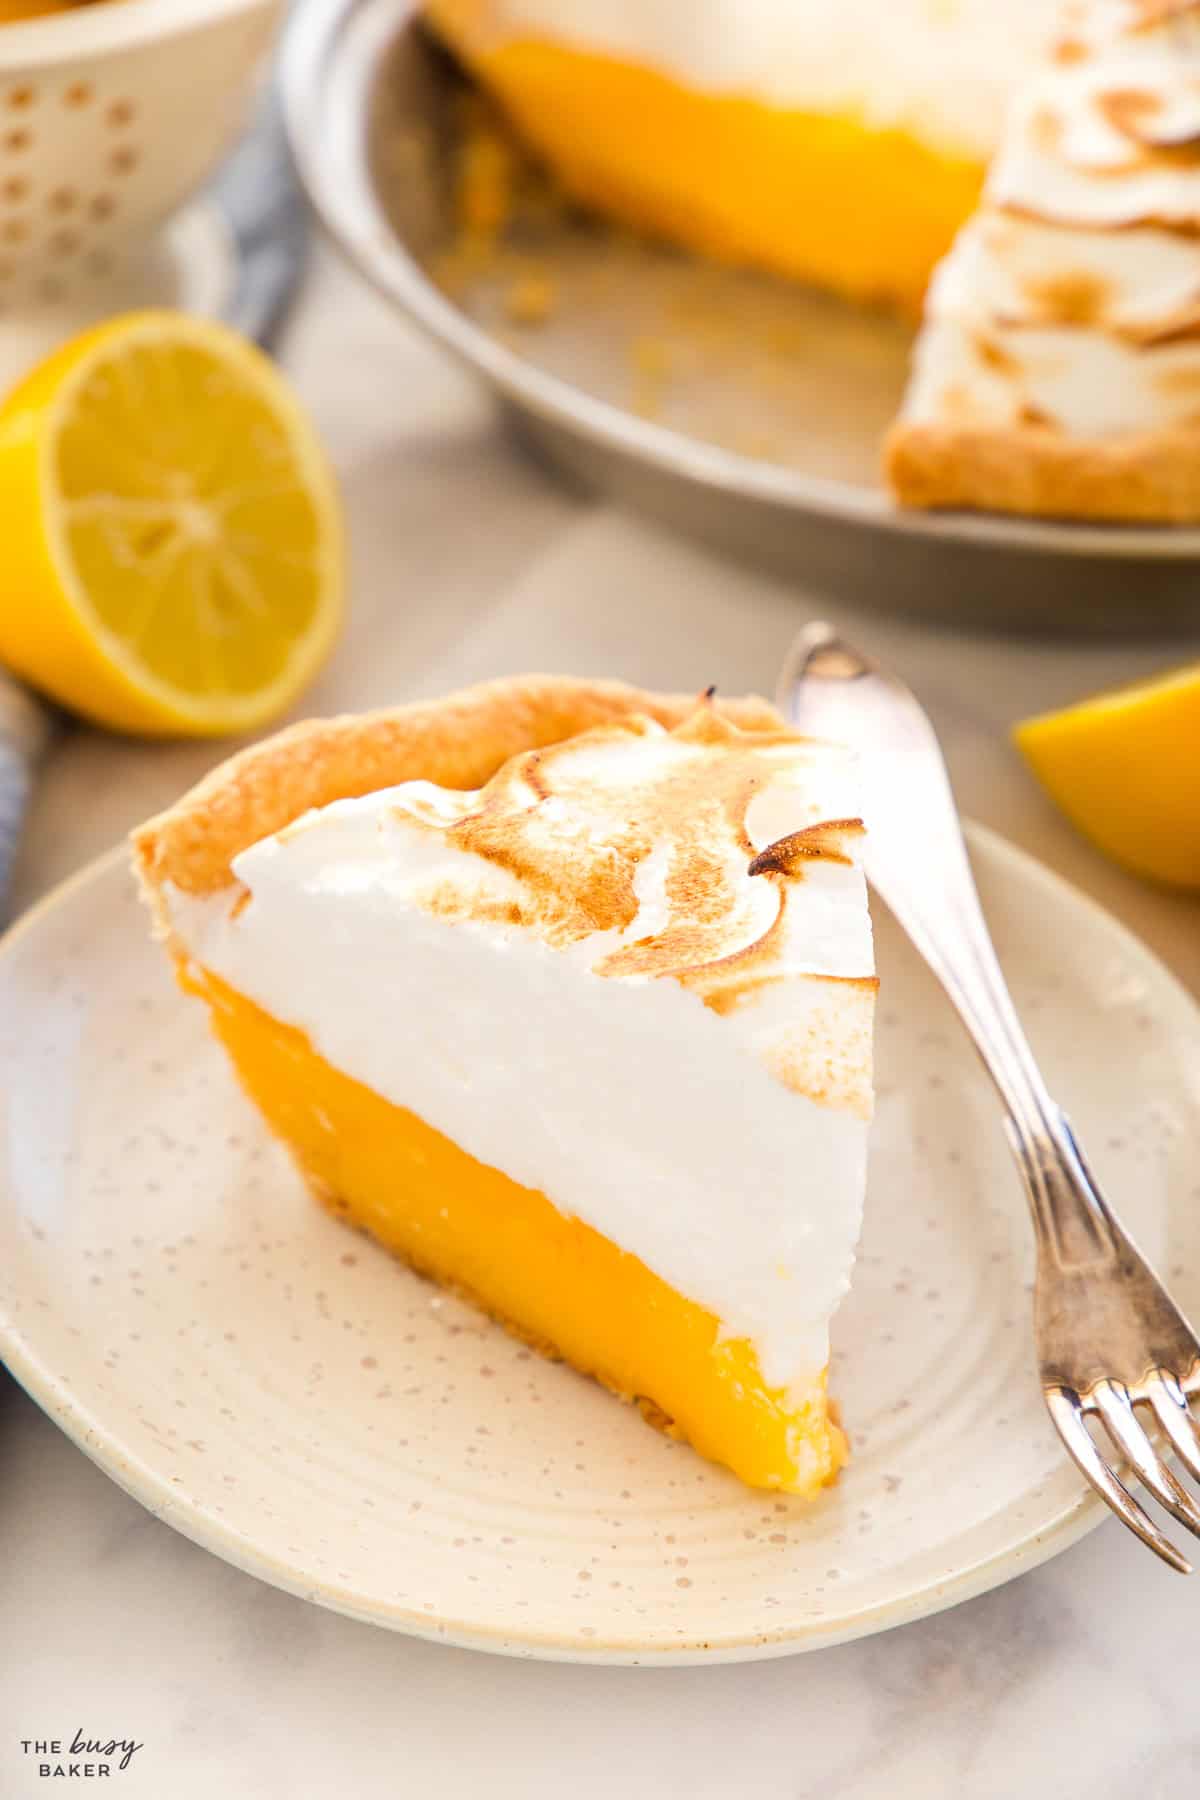
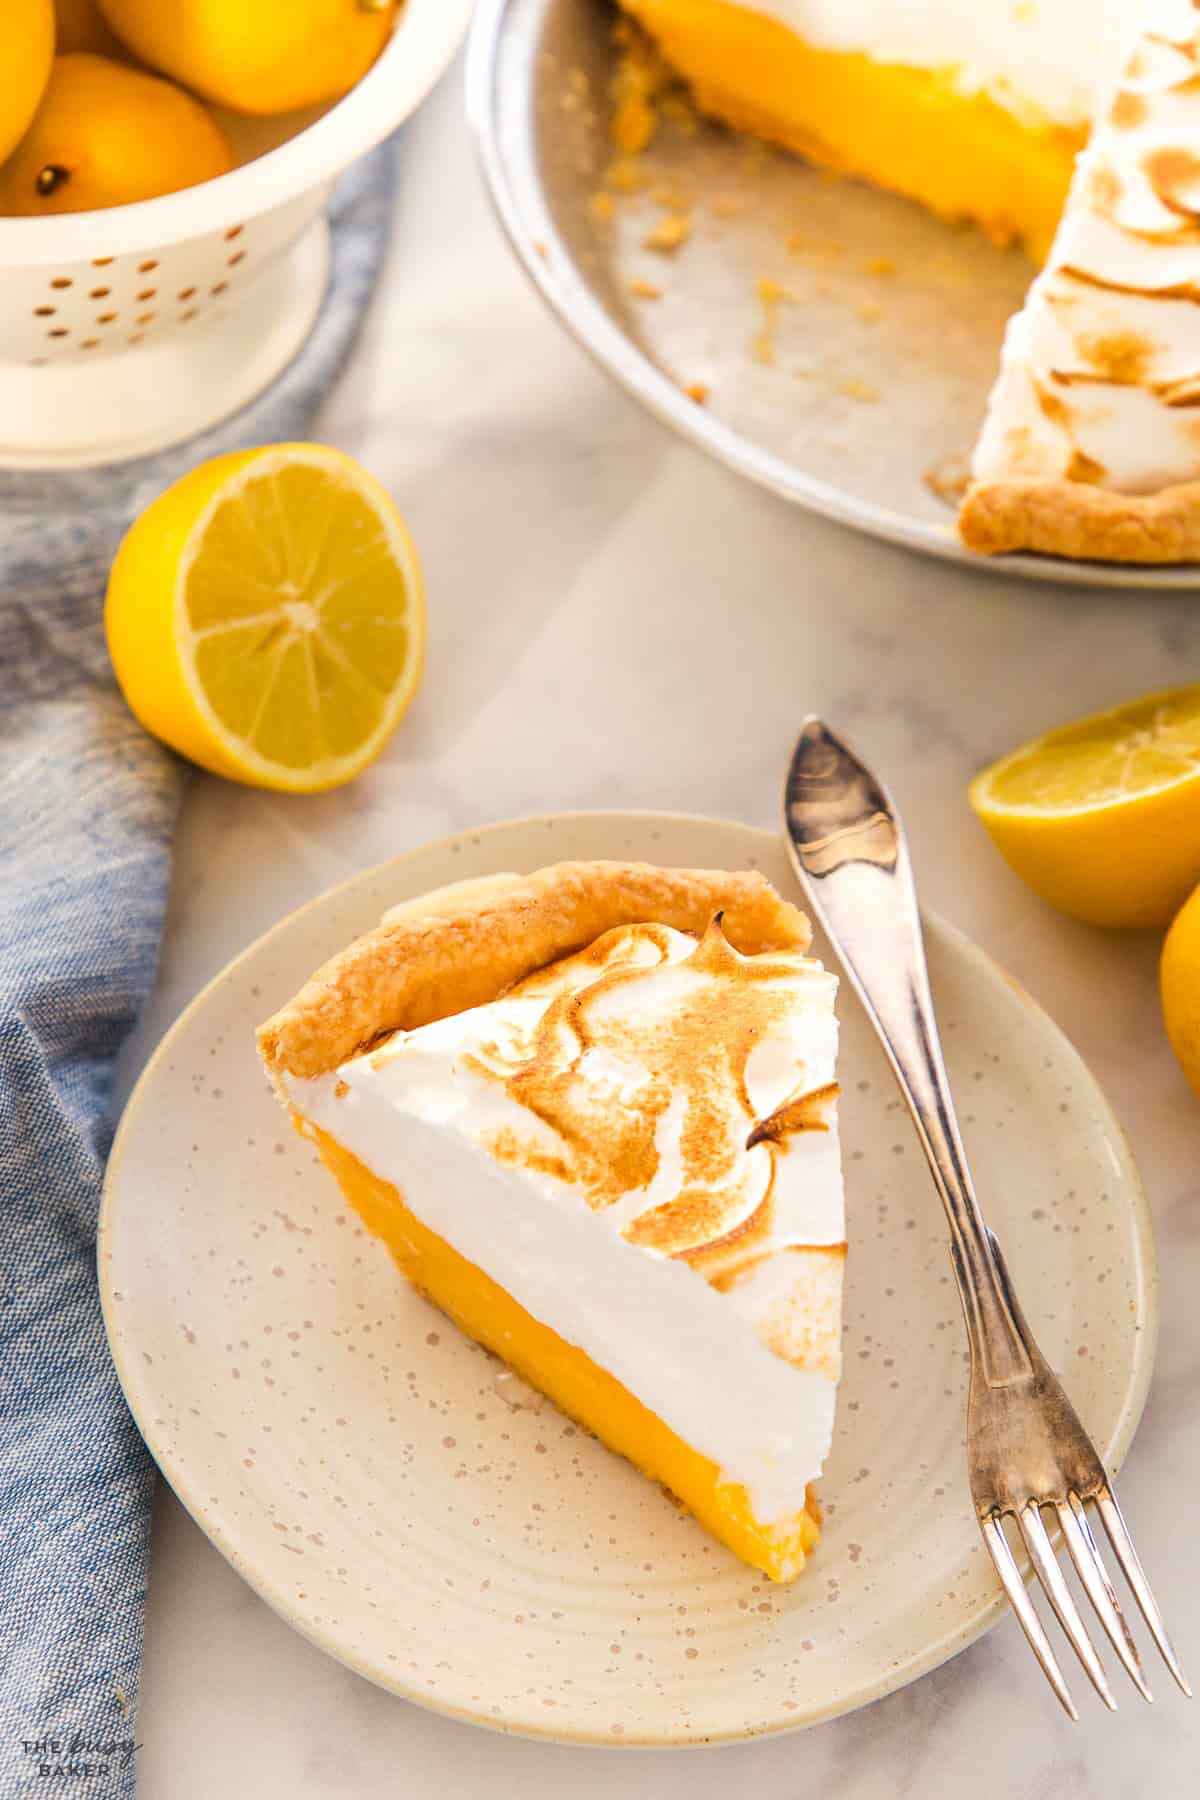
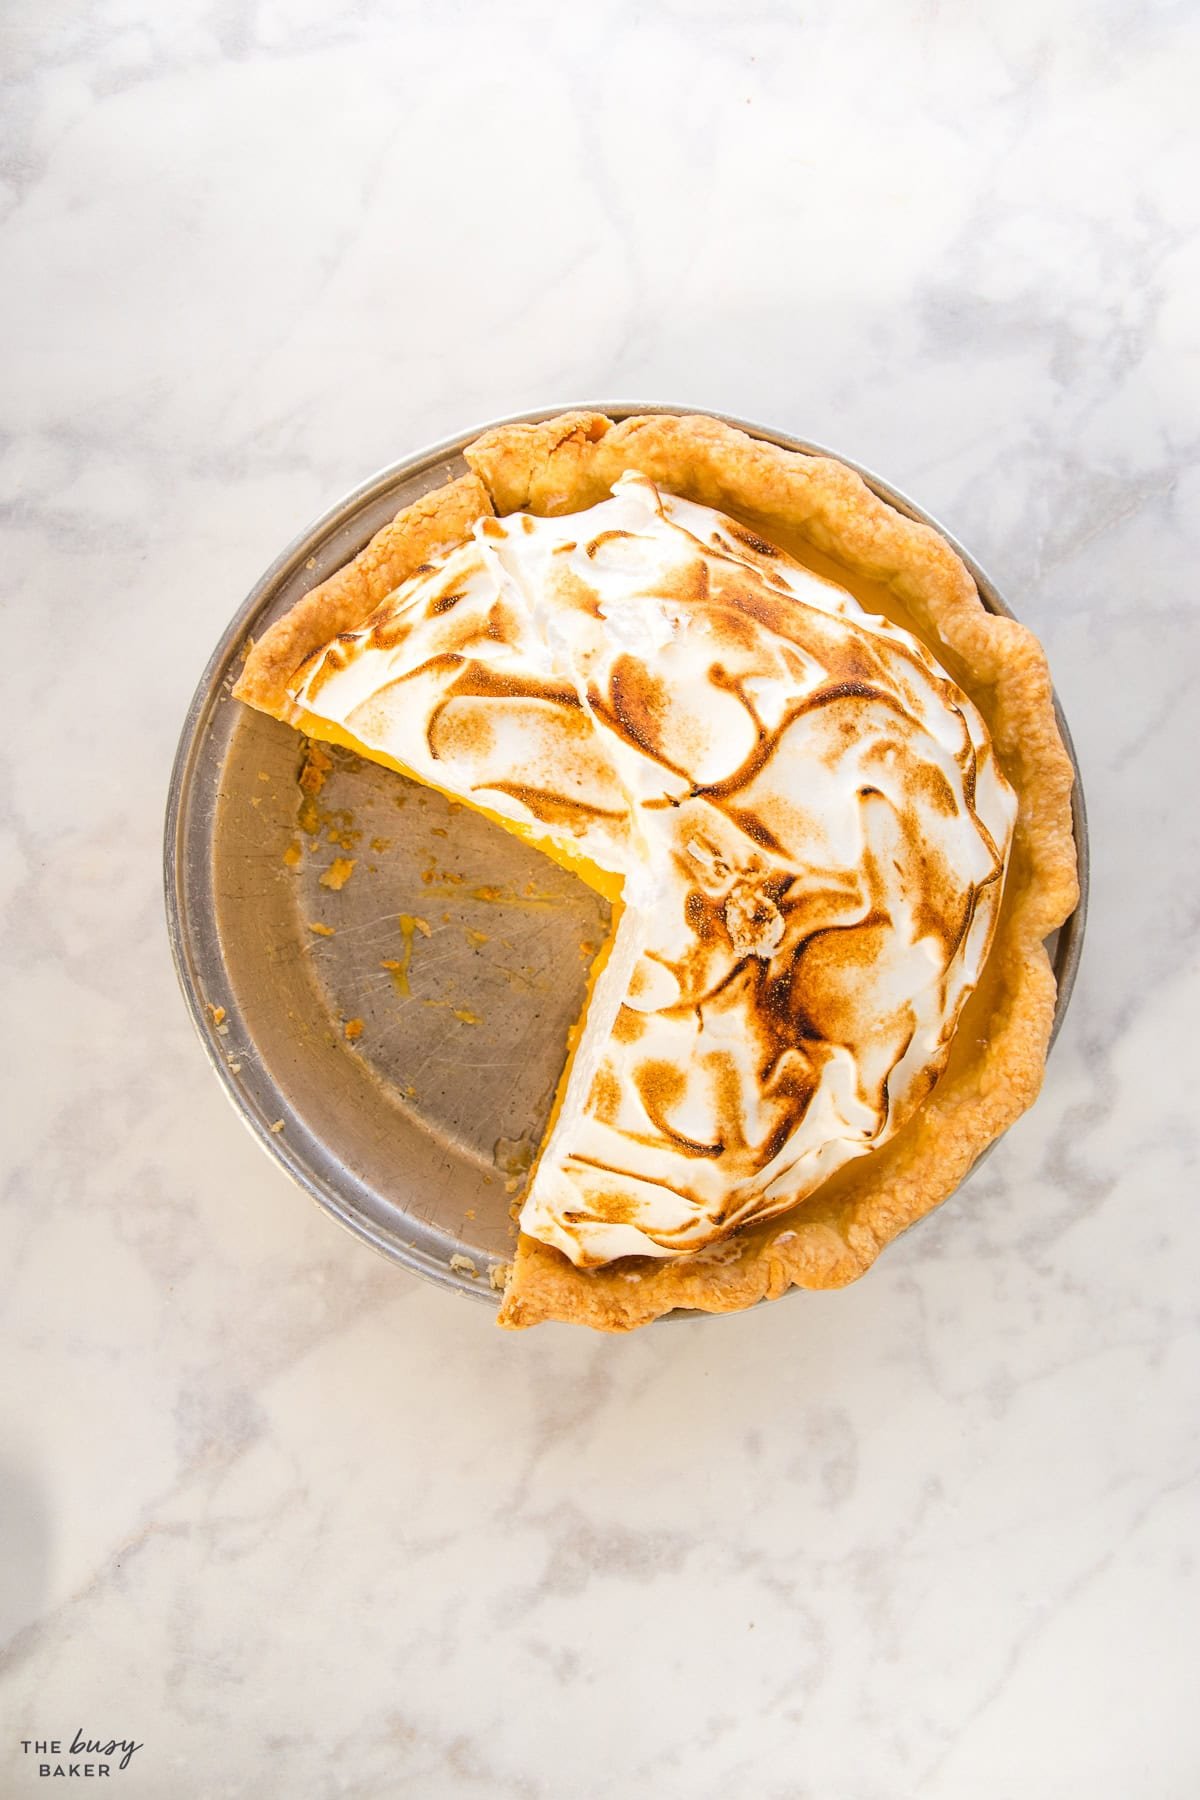
It doesn’t get much more classic than Lemon Meringue Pie. If you’ve never had the pleasure of enjoying a slice (especially if it’s homemade!), then it’s safe to say you’re missing out on one of life’s great experiences! Lemon meringue pie is the perfect dessert for anyone who loves lemon, even a little bit. The filling is oh so creamy and tart, the crust is perfectly crispy and flaky, and the meringue topping… well let’s just say it’s hard to describe just how delectable homemade meringue can be. And all three of those textures and flavours together? It’s basically pie heaven, and we’re here for every single bite.
But here’s the thing – lemon meringue pie is usually one of those recipes people think is out of their league. Until now! Our simple tutorial walks you through how to make a lemon meringue pie from scratch, step by simple step. We’ll teach you how to make (and bake) the perfect pie crust, how to get the perfect silky texture when you make the lemon pie filling, how to make the fluffiest meringue, and how to make sure everything works together so you don’t have any of the most common issues that plague most home bakers, like weeping meringue, a filling that won’t set, or a burnt crust.
Don’t worry, you’ve got this! You’re about to make the best lemon meringue pie ever!
Lemon meringue pie is a classic American desert that fills a buttery, flaky crust with a tangy and bright lemon filling and tops it with a toasted meringue topping. It’s the perfect mix between creamy, sweet, and sour and it’s a family favourite recipe that’s enjoyed in a diner or old fashioned restaurant.
Many folks find lemon meringue pie intimidating to make, so they opt for a box mix or a can of lemon pie filling to make things easier, but making your own lemon pie filling at home is a much better way to get that classic lemon pie flavour everyone knows and loves!
There are so many reasons why we LOVE this lemon meringue pie recipe! Here are just a few:
- It’s the perfect BALANCE of sweet and tart. The contrast of the tartness of the lemons with the sweetness of the meringue is absolute perfection!
- It has the perfect FLAKY BUTTERY crust. The homemade crust takes this lemon pie over the top. It’s perfectly flaky and tender.
- It’s a FAMILY FAVOURITE recipe. Lemon pie is a nostalgic desert that everyone loves. It’s a super popular dessert that’s always a crowd pleaser.
- It’s made with REAL LEMONS. None of that box mix stuff here – this lemon pie recipe is made with real lemon which gives it such a delicious and fresh flavour.
- The MERINGUE is out of this world. Perfect flavour, unbelievable texture – this meringue is as good as it gets!
There are 3 common ways to make meringue for lemon meringue pie. We’ll break them down for you and explain why we choose the Italian Meringue method.
In French meringue, egg whites are whipped with sugar (usually added slowly) until stiff peaks form. No heat is used during whipping at all, and the egg whites remain raw.
Pros of French Meringue:
- It’s quick and easy to make – no stovetop required.
- It’s great for airy toppings or folding into batters (like when you’re making macarons or mousse).
- It’s ideal for short prep times.
Cons of French Meringue:
- It’s the least stable. It can collapse or weep quickly, especially on pies.
- It’s not safe for raw consumption unless you use pasteurized egg whites.
- The sugar can stay grainy if not dissolved properly.
In Swiss Meringue egg whites and sugar are gently heated together over a double boiler until the sugar dissolves and the mixture reaches 160–165°F (71–74°C), then it’s whipped to stiff peaks.
Pros of Swiss Meringue:
- It’s safer (eggs are pasteurized by heating).
- It’s more stable than French meringue.
- It has a smoother and glossier texture.
Cons of Swiss Meringue:
- It’s less stable than Italian meringue, and it can still weep over time.
- It’s hard to make – it requires constant stirring and a candy thermometer.
- It doesn’t hold as firm a shape under heat, so it can’t really be placed under the broiler to toast.
For Italian Meringue, sugar and water are cooked to 240–245°F (115–118°C) to form a syrup. The syrup is then slowly streamed into partially whipped egg whites, then whipped to stiff peaks.
Pros of Italian Meringue:
- It’s the most stable meringue. It resists weeping, collapsing, and beading.
- It holds its shape for hours or even days.
- It’s ideal for pies or any meringue that must sit for a while.
Cons of Italian Meringue:
- It’s slightly more complicated to make because it requires a thermometer and careful syrup pouring.
- It’s a slightly higher learning curve for beginners.
The verdict? Using Italian meringue (hot sugar syrup + whipped whites) with cream of tartar is the gold standard for lemon meringue pie. It creates a shiny, stable meringue that’s less prone to weeping, beading, or collapse, and it’s the method we’d choose every time!
Here’s everything you need to know to make the best ever homemade lemon pie!
Chilling the dough ensures you have the flakiest, most buttery crust that keeps its shape and holds the pie perfectly.
Make the crust in advance and be sure it’s cooled before adding the filling to set.
To make sure your pie crust is the perfect shape, use some pie weights or some rice or even beans on top of aluminum foil to prevent the bottom from inflating as it bakes.
For the best flavour and to avoid the artificial taste, use fresh squeezed lemon juice and fresh grated zest.
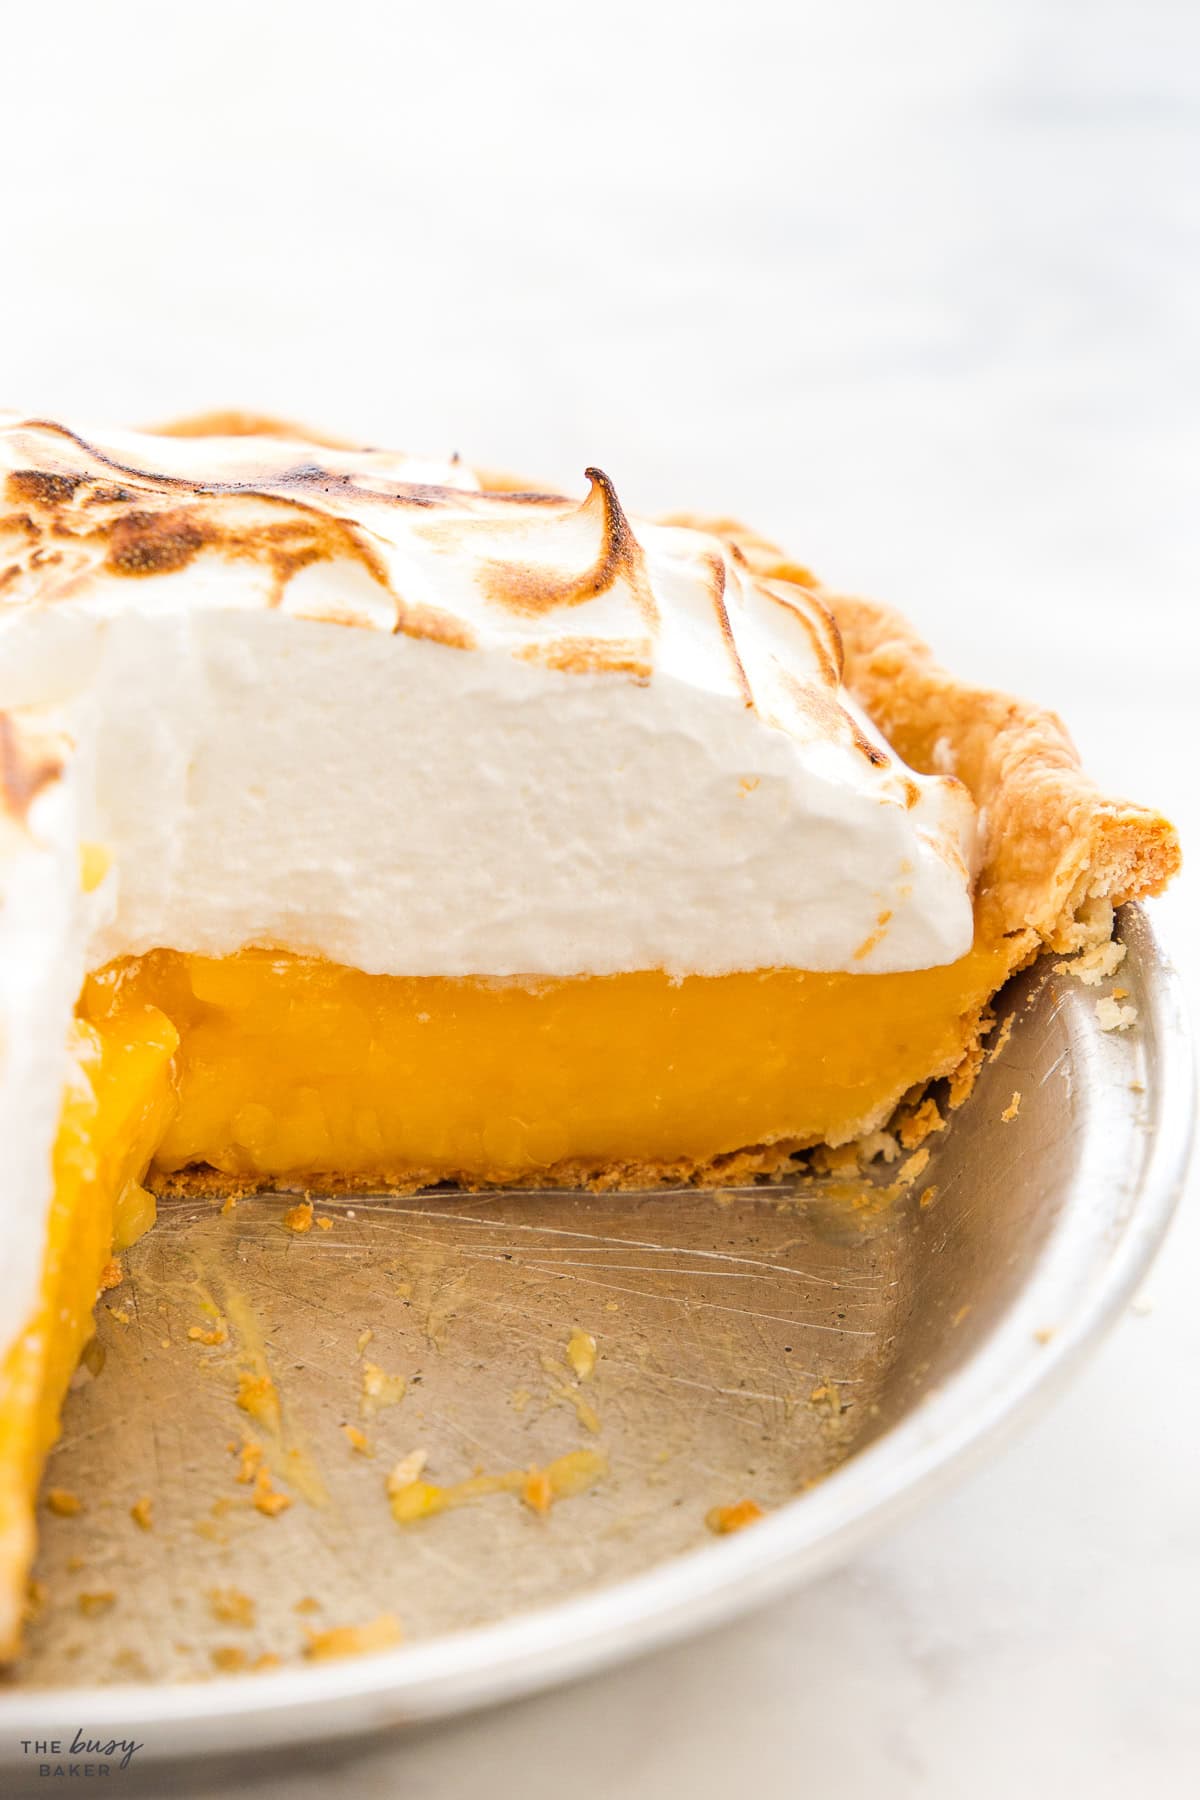
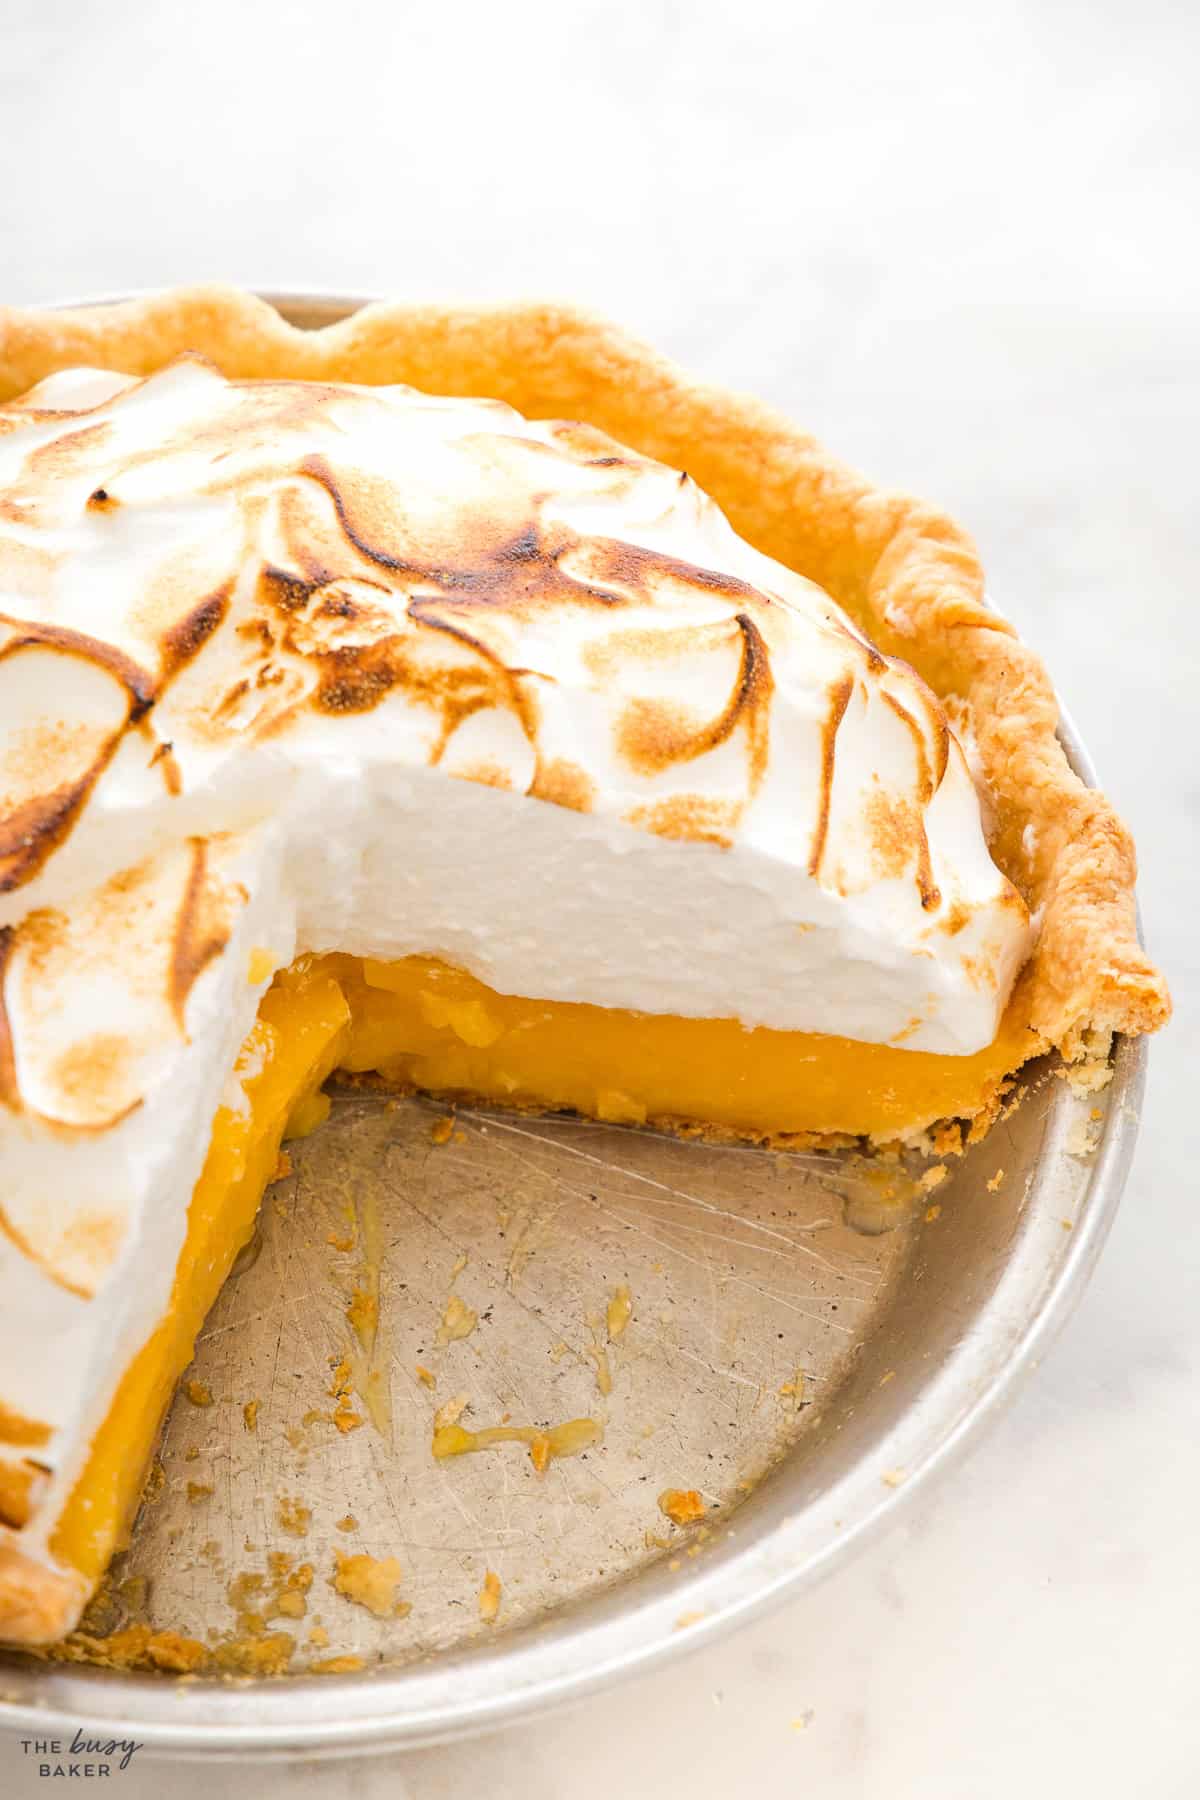
To make sure your lemon filling and meringue top bond, add the meringue on top of the filling while it’s still hot. This step prevents a moisture layer forming between the layers and the meringue sliding off the filling as it cools.
To get the cleanest slices and prevent the meringue from sticking to your knife, dip your knife in hot water for a few minutes and dry it well before slicing into the pie.
Whether you love to bake and have been baking for years or you’re just starting out, we’ve got a FREE baking bootcamp you’ll love! We’ll share all our best baking tips, pro tricks, our favourite baking recipes and tutorials for tons of baked goods. Sign up below and we’ll deliver all the info straight to your inbox!
Even seasoned bakers can run into issues when making a lemon meringue pie from scratch. This recipe involves three complicated components – the crust, the filling, and the meringue, each with its own unique potential for mistakes or mishaps. Our troubleshooting tips below will help you understand what might go wrong and how to prevent or fix it.
A shrinking crust usually happens because of overworked dough or dough that wasn’t chilled properly before baking. Handle your pie dough as little as possible when mixing and rolling, and always chill it in the pan for at least 30 minutes before blind baking (or in the freezer for 10-20 minutes). This allows the gluten to relax and helps the fat solidify, reducing the chance the crust will shrink during baking. Be sure to avoid stretching the dough it as you put it into the pie dish. When it bakes it will contract and shrink if it’s been stretched.
This often happens when the crust isn’t fully blind-baked or isn’t given time to cool and dry out before the filling is added. Be sure to bake your crust until it’s golden and crisp. To protect against sogginess, you can also brush the baked crust with a thin layer of egg white and return it to the oven for a few minutes to create a moisture barrier before adding the filling.
This is a very common issue and usually happens when the meringue and the filling don’t bond properly. Always spread your meringue on top of the filling while the filling is still hot. This helps the steam from the filling rise up into the meringue, sealing the two layers together. Also, using the Italian meringue method (as in this recipe) helps because the cooked sugar syrup stabilizes the meringue. Weeping can also happen in very humid environments, so try to make and store the pie in a dry, cool place if possible.
If your meringue is too soft or deflates, it’s likely due to under-beating. You’ll want to beat the meringue to stiff, glossy peaks, not soft or foamy. However, over-beating is also a problem; it can break the structure and cause the meringue to look dry or clumpy. Whip just until the tips stand tall and glossy, and stop there.
To avoid this, always spread the meringue all the way to the edges, touching and sealing to the crust. If the meringue sits only on the filling, it will shrink as it chills and leave a gap, allowing moisture to sneak in and separate the layers.
Lemon curd-based fillings rely on the right balance of eggs, starch (like cornstarch), and cooking time. If your filling is runny, it probably wasn’t cooked long enough for the starch to fully activate and thicken the mixture. Always cook the filling until it’s visibly thick and glossy and starts to bubble. Then, pour it directly into the crust while hot so it sets properly as it cools.
Overcooking the filling can bring out an eggy flavour. Make sure to follow the filling instructions closely, and don’t increase the heat in an attempt to speed up the thickening because it can scramble the eggs. Also, use stainless steel pans when cooking anything acidic like lemon curd, as aluminum pans can react with the lemon juice and give a metallic taste.
This is often caused by spreading meringue onto cool or room temperature filling. The steam from hot filling helps bond the meringue, so don’t wait too long between finishing the filling and applying the meringue. Also, be sure to chill the pie in the fridge only after it’s completely cooled to room temperature to avoid condensation forming between layers.
This usually happens when the pie is sliced before it’s fully chilled. The filling and meringue need time to firm up in the fridge – chill the pie for at least 3–4 hours or overnight. Use a knife dipped in hot water and wiped dry between slices for clean edges, and so the meringue doesn’t stick to the knife when slicing.
Here’s a list of the kitchen equipment you’ll need to make this lemon pie recipe (paid links):
- Food Processor
- measuring cups and spoons
- liquid measuring cups
- Plastic Wrap
- pie dish
- Rolling Pin
- medium saucepan
- Whisk
- Microplane Zester
- mixing bowls
- Stand Mixer
- piping bag (optional)
- Offset Spatula
- pie weights
- kitchen torch
Here’s a comprehensive list of everything you’ll need to make this lemon meringue pie recipe (paid links):
For the crust:
- 1/2 cup butter
- 1 cup all purpose flour
- 1/4 teaspoon salt
- 1 tablespoon granulated sugar
- 1/2 teaspoon vinegar
- 3-4 tablespoons ice water
For the filling:
- 1 cup granulated sugar
- 1/3 cup cornstarch + 1 tablespoon
- 1 cup water
- 1 cup lemon juice
- Zest of 2-3 lemons
- 5 egg yolks
- 4 tablespoons butter
For the meringue topping:
- 4 egg whites
- 1/4 teaspoon cream of tartar
- A pinch of salt
- 1 cup sugar
- 1/2 cup water

Time needed: 4 hours and 50 minutes
Here’s everything you need to know about how to make Lemon Meringue Pie!
- Prepare your pie dough.
Add the flour, sugar, and salt to the bowl of your food processor (or a large bowl if you’re making the dough by hand). Turn the food processor on low speed and add the chunks of cold butter one at a time while the food processor runs until all the butter is added and the mixture resembles coarse crumbs.
If making by hand, use a pastry blender or your hands to work the butter into the dough until the mixture is crumbly.
Try not to handle the butter too much (the heat from your hands will soften it) – use quick movements and don’t worry if some larger chunks of butter still remain. Add the vinegar and the water slowly as the food processor runs on low, just until the dough comes together and pulls away from the sides of the bowl.
Depending on the weather and even on the brand of flour, you could use anywhere between 5 and 8 tablespoons of water.
If making by hand, use your hands to form the dough gently and quickly using just enough water for the dough to come together.
Dump the rough dough onto the counter, shape it into a disc and wrap it in plastic wrap, placing it in the fridge to chill for 45 minutes or overnight. - Shape the crust and chill.
Remove the chilled pie dough from the fridge and let it sit for about 10 minutes before rolling.
Roll out the ball of dough into a large circle using a rolling pin. Add some flour to the rolling surface and to the rolling pin, to prevent sticking and cracking.
Peel the rolled out dough off the counter surface gently by rolling it backwards onto the rolling pin.
Transfer it to a 9-inch pie dish and gently press the dough into the bottom of the pie plate and over the edges (try for a 1-2 inch overhang if possible).
Trim any dough that hangs over the edge of the pie to 1-2 inches past the edge (try to keep the overhang amount even all the way around). Tuck any overhanging dough under and into the pie plate to create a clean edge.
If your pie plate has a wide edge, seal the edge of the pie by creating a fluted pattern – press into the edge of the pie from the outside with your left thumb and index finger while pressing into the edge of the pie from the inside with your right index finger. Do this all the way around the edge of the pie to create a fluted pattern (and see a tutorial HERE for how to create a beautiful fluted edge to your pies!)
Place your prepared pie crust in the fridge for 30 minutes or the freezer for 10-20 minutes.
Preheat your oven to 400 degrees Fahrenheit (200 degrees Celsius). - Bake the crust.
Remove the pie crust from the freezer, add foil or parchment paper and pie weights.
Bake at 400 degrees Fahrenheit (200 degrees Celsius) for about 15 minutes, then remove the foil and pie weights and bake for another 10-15 minutes until the crust is evenly browned. Cool it completely to room temperature before adding the filling. - Make the filling.
Mix the water, lemon juice and lemon zest, cornstarch, and granulated sugar in a small saucepan.
Cook them over medium heat whisking constantly until the sugar is dissolved and the cornstarch is cooked (becomes translucent.
In a bowl, whisk the egg yolks and start drizzling in the lemon filling slowly, whisking constantly. When all the lemon mixture is mixed with the egg yolk mixture, return to the sauce pan and cook for another 3-5 minutes until it thickens a bit. Don’t forget to stir pretty much constantly.
Remove from the heat and pour into the baked, cooled pie crust. - Make the meringue.
In the bowl of a stand mixer, add the egg whites, cream of tartar, and a pinch of salt and whip them with the whisk attachment until they reach soft peaks.
In the meantime, to a saucepan add the 1 cup of sugar and half cup water and cook them over medium high heat until the syrup reaches 115 degree Celsius (239 degrees Fahrenheit).
Slowly drizzle the hot syrup over your egg whites as the mixer is running on medium to medium-high speed in a thin, steady stream to prevent splattering.
Continue beating until the mixture forms glossy, stiff peaks and the bowl of your stand mixer bowl is no longer warm to the touch. - Add the meringue topping.
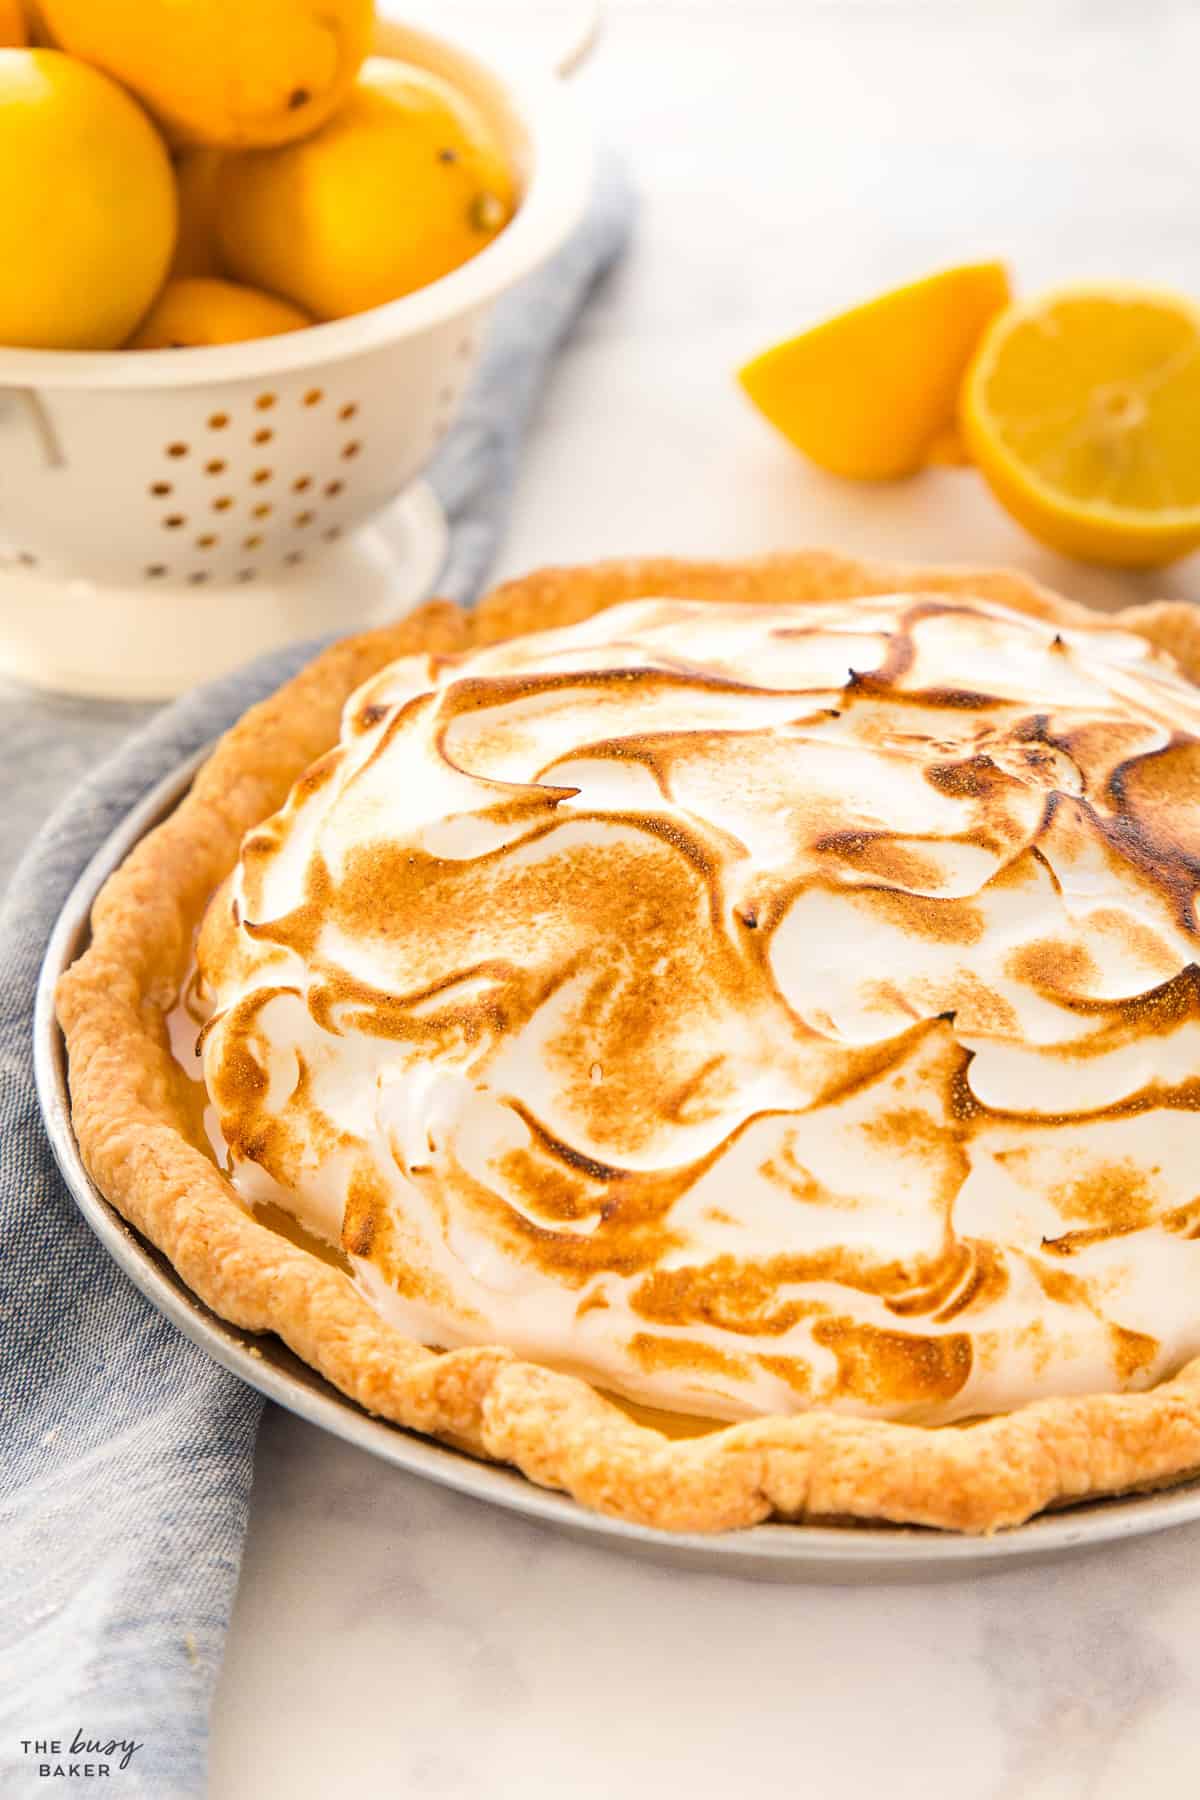
Make sure you add the meringue topping when the lemon filling is still hot. This step helps the two layers bond and prevents weeping.
Using a big scoop or an ice cream scoop, add the meringue on top of your filled pie, making sure it reaches the crust.
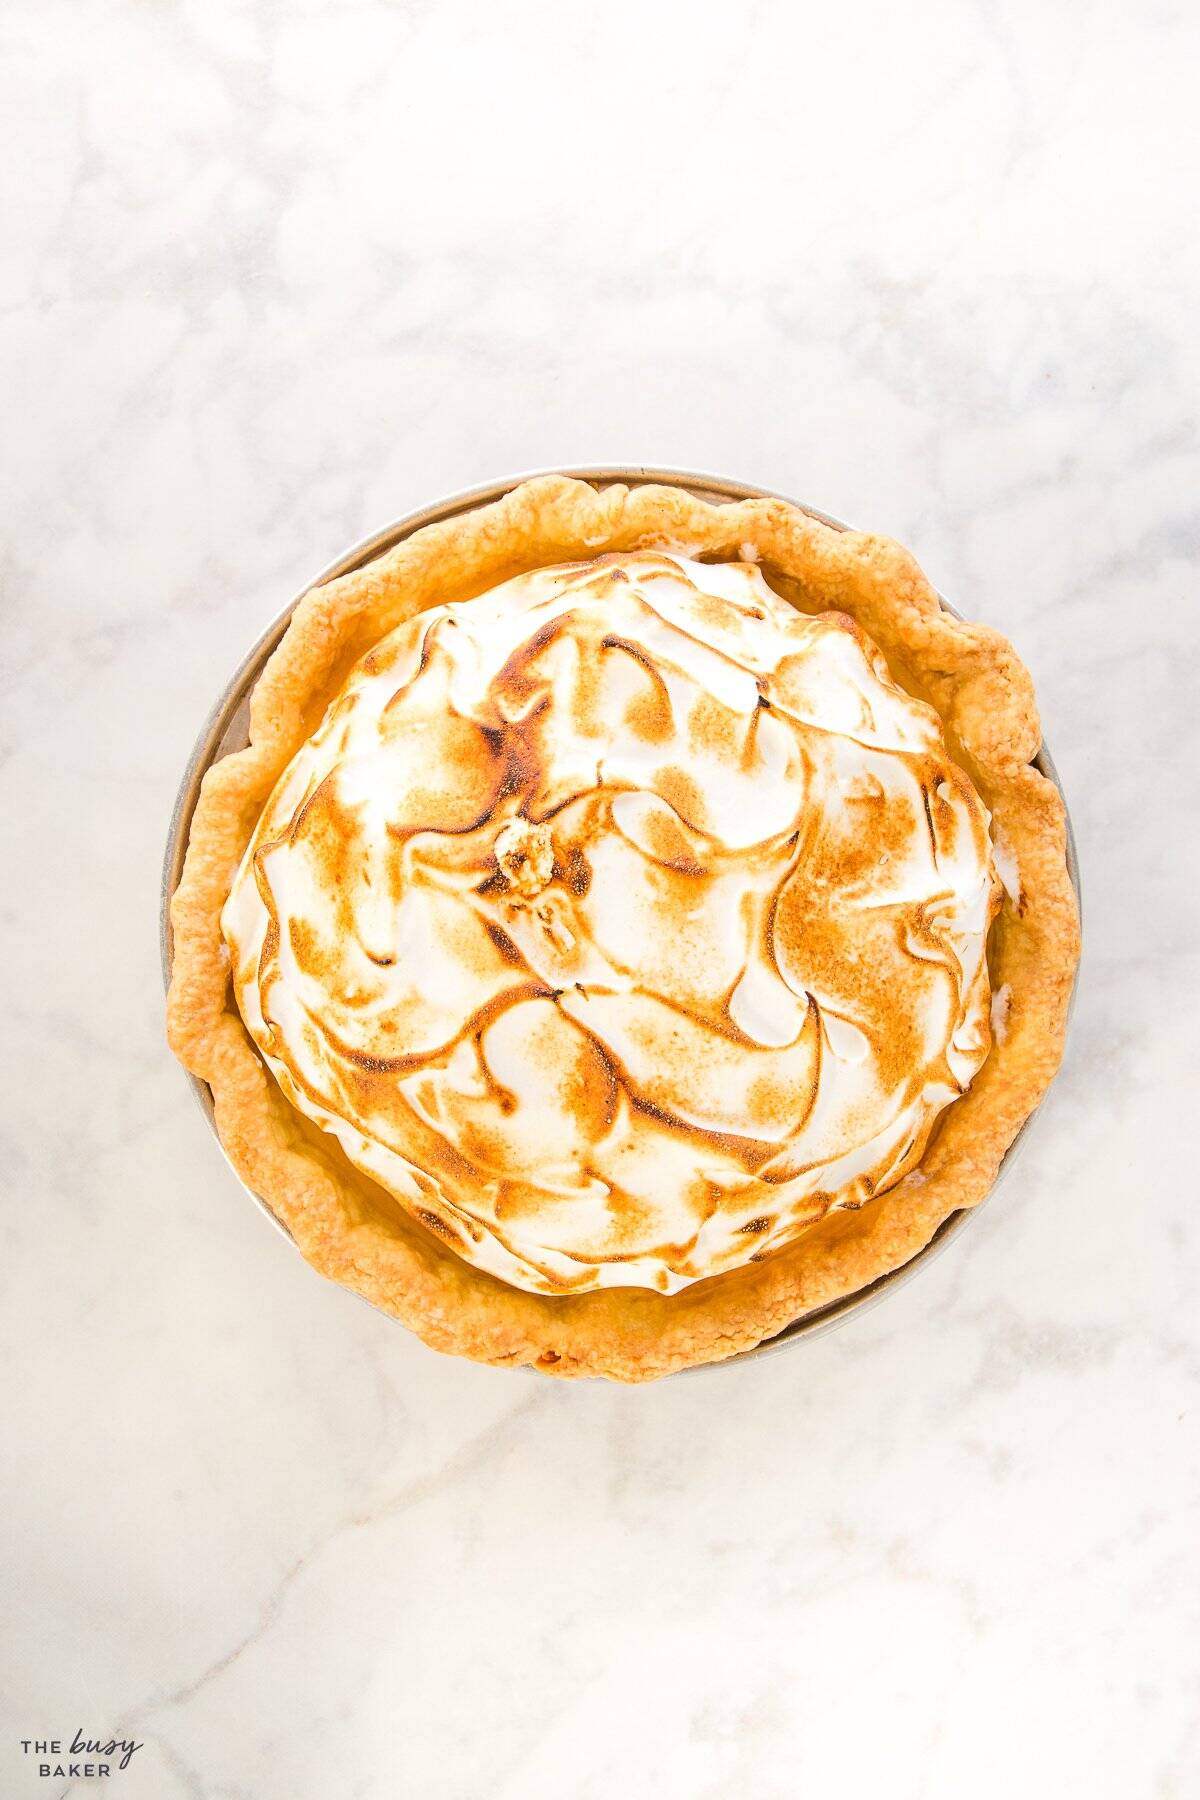
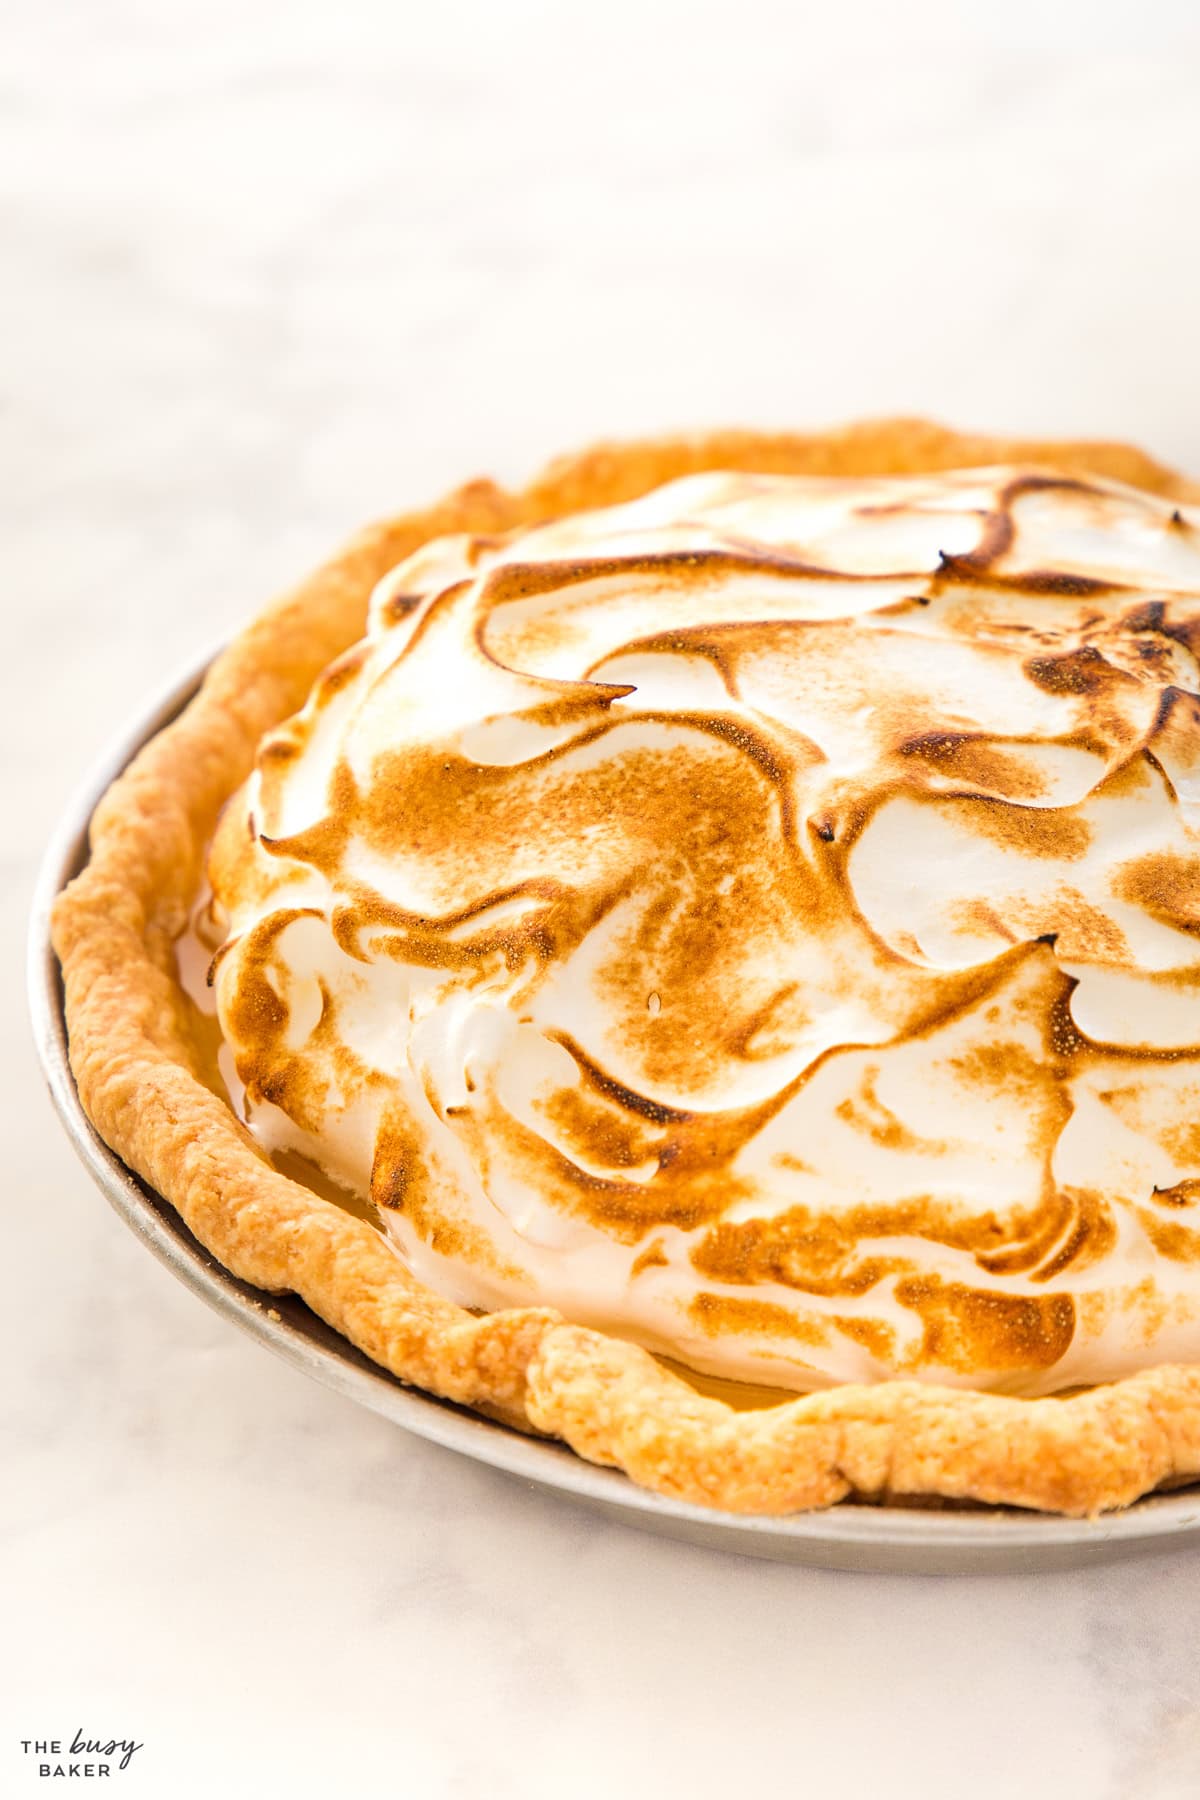
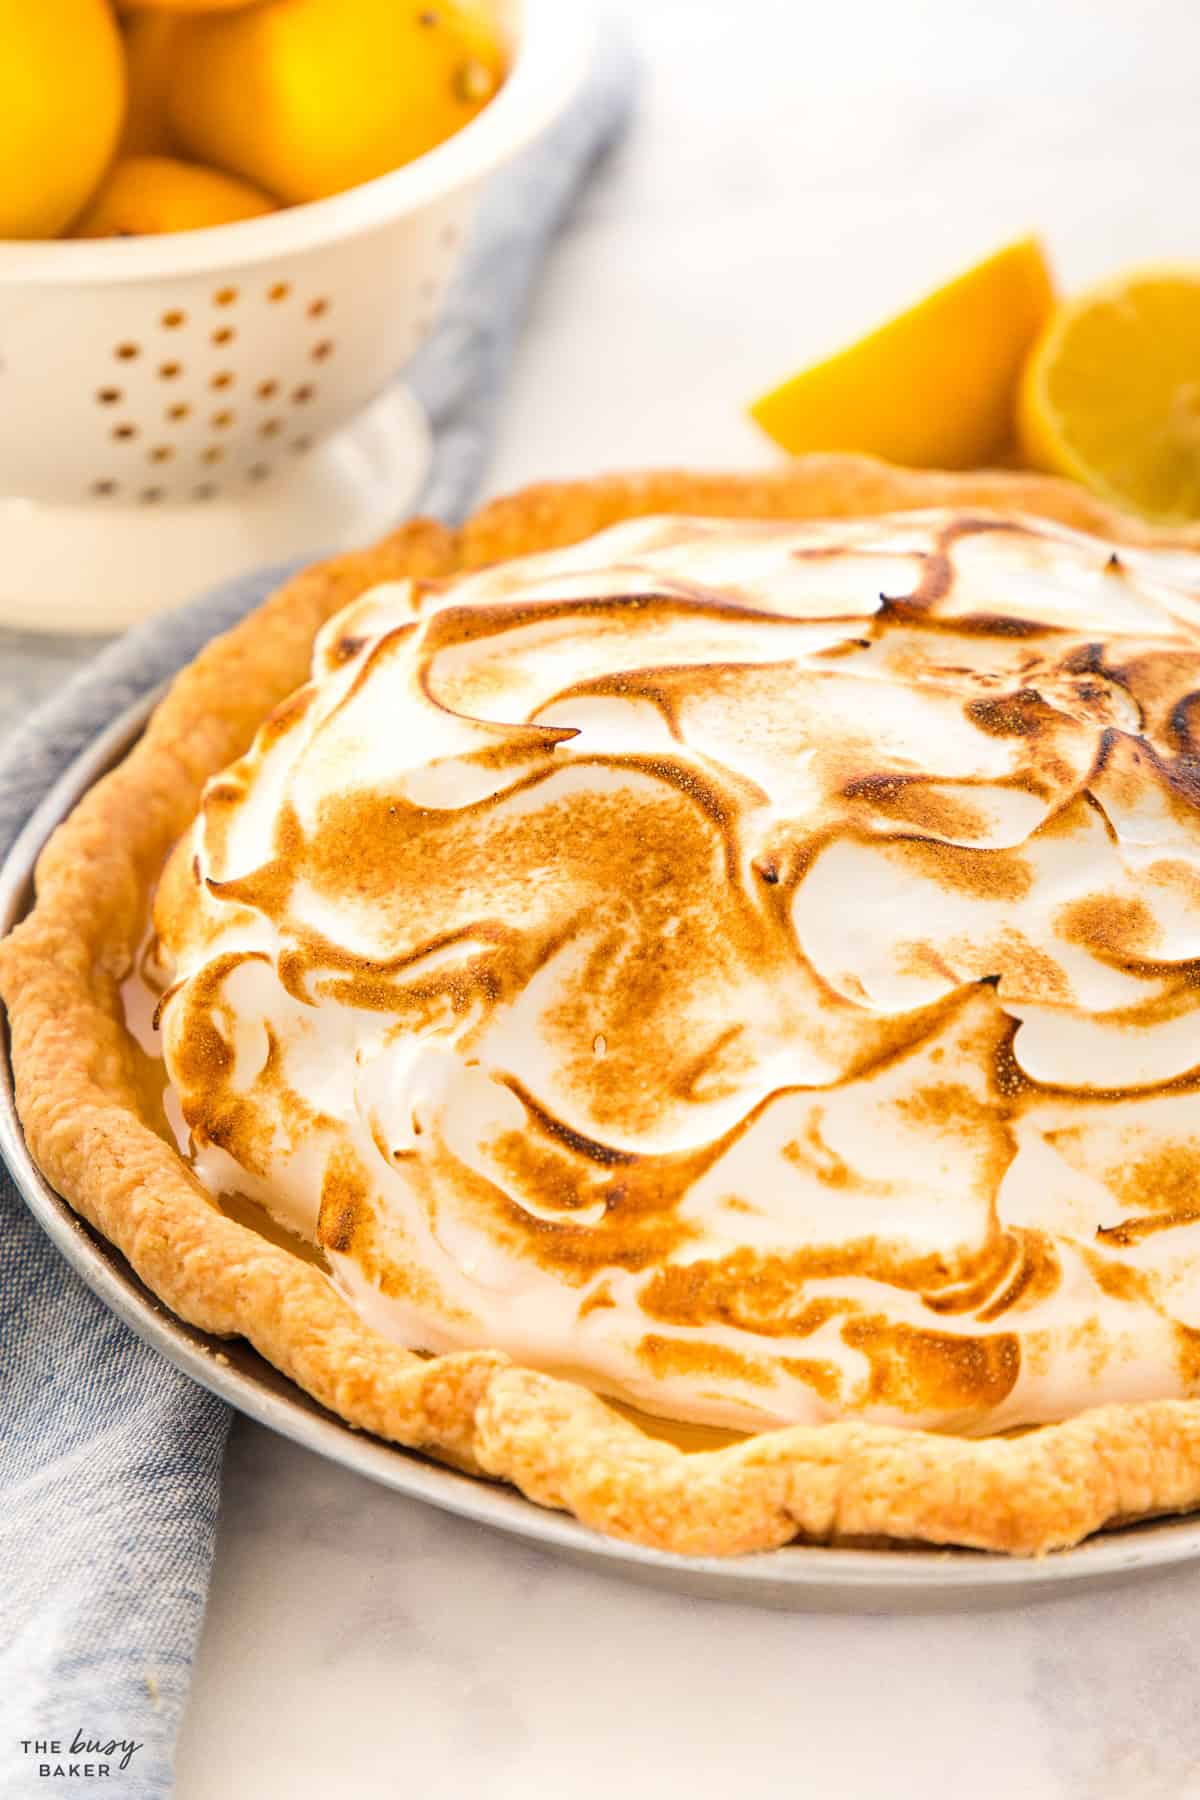
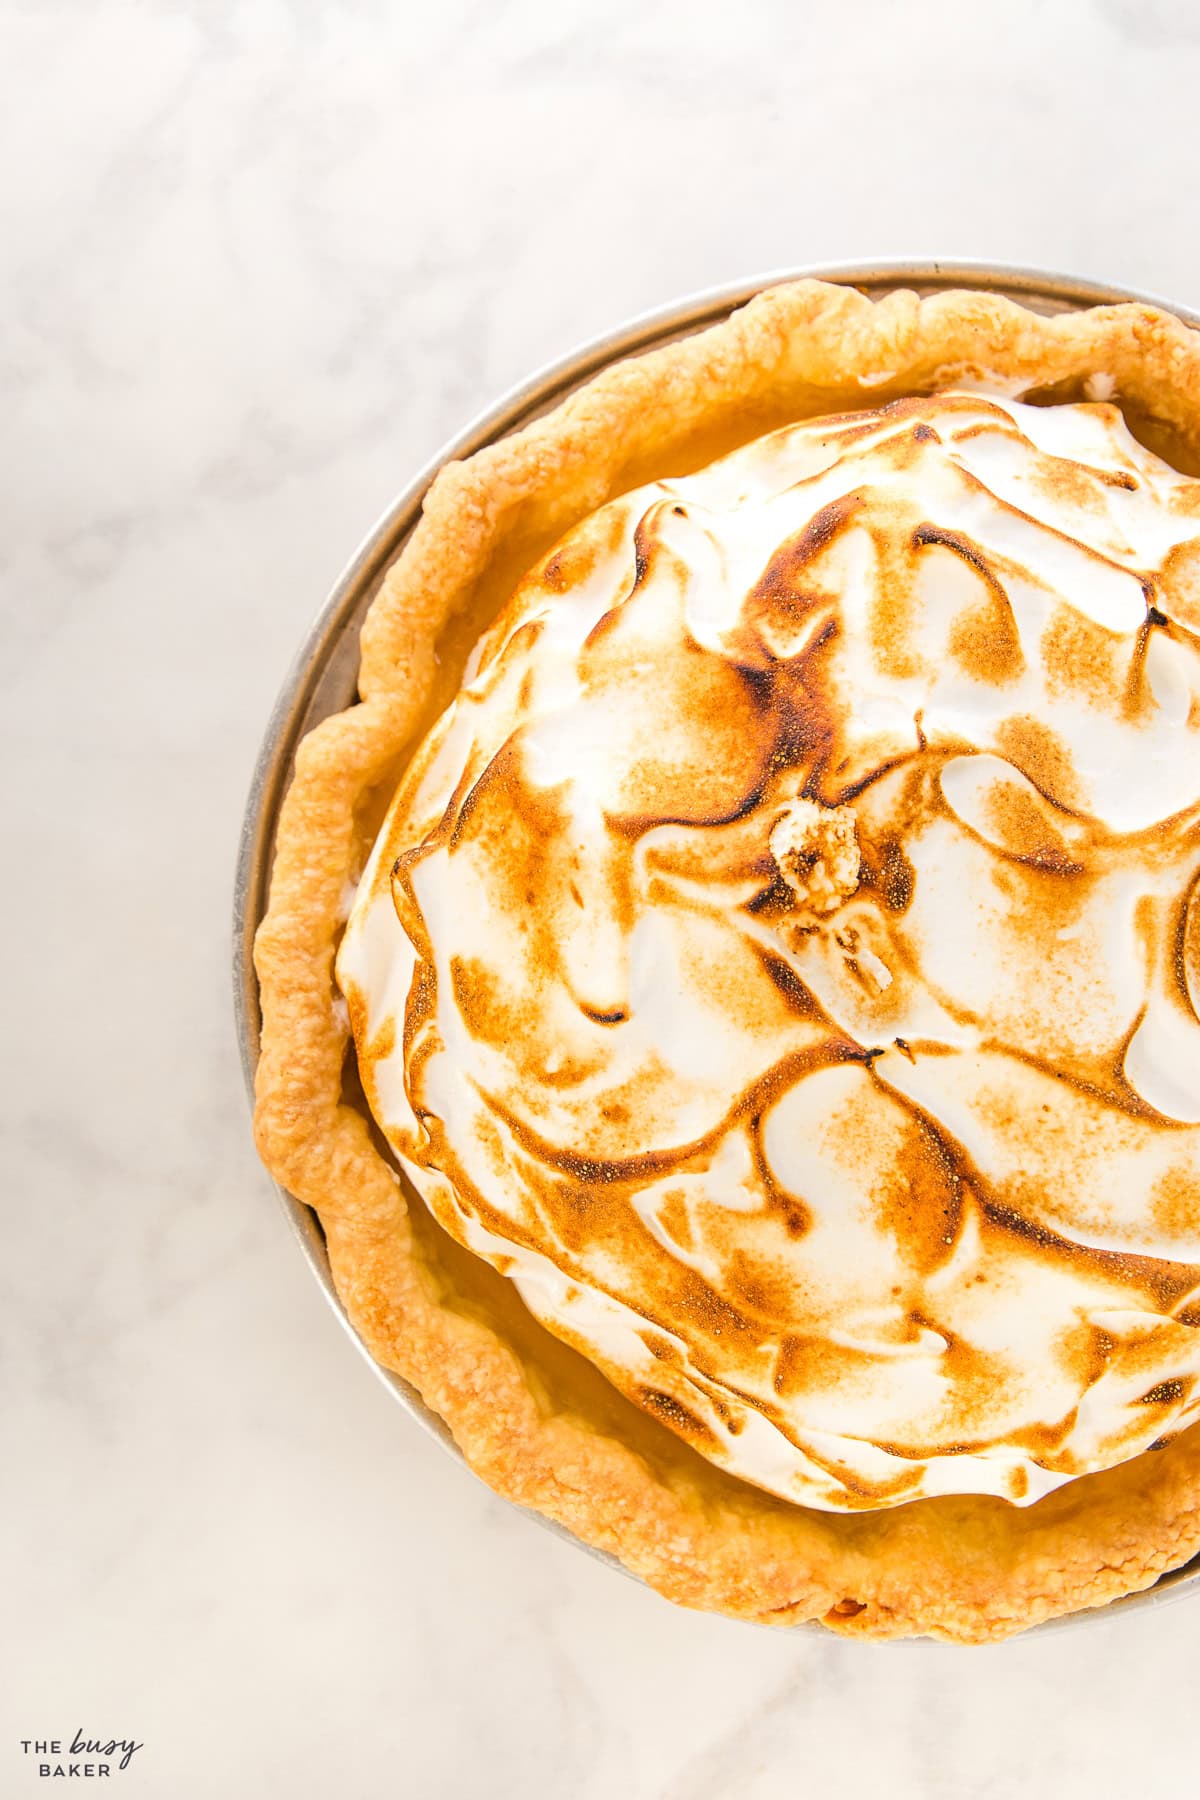
Spread the meringue out creating a swirl pattern with an offset spatula or a silicone spatula, making sure there’s no filling visible and the meringue top is sealed to the crust.
Using a blowtorch, toast the meringue top with quick motions so that you don’t burn it but rather give it an auburn colour.
Alternatively, you could broil the pie in the oven for 6-8 minutes until the meringue top is toasty brown.
Let the pie reach room temperature and then chill it for 3-4 hours in the fridge before slicing and serving.
Can I make the crust ahead of time?
Yes! You can prepare the crust ahead of time and refrigerate it for up to 3 days, freeze it for up to 3 months, or even use a store bought one.
Do I need to blind bake the crust?
Yes! The filling is cooked on the stovetop so the crust needs to be fully cooked before assembling.
Can I use bottled lemon juice when making lemon pie?
No, we would not recommend that. Fresh lemons completely change the flavour of this pie, so definitely don’t skip this!
How do I keep the meringue from weeping or separating from the lemon filling?
Make sure the filling is hot when you add the meringue and seal the meringue layer to the crust. Be sure to not under-beat or over-beat the meringue, and be sure the sugar is fully dissolved in the meringue.
Can I use lemon curd instead of lemon filling?
No, we wouldn’t recommend that as lemon curd is not as thick as lemon pie filling and will not slice the same way.
We hope you love this Lemon Meringue Pie recipe as much as we do! Let us know in the comments below, what’s your favourite lemon dessert? We’d love to know!

More Tasty Pie Recipes
- Peach Pie
- Blackberry Pie
- Strawberry Pie
- Grasshopper Pie
- Chocolate Peanut Butter Pie
- Raspberry Pie
- Blueberry Pie
- Fresh Strawberry Pie
- Apple Cranberry Pie
If you made this, share a photo!
Are you trying this recipe? Use the comment form below to share your take; now with support for image uploads and comment voting!
Lemon Meringue Pie

Recipe: Equipment
Recipe: Ingredients
For the crust:
- 1/2 cup unsalted butter
- 1 cup all purpose flour
- 1/4 teaspoon salt
- 1 tablespoon granulated sugar
- 1/2 teaspoon vinegar
- 3-4 tablespoons ice water
For the filling:
- 1 cup granulated sugar
- 1/3 cup cornstarch + 1 tablespoon
- 1 cup water
- 1 cup lemon juice
- Zest of 2-3 lemons
- 5 egg yolks
- 4 tablespoons unsalted butter
For the meringue top:
- 4 egg whites
- 1/4 teaspoon cream of tartar
- A pinch of salt
- 1 cup granulated sugar
- 1/2 cup water
Recipe: Instructions
For the crust:
- Add the flour, sugar, and salt to the bowl of your food processor (or a large bowl if you're making the dough by hand)
- Turn the food processor on low speed and add the chunks of cold butter one at a time while the food processor runs until all the butter is added and the mixture resembles coarse crumbs.If making by hand, use a pastry blender or your hands to work the butter into the dough until the mixture is crumbly. Try not to handle the butter too much (the heat from your hands will soften it) – use quick movements and don't worry if some larger chunks of butter still remain.
- Add the vinegar and the water slowly as the food processor runs on low, just until the dough comes together and pulls away from the sides of the bowl. Depending on the weather and even on the brand of flour, you can use anywhere between 5 and 8 tablespoons of water. If making by hand, use your hands to form the dough gently and quickly using just enough water for the dough to come together.
- Dump the rough dough onto the counter, shape it into a disc and wrap it in plastic wrap, placing it in the fridge to chill for 45 minutes or overnight.
- Remove the chilled pie dough from the fridge and let it sit for about 10 minutes before rolling. Roll out the ball of dough into a large circle using a rolling pin. Add some flour to the rolling surface and to the rolling pin, to prevent sticking and cracking.
- Peel the rolled out dough off the counter surface gently by rolling it backwards onto the rolling pin.
- Transfer it to a 9-inch pie plate and gently press the dough into the bottom of the pie plate and over the edges (try for a 1-2 inch overhang if possible).
- Trim any dough that hangs over the edge of the pie to 1-2 inches past the edge (try to keep the overhang amount even all the way around). Tuck any overhanging dough under and into the pie plate to create a clean edge.
- If your pie plate has a wide edge, seal the edge of the pie by creating a fluted pattern – press into the edge of the pie from the outside with your left thumb and index finger while pressing into the edge of the pie from the inside with your right index finger. Do this all the way around the edge of the pie to create a fluted pattern (and see a tutorial HERE for how to create a beautiful fluted edge to your pies!)Place your prepared pie crust in the freezer for 10-20 minutes, or in the fridge for 30 minutes.
- Preheat your oven to 400℉ (200℃).
- Remove the pie crust from the freezer, add foil or parchment paper and pie weights.
- Bake at 400℉ (200℃) for about 15 minutes, then remove the foil and pie weights and bake for another 10-15 minutes until the crust is evenly browned.
For the filling:
- Mix the water, lemon juice and zest, cornstarch, and sugar in a small saucepan.
- Cook them over medium heat whisking constantly until the sugar is disolved and the cornstarch is cooked (becomes translucent.
- In a bowl, whisk the egg yolks and start drizzling in the lemon filling slowly, whisking constantly. When all the lemon mixture is mixed with the eggs, return to the sauce pan and cook for another 3-5 minutes until it thickens a bit.
- Remove from the heat and pour into the baked pie crust.
For the meringue top:
- In the bowl of a stand mixer, add the egg whites, cream of tartar, and a pinch of salt and whip them until they reach soft peaks.
- In the meantime, to a saucepan add the 1 cup of sugar and half cup water and cook them over medium high heat until the syrup reaches 115℃ (239°F).
- Slowly drizzle the hot syrup over your egg whites as the mixer is running on medium to medium-high speed in a thin, steady stream to prevent splattering.
- Continue beating until the mixture forms glossy, stiff peaks and the bowl of your stand mixer is no longer warm to the touch.
Assembly:
- Make sure you add the meringue top when the lemon filling is still hot. This step helps the two layers bond and prevents weeping.
- Using a big scoop or an ice cream scoop, add the meringue on top of your filled pie, making sure it reaches the crust.
- Spread the meringue out creating a swirl pattern with an offset spatula, making sure there's no filling visible and the meringue top is sealed to the crust.
- Using a kitchen torch, toast the meringue top with quick motions so that you don't burn it but rather give it an auburn colour.
- Alternatively, you could broil the pie in the oven for 6-8 minutes until the meringue top is toasty brown.
- Let the pie reach room temperature and then chill it for 3-4 hours in the fridge.
Recipe: Notes
Storage Instructions
Store any leftovers of this pie in an airtight container in the fridge for up 5 days.Freezer Instructions
The PIE CRUST can be frozen for up to 2-3 months before baking (cover in plastic wrap or freeze in an airtight container), thawed in the fridge overnight and then baked fresh in the morning. The crust can also be frozen after baking for up to 2-3 months (cover in plastic wrap or freeze in an airtight container). Thaw at room temperature and reheat before serving, if desired. The lemon pie in its entirety cannot be frozen and thawed, as this would ruin both the filling and the meringue.Recipe: Nutrition
Notice: Nutrition is auto-calculated, using Spoonacular, for your convenience. Where relevant, we recommend using your own nutrition calculations.

EASY AND DELICIOUS SUMMER DESSERT RECIPES YOU’LL LOVE!
Get my no-fail summer dessert recipes e-cookbook!