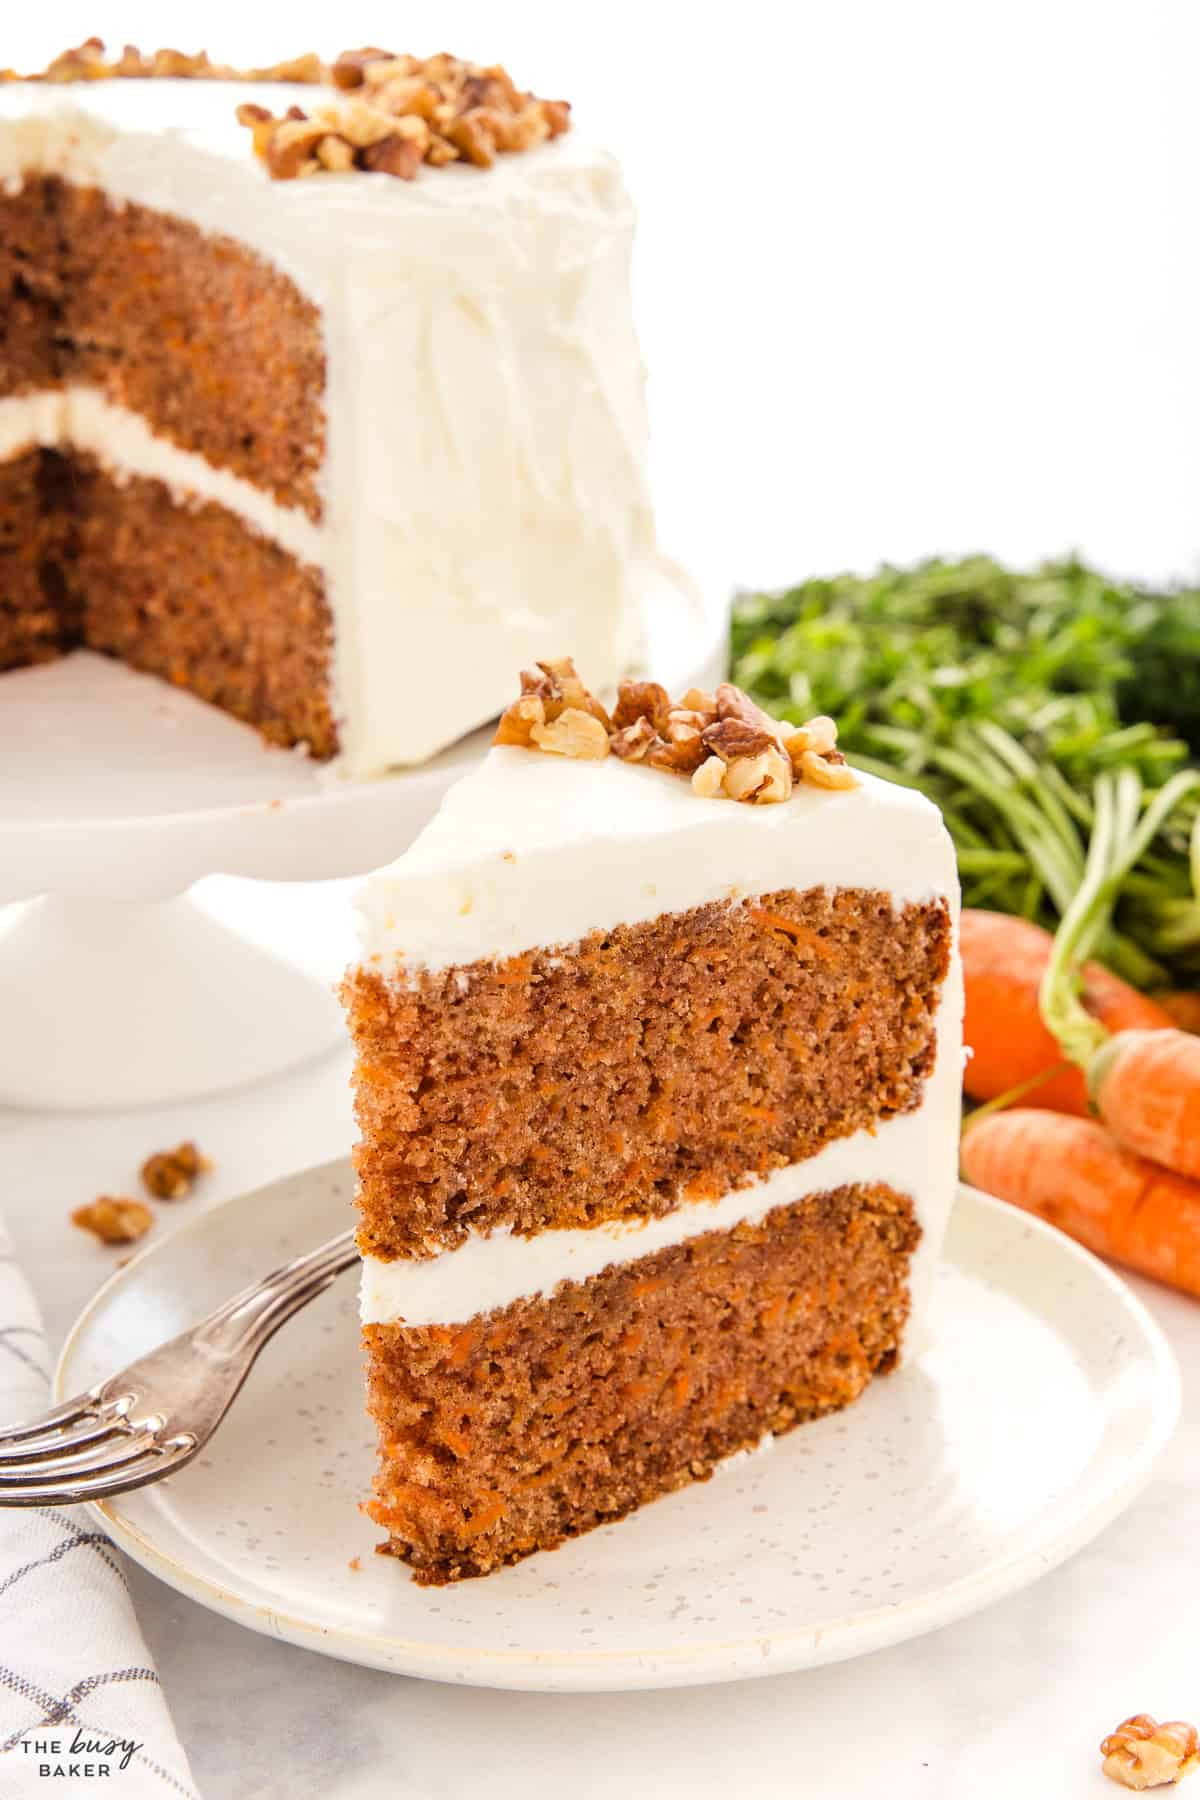
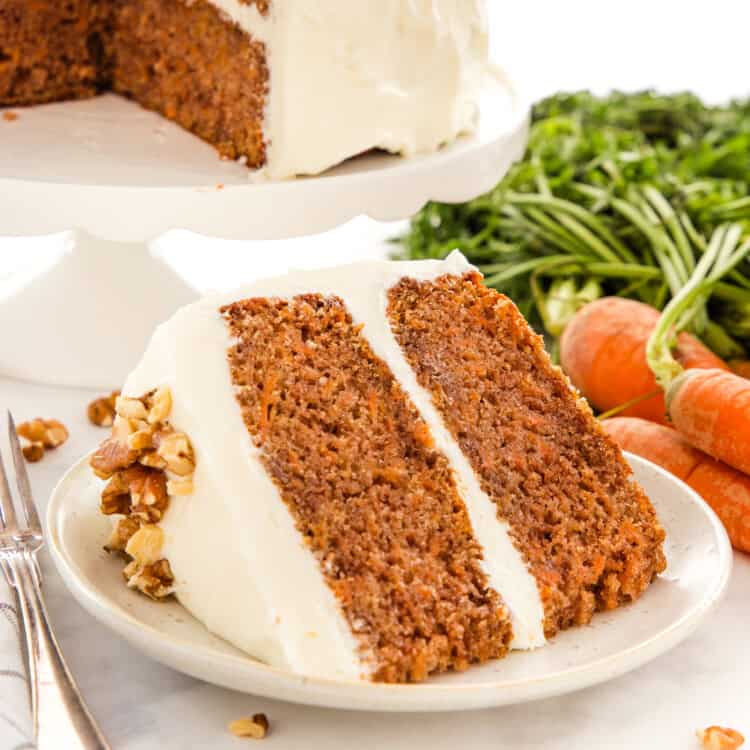
This Carrot Cake with Cream Cheese Frosting recipe is simple and delicious – a homemade carrot cake recipe that anyone can make and everyone will love!
Estimated reading time: 18 minutes
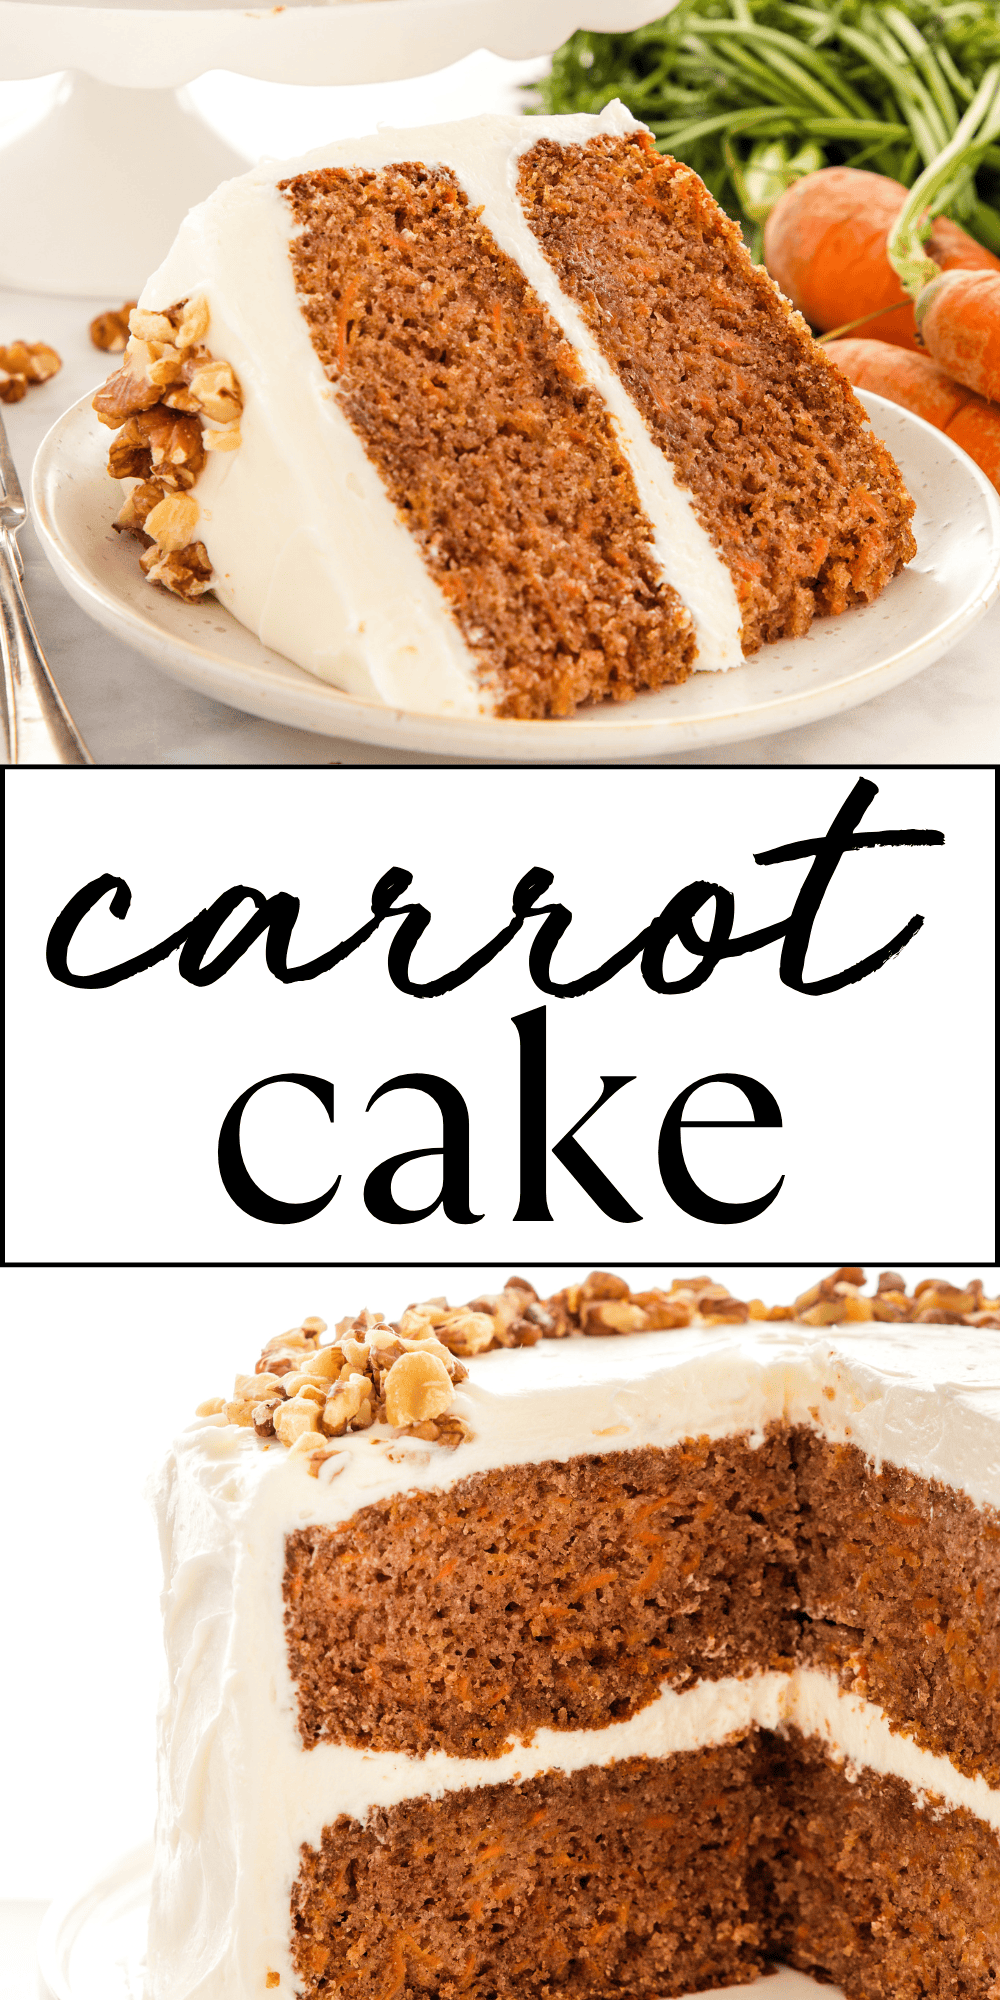
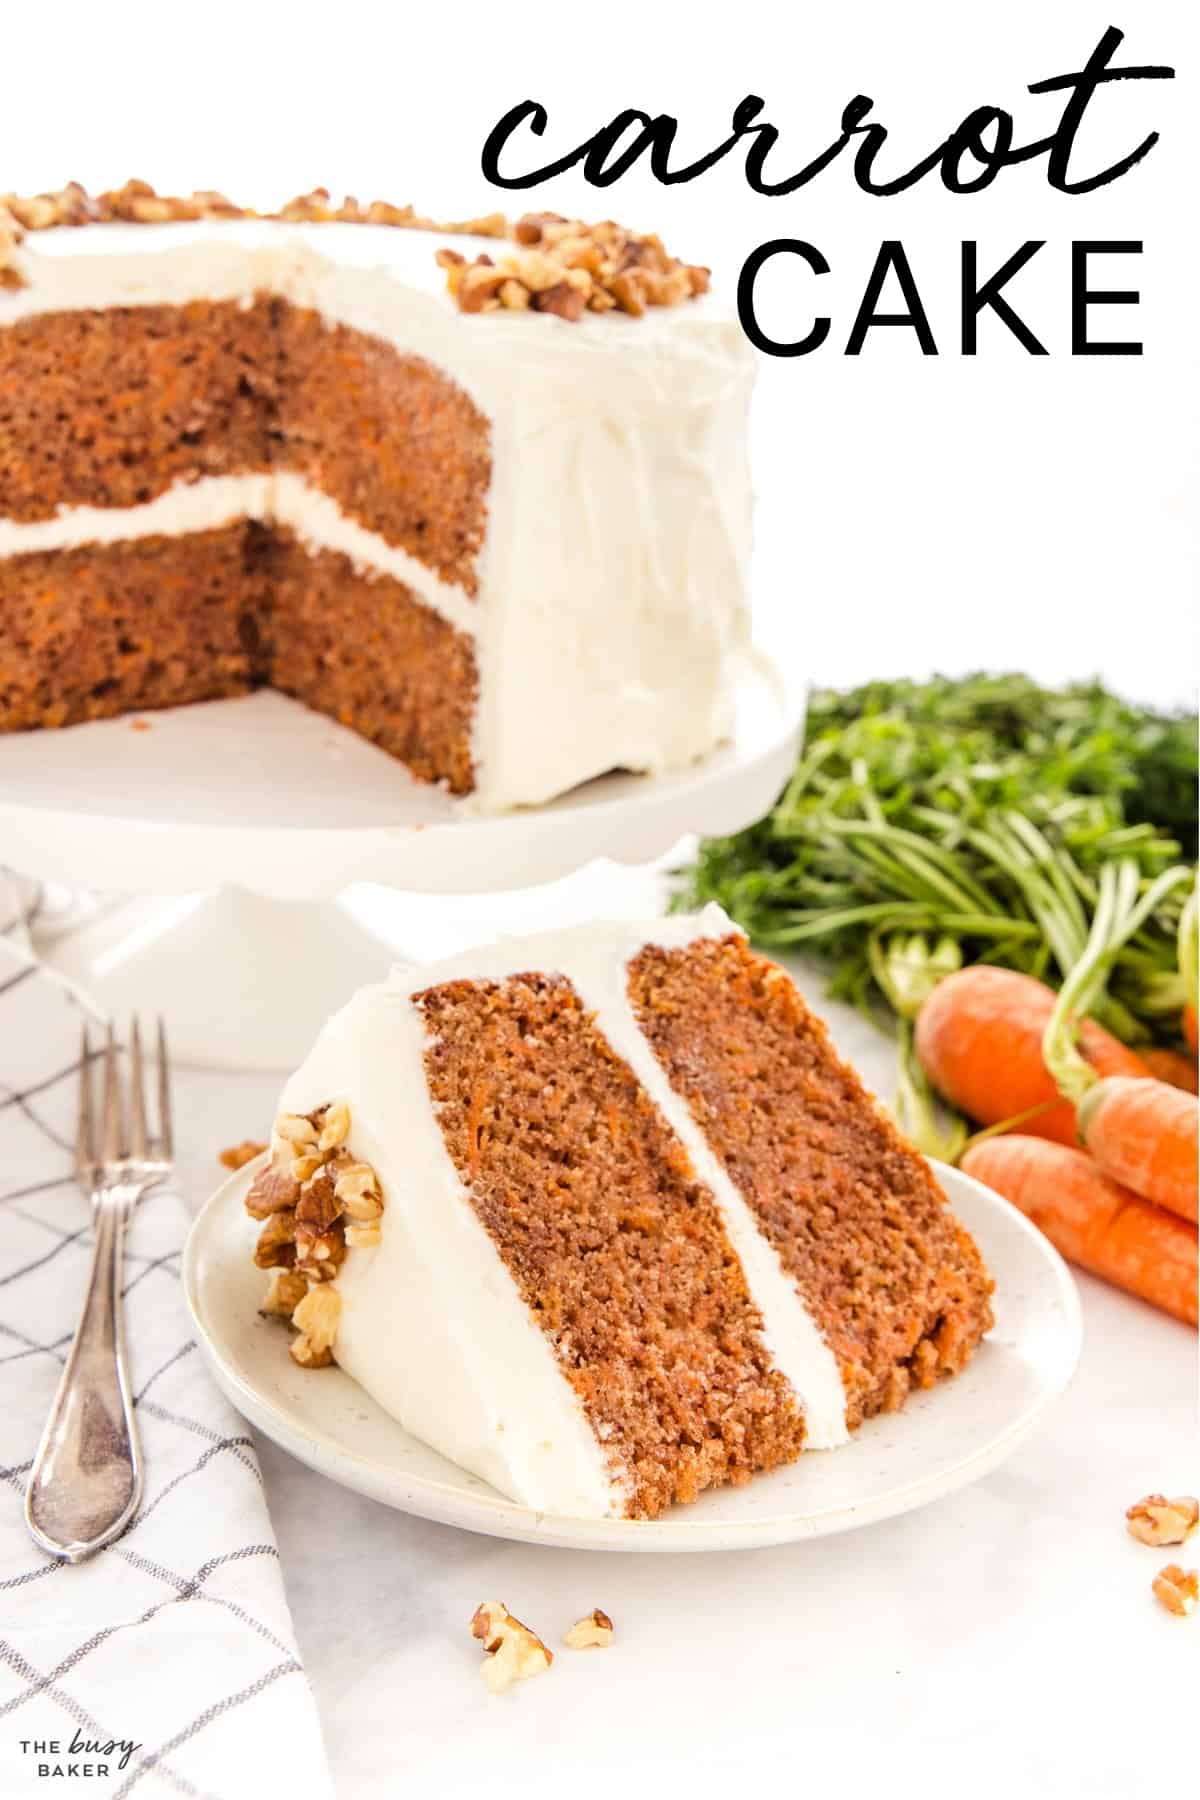
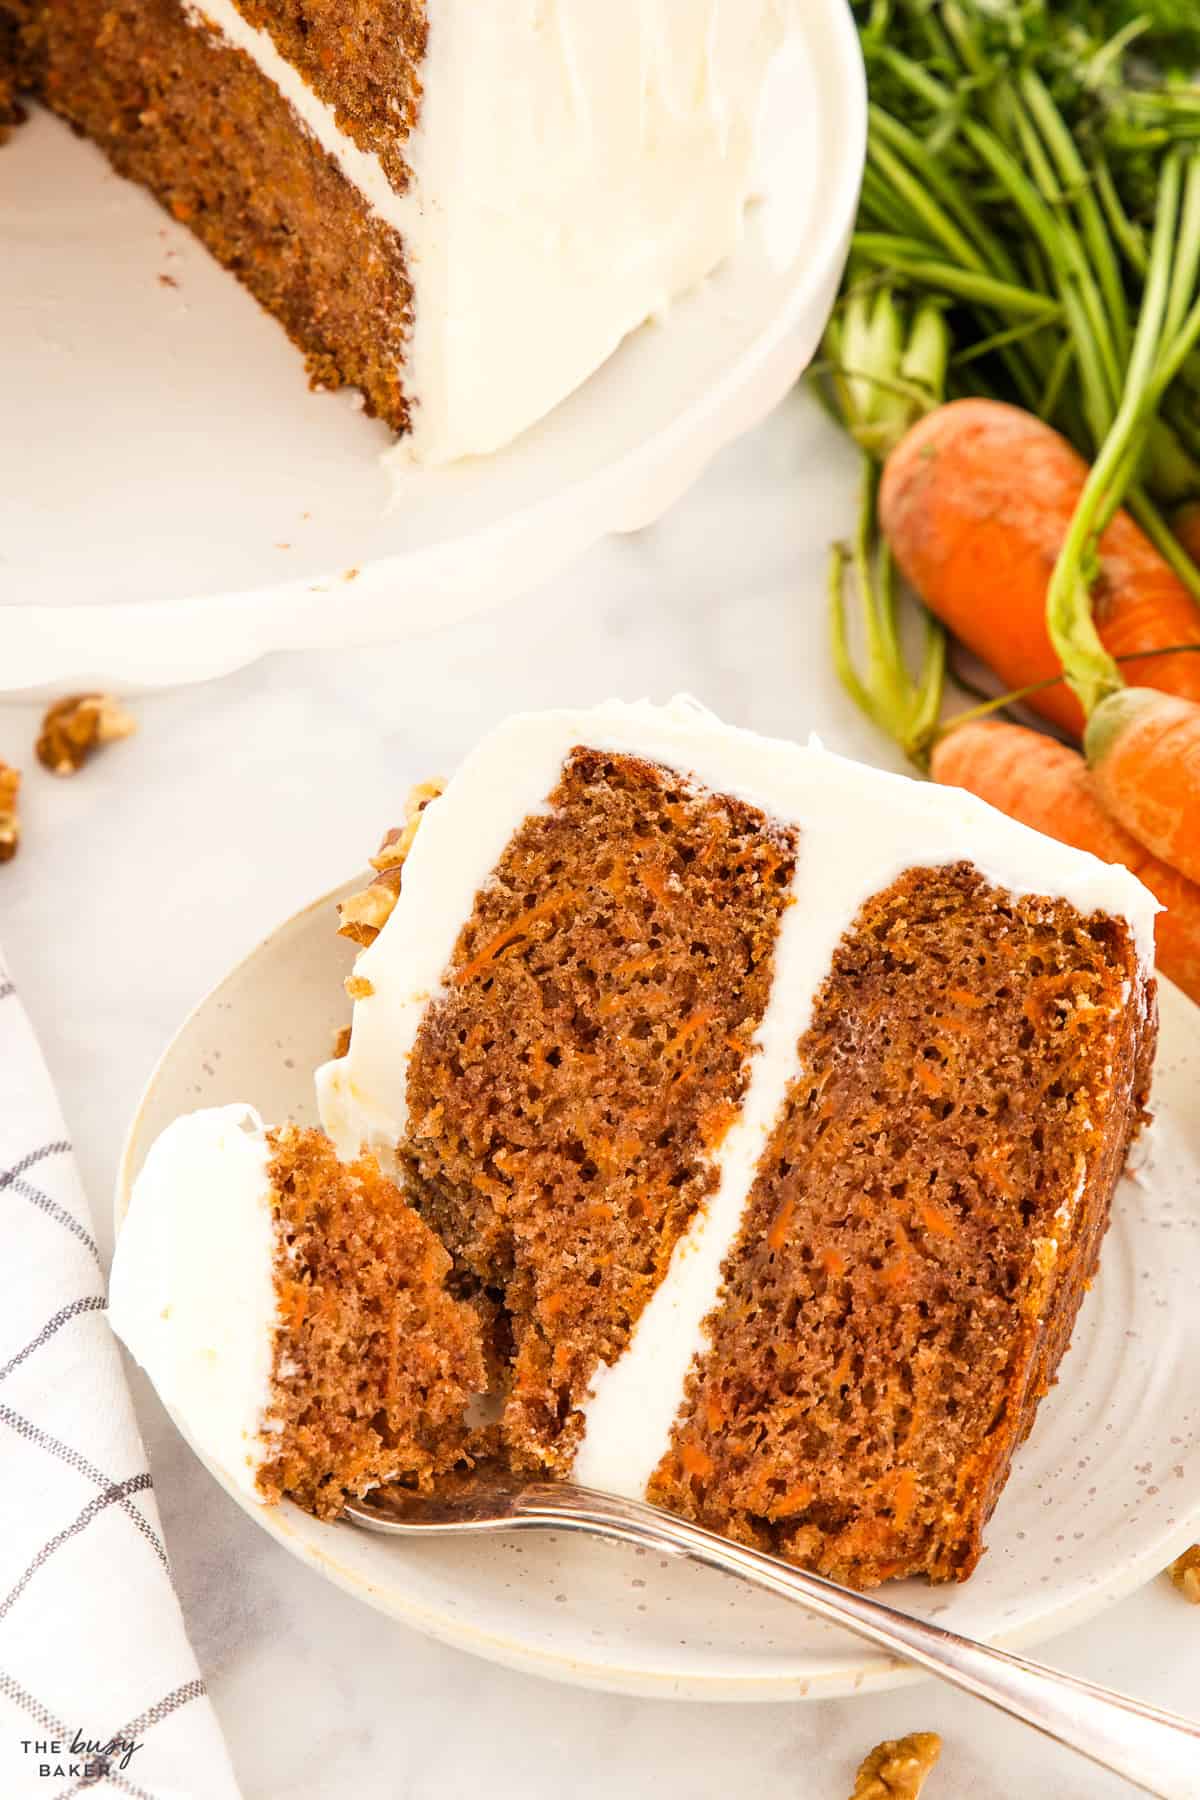
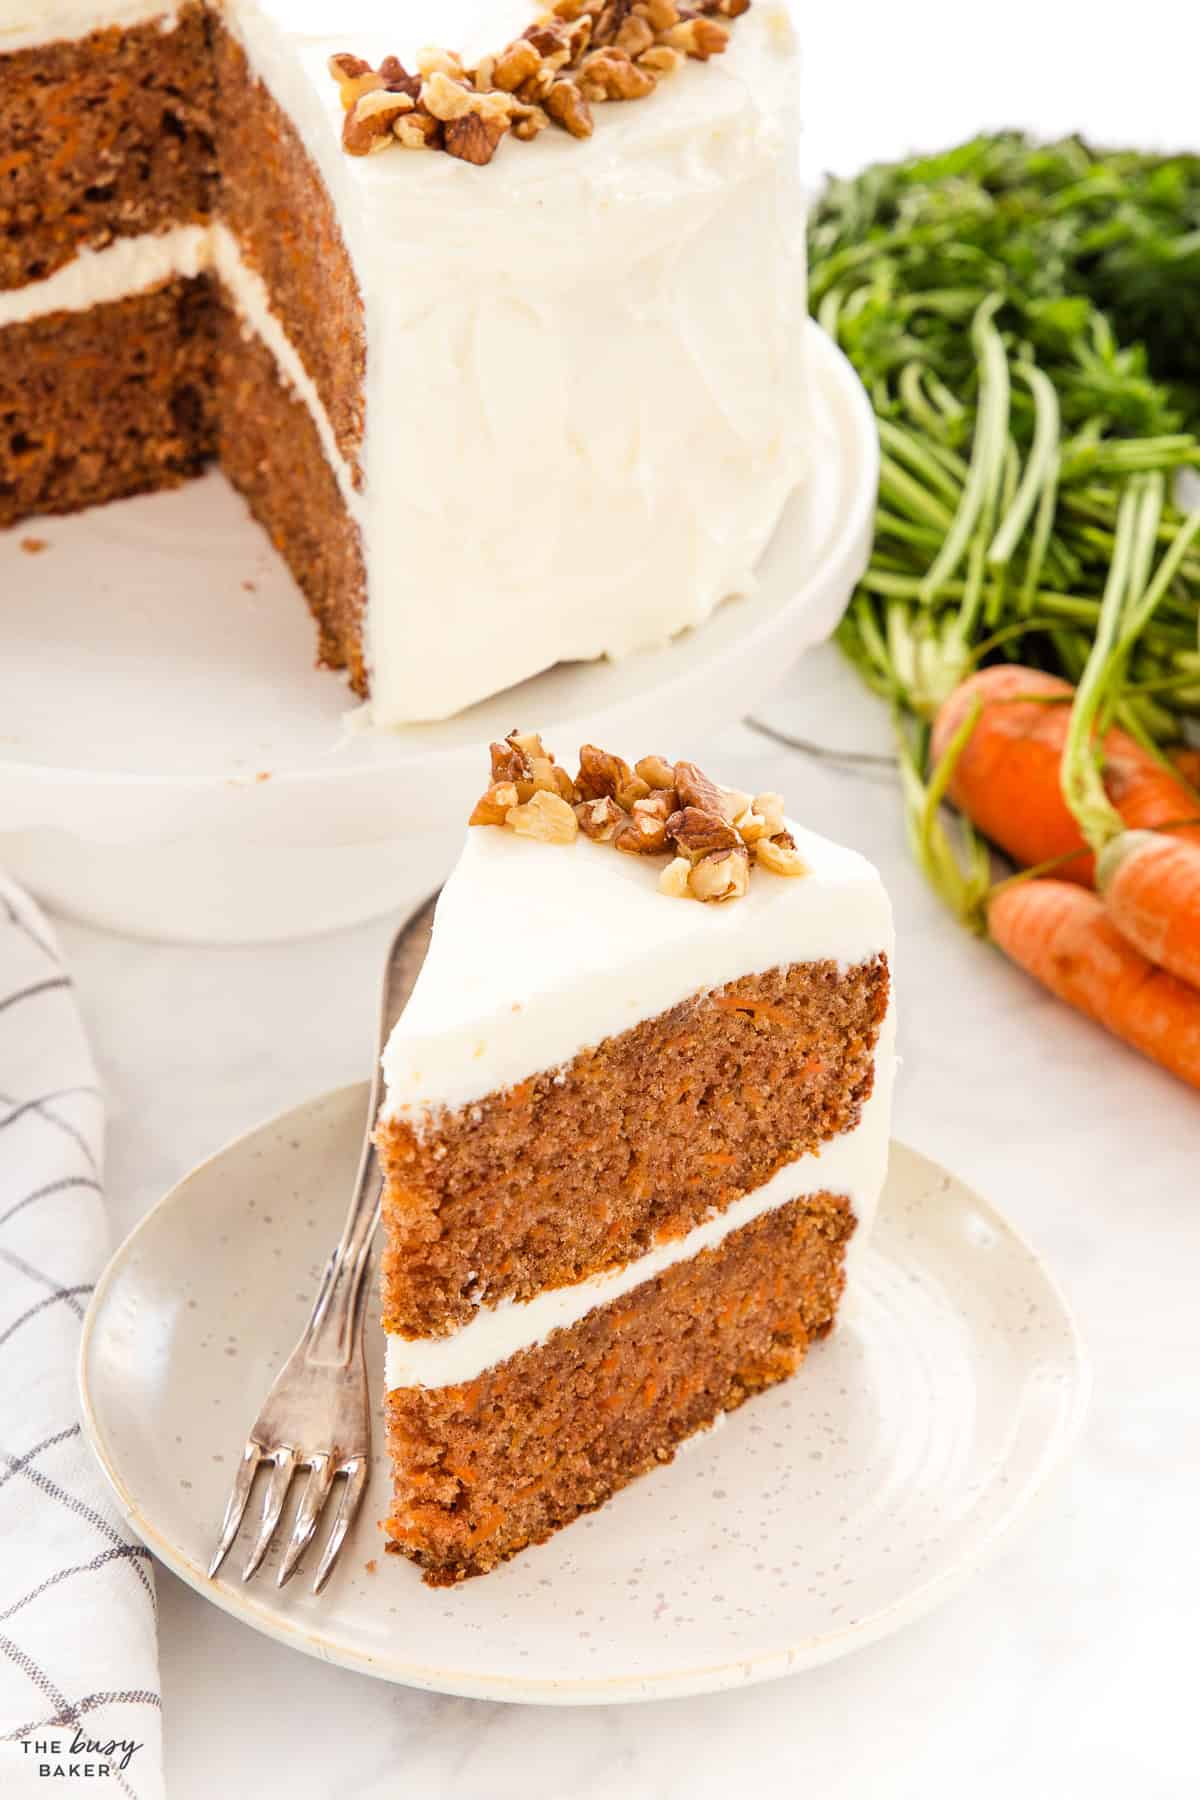
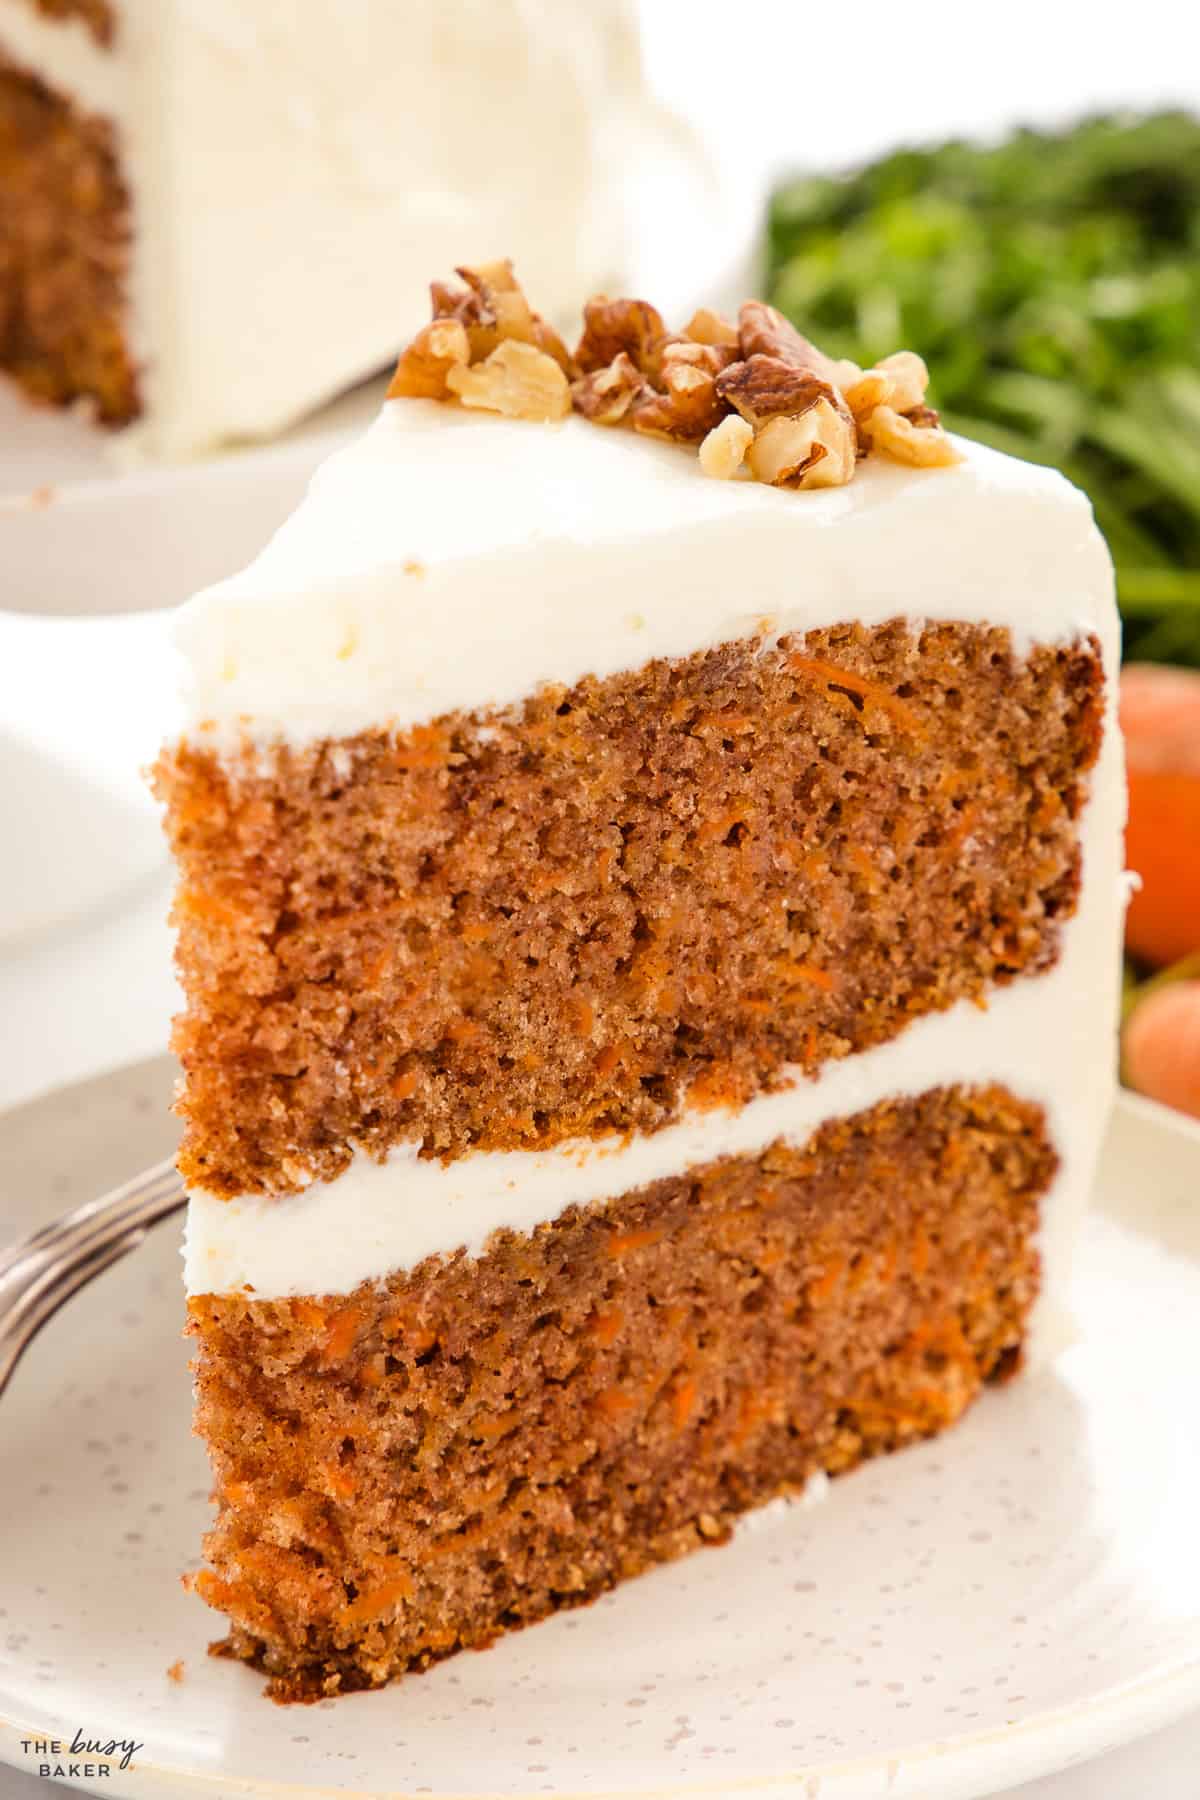
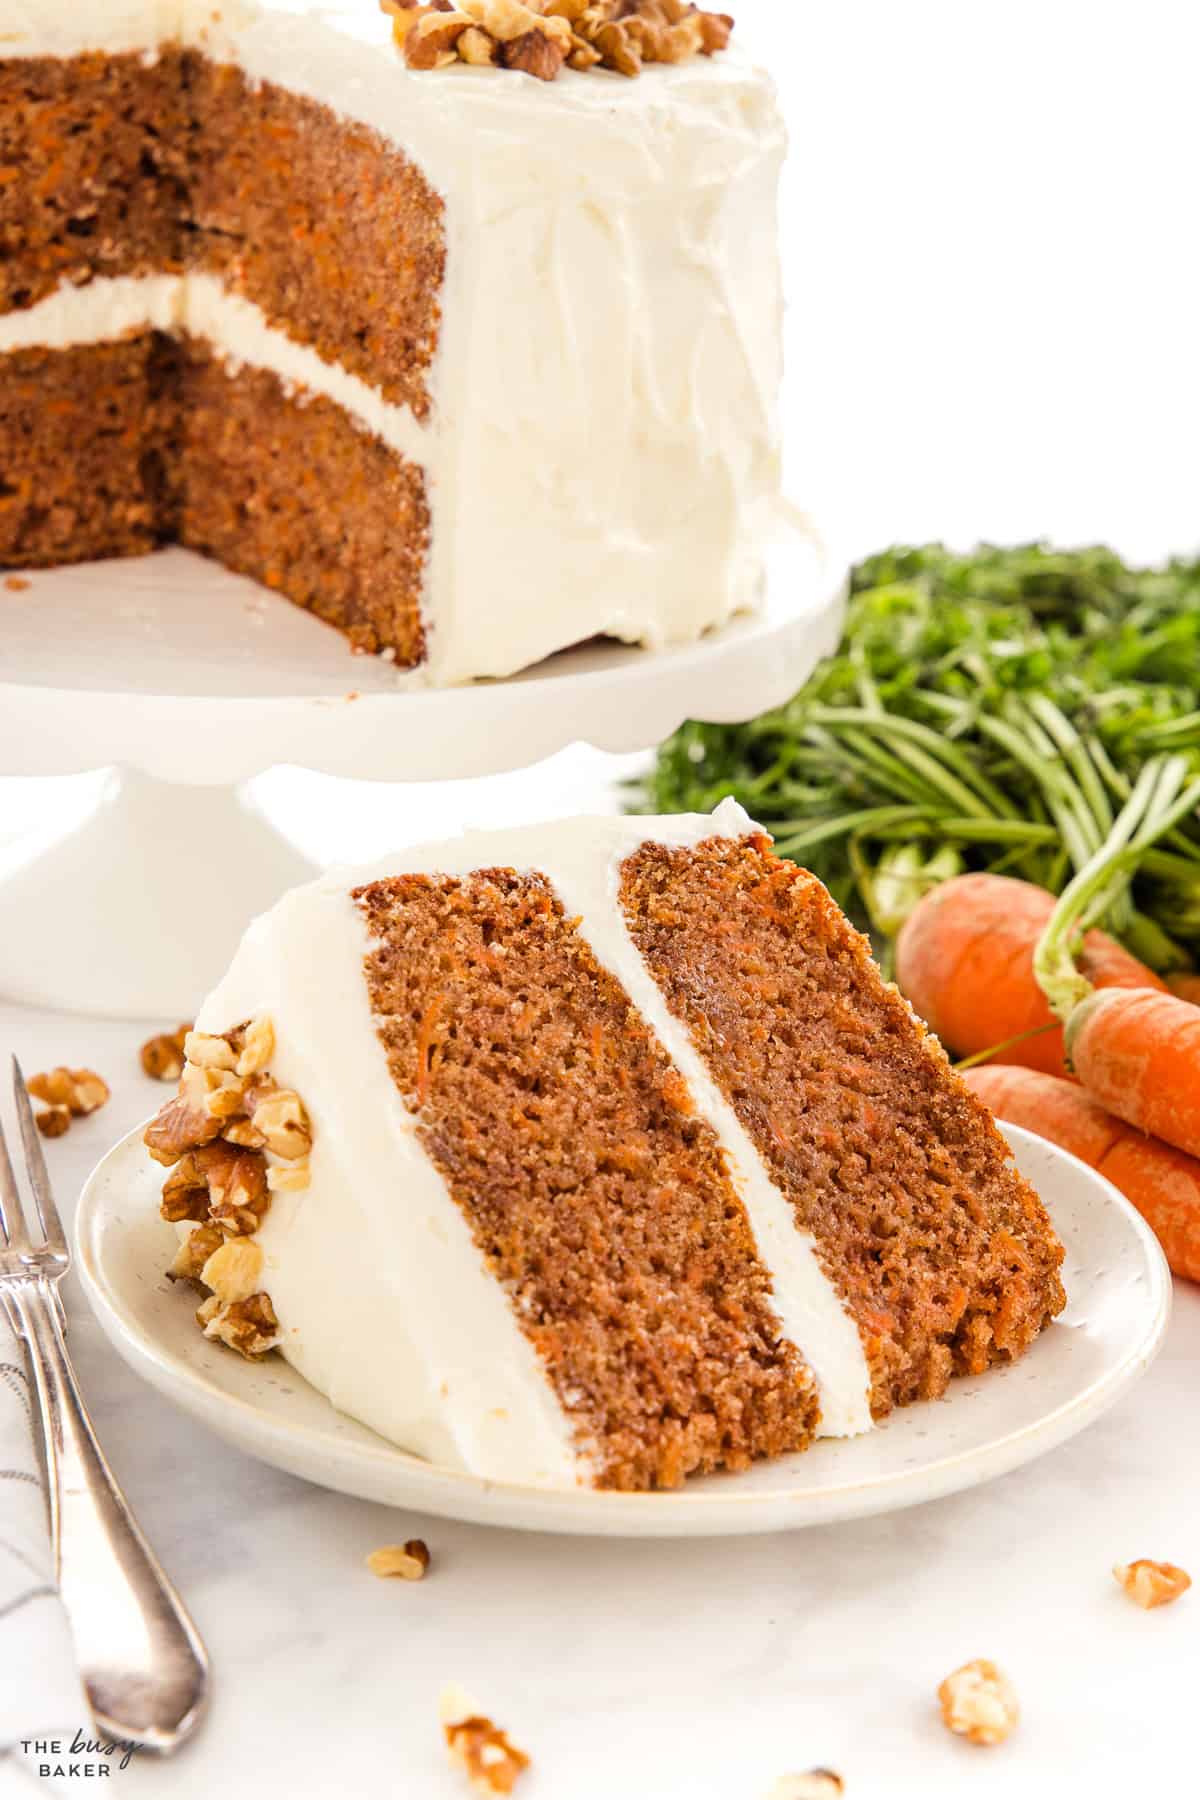
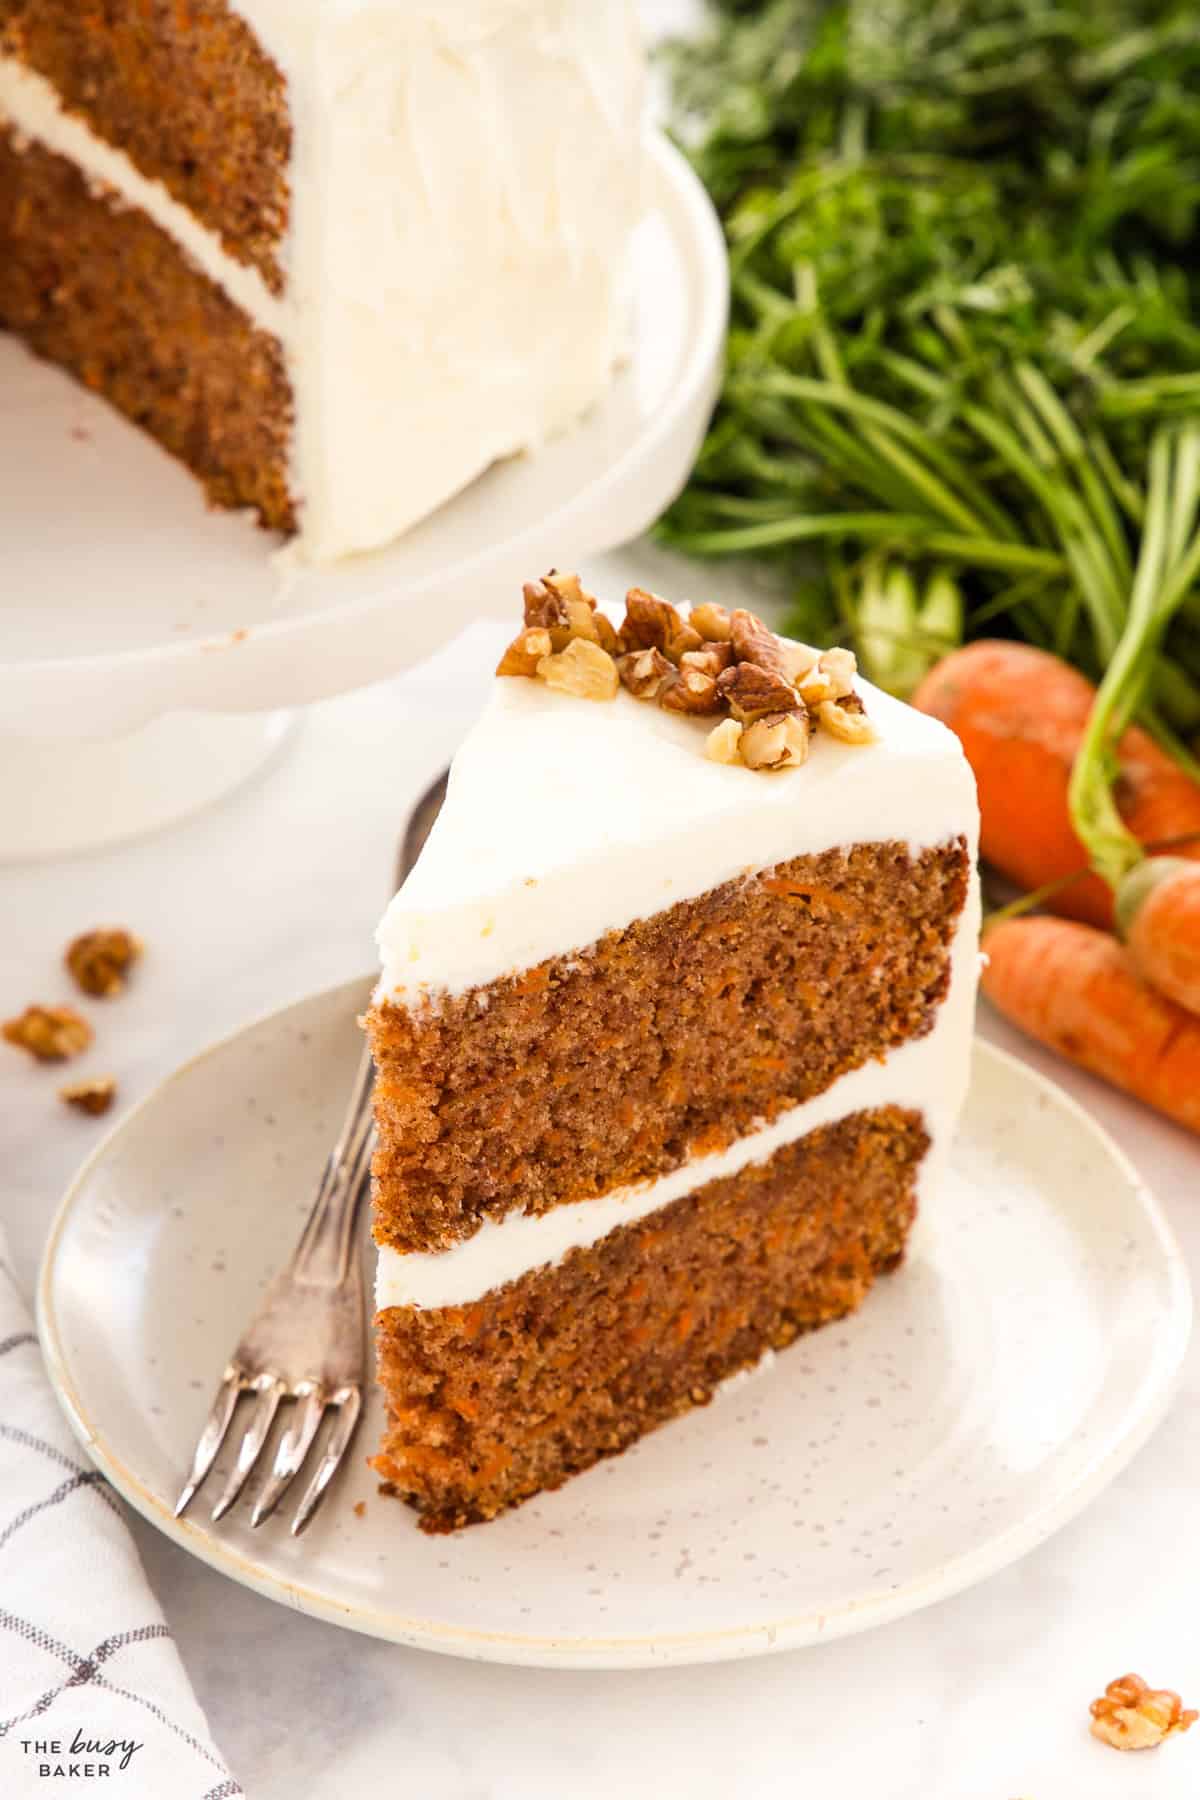
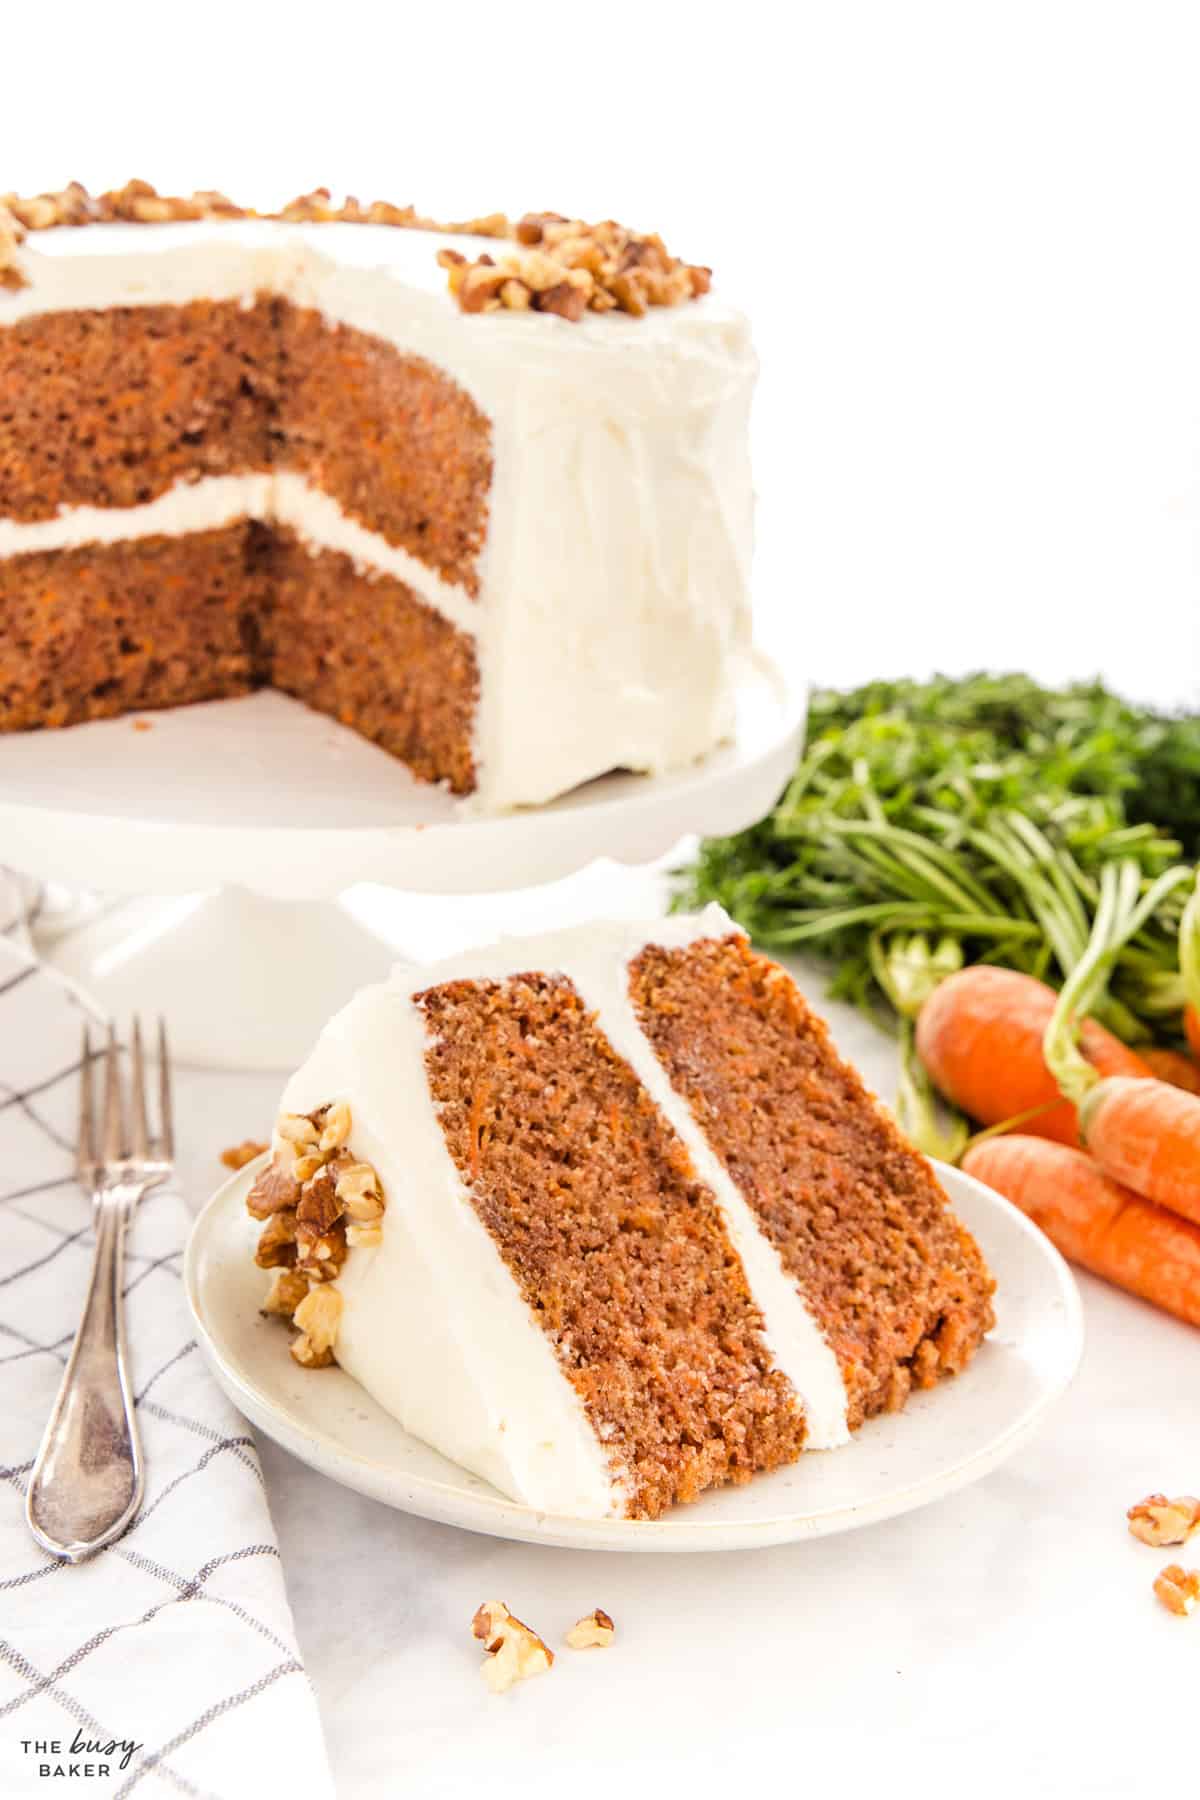
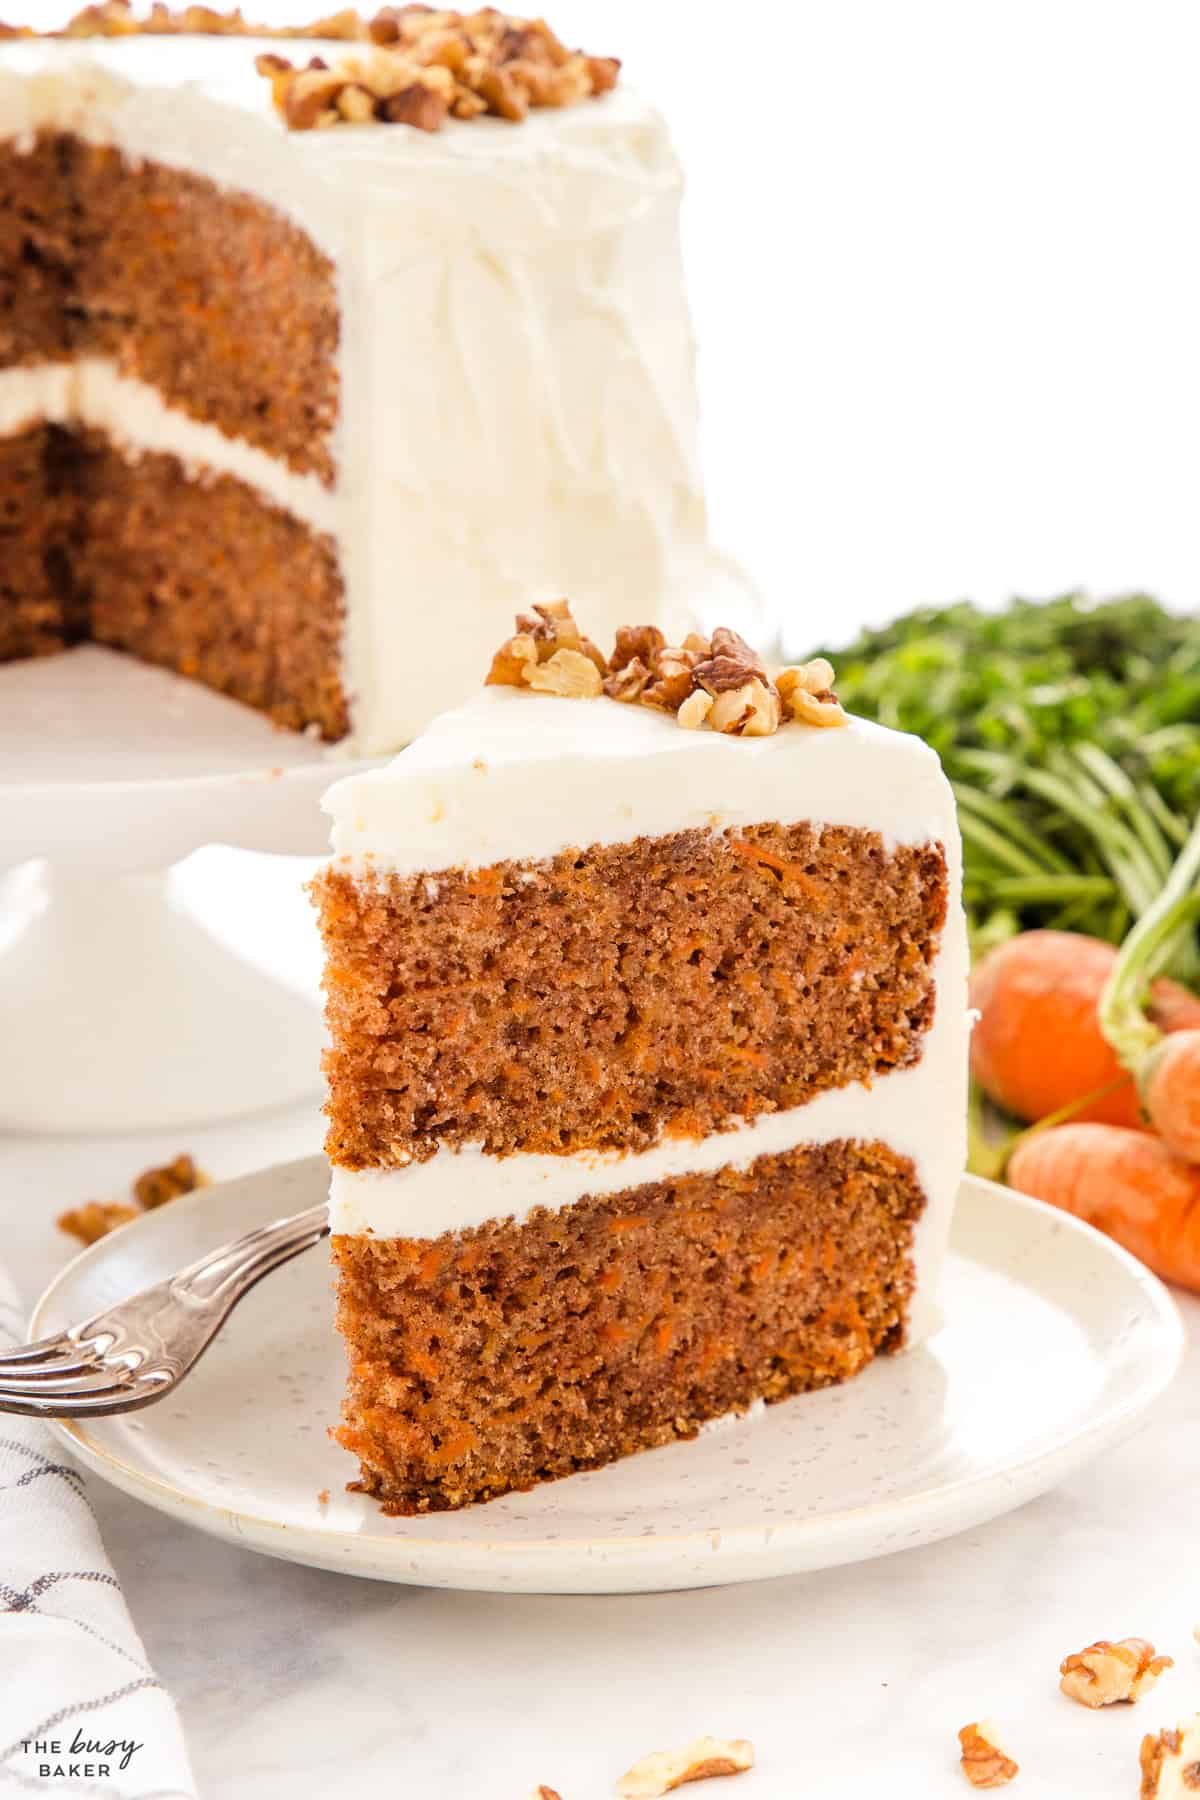
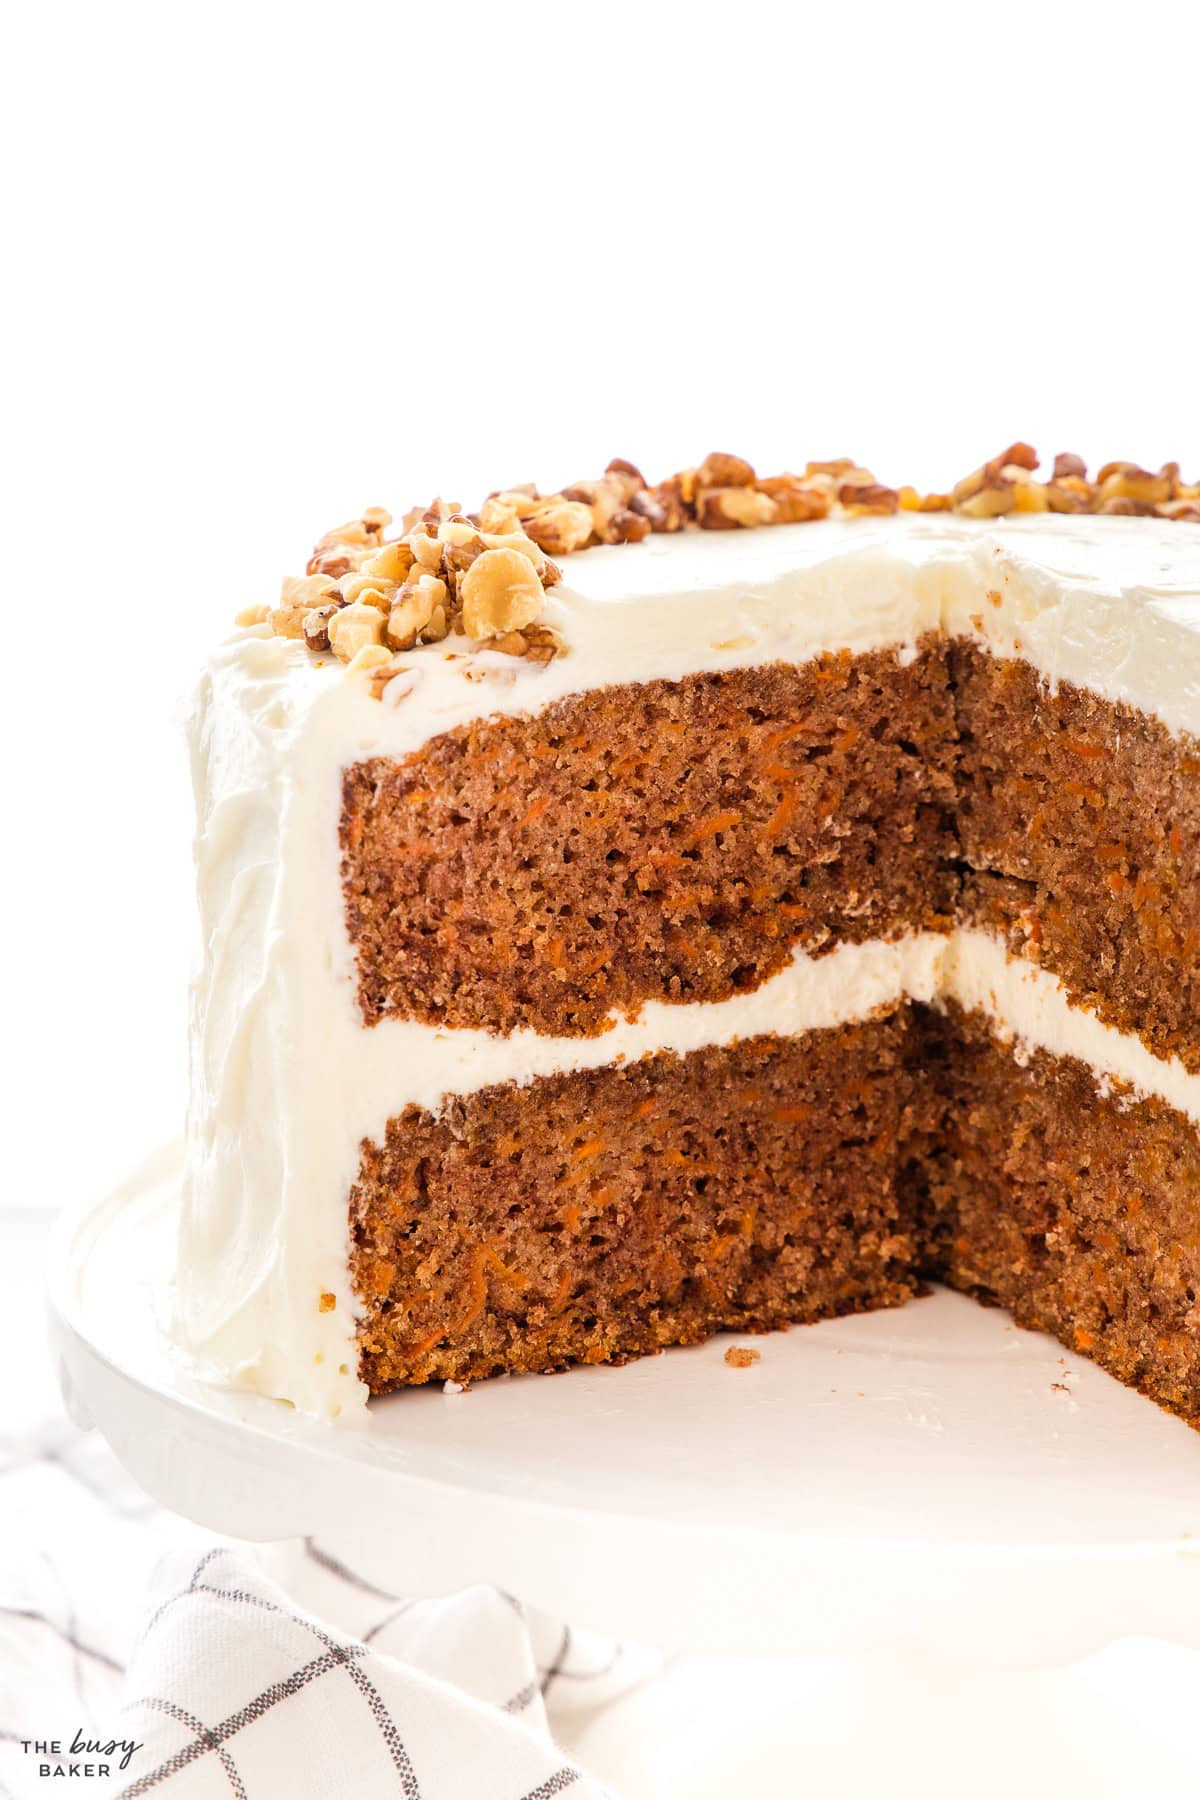
As far as desserts go, Carrot Cake might be on the list of the most polarizing sweets. People either love carrot cake or they hate it, but lucky for us, adding veggies to dessert is right up our alley! This Carrot Cake with Cream Cheese Frosting is one of our FAVOURITE desserts for spring, and it’s truly an amazing cake recipe. The cake layers bake up beautifully from scratch with basic pantry ingredients, and the frosting is SO fluffy and creamy. If you’re looking for the best carrot cake recipe for spring or Easter, THIS is the recipe you need!
There are SO many reasons we love this easy carrot cake recipe! Here are just a few:
- It calls for BASIC INGREDIENTS. No strange or hard-to-find ingredients here! Just basic flour, sugar, oil, buttermilk, and carrots!
- It’s SIMPLE TO MAKE. We’ve never met a more straightforward layer cake than this one! It’s a one bowl batter that bakes to perfection with minimal effort.
- It’s SO MOIST and TENDER. This is the best carrot cake because of how moist and tender it is!
- The FROSTING is PERFECTION. There’s nothing better than creamy, fluffy, cream cheese frosting
- It’s PERFECT for EASTER. Carrot cake is so festive for Easter and spring parties, and this recipe is great for spring entertaining!
Here are all our best tips for making the perfect carrot cake!
Use fresh carrots and grate them yourself using a box grater or a food processor, if you have one. Stay away from pre-grated carrots from the grocery store as they contain a lower level of moisture than freshly grated carrots and can make the cake turn out a little dry.
Buttermilk adds a lot of flavour to this carrot cake, and it also helps create a tender crumb.
Using vegetable oil in this recipe instead of melted butter will make this carrot cake extra tender and give it a moist crumb. Melted butter can sometimes work in place of oil in cake recipes, but because butter is solid at room temperature, it gives layer cakes more structure but also makes them more dry and crumbly instead of tender and moist.
The warmth of the cinnamon, nutmeg, and cloves are what make this BEST carrot cake recipe truly the best. Spices add a ton of flavour, so be sure to add them generously to the carrot cake batter!
- Start with room-temperature ingredients. Make sure your milk and eggs are at room temperature. This will create a smooth cake batter and help the ingredients combine properly.
- Measure the flour correctly. The best way to measure flour is in grams, but if you’re using cup measurements be sure to fluff the flour in its bag or container before scooping VERY gently (don’t pack the flour into the measuring cup at all), and then level it off with the back of a knife or other flat object.
- Avoid over-mixing, especially after adding the flour. Over-mixing can create a dry, tough cake because it reduces the number of air bubbles present in the batter which give the cake its lift as it bakes.
- Don’t mix on high speed. This can create something called tunnelling where long, thin air bubbles appear in the baked cake. This is caused by vigorous mixing that strengthens the gluten strands in the cake batter too much.
- Prepare the pans properly. Always grease your cake pans generously with butter and dust the inside with cocoa powder on all sides (use flour if you’re making a white cake and cocoa powder for a chocolate one). This will prevent the cake from sticking to the pan. We suggest using spring-form pans for baking cakes for even easier removal.
- Bake immediately after mixing. Don’t let an unbaked cake sit out on the counter. Always preheat your oven first and bake the cake immediately after adding the batter to the pans. This will help the cake rise properly in the oven as the leavening agent in the cake batter is activated as soon as the wet and dry ingredients are combined.
- Place the pans in the centre of the oven. Don’t place the pans too close together as this can cause them to brown too much on one side. Add the pans to the centre of the oven so they bake evenly.
- Don’t open the oven as they bake. Avoid opening the oven during baking unless it’s absolutely necessary to rotate the cakes while baking (if your oven is small or has a hot spot). Opening the oven door at the end of the baking time is ok, especially because testing the cake with a toothpick is necessary to prevent over-baking.
- Don’t over bake. Over-baked cakes are dry and crumbly. Be sure to remove them from the oven as soon as a toothpick inserted into the top of the cake comes out clean.
- Don’t under bake. Under-baked cakes are partly baked but gummy on top and in the centre. Test the cake with a toothpick to be sure the cake is baked completely.
- Don’t let them cool completely in the pan. Cool the cakes in the pan only for the first 10-20 minutes of cooling, then turn them out onto a cooling rack to cool completely. Cooling the cakes in the pan will trap moisture in and make them soggy.
- Frost only after completely cooled. Don’t try to frost a cake that’s still warm, especially if you’re using a butter-based frosting as the butter will melt and you’ll be left with a mess. Wait for the cakes to cool completely, then frost.
- Level the cakes before frosting, if necessary. Use a large serrated knife (like a bread knife) to cut any domed top off of the cakes before assembling and frosting.
- Chill the cake during assembly. Add whatever filling you’re using between the layers, then chill for 20-30 minutes in the fridge. This will help the filling firm up so the cake keeps its shape as you add the frosting around the outside of the cake.
- Chill the cake before slicing. Place the cake in the fridge once you’ve finished frosting it so the frosting can firm up. This will make the cake easier to slice and create clean, uniform slices.

Frosting a layer cake is not just about making it look pretty! Proper frosting technique helps seal in moisture and helps the cake keep its shape. Here’s our detailed guide to help you frost your homemade cakes perfectly!
- Prepare Your Tools: Before you start, make sure you have helpful tools: a turntable or lazy susan (extra helpful for spinning the cake as you frost it), an offset spatula, a bench scraper, and a piping bag and tip are the tools we always use for frosting layer cakes. Have your frosting ready and make sure it’s at a spreadable consistency. If it’s too stiff, you can soften it slightly in a mixer on low speed using the paddle attachment (using the paddle attachment instead of the whisk attachment prevents you from adding too much air to the frosting, as this can cause air bubbles, making it hard to work with). Make sure your workspace is clean and that you have enough room to maneuver around the cake.
- Level the Cake: After your cakes have completely cooled, you’ll likely notice they have domed on top just a little bit. To create a flat, stable surface for frosting, you need to level the cakes by gently sawing off the domed top using a serrated knife. Aim to keep the knife as level as you can.
- Stacking the Cake Layers: Begin by placing your first layer on a cake board (bottom side down) slightly larger than your cake. Scoop about 1/2 to 3/4 cup of frosting onto the centre of the layer, then spread it evenly with your offset spatula all the way to the edges. It’s crucial to get this layer even, as it sets the foundation for the rest of your cake. Add the second layer on top, but turn it upside down so the flat bottom is actually the top of the cake. This will give your layer cake a professional look.
- Apply a Crumb Coat: The crumb coat is a thin layer of frosting that helps to catch any loose crumbs so that they don’t appear on the outer layer of your cake once it’s frosted. After stacking your layers with frosting between them, apply a thin coat of frosting all over the cake. Use your offset spatula to spread it, and then smooth it out with the bench scraper. Don’t worry if it looks messy and is full of crumbs… that’s why it’s called the crumb coat. Refrigerate the cake for about 30 minutes to set this crumb coat, which will make applying the final coat of frosting SO much easier.
- Frosting the Cake: Once the crumb coat is set in the fridge, apply the final coat of frosting by adding a generous amount of frosting on top of the cake, and spreading it outwards and down the sides of the cake evenly with your offset spatula. Keep the layer of frosting uniform, as much as you can, and create rustic swirls (or follow our rosette tutorial).
- Refrigerate Before Slicing: As tempting as it might be to slice it right away, 30 minutes in the fridge will help the frosting firm up just enough to slice the cake cleanly. This will give your cake slices that professional bakery look.
Here are some common problems you might encounter while baking layer cakes and how to prevent them:
- An uneven or sunken cake:
- Make sure to measure ingredients accurately, especially the leavening agents like baking powder or baking soda.
- Do not over-mix the batter as this can result in excess air being incorporated into the batter, leading to uneven baking and sinking in the centre of the cakes.
- Ensure the oven is preheated to the correct temperature before placing the cake inside.
- Avoid opening the oven door during baking as this can cause major changes in oven temperature and result in an uneven rise.
- A dry or dense cake:
- Measure the flour properly by spooning it into the measuring cup and levelling it off, rather than scooping it directly from the bag (using the fluff and scoop method also works well).
- Do not over-mix the batter as this can over-develop gluten in the batter and lead to a tougher texture. Mix until the ingredients are just combined and the flour disappears.
- Check the baking time and temperature. Over-baking can cause the cake to dry out. Use a toothpick to check for doneness.
- A cracked cake:
- An oven temperature that’s too high can cause the cake to rise too quickly and crack on the surface. Double-check that your oven temperature is correct by using an oven thermometer.
- Avoid opening the oven door during the first half of baking. This can cause sudden temperature changes that contribute to cracking on the top of the cake.
- Cakes that stick to the pan:
- Properly grease and flour the cake pans (dust with cocoa powder instead of flour for a chocolate cake). You can also use parchment paper to line the bottoms of the pans to prevent sticking.
- Allow the cake to cool in the pan for 10, 15 or even 20 minutes before inverting it onto a wire rack. Cooling the layers in the pan for several minutes helps the cake release more easily.
- Sunken cake layers:
- Check the freshness of your baking powder or baking soda. They lose potency over time and can cause cakes to sink. Replace them if necessary.
- Ensure the oven temperature is accurate. Use an oven thermometer to check the temperature.
- Avoid over-mixing the batter, as this can deflate the air incorporated during the creaming process. Mix until just combined.
- Be sure the cakes are fully baked before removing them from the oven. If they’re not fully baked in the centre, they’ll sink in the middle after you remove them from the oven.
- Difficulty frosting the cake:
- Be sure the texture of your frosting is soft enough that it will easily glide over the surface of the cake without difficulty.
- It’s a good idea to refrigerate the cake layers before frosting to make frosting the cake easier (the layers will be firmer after refrigerating).
- The cake is bulging on the sides or difficult to slice:
- Refrigerate the cake after placing the frosting between the layers and before frosting the outside of the cake. This will prevent the cake from settling too much and the sides from bulging.
- If the cake is difficult to slice because it’s too soft, refrigerate for 30 minutes to an hour before slicing.
Here’s a list of everything you’ll need to make this delicious carrot cake recipe (paid links):
- 8 or 9 inch round cake pans
- mixing bowls
- measuring cups and spoons
- liquid measuring cups
- Whisk
- Silicone Spatula
- Hand Mixer
- Stand Mixer
- Offset Spatula
Here’s everything you’ll need to make the BEST carrot cake recipe (paid links):
For the cake layers:
- 2 cups all purpose flour
- 2 cups sugar
- 2 teaspoon baking powder
- 1 teaspoon baking soda
- 1 tablespoon ground cinnamon
- 1/4 teaspoon ground nutmeg
- 1/4 teaspoon ground cloves
- 1/2 teaspoon salt
- 2 cups shredded carrots
- 4 large eggs
- 3/4 cup canola oil
- 1 1/4 cups low fat buttermilk
For the frosting and garnish:
- 1 cup butter at room temperature
- 12 ounces cream cheese at room temperature
- 6 cups powdered sugar
- 1 teaspoon vanilla extract
- 1-2 tablespoons milk optional, depending on frosting consistency
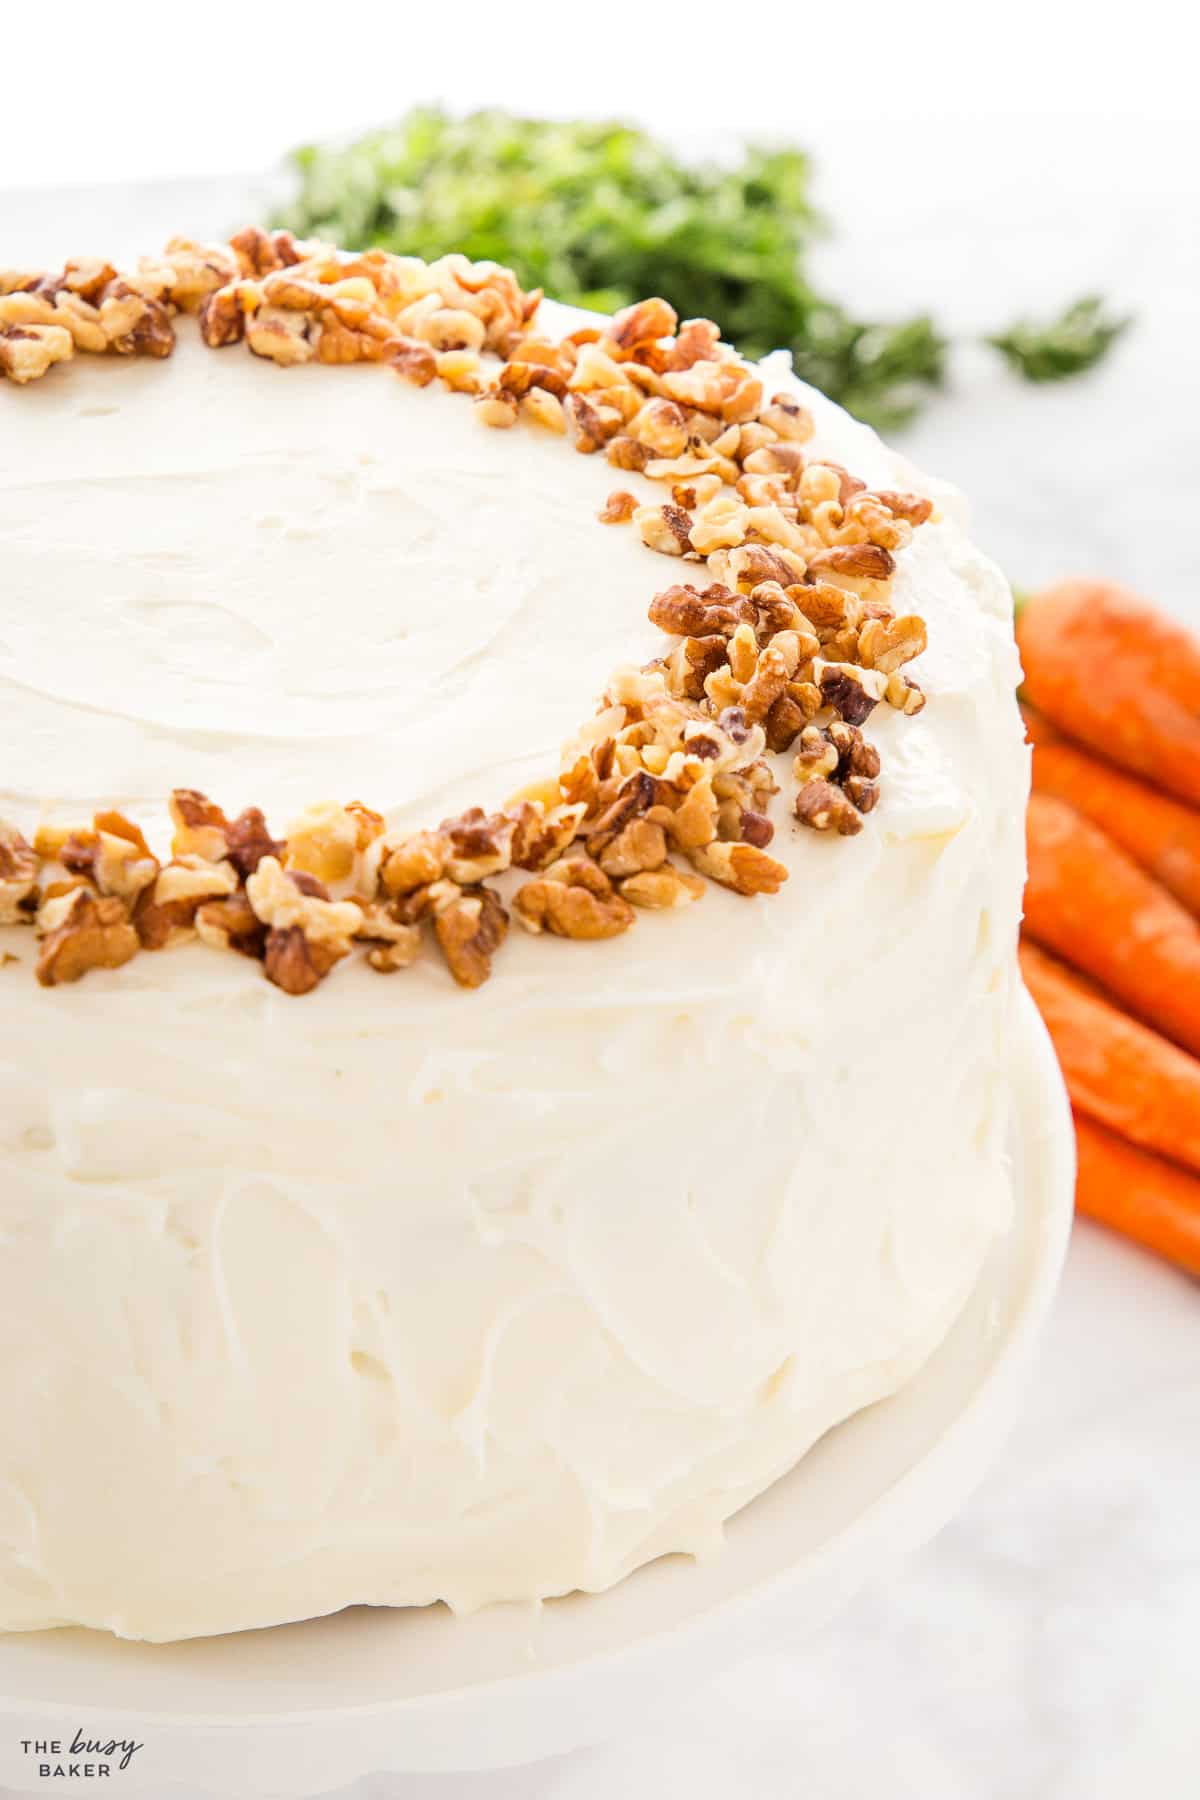
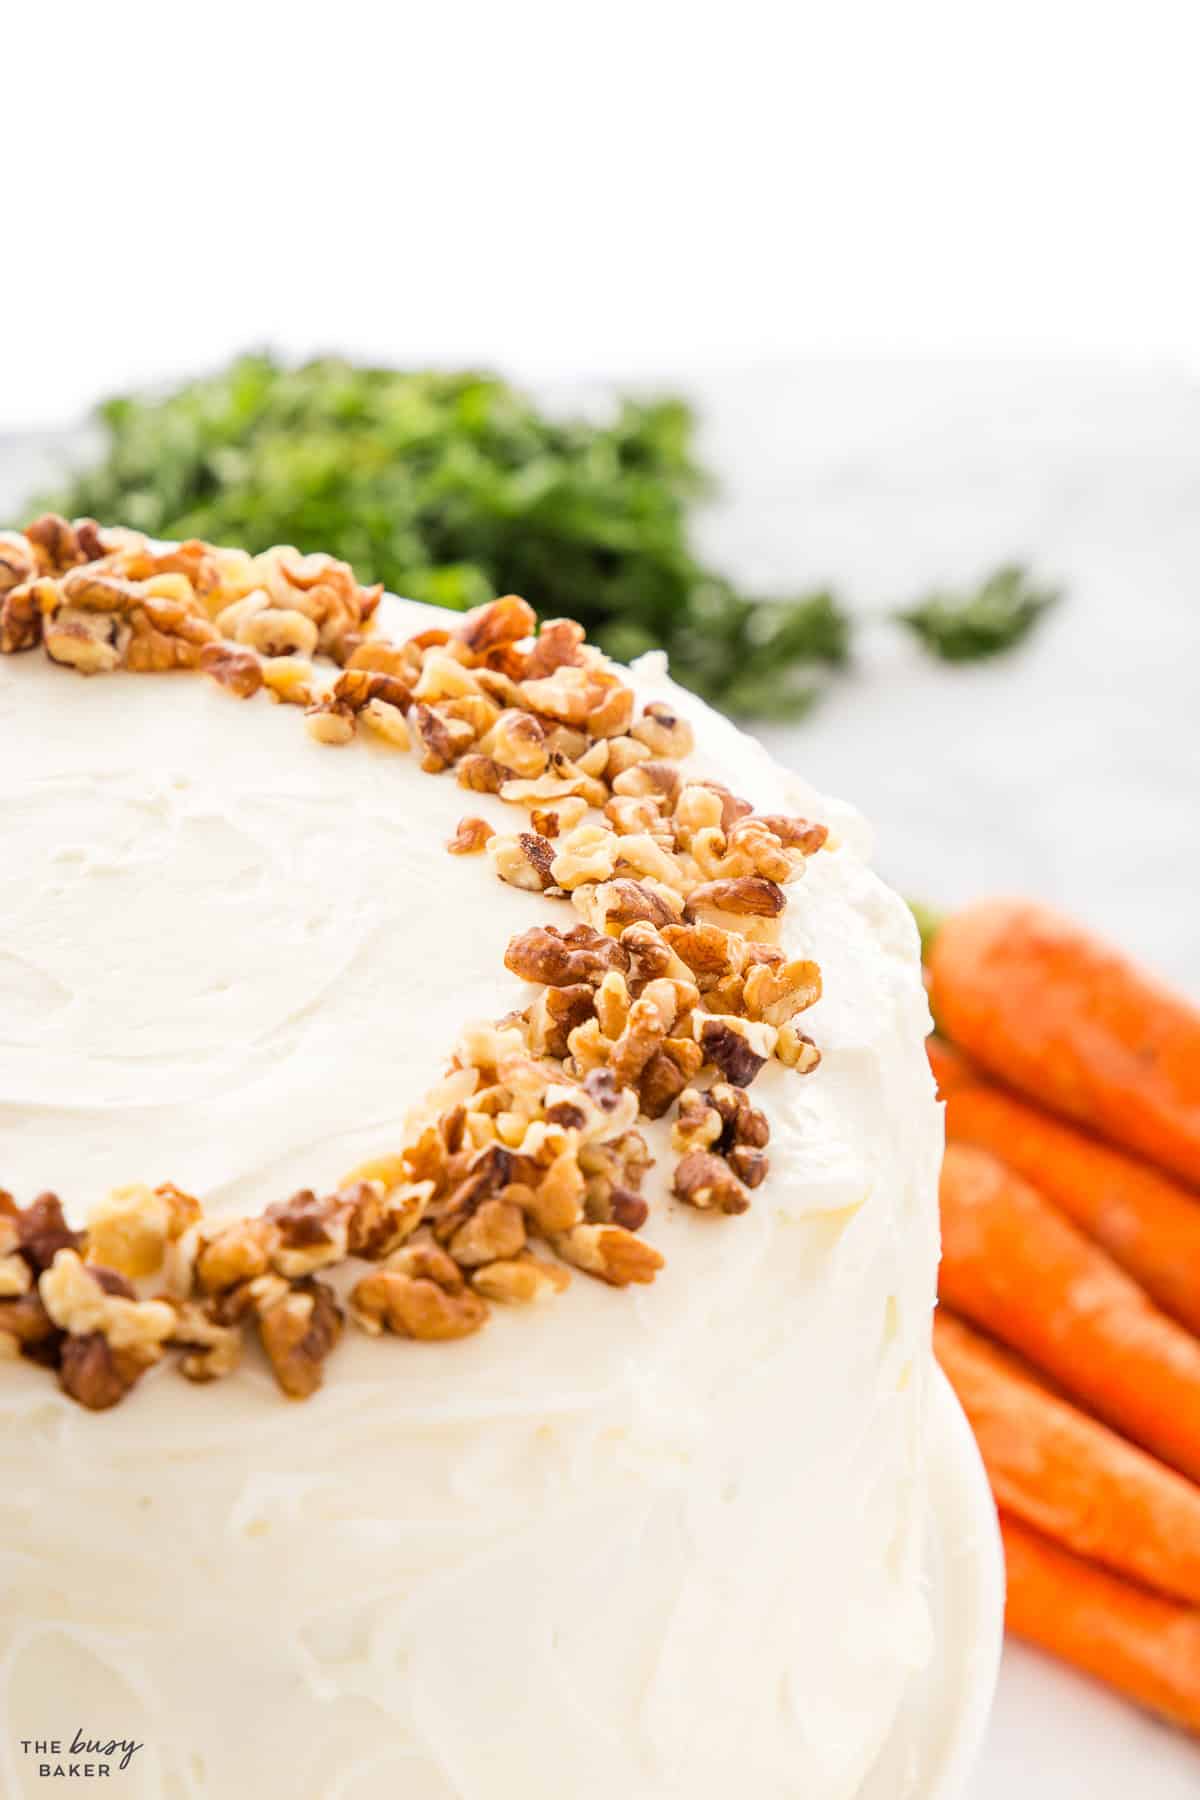
- chopped walnuts or toasted coconut for decoration (optional)
Time needed: 1 hour and 5 minutes
Here’s how to make this best carrot cake recipe!
- Prepare your pans.
Preheat your oven to 350 degrees Fahrenheit (175 degrees Celsius). Prepare two 9-inch round cake pans by greasing them well and lining the bottom with a circular piece of parchment paper. It’s also a good idea to grease the top of the parchment paper and flour the cake pans, as well.
- Whisk together the dry ingredients.
Add the flour, sugar, baking powder, baking soda, cinnamon, nutmeg, cloves, and salt to a large mixing bowl and whisk them together until combined.
- Add the shredded carrots.
Add the shredded carrots to the dry ingredients and whisk them in until they’re evenly distributed throughout the dry ingredients.
- Mix together the liquid ingredients.
Measure the buttermilk and oil into a liquid measuring cup, then add the eggs. Whisk these 3 ingredients together with a fork.
- Mix the wet and dry together.
Pour the wet ingredients into the dry ingredients and combine them with a rubber spatula just until no streaks of flour remain.
- Bake the cakes.
Divide the batter evenly between the 2 prepared cake pans and bake at 350 degrees Fahrenheit (175 degrees Celsius) for about 30-35 minutes or until a toothpick inserted into the middle of one of the cake layers comes out clean.
- Cool the cakes.
Remove the cakes from their pans and cool them upside down on cooling racks until they cool completely.
- Make the frosting.
Add the softened butter and powdered sugar to the bowl of your stand mixer fitted with the paddle attachment (or in a large mixing bowl with a hand mixer). Mix well until a smooth, creamy mixture forms. With the mixer running, add the cream cheese and the vanilla, and mix on medium high speed until the frosting is creamy and smooth.
- Frost the cake.
Once the frosting has reached the right consistency and the cake has cooled completely, frost the cake with a knife or an offset spatula, making sure there’s a generous layer of frosting between the layers before frosting the sides and the top. It’s a good idea to frost the cake with a crumb coat first, refrigerate, then add the remaining frosting in a final layer.
Maintaining moisture in cakes is very important and there are a few secrets professional bakers use to make sure their cakes are perfectly moist, every single time:
- They Use the Right Ingredients: High quality butter, the addition of vegetable oil, and incorporating buttermilk or sour cream adds richness and moisture to cakes.
- They Follow the Correct Baking Process: Professional bakers measure correctly and accurately, they use the correct oven temperature, and they avoid over-baking – all things that affect the moisture level of a cake.
- They Use Syrups: Professional bakeries often brush their cakes with a simple syrup before frosting and decorating to add sweetness and other flavours, as well as moisture.
- They Cool, Handle and Store the Cakes Properly: Letting the cake cool in the pan for a short time prevents it from releasing too much steam. Wrapping the cake layers in plastic wrap if you’re storing them also helps lock in moisture, and storing the cake in an airtight container even after it’s frosted helps it stay moist.
- They Frost the Cakes Properly: Frosting the cake with a crumb coat first locks in moisture because the crumb coat acts as a moisture barrier.
Can I make carrot cake cupcakes with this recipe?
We recommend making our Carrot Cake Cupcakes recipe instead of using this recipe for cupcakes. The recipes are very similar.
What can I add to carrot cake?
Feel free to add up to one cup of chopped pecans, raisins, walnuts, or other dry ingredients like this. We don’t recommend adding fresh or canned fruit like crushed pineapple, as this will add moisture to the batter and change the outcome of the recipe.
Can I make this carrot cake ahead of time?
Feel free to make the cake layers ahead of time, wrap them in plastic wrap (don’t use foil, as it’s not airtight), and then store them in the refrigerator for up to 2 days or in the freezer for up to 3 months. Be sure to thaw the cake layers completely to room temperature before frosting if you freeze them.
Can I substitute the sugar in this recipe?
We recommend sticking with the granulated sugar in this recipe, instead of adding brown sugar or other sugar substitutes.
What is cream cheese frosting made of?
Cream cheese frosting is similar to traditional buttercream, made with butter mixed with powdered sugar. Adding cream cheese to the butter and powdered sugar mixture makes the frosting extra creamy and smooth.
How can I enhance my carrot cake flavour?
Adding spices like cinnamon, nutmeg, and cloves enhance the flavour of carrot cake.
Can carrot cake be refrigerated?
Yes! Because it’s made with cream cheese frosting, leftover carrot cake should be refrigerated, or it should be refrigerated before serving if made in advance.
Could I substitute grated apple for carrot in a carrot cake recipe?
We don’t recommend substituting grated apples for the grated carrots in this recipe because apples contain a higher amount of water than carrots, which changes the texture of the cake as it bakes.
What’s in a carrot cake?
Carrot cake contains grated carrots, sugar, buttermilk, eggs, oil, spices, and dry ingredients like flour.
How long does carrot cake last?
This carrot cake is best served the day it’s made or the day after it’s made. It should be stored in the fridge and lasts for about 3 days before it begins to dry out.

More Delicious Recipes
- Carrot Muffins
- Rainbow Carrots
- Mini Egg Cheesecake
- Carrot Cake Roll
- Mini Eggs Chocolate Chip Cookies
- Easy Carrot Cake
- Instant Pot Carrot Soup
- Paska
- Carrot Ginger Soup
- Best Deviled Eggs
- Mini Eggs Easter Brownie Parfaits
Watch the video below to see exactly how I make this recipe. You can find more delicious recipe videos on my YouTube channel
If you made this, share a photo!
Are you trying this recipe? Use the comment form below to share your take; now with support for image uploads and comment voting!
Carrot Cake with Cream Cheese Frosting
Recipe: Equipment
Recipe: Ingredients
- 2 cups all purpose flour
- 2 cups sugar
- 2 teaspoon baking powder
- 1 teaspoon baking soda
- 1 tablespoon ground cinnamon
- 1/4 teaspoon ground nutmeg
- 1/4 teaspoon ground cloves
- 1/2 teaspoon salt
- 2 cups shredded carrots
- 3/4 cup canola oil
- 1 1/4 cups low fat buttermilk
- 4 eggs
For the frosting:
- 1 cup butter at room temperature
- 6 cups powdered sugar
- 12 ounces cream cheese at room temperature
- 1 teaspoon vanilla extract
- 1-2 tablespoon milk optional, depending on frosting consistency
For garnish:
- 1/4 cup chopped walnuts optional
- 1/2 cup sweetened toasted coconut optional
Recipe: Instructions
For the cake:
- Preheat your oven to 350 degrees Fahrenheit (175 degrees Celsius). Prepare two 9-inch round cake pans by greasing them well and lining the bottom with a circular piece of parchment paper. It's also a good idea to grease the top of the parchment paper and flour the cake pans, as well.
- Add the flour, sugar, baking powder, baking soda, cinnamon, nutmeg, cloves, and salt to a large bowl and whisk them together until combined.
- Add the shredded carrots to the dry ingredients and whisk them in until they’re evenly distributed throughout the dry ingredients.
- Measure the buttermilk and oil into a liquid measuring cup, then add the eggs. Whisk these 3 ingredients together with a fork.
- Pour the wet ingredients into the dry ingredients and combine them with a rubber spatula just until no streaks of flour remain.
- Divide the batter evenly between the 2 prepared cake pans and bake at 350 degrees Fahrenheit (175 degrees Celsius) for about 30-35 minutes or until a toothpick inserted into the middle of one of the cake layers comes out clean.
- Remove the cakes from their pans and cool them upside down on cooling racks until they cool completely.
For the frosting:
- Add the room temperature butter to the bowl of your mixer fitted with the paddle attachment (or to a large mixing bowl with a hand mixer). Mix the butter on medium high speed until it's creamy and smooth.
- Add the powdered sugar one cup at a time, mixing on medium-low speed until it's completely blended and thick (you might need to scrape down the sides of the bowl several times).
- Add the cream cheese and the vanilla extract to the butter mixture and continue to whip on medium speed until they're well combined.
- If at this point the frosting is too thick to spread, beat in a tablespoon or two of milk to loosen it up a little bit (add the milk a couple teaspoons at a time just to be sure you don't add too much!).
- Once the frosting has reached the right consistency and the cake has cooled completely, frost the cake with a knife or an offset spatula, making sure there's a generous layer of frosting between the layers before frosting the sides and the top.
For garnish:
- Decorate the cake with chopped walnuts and/or shredded toasted coconut (optional).
Recipe: Notes
How to Decorate
You can frost the cake any way you like, with a rustic swirl pattern or with smooth upward strokes. Once it’s frosted, top it with the toasted coconut and chopped walnuts and let it sit in the fridge for an hour or two before slicing.Storage Instructions
This carrot cake is best served the day it’s made or the day after it’s made. It should be stored in the fridge and lasts for about 3 days before it begins to dry out.Make-Ahead and Freezer Instructions
Feel free to make the cake layers ahead of time, wrap them in plastic wrap (don’t use foil, as it’s not airtight), and then store them in the refrigerator for up to 2 days or in the freezer for up to 3 months. Be sure to thaw the cake layers completely to room temperature before frosting, if you freeze them.Recipe: Nutrition
Notice: Nutrition is auto-calculated, using Spoonacular, for your convenience. Where relevant, we recommend using your own nutrition calculations.

TRY OUR MEAL PLAN BUNDLE!
Let us do the work for you with 11 WEEKS of deliciously easy family dinners, grocery lists, meal prep guides and so much MORE!
11 weeks of done-for-you family meal plans for only $9.99!
It looks delicious. Thanks for sharing this recipe.
This cake is AMAZING – so flavourful, moist and delicious. Ever since discovering this recipe I make it every year for my husbands birthday. I have printed off the recipe and put it in a binder- I will never need another carrot cake recipe, this can’t be beat! Thank you!!
I’m so happy you enjoyed it! Thank you for taking the time to leave your feedback. And Happy Birthday to your husband!
Tried this recipe and the cake turned out amazing, however the cream cheese frosting turned out quite runny. I followed the recipe so I’m not sure what I did wrong? I didn’t even add the milk that the recipe mentions if the frosting is too thick.
Make sure you’re using full fat cream cheese, the light variety tends to contain more water that melts the sugar and gives you a frosting that will never have a stable texture.
What did I do? My icing isn’t getting thicker? The cake is delicious but the icing is a bit thicker than water
Make sure you’re using full fat cream cheese. The light variety contains too much water and using it results in a liquid frosting
Can this be baked in a Bundt pan? Thanks. I’ve made your recipe and it’s very delicious.
I have never tried it myself so I couldn’t tell you, but if you do try, please let us know! You might have to adjust the baking time. Happy baking ☺️
I’ve made this cake in a Bundt pan for years and it’s so moist and delicious. Takes around 50 min – toothpick test works best just as you said.
Thanks for letting us know!