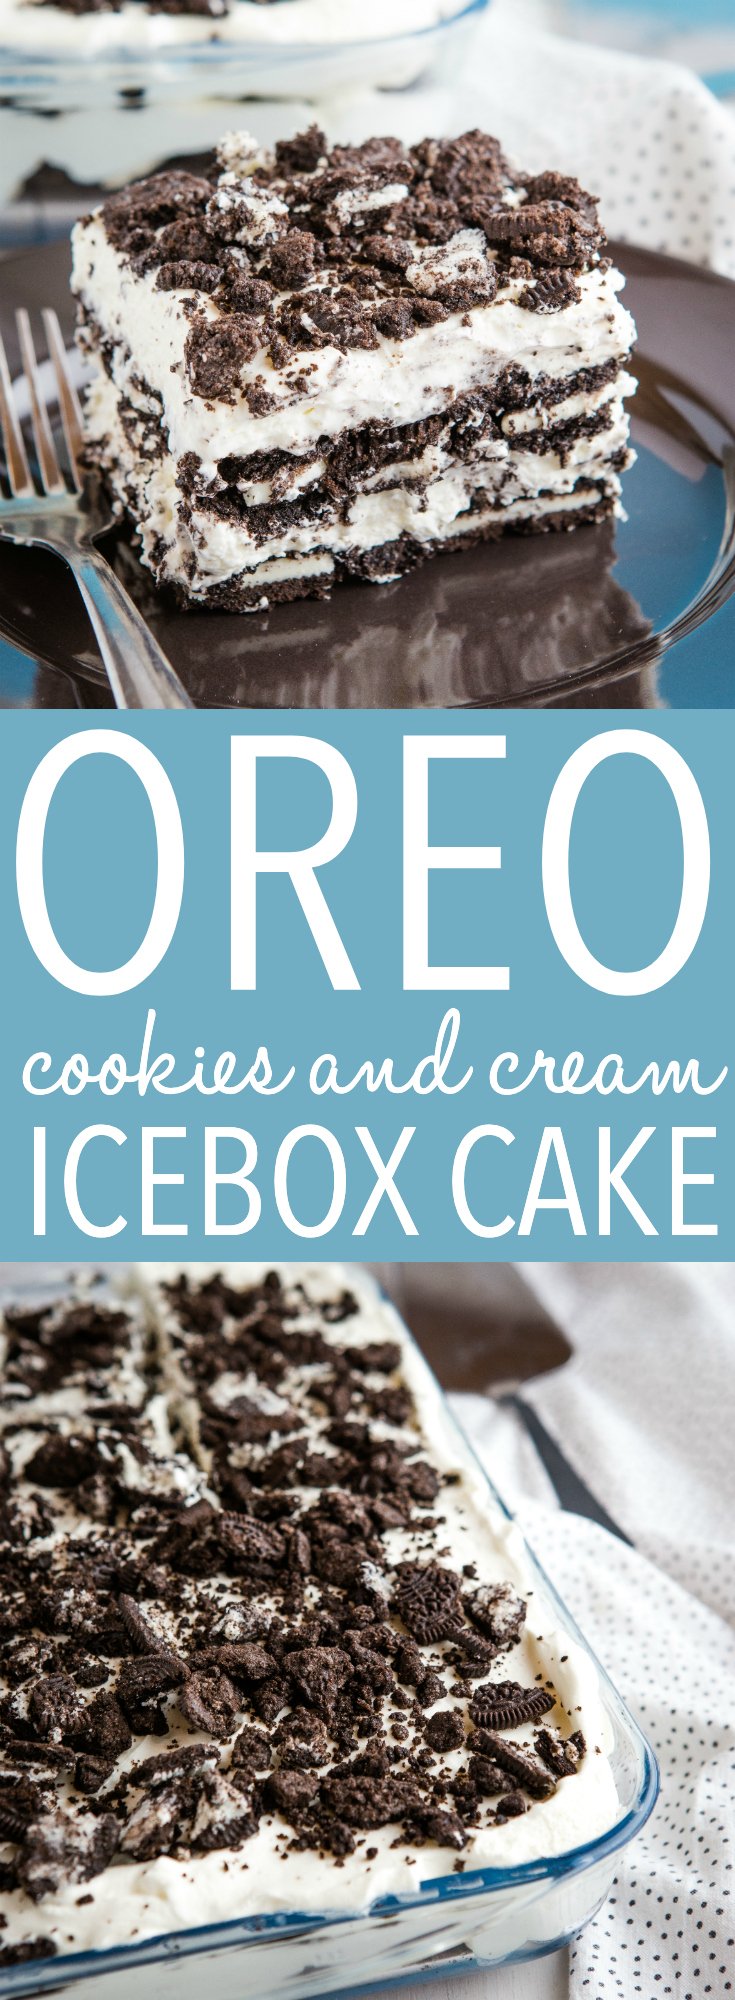
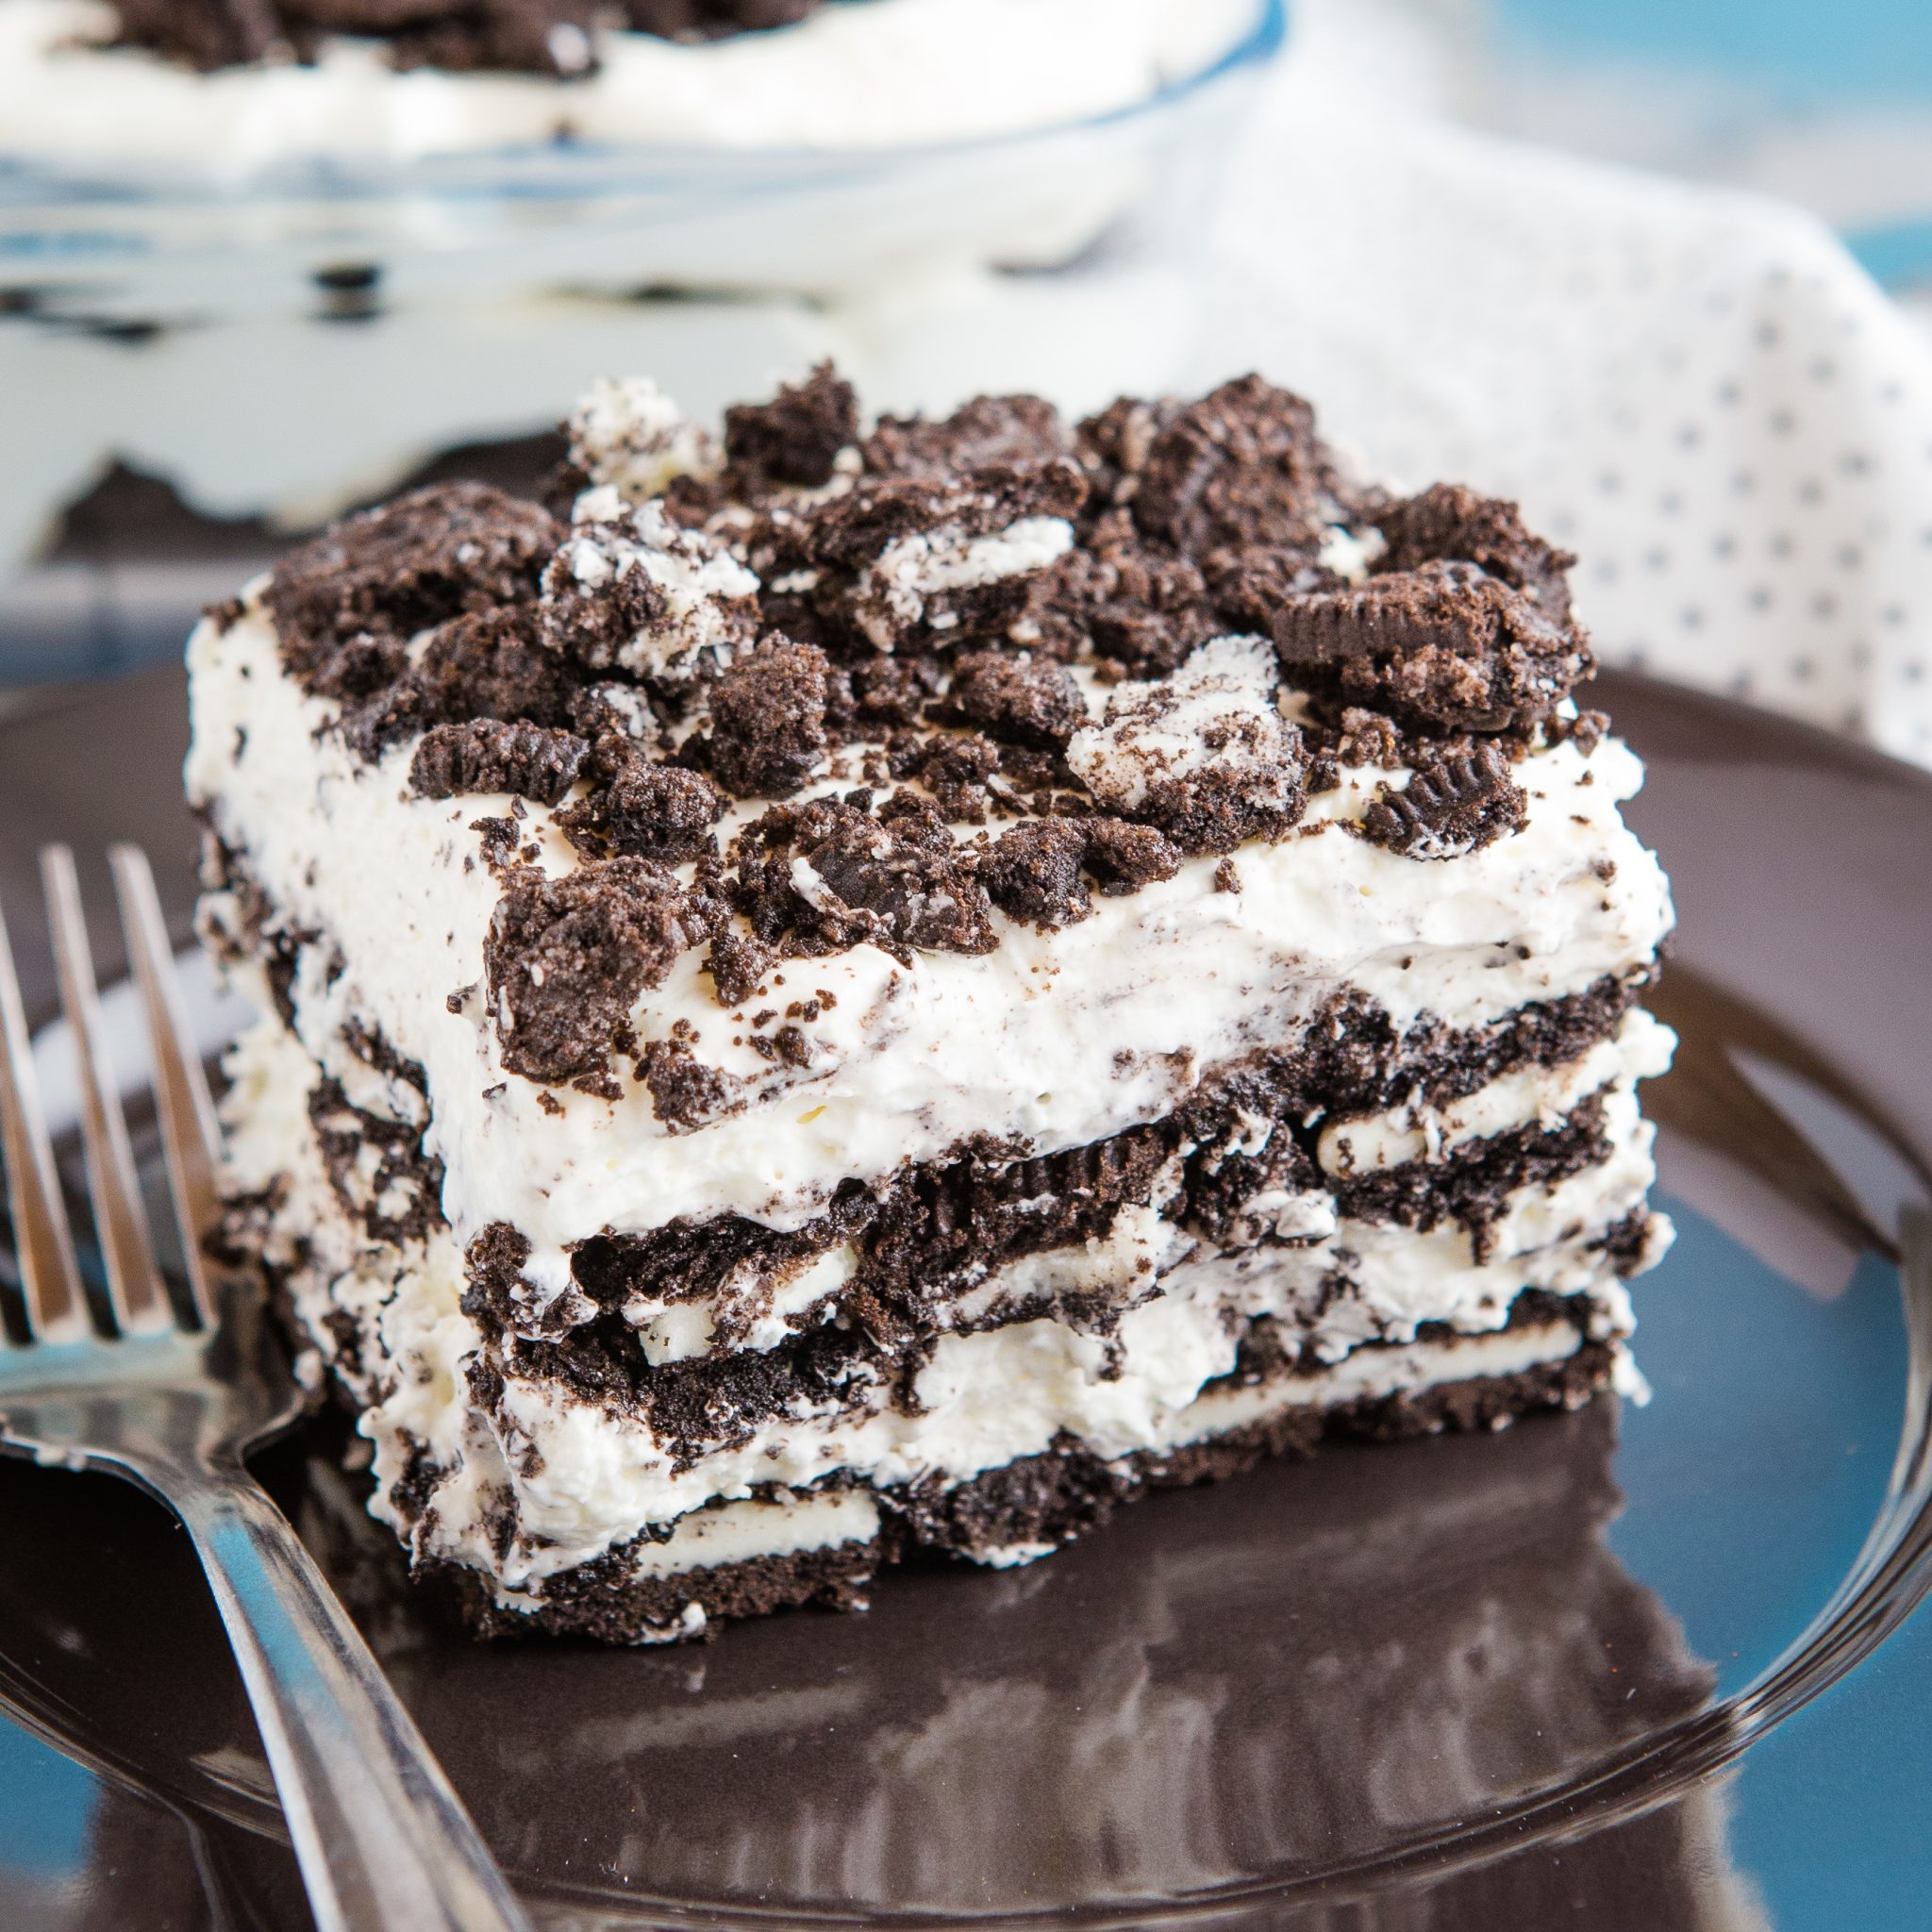
This Oreo Icebox Cake is the perfect creamy no bake Oreo dessert for the summer! Only 4 ingredients required!

Estimated reading time: 9 minutes
No-bake desserts are a life-saver in the summertime! We host lots of get-togethers, barbecues, and times with friends that always require a dessert during the summertime. We turn on our oven as little as possible for the months of June, July, August, and September, which makes this Oreo Icebox Cake one of our go-to dessert recipes for summer!
We have shared many of our favourite no bake icebox cake recipes with you in the past, like this No Bake Chocolate Mocha Tiramisu Icebox Cake, this No Bake Monster Cookie Icebox Cake, or even this No Bake Black Forest Icebox Cake. This No Bake Oreo Ice Box Cake is another delicious icebox cake that’s made with only 4 ingredients!!
An Icebox Cake is a cake made from layers of cookies and a whipped cream filling that is chilled, not baked. It got the name ‘icebox cake’ because it was stored in an icebox to keep cool and to chill for hours, in order for it to set before serving.
Icebox cakes can be made with so many different kinds of cookies or biscuits, and with so many variations of the creamy filling, some with mascarpone, cream cheese, or even packaged pudding mixes, and many icebox cakes are also made with fruit. The options are endless, which is why icebox cakes are such a popular summer dessert!
Here are just a few reasons why we love this Oreo Ice box Cake!
- It’s EASY to MAKE: This recipe is so easy to make and it only calls for 4 ingredients!
- It’s VERSATILE: This recipe uses layers of Oreos but you can also use graham crackers, chocolate chip cookies, different flavours of Oreos like mint, golden, or regular for a different flavours of icebox cakes to enjoy!
- It’s NO-BAKE: A no bake Oreo cake is a perfect dessert to make in summer when you don’t want to heat up your house by turning on your oven!

Here are my BEST Pro TIPS for making the perfect Oreo Ice Box Cake every time!
Using real whipping cream instead of whipped topping (like Dream Whip or Cool Whip) creates a really creamy texture and more importantly, it contains less water than conventional whipped toppings. This means it’s less likely to separate as the cake chills in the fridge and keeps a consistent texture.
It is important to use room temperature ingredients so it mixes properly, otherwise there can be lumps of cream cheese remaining in the creamy mixture.
Full fat cream cheese adds stability to your icebox and it helps it slice cleanly and stay together. It also adds delicious flavour and makes the filling ultra creamy.
Be sure to let your icebox cake chill in the fridge for at least 12 hours. We like letting ours chill for about 18 hours in the fridge for best results!

If you are having trouble with this no bake Oreo dessert recipe, follow the solutions we recommend below.
Make sure to use real whipped cream and full fat cream cheese as their properties are what you need for the cake to set. Using low fat ingredients or whipped topping from the freezer section can prevent the cake from setting properly.
The cookies can be too crunchy if there is not enough cream between the layers of cookies or if the cake does not chill long enough, the cookies will not absorb the moisture. Another option is to use Oreo thins or allow the cake to set for several more hours.
Make sure to chill the cake long enough to allow it to set properly and make it easy to slice.
To prevent the creamy mixture from becoming lumpy, be sure to beat the cream cheese well before mixing it with the other ingredients. Be sure the cream cheese is at room temperature so it integrates more evenly with the other ingredients.

To make this No Bake Oreo Cake, you will need these kitchen items on hand (paid links):
- Hand Mixer
- large mixing bowl
- measuring cups and spoons
- liquid measuring cups
- Silicone Spatula
- 9×13 Glass Baking Dish

To make this Easy No Bake Oreo Icebox Cake, you’ll need only 4 ingredients (paid links):
- 220 grams full fat cream cheese 8 ounces, at room temperature
- 1 1/2 cups powdered sugar sifted to remove lumps
- 1 liter heavy whipping cream approximately 4 cups
- 72 Oreo Cookies
Try one of these variations to make a different version of this easy Oreo Cake!
- Lemon Oreo – Layer with golden Oreos and add lemon extract, lemon zest, and juice to the whipped cream mixture for a lemon flavoured cake.
- Mint Oreo – If you love mint, try out mint flavoured Oreos and add a few drops of peppermint extract to the whipped cream for the best tasting chocolate mint cake!
- Strawberry and Cream – Layer thinly sliced strawberries between the Oreos and cream, and drizzle with a strawberry sauce before serving. The Oreo icebox cake with cream cheese complements the strawberries nicely. Or, you can use different cookies, like butter cookies, graham crackers, or thin shortbread cookies.
- Mocha Oreo – Add in a few teaspoons of instant espresso powder to the whipped cream and sprinkle the top with cocoa powder for a Coffee infused cookies and cream cake.

Time needed: 18 hours and 30 minutes
Follow these steps to make the best Oreo Icebox cake with cream cheese!
- Whip the cream cheese.
Add the room temperature cream cheese to a large bowl and whip on medium speed until creamy and smooth.
- Add in the sugar.
Add the powdered sugar and continue to whip until incorporated.
- Mix in the cream until smooth.
Add the whipping cream in a steady stream while the mixer is running on medium speed. Continue mixing on medium speed until the whipping cream mixes smoothly with the cream cheese mixture.
- Whip mixture until it thickens.
Turn the mixer to high speed and let the mixture whip until it thickens and reaches the hard-peaks stage.
- Crumble Oreos.
Crumble 24 of the Oreo cookies and set them aside in a bowl.
- Layer Oreos into the glass pan.
Add 24 Oreo cookies to the bottom of a 9-inch by 13-inch Pyrex or glass pan.
- Layer Oreos with cream mixture.
Add 1/2 the cream mixture on top of the Oreo cookies and smooth it out as best you can to create an even layer.
- Add another Oreo layer.
Add another 24 Oreo cookies on top of the cream layer, adding a few of the crumbled Oreo cookies in between the whole ones.
- Repeat layers.
Add the other half of the cream mixture, smoothing it out as evenly as possible to the edges of the pan.
- Top with crumbled Oreo cookies.
Add the rest of the crumbled Oreo cookies on top of the cream layer, spreading out the crumbled cookies over the whole cream layer (to the edges).
- Cover and store in fridge.
Cover (optional) with a lid or tin foil (NOT plastic wrap, as this can cause condensation) and store in the fridge for 12 to 18 hours.
- Once chilled, slice and serve.
After sufficient refrigeration, slice and serve.

Do I make homemade whipped cream first before adding it to the mixing bowl or keep it as a liquid?
No, first you pour it into the cream cheese as a liquid and then mix them together until it thickens into stiff peaks.
Can I make this ice box cake recipe in the bowl of a stand mixer instead of with a hand mixer?
You can use whatever mixer you have on hand. Pay attention to the ingredients and make sure you don’t over-mix.
Do I crumble the Oreos by hand or with a food processor?
You can do either – you can crumble the Oreos by hand, put them in a bag and roll over them with a rolling pin, or use a food processor on pulse. The key is we want larger chunks of Oreos, not crumbs.
How do I store the Oreo icebox cake with cream cheese?
Cover the cake with a lid or foil and place in the fridge. Don’t use plastic wrap as it collects condensation.
Can I make this no bake Oreo cake ahead of time?
Yes, this Oreo ice box cake can be made ahead of time. It can be stored in the fridge for up to one and half days (36 hours) ahead of time, before serving – for best results.
How long should I chill the Oreo icebox cake with cream cheese before serving?
We recommend chilling it for 12-18 hours before serving.

We hope you love this No Bake Oreo Ice box Cake as much as we do! Let us know in the comments below, what’s your favourite no bake dessert to make for summer? We’d love to know!
FREE Baking Bootcamp
All the best tips, tricks, recipes and tutorials you need to become a successful home baker! If you’ve ever wanted to learn how to bake the BEST muffins, bread, cookies, cakes, buns and MORE, this Baking Bootcamp is for YOU!

More No Bake Desserts
- No Bake Lemon Tart
- No Bake Monster Cookie Icebox Cake
- No Bake Blackberry Cheesecake
- No Bake Matcha Cheesecake
- No Bake Lemon Blueberry Icebox Cake
- Easy No Bake Gingerbread Cheesecake
- Easy No Bake Biscoff Cheesecake
- Easy No Bake Birthday Cheesecake
- Chocolate Mocha Tiramisu Icebox Cake
Watch the video below to see exactly how we make this recipe. You can find many more deliciously simple recipe videos on our YouTube channel!
If you made this, share a photo!
Are you trying this recipe? Use the comment form below to share your take; now with support for image uploads and comment voting!
Oreo Icebox Cake
Recipe: Equipment
Recipe: Ingredients
- 220 grams full fat cream cheese 8 ounces, at room temperature
- 1 1/2 cups powdered sugar sifted to remove lumps
- 1 liter heavy whipping cream approximately 4 cups
- 72 Oreo Cookies
Recipe: Instructions
- Add the room temperature cream cheese to a large bowl and whip on medium speed until creamy and smooth.
- Add the powdered sugar and continue to whip until incorporated.
- Add the whipping cream in a steady stream while the mixer is running on medium speed. Continue mixing on medium speed until the whipping cream mixes smoothly with the cream cheese mixture.
- Turn the mixer to high speed and let the mixture whip until it thickens and reaches the hard-peaks stage.
- Crumble 24 of the Oreo cookies and set them aside in a bowl.
- Add 24 Oreo cookies to the bottom of a 9-inch by 13-inch Pyrex or glass pan.
- Add 1/2 the cream mixture on top of the Oreo cookies and smooth it out as best you can to create an even layer.
- Add another 24 Oreo cookies on top of the cream layer, adding a few of the crumbled Oreo cookies in between the whole ones.
- Add the other half of the cream mixture, smoothing it out as evenly as possible to the edges of the pan.
- Add the rest of the crumbled Oreo cookies on top of the cream layer, spreading out the crumbled cookies over the whole cream layer (to the edges).
- Cover (optional) with a lid or tin foil (NOT plastic wrap, as this can cause condensation) and store in the fridge for 12 to 18 hours.
- After sufficient refrigeration, slice and serve.
Recipe: Notes
Storage and Make Ahead Instructions
This Icebox Cake can be stored in the fridge for up to one and half days (36 hours) ahead of time, before serving – for best results.Recipe: Nutrition
Notice: Nutrition is auto-calculated, using Spoonacular, for your convenience. Where relevant, we recommend using your own nutrition calculations.

HEALTHY WHOLE FOOD RECIPES AND COOKING TIPS
Get my healthy whole-food recipes e-cookbook!
Do you put the foil over yours for 18 hours or not cover it. It says it is optional but want to know what you do.
We usually cover it.
Excited to try this recipe, but I need to make it a few days ahead… Can I freeze it and thaw in fridge or at room temperature before serving?
Yes, you can freeze it and defrost it in the fridge before serving!
Made it for the first time today, it didn’t turn out as “pretty” as yours, but it tastes amazing! Definitely a hit with my family and I’ll try again….hopefully it looks neater next time.
Nice! Thank you for your feedback Caroline!!
I love icebox cakes and this looks splendid! Looking forward to enjoying this summer treat all season long!
Thanks! Let me know how you like them!!
I am drooling over this icebox cake! A must try recipe!
Thank you, let me know how you like them!
This looks incredibly delicious! Get in my belly! This looks so good.
Thank you!
An excellent summer time dessert! Great recipe!
Glad you liked the recipe!😊
I can’t get enough of easy summer desserts like this one!!
thanks for the comment!🙂