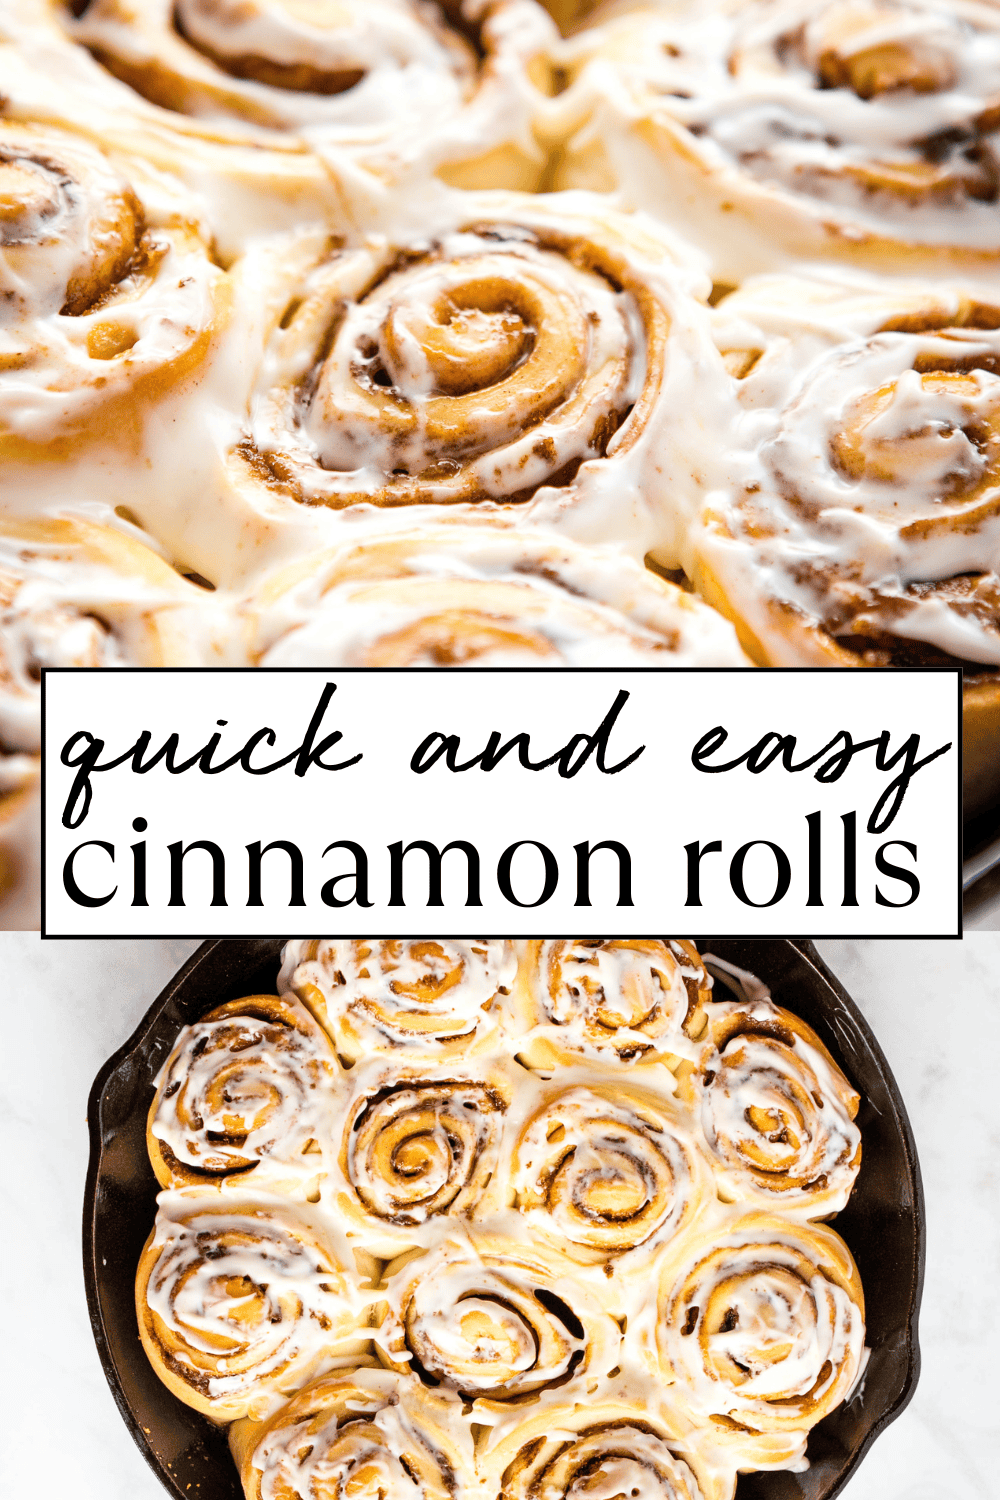
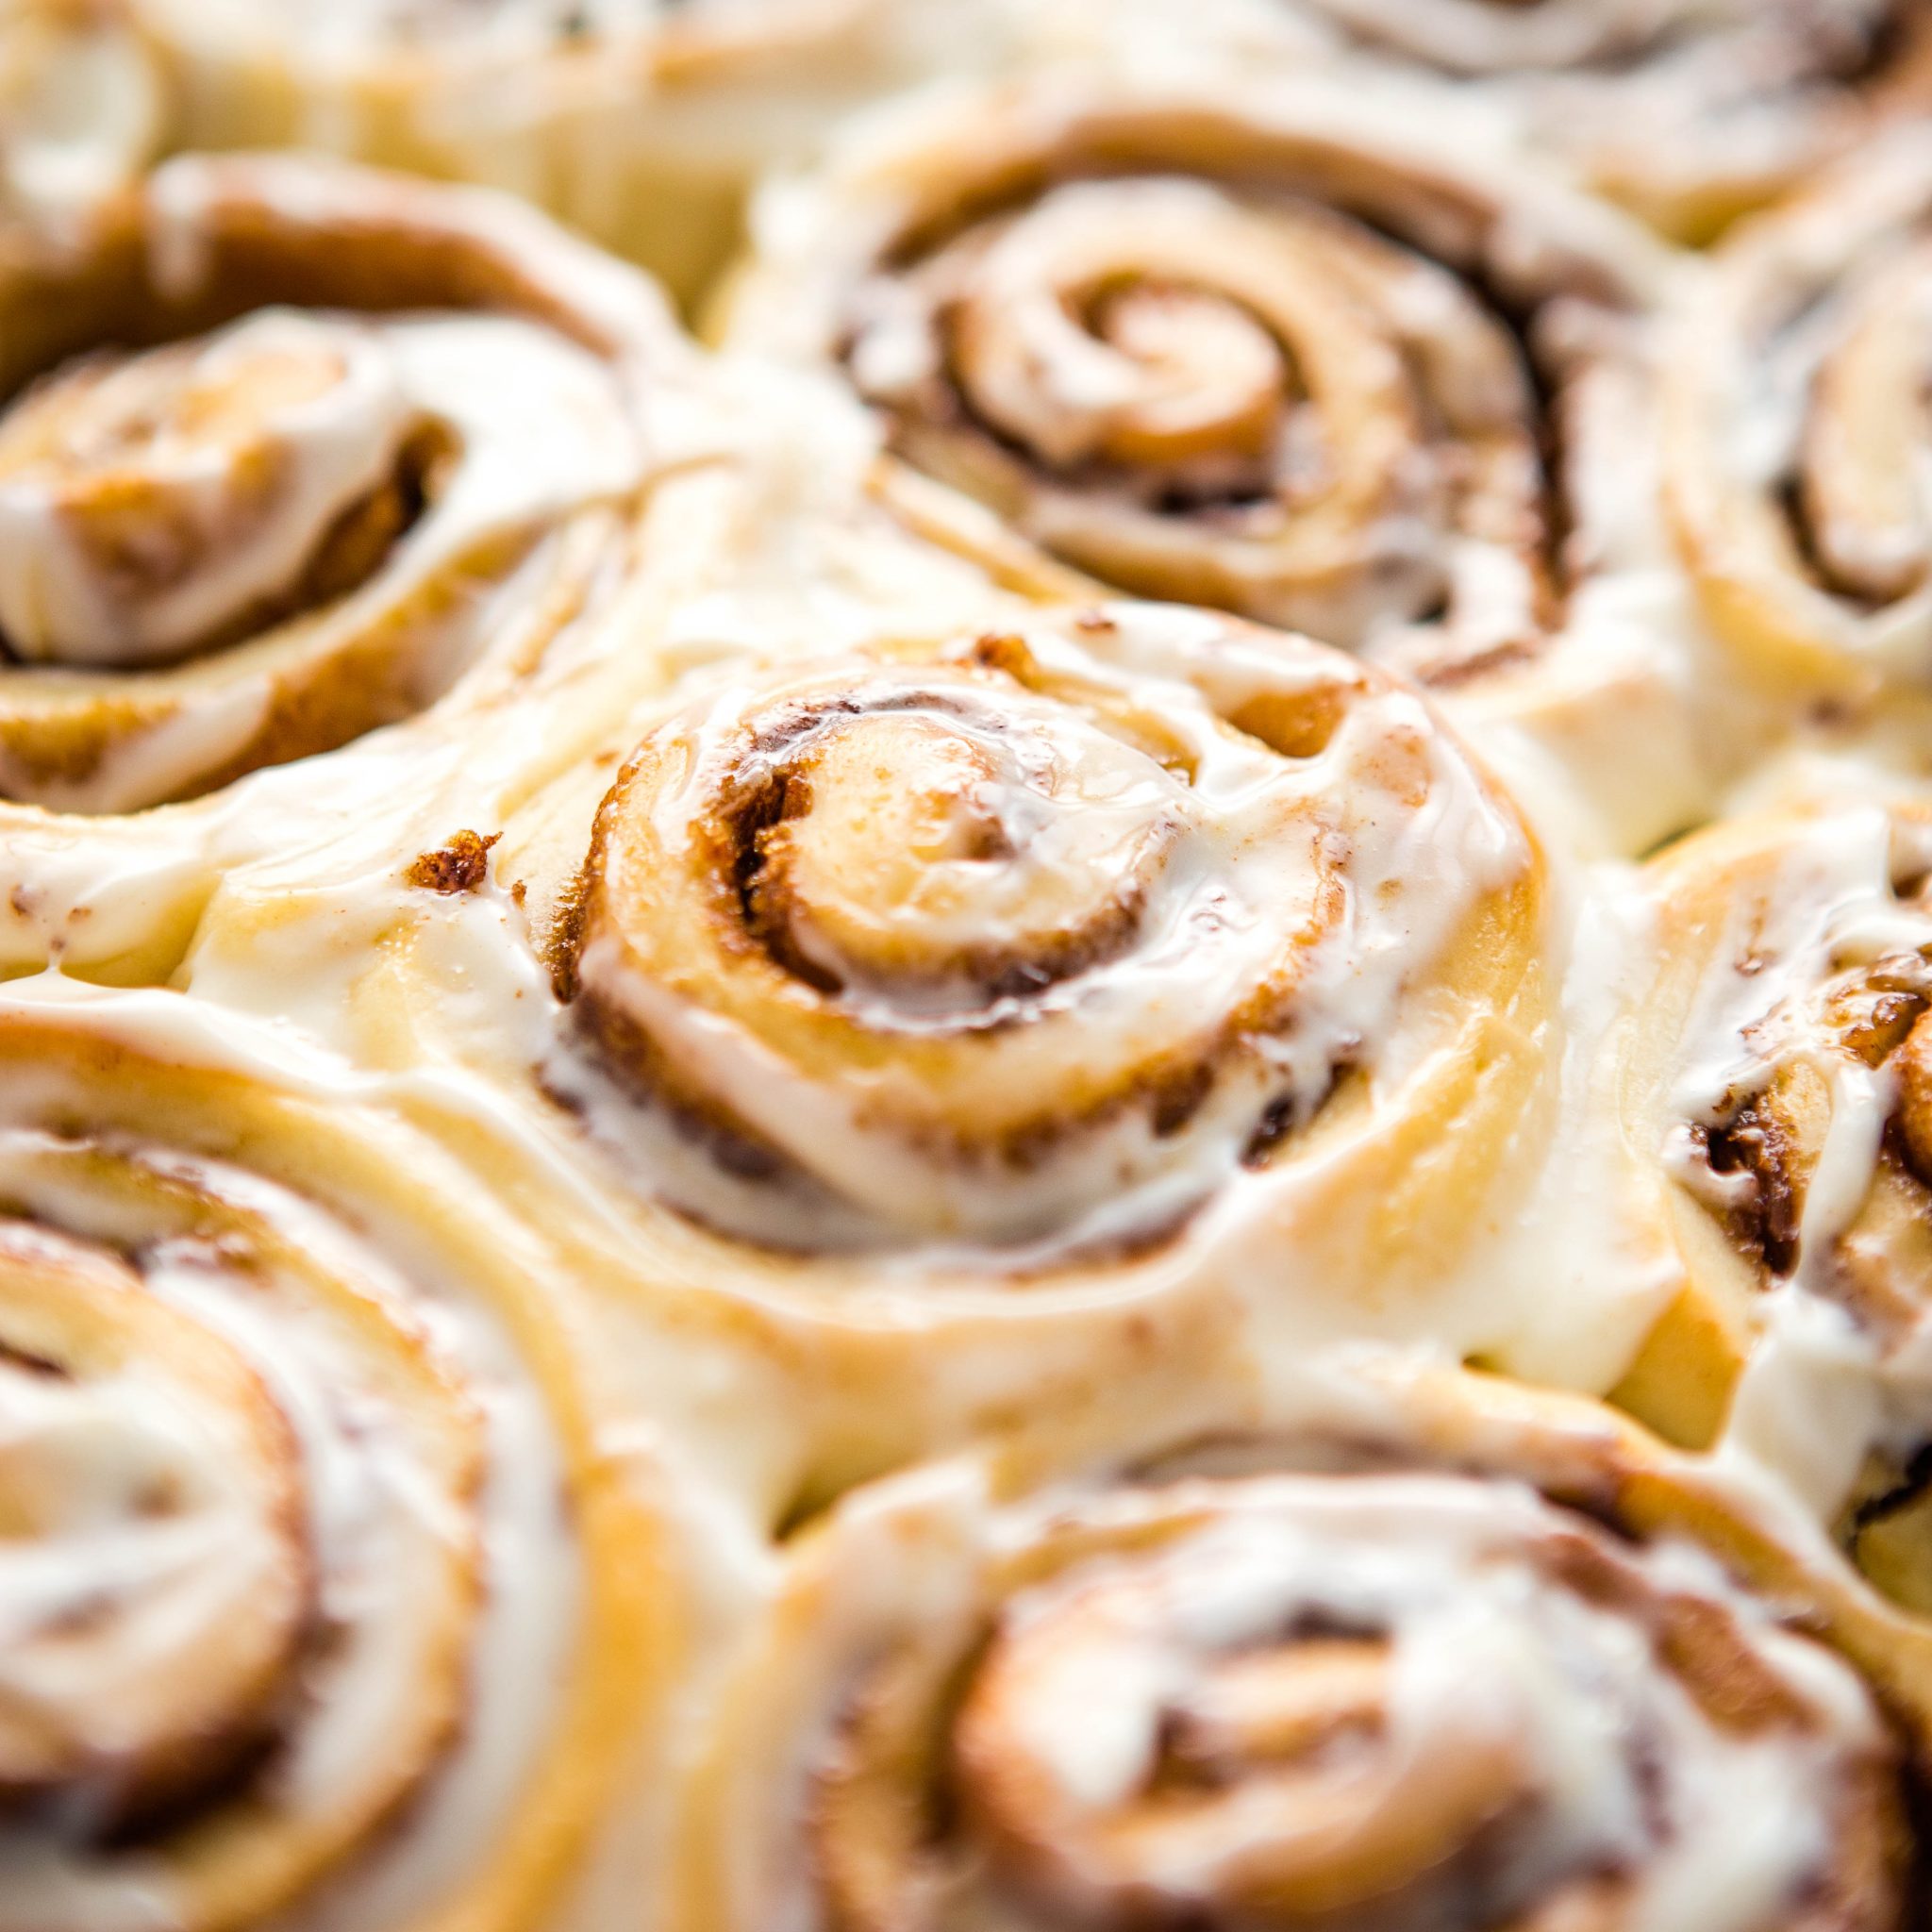
These Quick & Easy Cinnamon Rolls are the BEST simple cinnamon rolls to make in only 1 hour – with my pro tips and tricks! Fluffy, sweet and delicious with an easy cream cheese frosting!
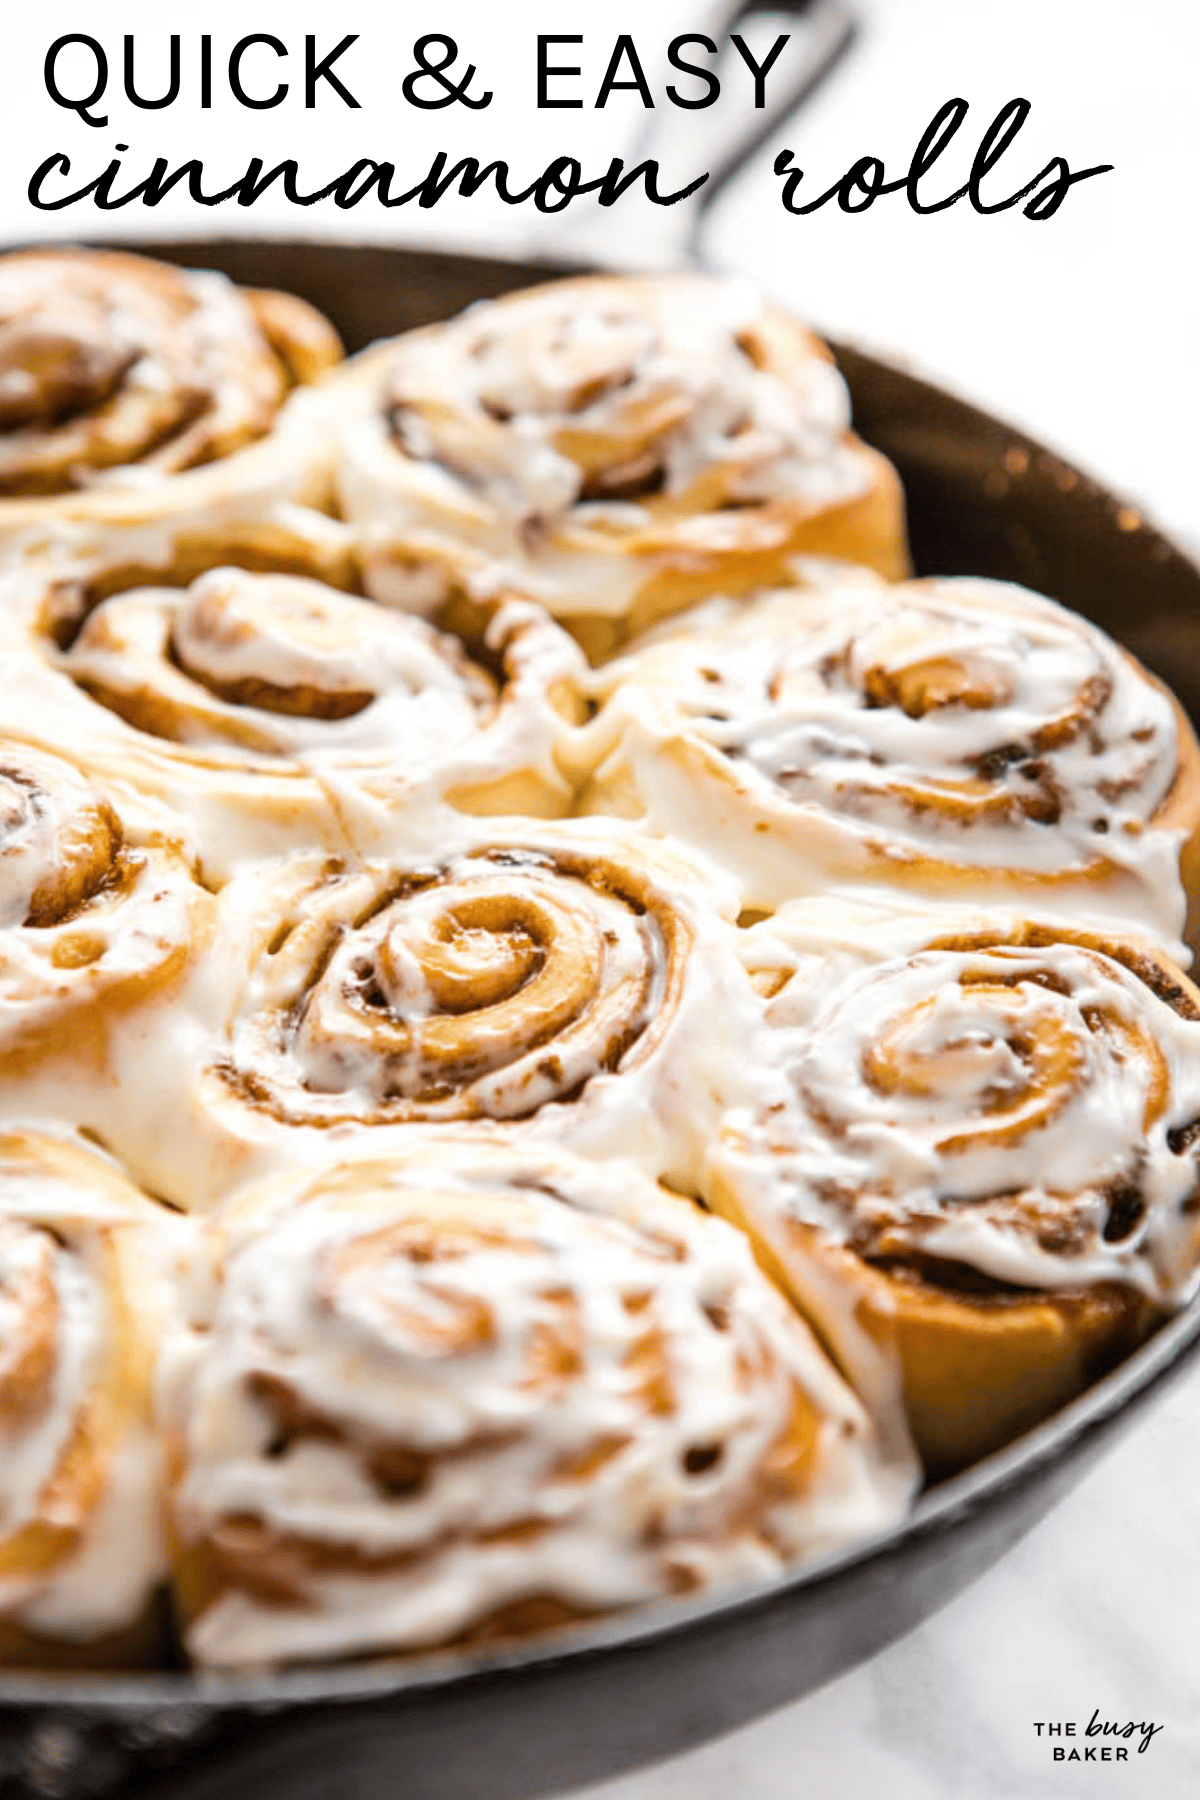
If you’re a fan of homemade cinnamon rolls but hate spending half the day waiting for dough to rise, these Quick and Easy One Hour Cinnamon Rolls are exactly what you need! They’re super soft, fluffy, perfectly sweet, and filled with that classic cinnamon sugar swirl we all love, but they come together in a fraction of the time of traditional from-scratch cinnamon rolls.
Whether you’re making them for a weekend breakfast, a holiday morning brunch, or just because, these cinnamon rolls feel like a special treat but they’re simple enough for everyday baking!

This recipe works so well because it removes one of the biggest barriers to homemade cinnamon rolls: time!
Traditional cinnamon roll dough relies on long rise times to develop structure, texture, and flavour. In this one hour recipe, the dough is designed to rise quickly while still producing a soft, tender texture. You get that same fluffy, bakery-style result without needing hours of rising time.
The dough is easy to handle, which makes rolling and shaping simple even if you’ve never made cinnamon rolls before. It creates a consistent swirl, bakes evenly, and stays soft after baking.
It’s also a very forgiving recipe. Even if your kitchen is a little bit cool or your timing isn’t exact, these cinnamon rolls still turn out beautifully every single time. That reliability is what makes this recipe one my readers come back to again and again!

5 Pro Tips for Quick and Easy Cinnamon Rolls in ONLY 1 Hour!
In order to achieve a fluffy dough that rises well, the temperature of the wet ingredients when they hit the yeast is critical: too cold, and the yeast won’t be able to grow; too hot and the liquid will kill the yeast. Both of these situations will cause your dough to be tough and dry, and you’ll be lucky if it rises at all.
To help these rolls rise quickly, use warm milk that feels like the temperature of a baby’s bath water (not too hot!).
Cinnamon bun dough should be tacky to the touch, but not so sticky that it’s very messy. It should pull away from the sides of the mixing bowl easily and the bowl should appear fairly clean. If the dough appears too sticky, continue kneading and add flour one tablespoon at a time until the dough reaches that tacky texture.
Too little flour and the dough will be too sticky and will result in dense buns. Too much flour and the dough will be tough, resulting in dry, crumbly buns.
The BEST way to get your dough to rise quickly is to use warm water to warm up the mixing bowl as the dough rises. Once you’ve made the dough, place the bowl inside another larger bowl and pour very warm (almost HOT) water into the larger bowl (between the two bowls- just until the water gets at the same height as the dough is in the initial bowl) so the heat from the warm water is absorbed by the first bowl and warms up the dough inside – just be sure you don’t get any water inside the bowl with the dough! Warm dough rises much faster, and with this warm water trick you’ll be able to cut the rise time from the typical 60 or 90 minutes to only 20 minutes!
Placing your dough in a metal bowl to rise when you use this trick helps the dough rise even faster since metal conducts the heat from the water more than a glass or plastic bowl would. If you’re short on mixing bowls you can also place the bowl with the dough in your kitchen sink and fill the sink with warm (almost hot) water to just below the top of the mixing bowl. Again, just be sure you don’t get any water inside the bowl with the dough!
Turn the dough out onto a very lightly greased work surface rather than flouring the work surface. This makes the dough easy to roll out and it helps the surface of the dough to remain soft instead of drying it out like adding more flour would do. I like to spritz my counter top with a little bit of vegetable oil to make sure the dough doesn’t stick and it works like a charm!
There’s no need to let the rolls rise a second time – simply place them in a cold oven and set the oven to the correct temperature. The rolls will complete their final rise as the oven preheats, and this will cut down the baking time too!

Combine your ingredients until a soft dough forms. It should come together easily and feel smooth after a short knead.
Give the dough a short rest so it relaxes and rises, using the warm water trick (see the PRO Tips section above!). This makes rolling it out much easier and helps create a better texture.
Roll the dough out evenly so it’s the same thickness across the surface. This helps the rolls bake uniformly.
Cover the dough with the cinnamon sugar filling ingredients all the way to the edges so every bite has that classic flavour.
Roll the dough into a log, keeping it even from end to end. A consistent shape helps the rolls bake evenly.
Cut the rolls evenly so they bake at the same rate and look uniform in the pan.
Arrange the rolls in your baking dish and let them rise in the oven as it preheats. Start the baking time when the oven gets to temperature.
Bake just until the tops are lightly golden and the centres are set. Avoid over-baking to keep them soft.
Spread the frosting over the warm rolls so it melts slightly into the tops.

- Apple Pie Rolls: Add some diced apples and a pinch of nutmeg into your cinnamon filling for a spiced apple version.
- Chocolate Chip Swirls: Add a generous amount of chocolate chips to the cinnamon-sugar mixture for a sweet, chocolatey version.
- Nuts and Raisins: Mix raisins or chopped pecans into the filling for added texture.
- Strawberry Cheesecake: Try this Strawberry Cheesecake Sweet Rolls recipe, but use the fast-rise trick for quick and easy Strawberry Cheesecake Sweet Rolls.
- Cranberry Orange Rolls: Add fresh orange zest to your dough and cranberries to the filling for a citrusy twist. Top with an orange glaze for extra flavour. Try our Cranberry Orange Sweet Rolls recipe!
- Maple Bacon Rolls: Drizzle maple syrup over your prepared rolls and top with crispy bacon bits for a savoury-sweet combination.
- Pumpkin Spice Rolls: Mix pumpkin puree and pumpkin pie spices into your dough for a festive autumnal take on the original. Try our Pumpkin Spice Cinnamon Rolls recipe!
- Blueberry Lemon Rolls: Fill your rolls with fresh blueberries and lemon zest, and top with a lemon glaze for a refreshing twist. Try our Lemon Blueberry Sweet Rolls recipe!
- Chai Spice Rolls: Blend chai spices like cardamom, ginger, and cloves into your cinnamon filling for a warm, spicy version of the original.

Store at room temperature
Keep the rolls in an airtight container for up to 2 days.
Refrigerate for longer storage
Store in the fridge for up to 5 days, although they’re best fresh. Be sure to reheat before serving if you’ve stored them in the fridge.
Reheat before serving
Warm in the microwave for 15–20 seconds to restore softness.
Freeze for later
Freeze baked rolls (unfrosted or frosted) for up to 2 months. Thaw and reheat before serving.

Why are these called one hour cinnamon rolls?
These are called one hour cinnamon rolls because this recipe is designed to take about an hour, from start to finish, without long rise times.
Can I freeze the dough?
Yes, freeze after shaping the rolls. Thaw in the fridge and allow to rise before baking.
Can I use instant yeast instead of active dry yeast?
Yes. You can use either active dry yeast or instant yeast in this recipe.
How do I know when they’re done baking?
They should be lightly golden on top and set in the centre without being doughy.
Can I make these cinnamon rolls ahead of time?
Yes. You can prepare them the night before, refrigerate, and place them in a cold oven in the morning, straight from the fridge. Start the baking timer when the oven gets to temperature and bake as directed.
Can I double the recipe?
Yes, this recipe doubles well. Just be sure not to overcrowd your baking pan.
Can I freeze unbaked cinnamon rolls?
Yes! Freeze the rolls in a freezer-safe baking pan and cover well with plastic wrap. Thaw them in the fridge and then bake as directed.


More Cozy Treats You’ll LOVE
- Swedish Cinnamon Buns (Kanelbullar)
- Cinnamon Sugar Pull-Apart Bread
- Cinnamon Sugar Muffins
- Strawberry Cheesecake Sweet Rolls
- Sugary Cinnamon Twists
- Cranberry Orange Sweet Rolls
- Pumpkin Cinnamon Rolls
- Carrot Muffins
- Crumb Cake
- Best Ever Whole Wheat Cinnamon Buns
- Lemon Blueberry Sweet Rolls
- Cherry Almond Coffee Cake
- Rhubarb Streusel Cake
Watch the video below to see exactly how I make this recipe. You can find more delicious recipe videos on my YouTube channel
If you made this, share a photo!
Are you trying this recipe? Use the comment form below to share your take; now with support for image uploads and comment voting!
Quick and Easy Cinnamon Rolls (One Hour Cinnamon Rolls)
Recipe: Ingredients
For the dough:
- 1 1/4 cups warm milk just above body temperature
- 1/3 cup sugar
- 1 tablespoon instant dry yeast (active dry yeast also works)
- 1/3 cup butter melted
- 1 egg
- 3 2/3 cups all purpose flour
- 1 teaspoon salt
For the filling:
- 1/4 cup butter melted
- 1 cup brown sugar
- 1/2 – 1 tablespoon cinnamon to taste
For the frosting (optional):
- 1/3 cup full fat cream cheese at room temperature
- 1/3 cup powdered sugar
- 1 teaspoon lemon juice
Recipe: Instructions
- Into the bowl of your stand mixer (or in a large mixing bowl), add the warm milk, the sugar, and the yeast. Mix together with a fork.
- Add the melted (and cooled) butter to the milk mixture. Be sure the melted butter isn't too hot or it will kill the yeast.
- Add the egg to the milk mixture.
- Add the flour and salt to the bowl on top of the milk mixture and set the mixer to low speed (use the dough hook for this). If making by hand, mix with a wooden spoon.
- After about a minute you should see a sticky dough starting to come together. Scrape down the sides of the bowl if necessary.
- Turn up the mixer speed slightly and allow the mixture to knead the dough for about 2-3 minutes. The dough should be tacky to the touch, but not so sticky that it's very messy. It should pull away from the sides of the bowl easily and the bowl should appear fairly clean.
- If you don't have a stand mixer, you can knead the dough by hand on a lightly floured work surface for 3 minutes after the wet and dry ingredients are combined.
- Cover the bowl with some plastic wrap and place it inside another large mixing bowl. Pour some hot water (from the tap or recently boiled kettle) between the two bowls to gently heat up the dough. This will help it rise very quickly. Be careful not to use water that's too hot as this will cook the dough that's touching the mixing bowl. Also, be careful not to get any water into the bowl with the dough (See the information in the blog post for more tips on how to do this!). Let the dough rise for 20 minutes.
- While the dough rises, grease a large cast iron skillet (or a 9-inch by 13-inch baking dish also works) with butter.
- In a separate bowl, combine the brown sugar and the cinnamon. I use 1 tablespoon of cinnamon, but feel free to use a little less if you'd prefer a more subtle taste.
- Turn the dough out onto a work surface that's been very lightly greased with vegetable oil. Using a rolling pin, roll out the dough evenly until you have a rectangle that's approximately 18 inches wide and 12 inches deep. Brush the dough with the melted butter. Spread the brown sugar and cinnamon mixture evenly over the dough.
- Roll up the dough from the long side until you've got one long roll. Cut the long roll in half, then in half again, and then each of those sections into 3 pieces until you have 12 cinnamon rolls. Try to cut the rolls to an even thickness as this promotes even baking. You don't want some rolls to be overdone and others to be raw in the middle.
- Arrange the 12 pieces in the pan you've greased.
- Place the cinnamon rolls in a cold oven and set the oven to bake at 375°F (190°C). The cinnamon rolls will rise for a second time in the oven as it preheats.
- Set the oven timer for 23 minutes. When the oven timer goes off the cinnamon rolls should be baked to a golden brown colour. If 2-3 more minutes of baking are required, allow the rolls to bake for a few additional minutes (every oven preheats differently, so watch them around the 20-minute mark if your oven preheats very quickly!).
For the frosting:
- While the cinnamon rolls are baking, mix together the cream cheese, powdered sugar, and lemon juice in a bowl until smooth.
- Remove the pan from the oven and let the buns cool in the pan for about 15 minutes before smearing the frosting over the warm buns.
Recipe: Nutrition
Notice: Nutrition is auto-calculated, using Spoonacular, for your convenience. Where relevant, we recommend using your own nutrition calculations.
EASY NO-FAIL HOMEMADE BREAD RECIPES AND BAKING TIPS
Get my easy no-fail bread baking e-cookbook!
Turned out delish! One question, most of the cinnamon sugar melted to the bottom of the glass dish. Any tips to help it stick between the layers?
I’m so happy you enjoyed them! Thank you for taking the time to leave your feedback! The melted butter should make it stick enough so make sure you have the right measurement for that. Another thing you could try is to slightly squeeze the cinnamon rolls on the bottom part before placing them in the baking dish! Happy baking!
Today was my second time baking these in less than a month! We usually do “cinnamon roll sunday,” using the cinnamon rolls from the can. Our grocery stores have been out of the canned ones so I decided to try homemade ones and found this amazing recipe. The instructions were easy to follow..it was my first time using yeast, so I was nervous! These are so simple to make and very delicious! My husband and kids are glad that the stores haven’t had the canned ones! Thanks for this easy and delicious recipe!
I’m so happy you enjoyed them! Thank you for taking the time to leave your feedback!
This is absolutely the BEST cinnamon rolls I’ve ever eaten. I’m a pro baker and have tried many! The second rise as a preheat to the oven is brilliant! Excellent!!!!
I’m so happy you enjoyed them! Thank you for taking the time to leave your feedback!
I made these and the dough was perfect. The only problem I had was that it burned at the bottom and the sides. I didn’t bake it in a iron skillet though, could that be why? We still enjoyed them !
You should be able to also bake them in an oven safe glass dish as well, however, I suggest that you use an oven thermometer to check if your oven runs hot.
This is a good recipe, taste delicious. Only one thing, you might want to look at steps 10 and 11. A non- seasoned cook would get very confused. They need to be switched😊.
I’m so happy you enjoyed them! Thank you for taking the time to leave your feedback! As for steps 10 and 11, you’re supposed to use the time the dough raises to mix the sugar and cinnamon mixture. Hope this helps ☺️
If you’ve never made cinnamon rolls from scratch before, like myself, I wouldn’t say this is the best recipe to start with. The directions don’t say how long to let the bowl of dough sit in the hot water, how high the water should come up on the side of the bowl, and how much it should rise before rolling it out. My dough was impossible to roll out or cut, it was so sticky. Some more detailed directions would be helpful
Hello Danielle, you can find that information if you read my 5 tips for making these quick and easy cinnamon rolls. As for how much the dough should raise, a good rule of thumb is that it should raise until it doubles in size. I am so sorry your dough was so wet. Are you using a stand mixer or kneading by hand? When your dough is so sticky, you can add 1-2 tbsp of flour and knead it a while longer. As I have already said in the 5 tips, the cinnamon roll dough should be a bit sticky but should pull away from the sides of the bowl- when it does that, it’s a sign that it’s good to work with. Hope this helps and you try again ☺️
Do you know if this dough is freezable or can be refrigerated to use later? We’ve made them once before and it’s a great recipe!
Yes, you can freeze them after you roll and cut them.
I make these cinnamons rolls at least once a month, they are a staple in our home!!!
Quick question to go with this question/answer above, ….after they come out of the freezer, do I just need to have them come back to room temperature before doing the process of putting them in the cast iron and then into the cold oven and bake them per your instructions, or do I need to do anything differently to cook them if I froze them?
Yes, just bringing them to room temp is enough. Hope this helps. Happy baking!
Thank you! I have not had luck in the past with making yummy cinnamon rolls. On Christmas morning, the tin of Cinnamon rolls we bought to go in the oven, didn’t rise.
I did a quick search for an “easy and delicious” recipe and your recipe is the one that came up.
I will use this recipe for the rest of my life! No exaggeration. These are the best we’ve ever had and all of my neighbors agree.
Quick, easy, excellent tips and beyond delicious.
Thank you again for sharing.
I’m so happy you enjoyed it! Thank you for taking the time to leave your feedback.
Hi there! How long am I supposed to let them prove for? 🙂
As the instructions state, you only prove them once, for 20 minutes. Their second raise happens in the oven as it warms up.
Hi there! I’m planning to make these in a few days! Hopefully these aren’t silly questions but do you use salted or unsalted butter and what type of milk do you recommend (whole, 2%, skim?). Can’t wait to try these!
I use unsalted butter and whole milk. Happy baking ☺️
These were delicious, thank you! I will say, though, I doubled the filling, and also drizzled some heavy cream on top before baking to make them extra gooey.
I’m so happy you enjoyed them! Thank you for taking the time to leave your feedback!
Hi there, just made the rolls and the house smells amazing! Can’t wait to try them !!!
Question, do I start the timer as soon as I put them in the oven or do I set the timer once the over reaches 375 . Pls let me know
Thank you
You start the timer when you put them in! Happy baking ☺️
Oh my goodness! Tried your recipe this morning, loved it. I’ve been looking for a good one & have tried others. But yours is one I’ll continue to use over again and again! Thank you for sharing ♡
I’m so happy to hear that! Glad you enjoyed it!
Love the recipe I didn’t have lemon so I used orange and the frosting is amazing thank you for the recipe
You’re welcome Elise!! Sounds delicious!🙂
This is a simple recipe to make that turns out deliciously every time I make it. The buns need a few more minutes in my oven, but I just watch them, as you note to, and they are light and fluffy every time. My kids have asked that every Saturday be “Cinnamon Roll Saturday” 🙂 Thank you!
You’re welcome Heather!! I’m so glad you enjoyed them and found them simple to make!! 🙂
It’s a great recipe! Soft dough! With half of the recipe I made the cinnamon rolls and with the other half I made a loaf bread and both turned out delicious! Thank you
You’re welcome Leomar! What a great idea! Thanks!!
Cinnamon rolls are totally the best! I love the trick you shared for warming the bowls with hot water. I’m always looking for a way to cut down the poofing time. I’m going to make them this weekend for sure!
Let us know how they turn out!!🙂
Really great post, I love all the details and tips, but honestly? You had me at ‘quick’ and ‘cinnamon rolls’ ~ yum!!
Thank you Sue!!
There’s nothing better than fresh cinnamon rolls in the morning! I can’t wait to make these this weekend!
Exactly!! Thanks Liz!
What a super recipe – your cinnamon rolls look extra delicious in your cast iron skillet. I love baking in a cast iron skillet. It heats up beautifully in the oven for even cooking. Thanks for sharing this great recipe.
You’re welcome, thanks for taking the time to leave a comment!🙂
I love this recipe! It’s my go to for homemade cinnamon rolls. We make it probably 2x a month!
So glad to hear that!! Thanks so much for your review Kristina!🙂
Easy to make (yay) super delicious
Loved starting them in a cold oven using a cast iron frying pan.
I am so happy you enjoyed them! Thank you for taking the time to leave your feedback!
Can you make these the night before and leave the dough in the fridge?
Yes, you can prepare the dough and put it in the fridge before the first raise. However, the raise time will increase by a bit when you take the dough out from the fridge. I suggest you keep the dough at room temperature for a while before you raise it in the two bowls with warm water. Hope this helps ☺️