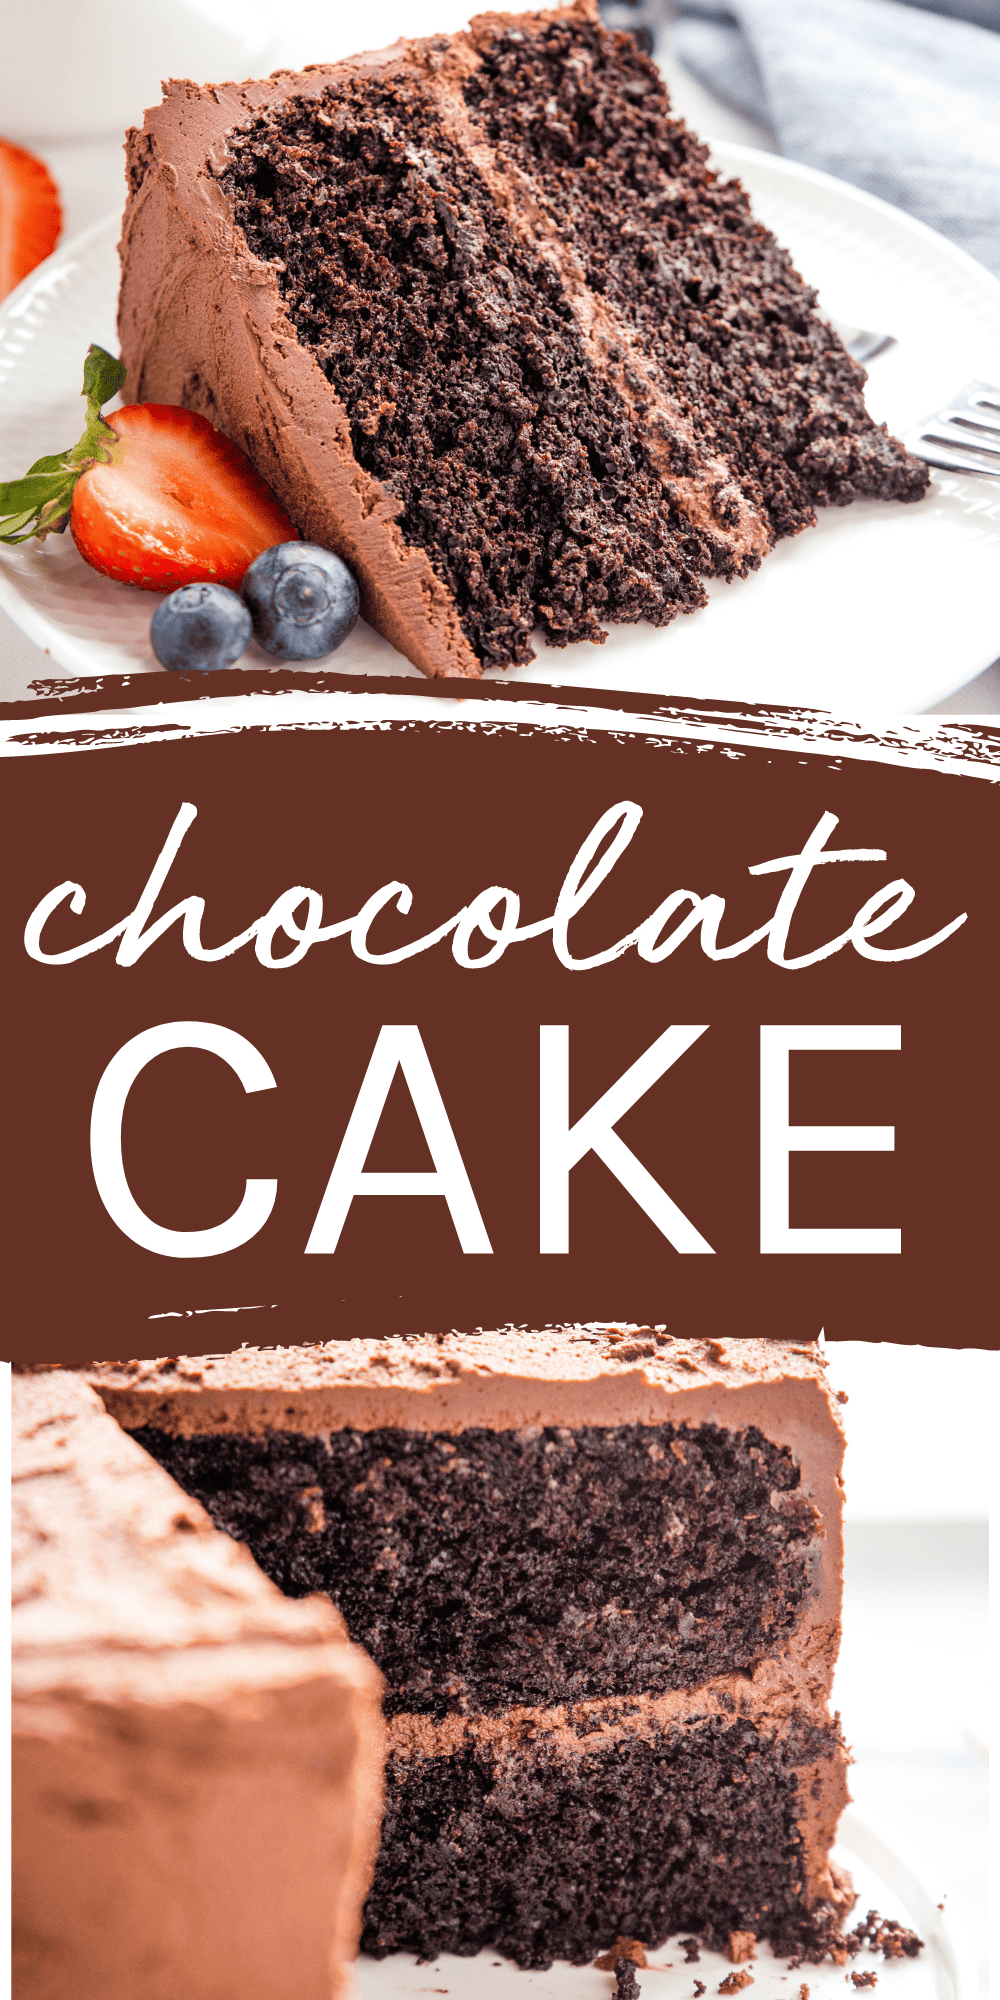
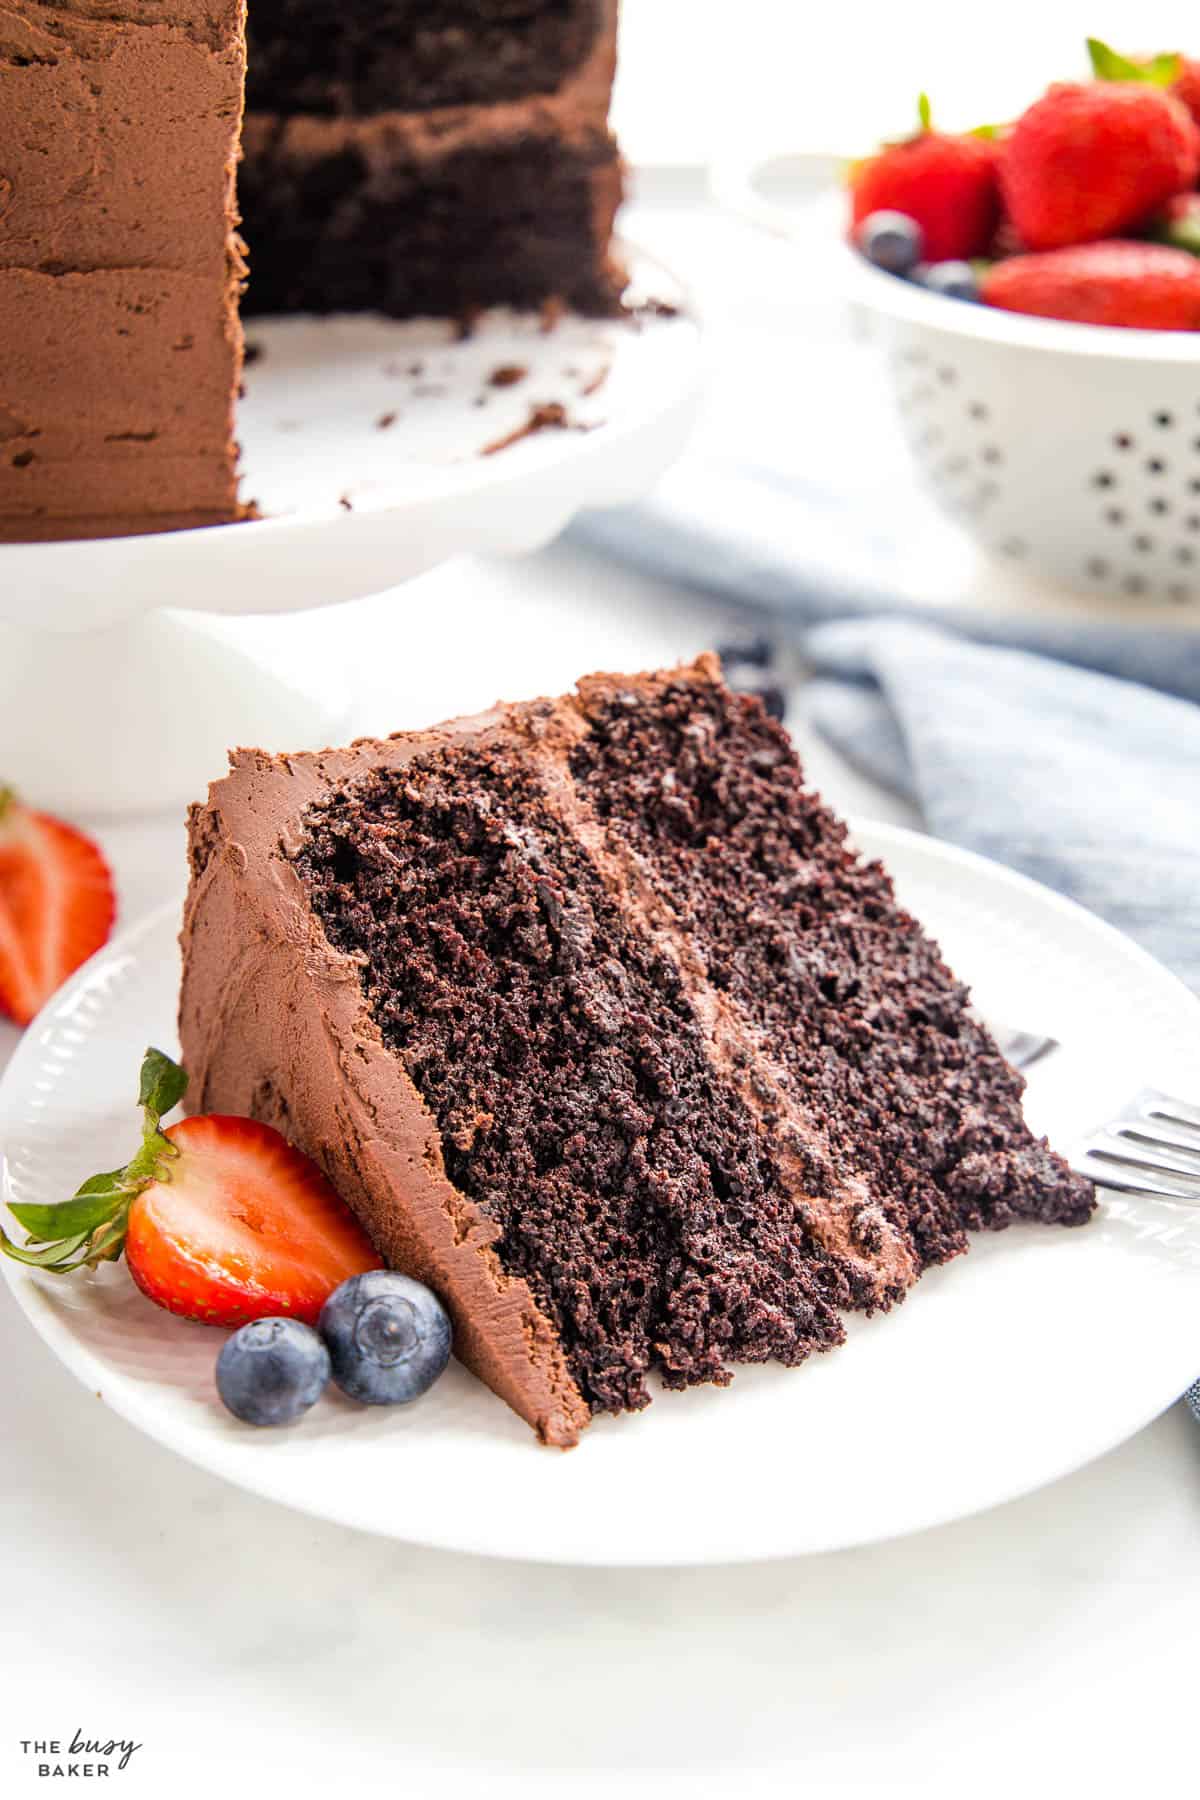
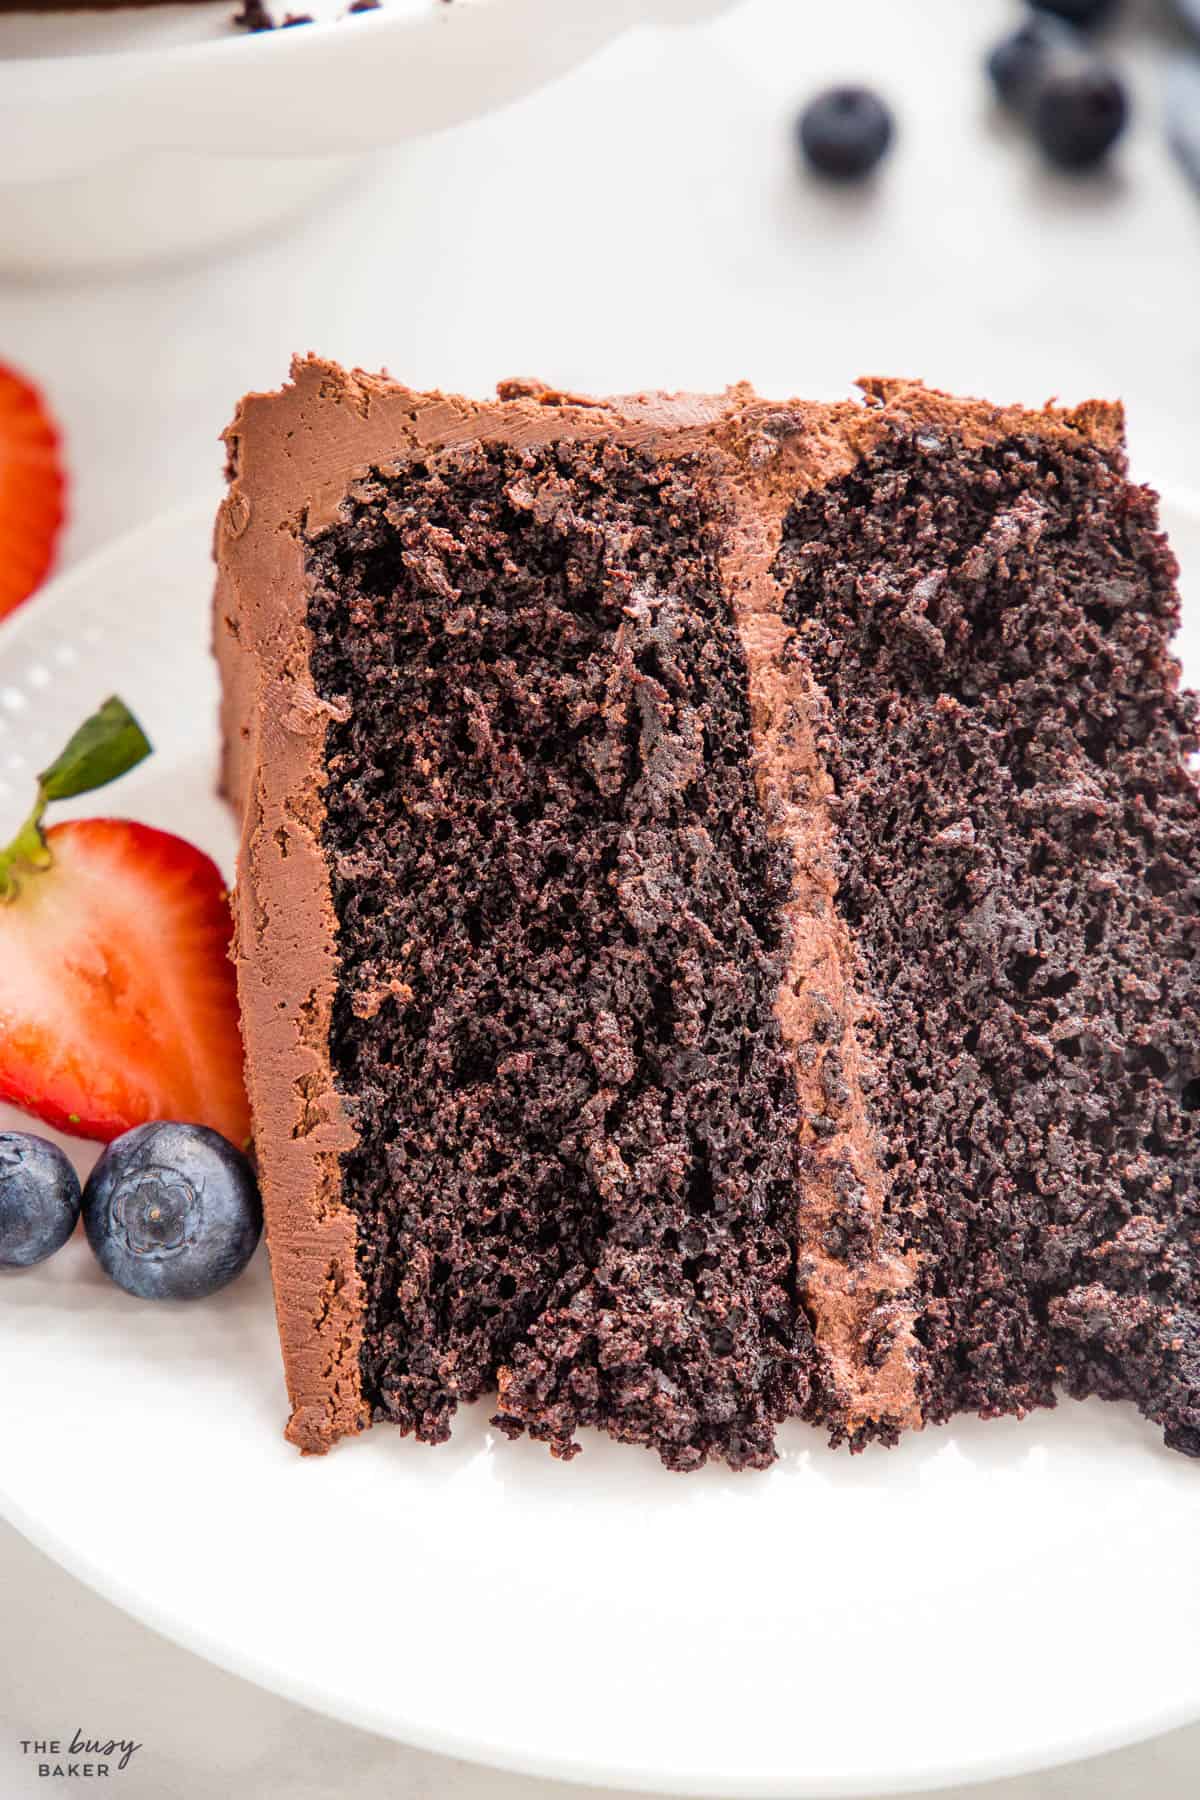
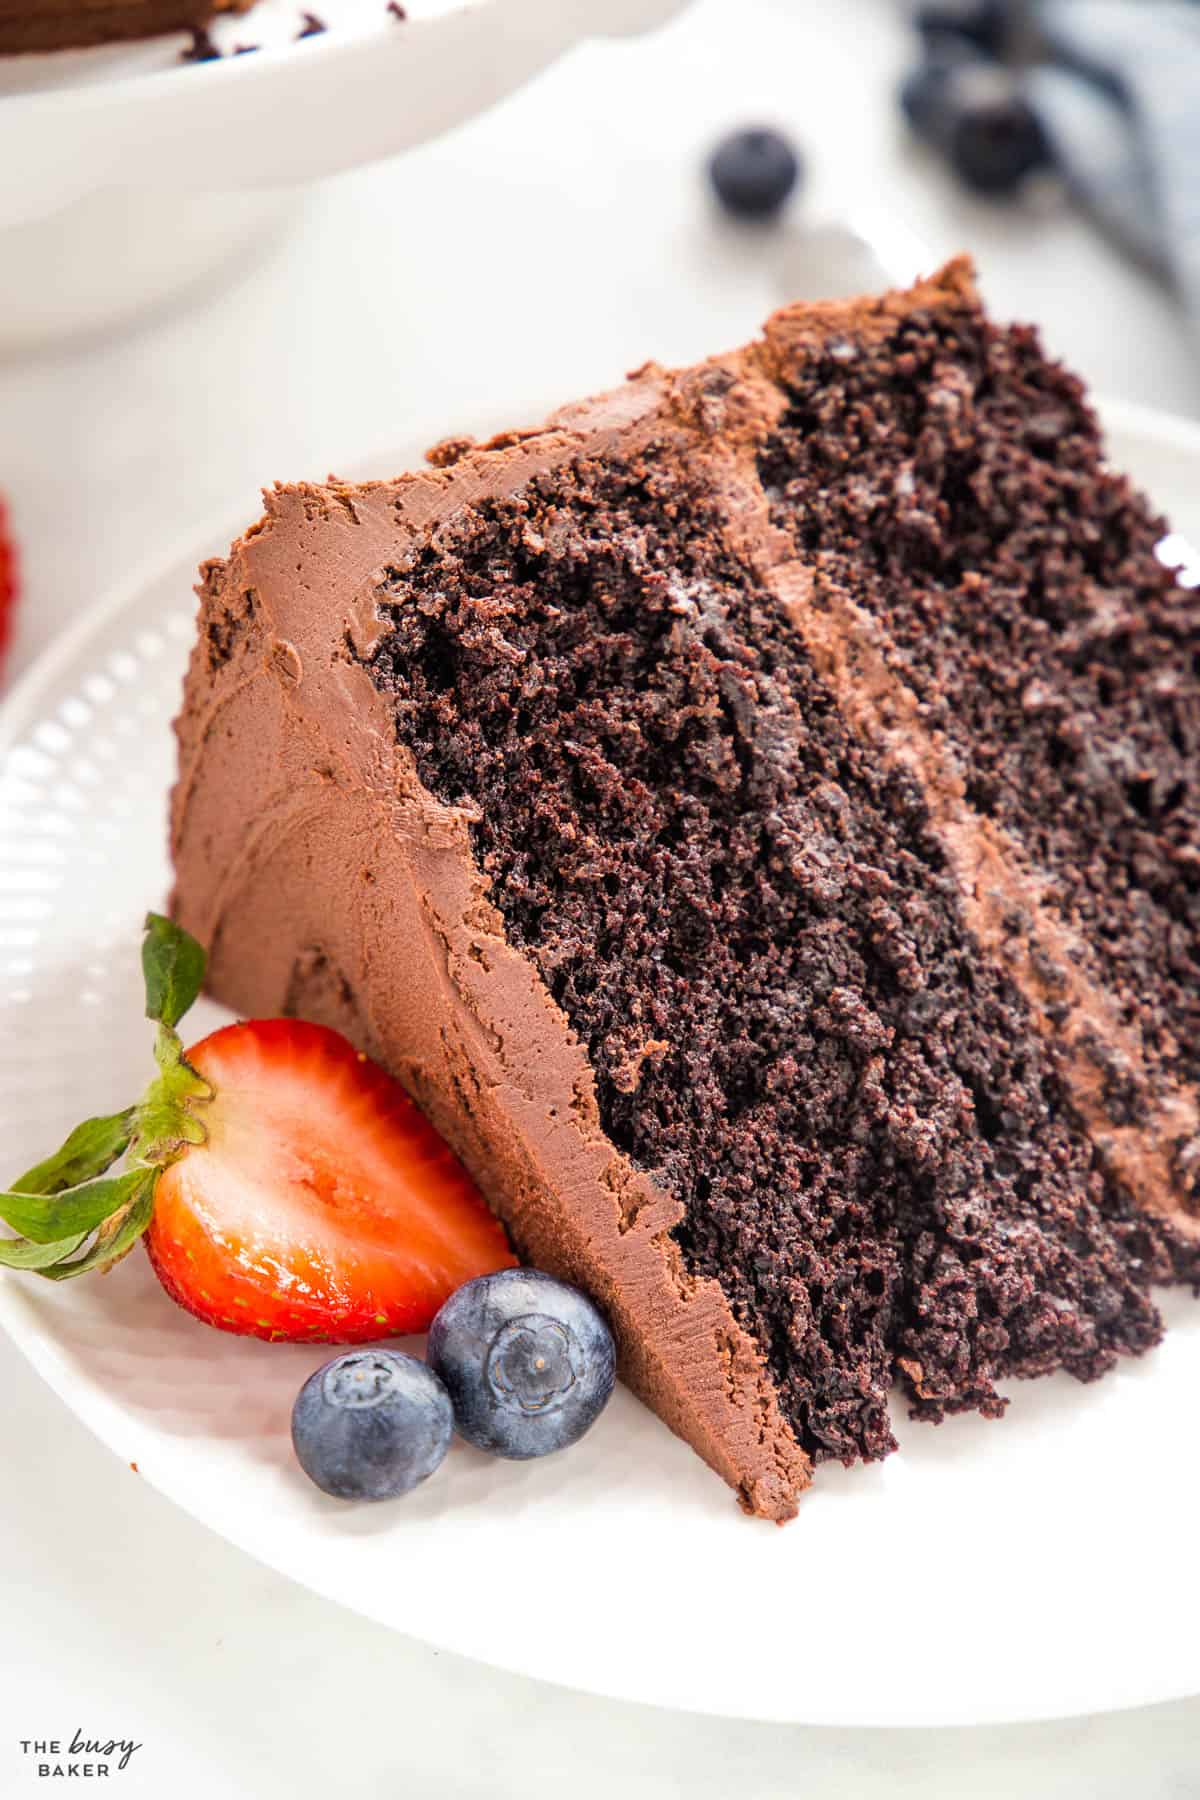
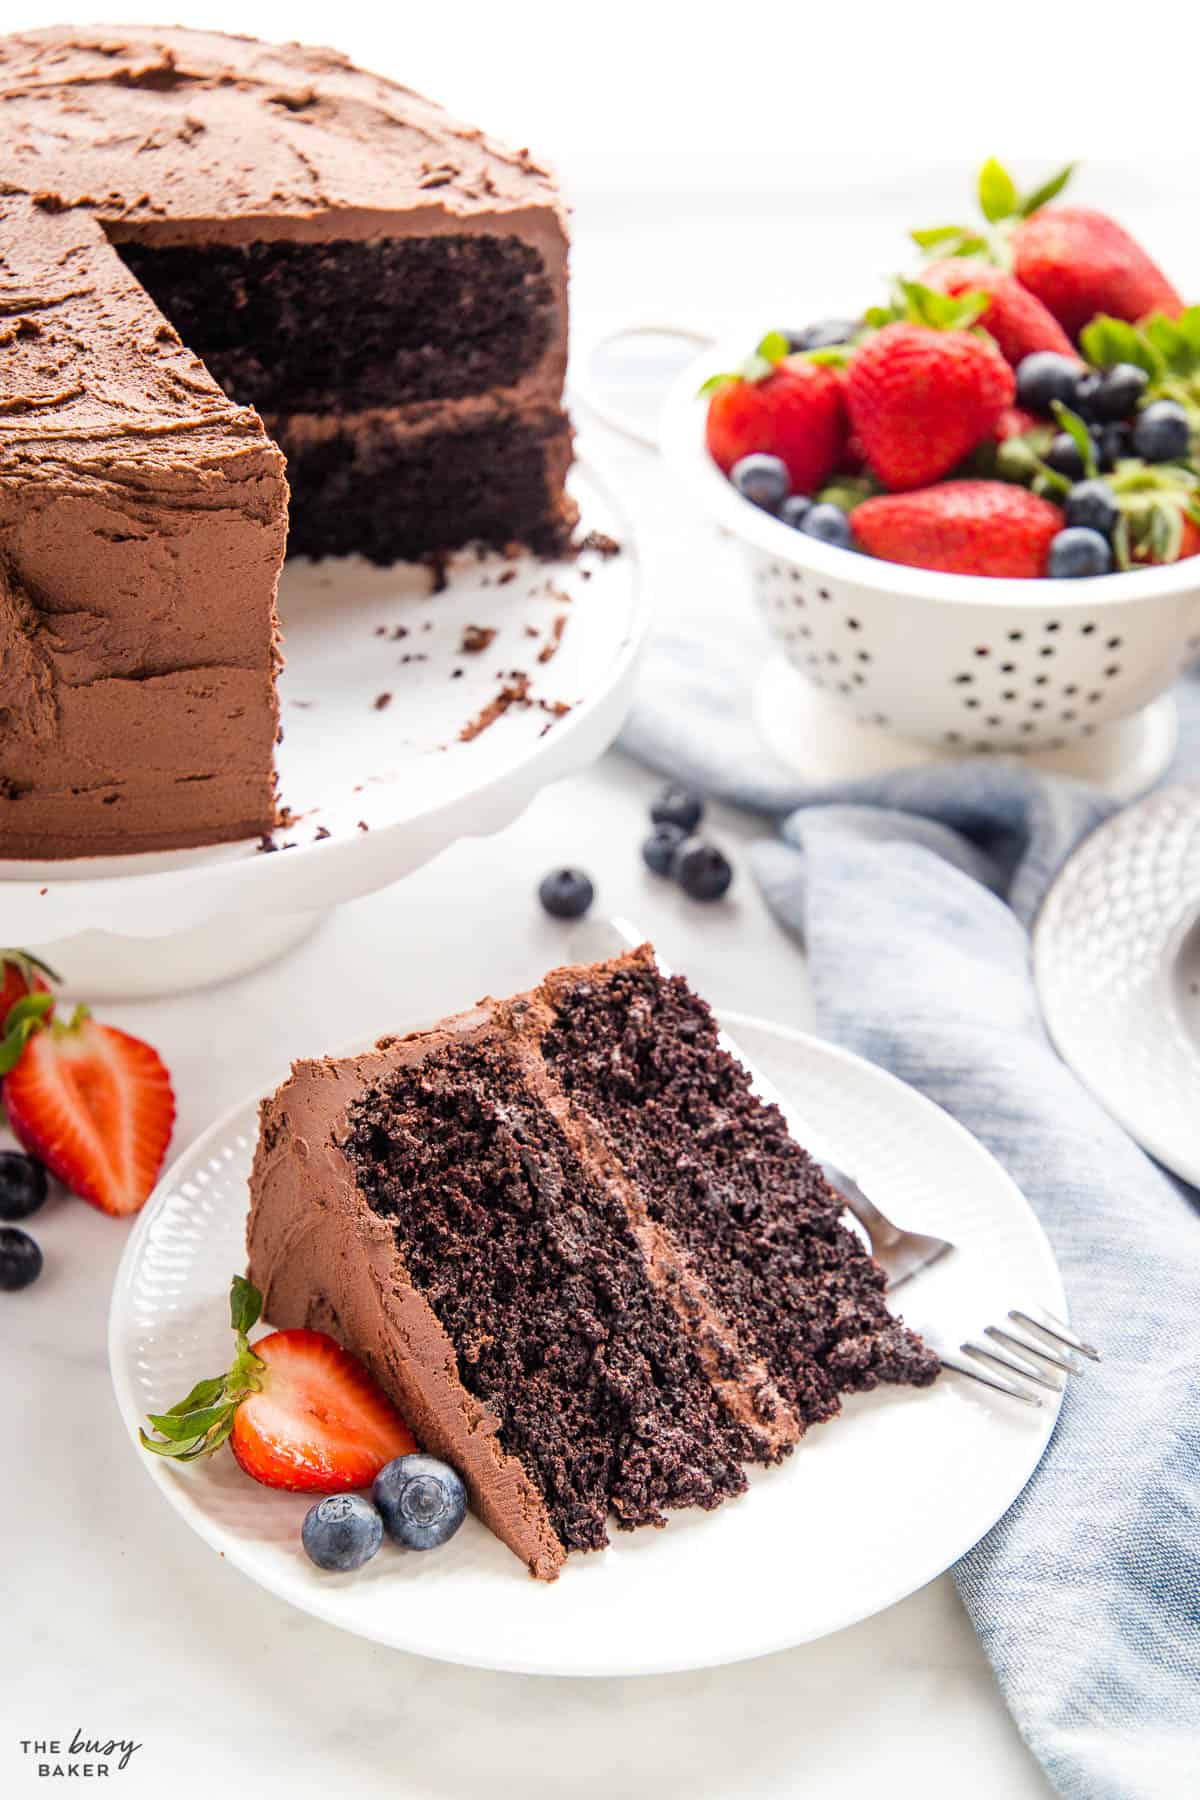
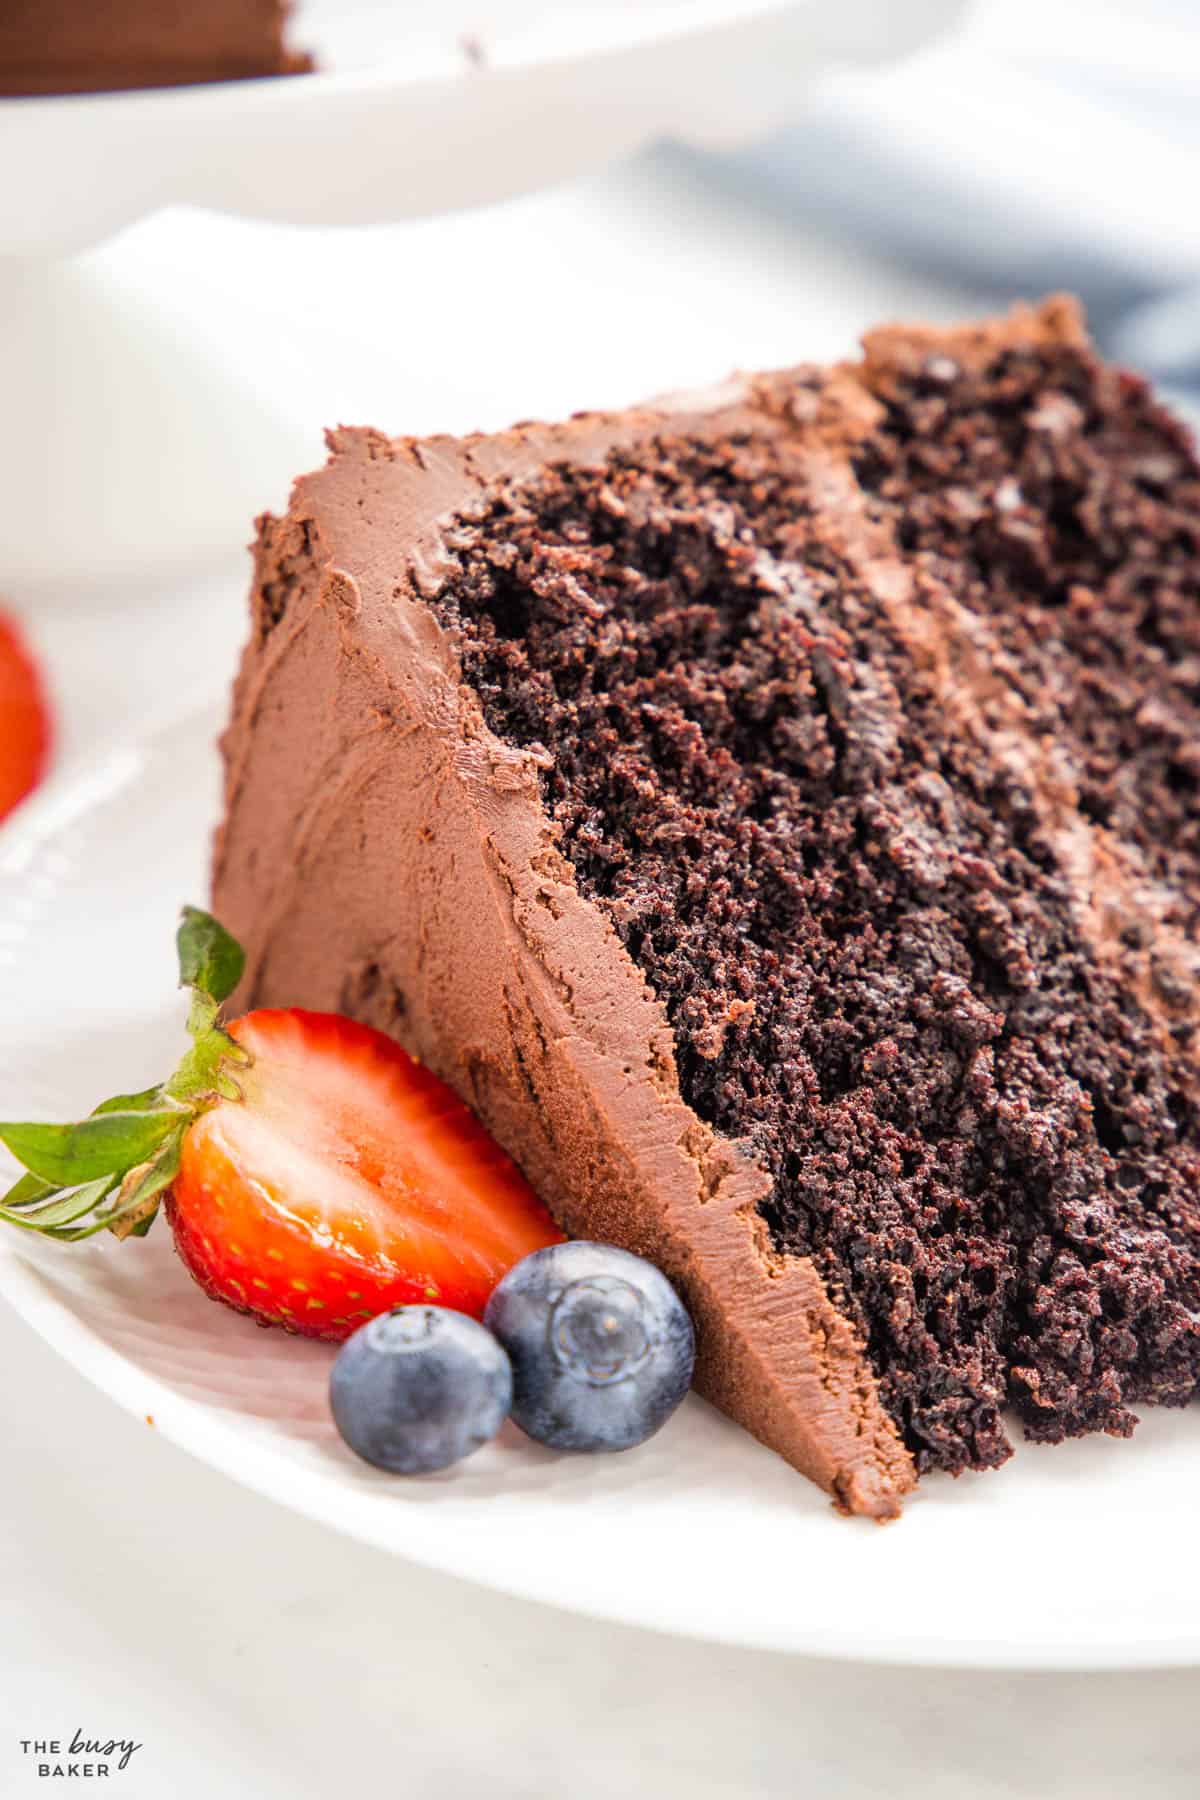
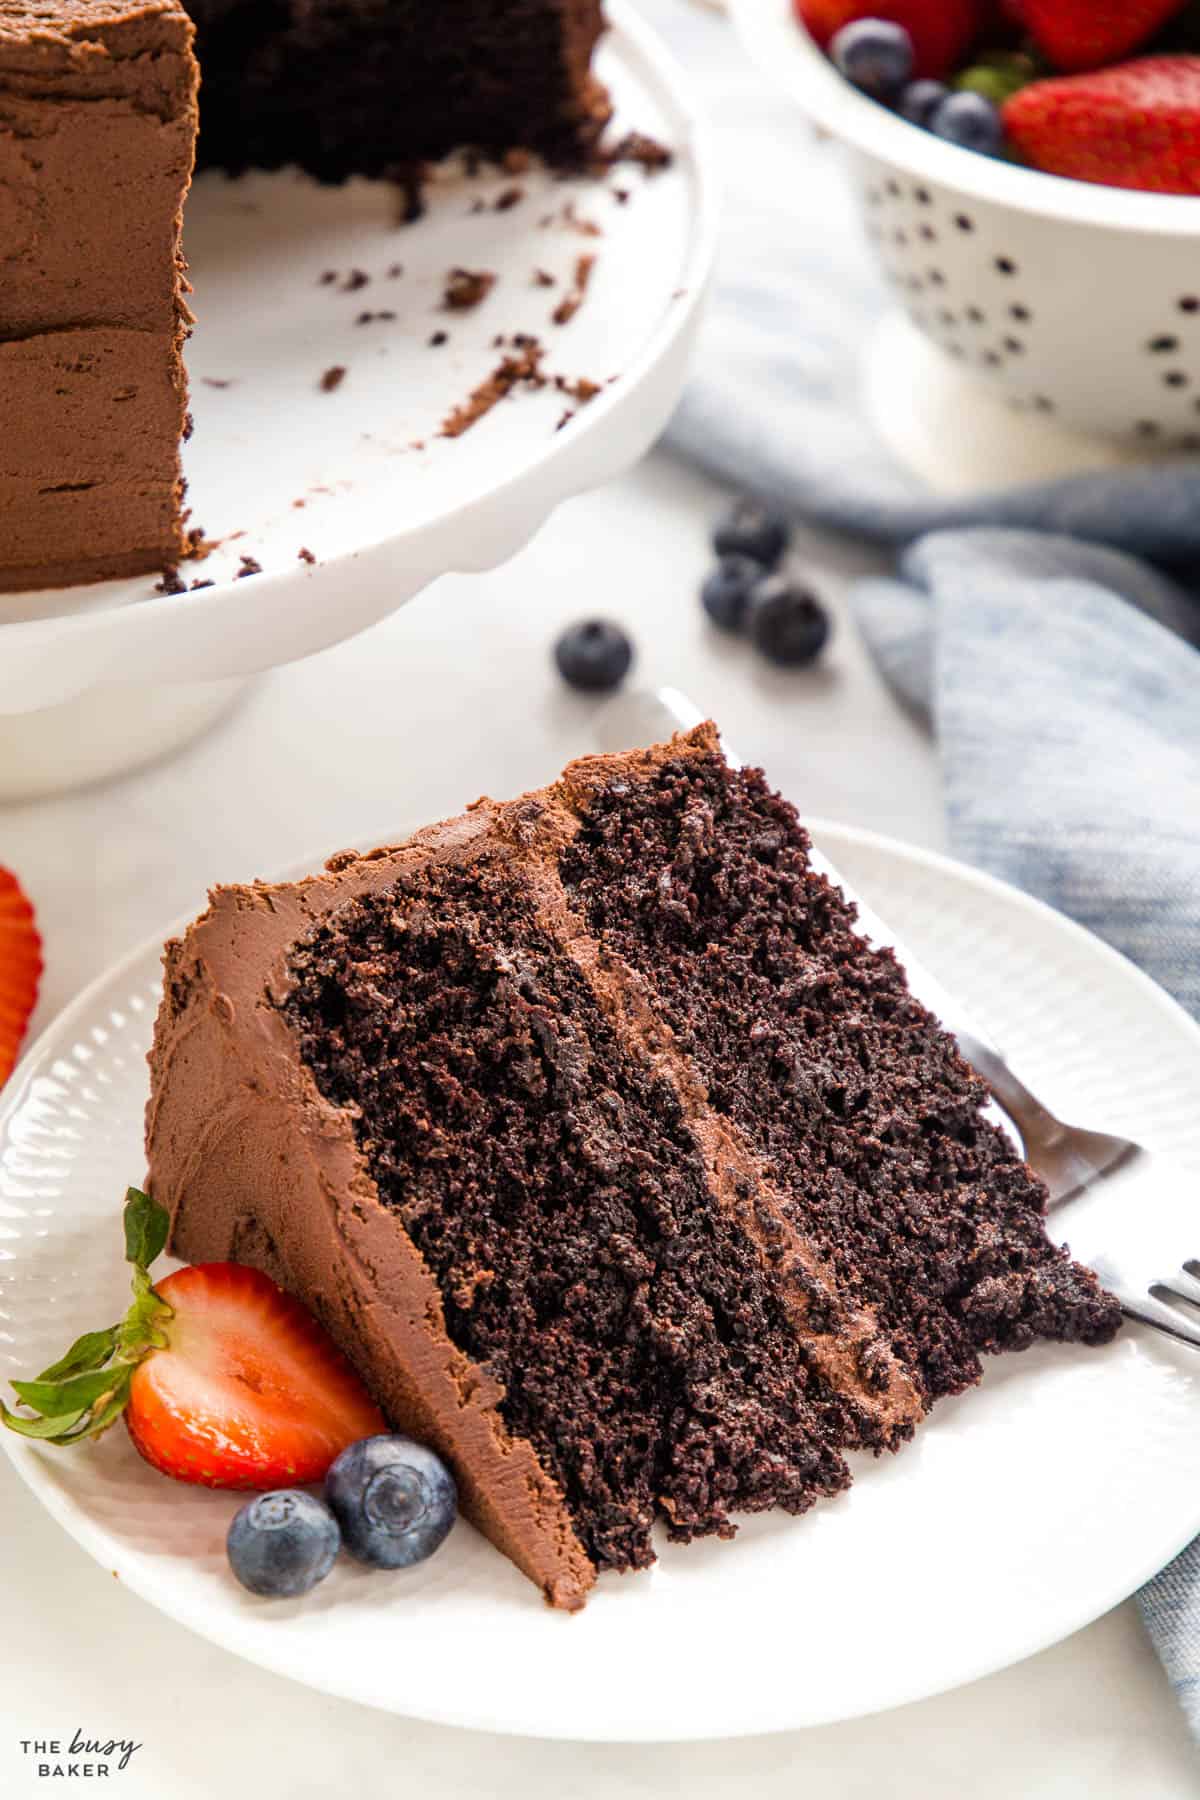
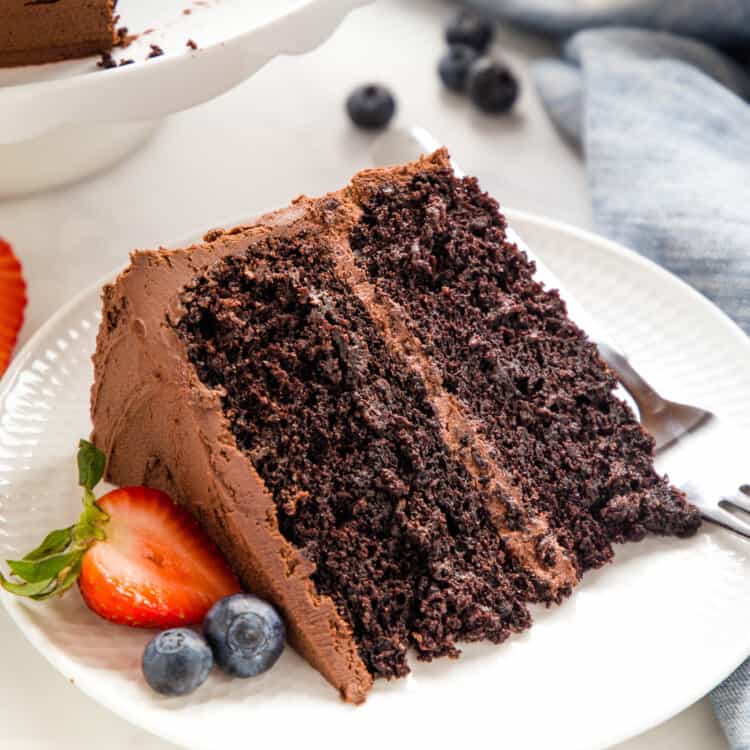
This Chocolate Layer Cake recipe is a classic dessert that’s perfect for any occasion. Ultra moist chocolate cake thanks to a secret ingredient, frosted with the easiest fluffy chocolate buttercream. The perfect homemade chocolate cake recipe for beginners!
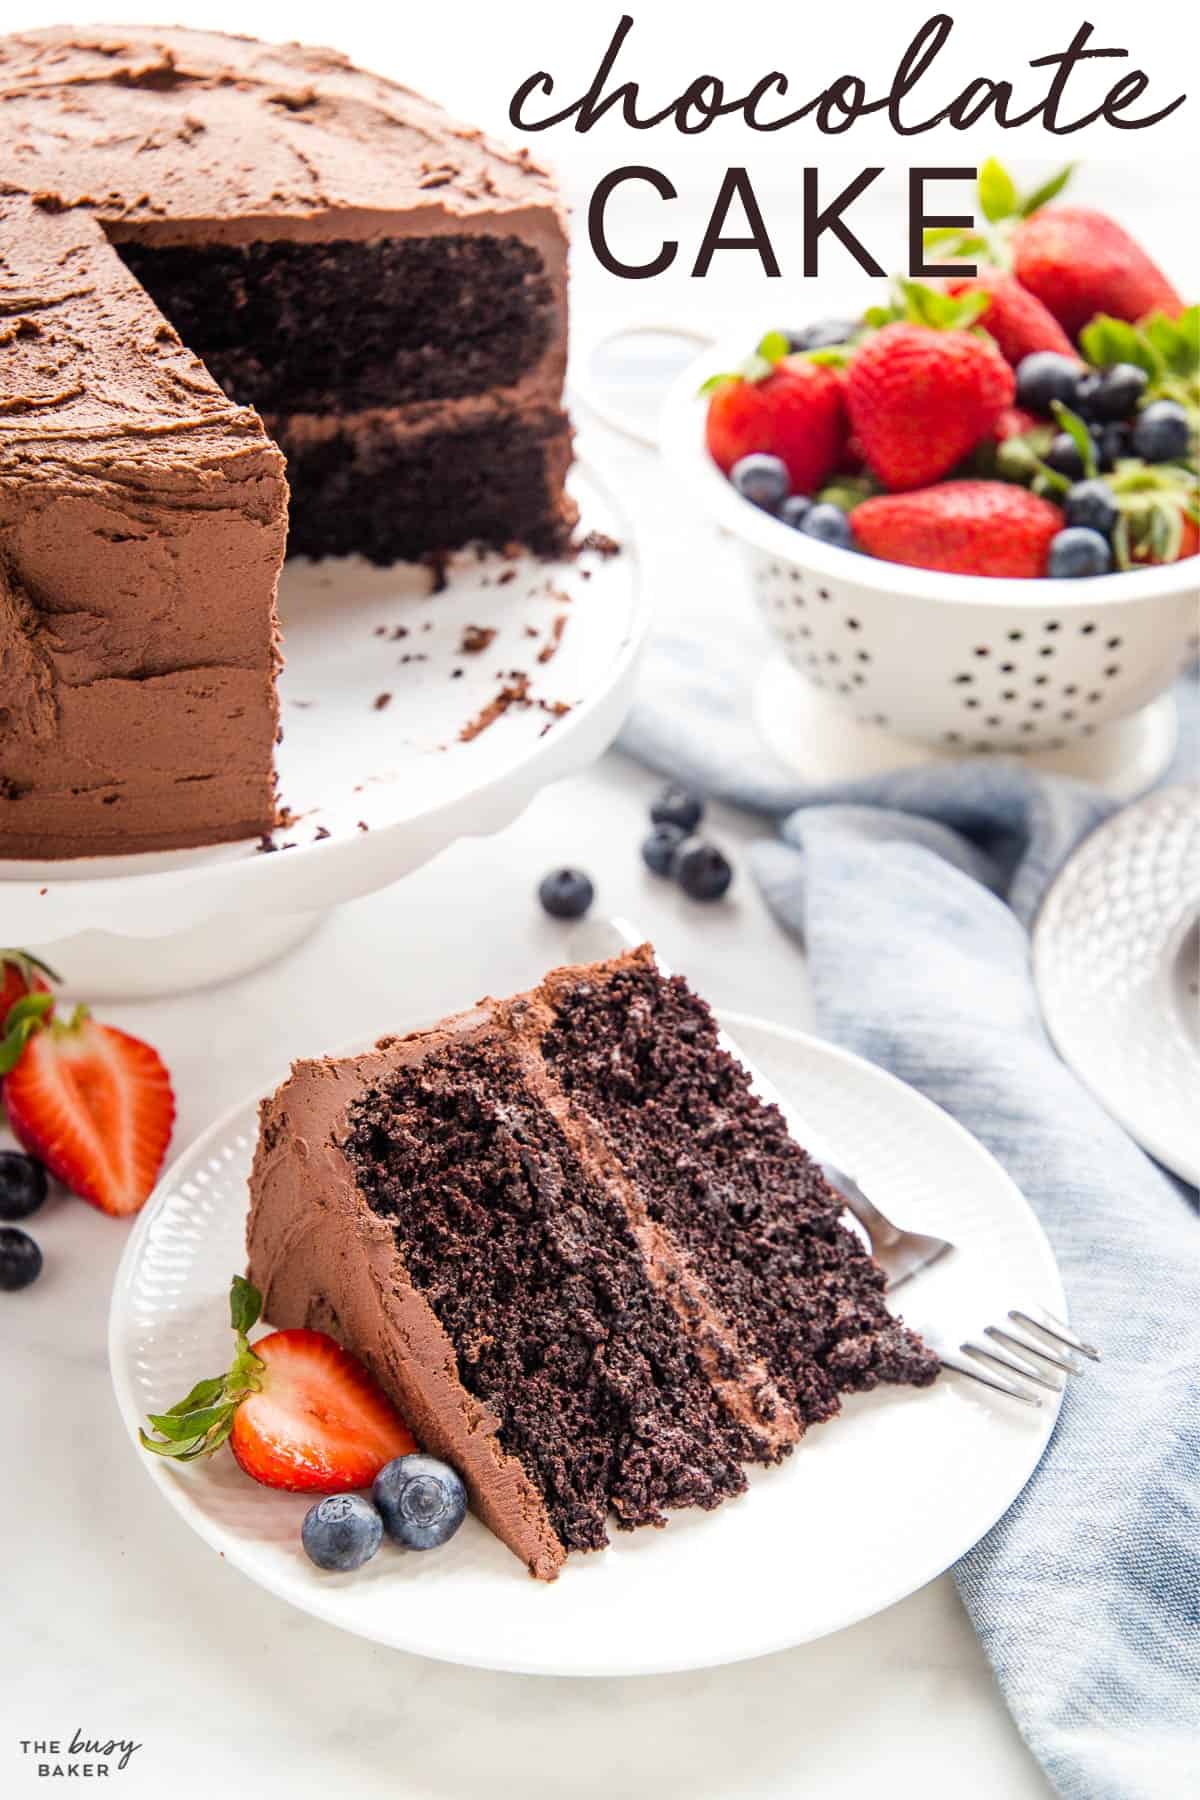
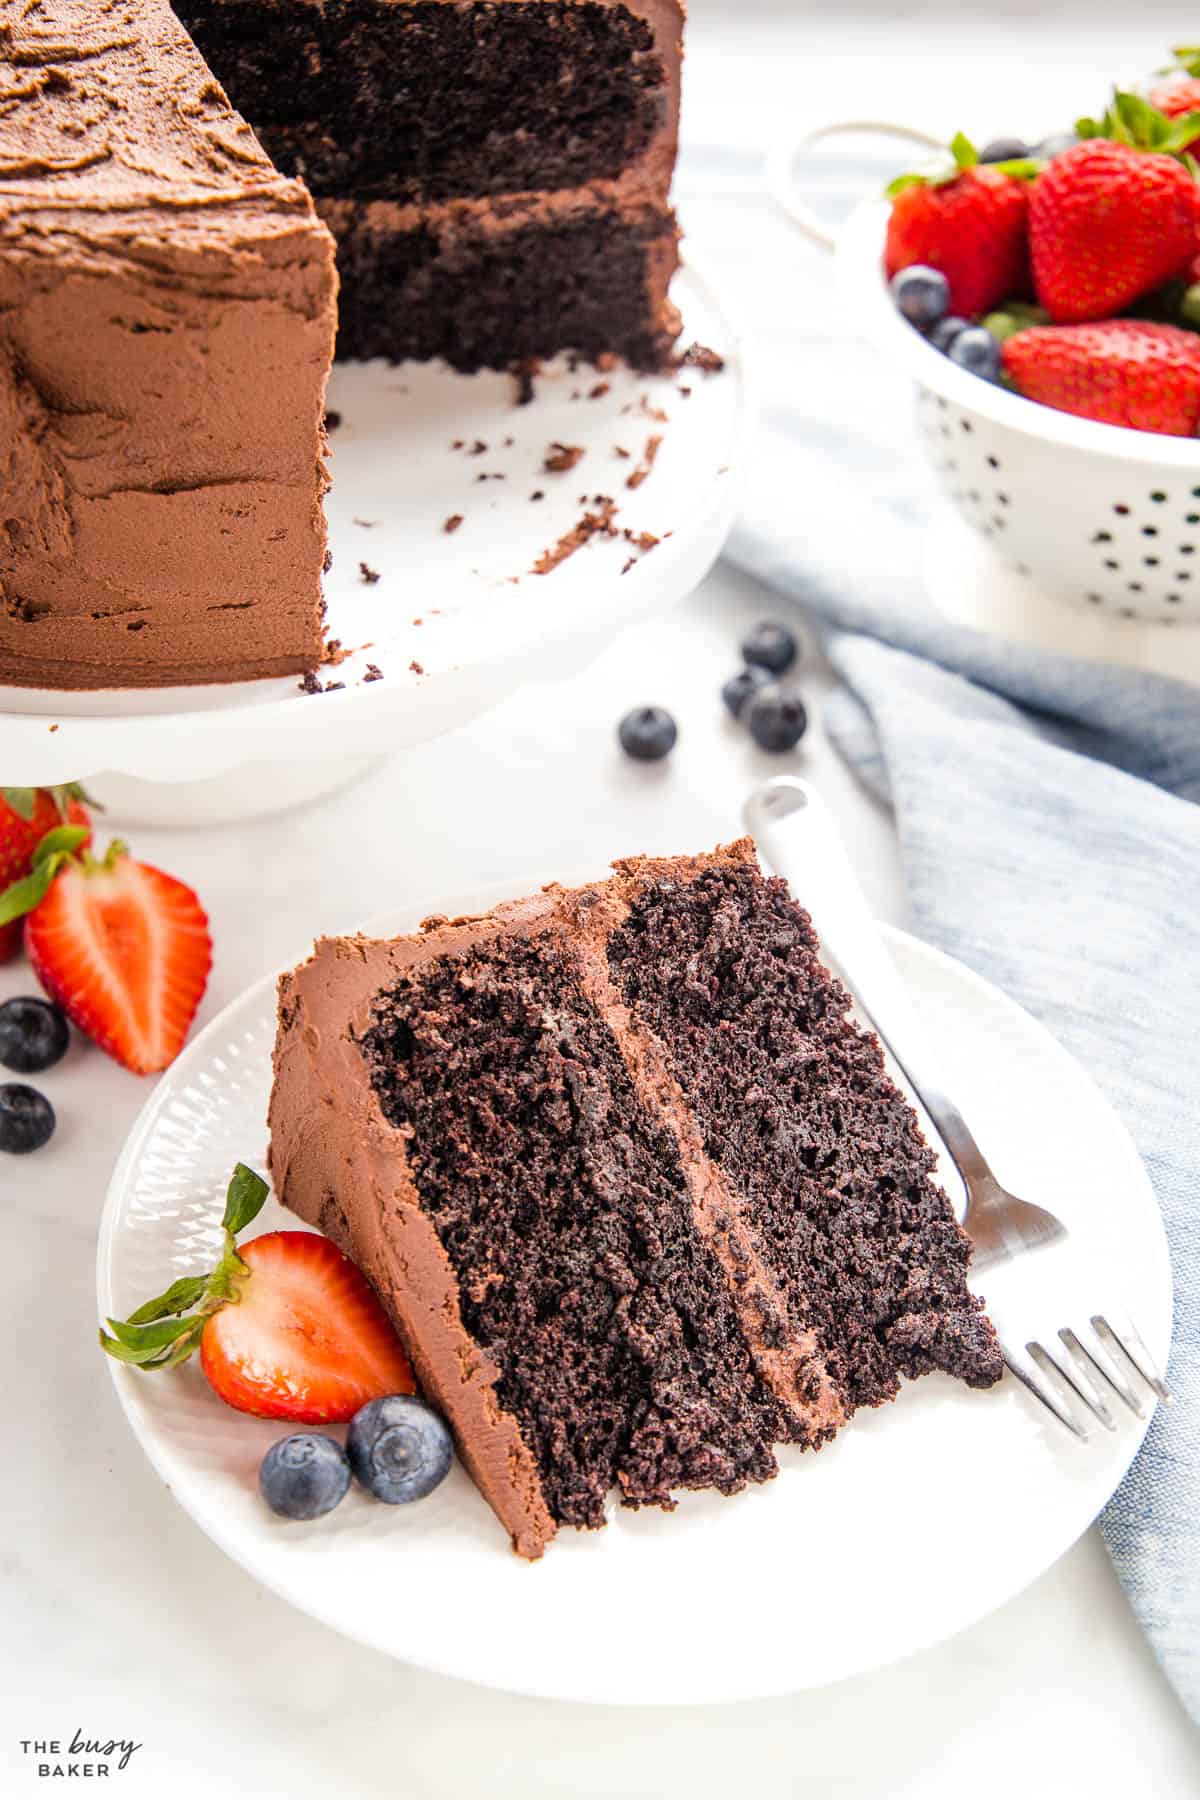
There’s nothing better than a delicious slice of homemade chocolate cake, and this Chocolate Cake Recipe is pretty much as good as it gets! This recipe has been a standby recipe in The Busy Baker kitchen for almost 20 years and it’s been shared over and over again with friends and family.
It’s a super easy chocolate cake recipe that’s almost impossible to mess up, which makes it the perfect recipe to start with if you’re a beginning baker! No need to be intimidated – this mix-by-hand cake batter comes together in minutes in just one bowl, and it’s the most moist and tender chocolate cake you’ll ever try. Trust us – you’ll never make another chocolate cake again!
There’s one ingredient in this recipe that takes this chocolate cake from good to AMAZING: boiling water.
Yes, you read that correctly – adding some boiling water to the cake batter right before baking causes the batter to become very fluid, but it bakes up into the most moist and decadent chocolate cake ever.
And if you want to elevate your homemade chocolate cake even further, add fresh hot black coffee instead of plain water. The hot coffee will moisten the cake just like the boiling water, and it will deepen the chocolate flavour even further. It’s truly the BEST and easiest secret ingredient to the perfect homemade chocolate cake that tastes like it’s from a fancy restaurant!

To make this easy homemade chocolate cake recipe you’ll need (affiliate links):
- a stand mixer or a hand mixer with some mixing bowls
- measuring cups and spoons for dry ingredients
- measuring cups for liquid ingredients
- a silicone spatula
- a whisk
- 8-inch round cake pans or 9-inch round cake pans
- an offset spatula
You won’t need a stand mixer or a hand mixer to make the cake itself, but an electric mixer is very handy for making the fluffy chocolate buttercream frosting.
The Done-For-You SUMMER BUNDLE + BONUS Menu Guide!
5 complete recipe guides for effortless summer hosting. The invisible work of summer? Done for you.
Ingredients you’ll need for the cake:
- all-purpose flour
- granulated sugar
- brown sugar (packed)
- cocoa powder (dutch processed is best)
- baking powder
- baking soda
- salt
- low-fat buttermilk
- vegetable oil
- vanilla
- eggs
- boiling water
Ingredients you’ll need for preparing the cake pans:
- butter
- cocoa powder
Ingredients you’ll need for the buttercream frosting:
- unsalted butter (at room temperature)
- melted semi-sweet chocolate
- powdered sugar
- cocoa powder (dutch processed is best)
- whole milk
Time needed: 1 hour
Follow these steps for the BEST homemade chocolate cake EVER!
- Prepare your cake pans well.
Grease and dust your pans with cocoa powder. It’s also a good idea to add a circle of parchment paper in the bottom of the pans.
- Sift your dry ingredients.
Prevent lumps by sifting your dry ingredients in a sifter or fine mesh sieve.
- Use oil for a tender cake.
Skip the butter and use vegetable oil for an ultra tender chocolate cake.
- Don’t forget the hot water or coffee!
Add hot water or coffee for an ultra moist cake.
- Bake immediately.
Bake the cake layers immediately after mixing so they rise properly in the oven.
- Frost once the layers are cool.
Be sure to cool the cake layers completely before frosting, or the frosting will melt.
- Refrigerate before and after frosting.
Adding the cake layers to the fridge so they’re cold while you’re frosting the cake helps the cake not to fall apart while frosting, and it helps the cake keep its shape. It’s a good idea to refrigerate the cake again for at least an hour before you serve it, if you can. This will make it much easier to cut evenly and it will help the frosting to set.
Here are some common problems you might encounter while baking chocolate cake and how to prevent them:
- An uneven or sunken cake:
- Make sure to measure ingredients accurately, especially the leavening agents like baking powder or baking soda.
- Do not over-mix the batter as this can result in excess air being incorporated into the batter, leading to uneven baking and sinking in the centre of the cakes.
- Ensure the oven is preheated to the correct temperature before placing the cake inside.
- Avoid opening the oven door during baking as this can cause major changes in oven temperature and result in an uneven rise.
- A dry or dense cake:
- Measure the flour properly by spooning it into the measuring cup and levelling it off, rather than scooping it directly from the bag (using the fluff and scoop method also works well).
- Do not over-mix the batter, as this can over-develop gluten in the batter and lead to a tougher texture. Mix until the ingredients are just combined and the flour disappears.
- Check the baking time and temperature. Over-baking can cause the cake to dry out. Use a toothpick to check for doneness.
- A cracked cake:
- An oven temperature that’s too high can cause the cake to rise too quickly and crack on the surface. Double-check that your oven temperature is correct by using an oven thermometer.
- Avoid opening the oven door during the first half of baking. This can cause sudden temperature changes that contribute to cracking on the top of the cake.
- Cakes that stick to the pan:
- Properly grease and flour the cake pans (dust with cocoa powder instead of flour for a chocolate cake). You can also use parchment paper to line the bottoms of the pans to prevent sticking.
- Allow the cake to cool in the pan for 10, 15 or even 20 minutes before inverting it onto a wire rack. Cooling the layers in the pan for several minutes helps the cake release more easily.
- Sunken cake layers:
- Check the freshness of your baking powder or baking soda. They lose potency over time and can cause cakes to sink. Replace them if necessary.
- Ensure the oven temperature is accurate. Use an oven thermometer to check the temperature.
- Avoid over-mixing the batter, as this can deflate the air incorporated during the creaming process. Mix until just combined.
- Be sure the cakes are fully baked before removing them from the oven. If they’re not fully baked in the centre, they’ll sink in the middle after you remove them from the oven.
- Difficulty frosting the cake:
- Be sure the texture of your frosting is soft enough that it will easily glide over the surface of the cake without difficulty.
- It’s a good idea to refrigerate the cake layers before frosting to make frosting the cake easier (the layers will be firmer after refrigerating).
- The cake is bulging on the sides, or difficult to slice.
- Refrigerate the cake after placing the frosting between the layers and before frosting the outside of the cake. This will prevent the cake from settling too much and the sides from bulging.
- If the cake is difficult to slice because it’s too soft, refrigerate for 30 minutes to an hour before slicing.
Here are all our BEST Pro Tips for baking chocolate cake from scratch!
- Start with room-temperature ingredients. Make sure your milk and eggs are at room temperature. This will create a smooth cake batter and help the ingredients combine properly.
- Measure the flour correctly. The best way to measure flour is in grams, but if you’re using cup measurements be sure to fluff the flour in its bag or container before scooping VERY gently (don’t pack the flour into the measuring cup at all), and then level it off with the back of a knife or other flat object.
- Avoid over-mixing, especially after adding the flour. Over-mixing can create a dry, tough cake because it reduces the number of air bubbles present in the batter which give the cake its lift as it bakes.
- Don’t mix on high speed. This can create something called tunnelling where long, thin air bubbles appear in the baked cake. This is caused by vigorous mixing that strengthens the gluten strands in the cake batter too much.
- Prepare the pans properly. Always grease your cake pans generously with butter and dust the inside with cocoa powder on all sides (use flour if you’re making a white cake and cocoa powder for a chocolate one). This will prevent the cake from sticking to the pan. We suggest using spring-form pans for baking cakes for even easier removal.
- Bake immediately after mixing. Don’t let an unbaked cake sit out on the counter. Always preheat your oven first and bake the cake immediately after adding the batter to the pans. This will help the cake rise properly in the oven as the leavening agent in the cake batter is activated as soon as the wet and dry ingredients are combined.
- Place the pans in the centre of the oven. Don’t place the pans too close together as this can cause them to brown too much on one side. Add the pans to the centre of the oven so they bake evenly.
- Don’t open the oven as they bake. Avoid opening the oven during baking unless it’s absolutely necessary to rotate the cakes while baking (if your oven is small or has a hot spot). Opening the oven door at the end of the baking time is ok, especially because testing the cake with a toothpick is necessary to prevent over-baking.
- Don’t over bake. Over-baked cakes are dry and crumbly. Be sure to remove them from the oven as soon as a toothpick inserted into the top of the cake comes out clean.
- Don’t under bake. Under-baked cakes are partly baked but gummy on top and in the centre. Test the cake with a toothpick to be sure the cake is baked completely.
- Don’t let them cool completely in the pan. Cool the cakes in the pan only for the first 10-20 minutes of cooling. Then turn them out onto a cooling rack to cool completely. Cooling the cakes in the pan will trap moisture in and make them soggy.
- Frost only after completely cooled. Don’t try to frost a cake that’s still warm, especially if you’re using a butter-based frosting as the butter will melt and you’ll be left with a mess. Wait for the cakes to cool completely, then frost.
- Level the cakes before frosting, if necessary. Use a large serrated knife (like a bread knife) to cut any domed top off of the cakes before assembling and frosting.
- Chill the cake during assembly. Add whatever filling you’re using between the layers, then chill for 20-30 minutes in the fridge. This will help the filling firm up so the cake keeps its shape as you add the frosting around the outside of the cake.
- Chill the cake before slicing. Place the cake in the fridge once you’ve finished frosting it so the frosting can firm up. This will make the cake easier to slice and create clean, uniform slices.
How do I make a moist chocolate cake?
Adding boiling water to your chocolate cake batter right before baking creates the most moist and delicious cake that’s tender and perfect for frosting.
Can I use cocoa powder instead of melted chocolate in a chocolate cake recipe?
When baking a chocolate cake, adding cocoa powder is the best way to achieve a deep chocolate flavour and dark colour, while keeping the cake moist and tender. Adding melted chocolate to your cake batter can make it dry and hard.
Can I substitute melted butter for oil in a chocolate cake recipe?
We don’t recommend substituting melted butter for the oil in a chocolate cake recipe as it will cause the cake to become dry and crumbly. For a moist and tender cake, use vegetable oil.
Can I freeze a chocolate cake?
Yes! Chocolate cake freezes very well. We recommend freezing the cake layers separately (wrapped in plastic wrap), or you can frost the cake and freeze it frosted. Simply defrost before serving.
How long does it take to bake a chocolate cake?
It takes approximately one hour to make a chocolate cake from start to finish. The baking time is approximately 35 minutes.
Can I bake a chocolate cake ahead of time?
Yes. We recommend baking the cake layers up to 2 days ahead of time and storing them in the fridge or freezer wrapped in plastic wrap to keep them moist and fresh. Frost before serving.
Looking for more delicious cake recipes? Make a Salted Caramel Pudding Cake or a Lemon Raspberry Glazed Bundt Cake!
We hope you enjoy this homemade chocolate layer cake recipe as much as we do! Let us know in the comments below, what’s your favourite cake recipe? We’d love to know!

Looking for more delicious cake recipes? You’ll LOVE these:
Watch the video below to see exactly how we make this recipe. You can find many more deliciously simple recipe videos on our YouTube channel!
If you made this, share a photo!
Are you trying this recipe? Use the comment form below to share your take; now with support for image uploads and comment voting!
Chocolate Layer Cake
Recipe: Equipment
Recipe: Ingredients
For the Cake:
- 1 3/4 cups all-purpose flour
- 1 1/2 cups white sugar
- 1/2 cup brown sugar packed
- 1 cup cocoa powder dutch processed is best
- 1 1/2 tsp baking powder
- 1 1/2 tsp baking soda
- 1 tsp sea salt
- 1 1/4 cups low-fat buttermilk
- 1/2 cup vegetable oil
- 1 tsp vanilla
- 2 large eggs
- 1 cup boiling water or use fresh hot coffee for an even more intense chocolate flavour
For preparing the Cake Pans:
- 2-3 tsp butter
- 2 tbsp cocoa powder
For the Buttercream Frosting:
- 1 1/2 cups unsalted butter at room temperature
- 8 ounces semi-sweet chocolate melted and cooled
- 5 cups powdered sugar icing sugar
- 3 tablespoons cocoa powder dutch processed is best
- a pinch or two of salt
- 3 to 4 tbsp whole milk
Recipe: Instructions
For the Chocolate Cake:
- Preheat oven to 350 degrees Fahrenheit.
- Prepare two 9-inch cake pans by greasing them well with 2-3 tsp butter and dust them with 2 tbsp of cocoa powder. Tap out as much of the excess cocoa powder as possible; you only want a very thin layer to coat the inside of the cake pans so it disappears as the cakes bake.
- After the cake pans are greased and floured, measure the flour, white sugar, brown sugar, cocoa powder, baking soda, baking powder and sea salt into a large mixing bowl through a sieve or flour sifter. This will help prevent lumps in the dry ingredients.
- Once you’ve pushed the dry ingredients through the sieve, give the mixture a stir with a wire whisk to combine all the ingredients.
- Add the buttermilk, vegetable oil, eggs, and vanilla and whisk them together into. the dry ingredients with a whisk and/or a spatula. The batter will appear rough and scraggly; this is expected.
- Set your kettle to boil some water. You'll need 1 cup.
- Switch to a whisk and very slowly pour the boiling water into the cake batter (you can use hot coffee instead of hot water, if desired). Adding it slowly will bring the temperature of the mixture up slowly and prevent any clumps of batter from being "cooked" by the heat of the water. Be sure to whisk the mixture gently and constantly as you add the water.
- Pour the cake batter evenly into your prepared 9-inch cake pans.
- Bake at 350 degrees Fahrenheit for about 30-35 minutes. After 30 minutes, if the cakes appear to be done, test the middle of one with a toothpick. If a toothpick inserted into the middle comes out pretty much clean, the cakes are done.
- Remove pans from the oven and allow cakes to cool in their pan for at least an hour before removing. This will help the cakes pull away from the sides of the pan naturally and they’ll be much easier to get out!
- After they’ve cooled significantly, place a wire rack upside down over the top of each cake pan. Invert the cake pan and the cakes should slip right out, upside down, onto the wire racks. Leave them like this to cool completely.
- Once the cakes have cooled completely to room temperature, wrap them in plastic wrap and refrigerate them before frosting.
For the Buttercream Frosting:
- Add the butter to the bowl of a stand mixer fitted with the paddle attachment. Beat the butter on medium-high speed for 1-2 minutes or until it’s smooth and creamy.
- Add the melted and cooled chocolate and combine it with the butter. Adding the chocolate to the butter before adding the powdered sugar will make the frosting extra smooth and creamy.
- Add the powdered sugar and cocoa powder to the butter mixture, along with a pinch of salt through a sieve or flour sifter to remove any lumps. Beat the powdered sugar and cocoa powder into the butter on medium-high speed until the mixture starts to come together (it will look lumpy and a bit powdery). Add the milk and continue to beat until it looks fluffy, scraping down the sides of the bowl as needed.
- Remove the cakes from the fridge and remove the plastic wrap.
For Assembling the Cake:
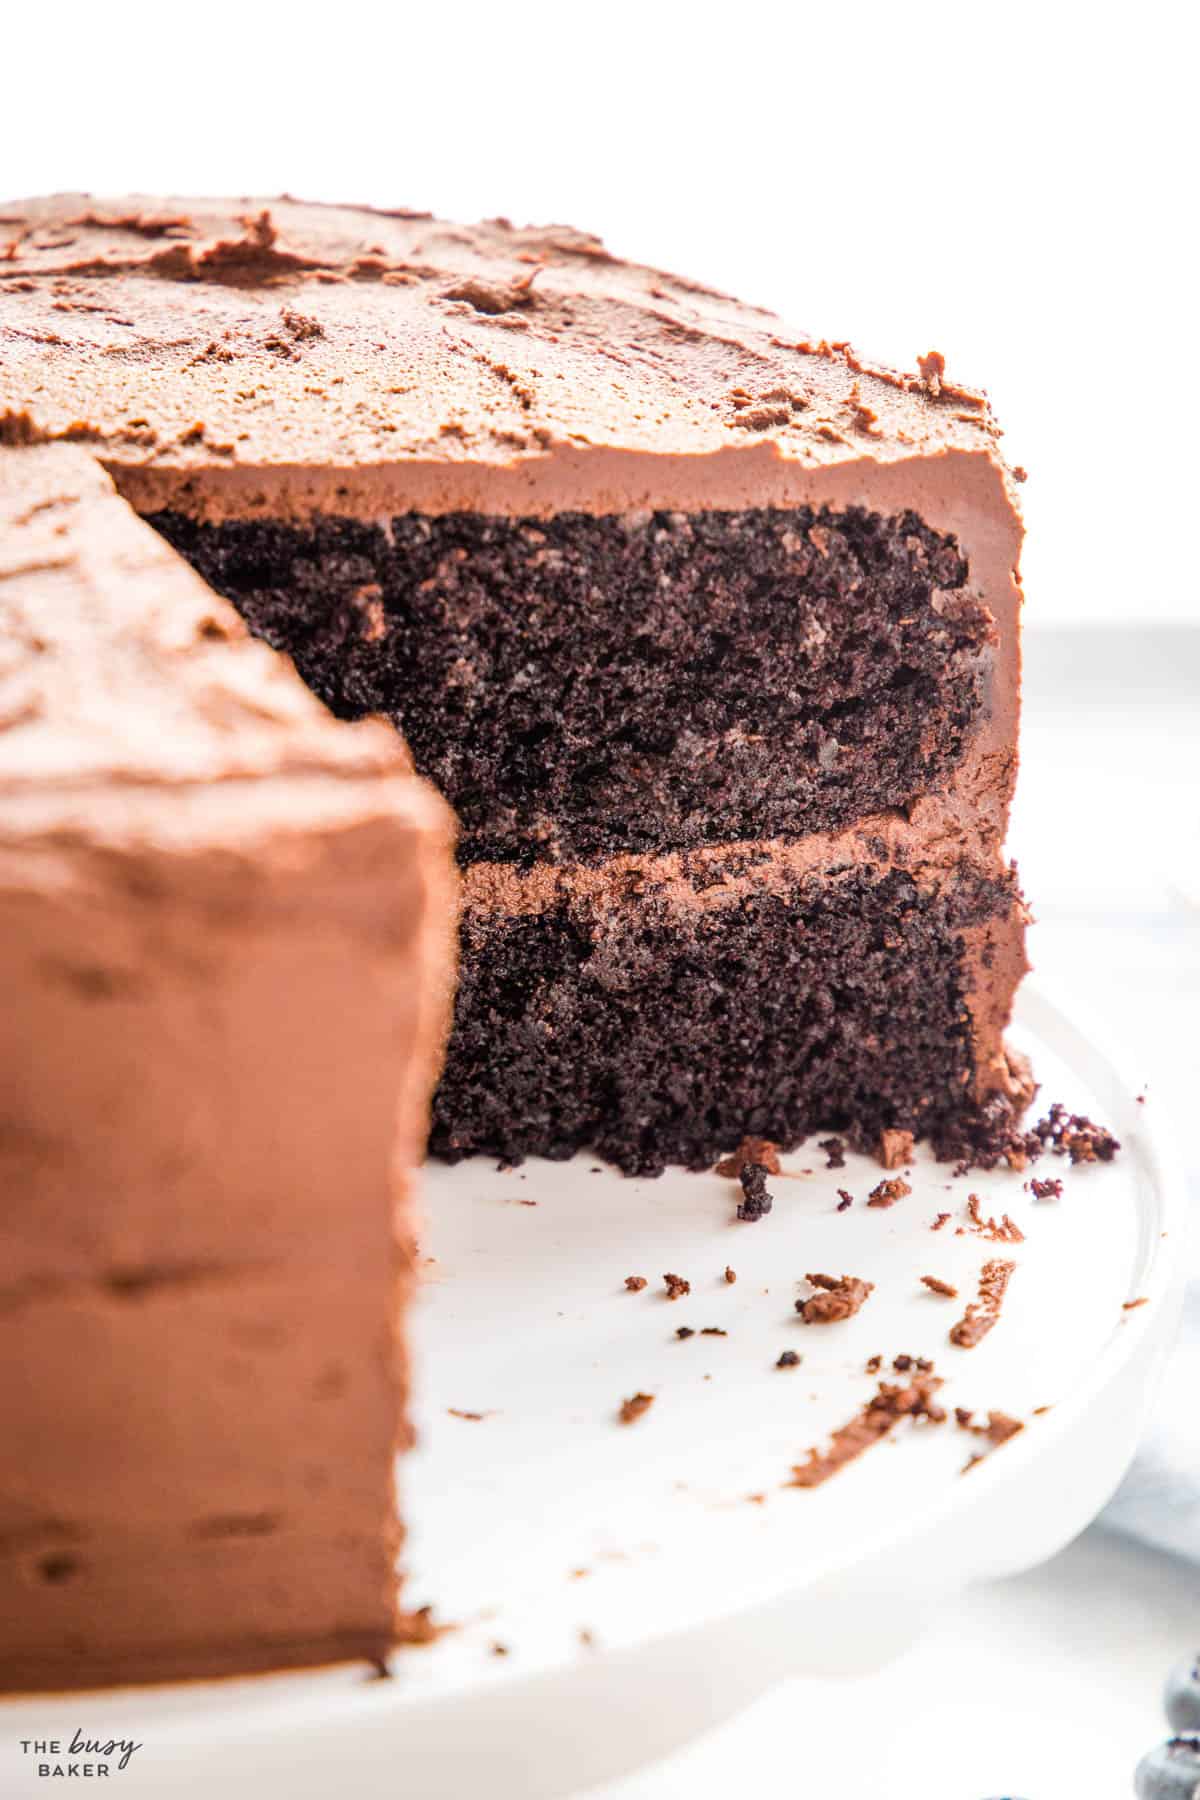
- Slide one of the cakes onto a plate (or a cake board if you want to get fancy…but fancy isn’t really what this cake is about!), making sure the cake is right-side-up. This means the bottom will be flat and the top will be slightly rounded. Since this is not one of those fancy-schmansy cakes, we’re not going to bother levelling it or anything like that. It’s supposed to look rustic and homemade…that’s what’s so beautiful about baking for someone you love.
- Place a large dollop of frosting on top, in the middle of the cake using an offset spatula (a butter knife also works well in a pinch!). Carefully spread the frosting outward until it reaches the sides of the cake. Be aware of the motions you’re using: don’t push and then pull the frosting. This will cause crumbs on the top of the cake to lift up and become mixed in with the frosting. This is not a good look! Just be careful and spread the frosting outward and downward.
- Once the top is covered, place the second cake on top of the first, but upside down (flat side up).
- Place a large dollop of frosting in the middle but don’t spread it yet! You’ll save it for the end after you frost the sides of the cake.
- Using your offset spatula, spread a large amount of frosting around the sides of the cake, making sure to fill in any holes or cracks, especially the large gap between the layers.
- Once the sides are covered, spread the frosting on top of the cake, creating whatever kind of rustic pattern you like.
- I chose to create small, natural-looking swirls with the same offset spatula I used to frost the cake. Carry this pattern down the sides of the cake and when you’re satisfied with the way it looks, you’re done!
- Refrigerate the cake until ready to serve. This will help the frosting to set and make the cake easier to slice.
Recipe: Notes
Storage Instructions
Store this cake in the fridge in an airtight container for up to 2 days before serving. Although not totally necessary, it’s a good idea to refrigerate the cake for at least an hour before you serve it. This will make it much easier to cut evenly and it will help the frosting to set.Freezer Instructions
Freeze the cake layers individually (wrapped in plastic wrap) for up to 3 months. Freeze the frosted cake whole, or in slices, in an airtight container for up to 3 months. Be sure to defrost to room temperature before serving.Recipe: Nutrition
Notice: Nutrition is auto-calculated, using Spoonacular, for your convenience. Where relevant, we recommend using your own nutrition calculations.

TRY OUR MEAL PLAN BUNDLE!
Let us do the work for you with 11 WEEKS of deliciously easy family dinners, grocery lists, meal prep guides and so much MORE!
11 weeks of done-for-you family meal plans for only $9.99!
Made it. A rich, chocolatey, not too sweet cake. Perfect for my son’s birthday. Thanks
I’m so happy you enjoyed it! Thank you for taking the time to leave your feedback!
Can you use this recipe for a tiered cake??
I’d hesitate to recommend this cake for a tiered cake as it’s a very soft chocolate cake. If you do choose to make a tiered cake with this recipe, I’d recommend chilling the cake well before frosting and using wooden dowels and cake boards to provide stability.
This looks really good. I'm a chocolate cake aficionado; I'll definitely be trying this.
You'll love it! The boiling water makes ALL the difference!! 🙂
Chrissie, your dad is so blessed to have you! You're an angel for making his favorites! This chocolate cake looks really good, I could almost taste the rich ganache! I always adore chocolates and strawberries, I think they are perfect together! awesome photos, as always 🙂
Thanks so much!
That's one beautiful cake! And congratulations to your Dad!
Thanks so much! And I'll pass on the congratulations 🙂
Oh my, that does look delicious!
Thank you!!
Looks delicious, and after walking 800km I wouldn't feel one bit guilty about devouring it 🙂
Thanks! And yes, I don't think he experienced any guilt!!!
Would you recommend serving this cake at room temperature or is it soft and moist straight from the fridge?
Great question! I like to let it sit for just a few minutes (3-5 minutes) before cutting, but it is quite soft and moist even after it's been chilled.
Thanks! I tried it and she put it back in the fridge but it was just as moist afterwards! This has become my go-to chocolate cake recipe! So delicious!
That's great! So glad you enjoyed it!