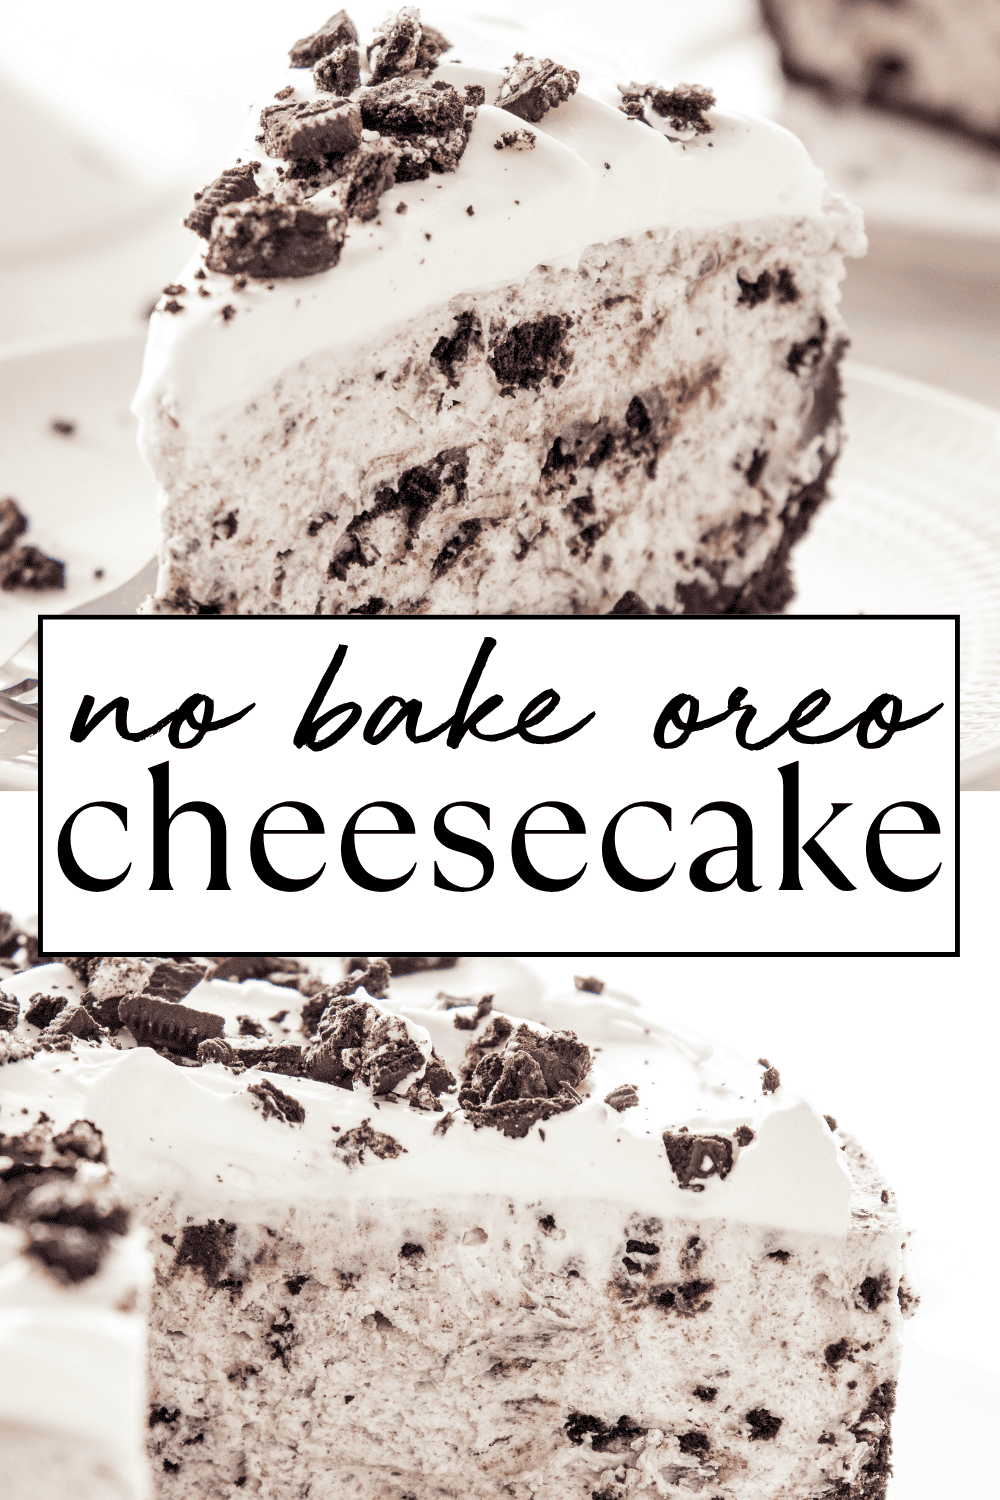
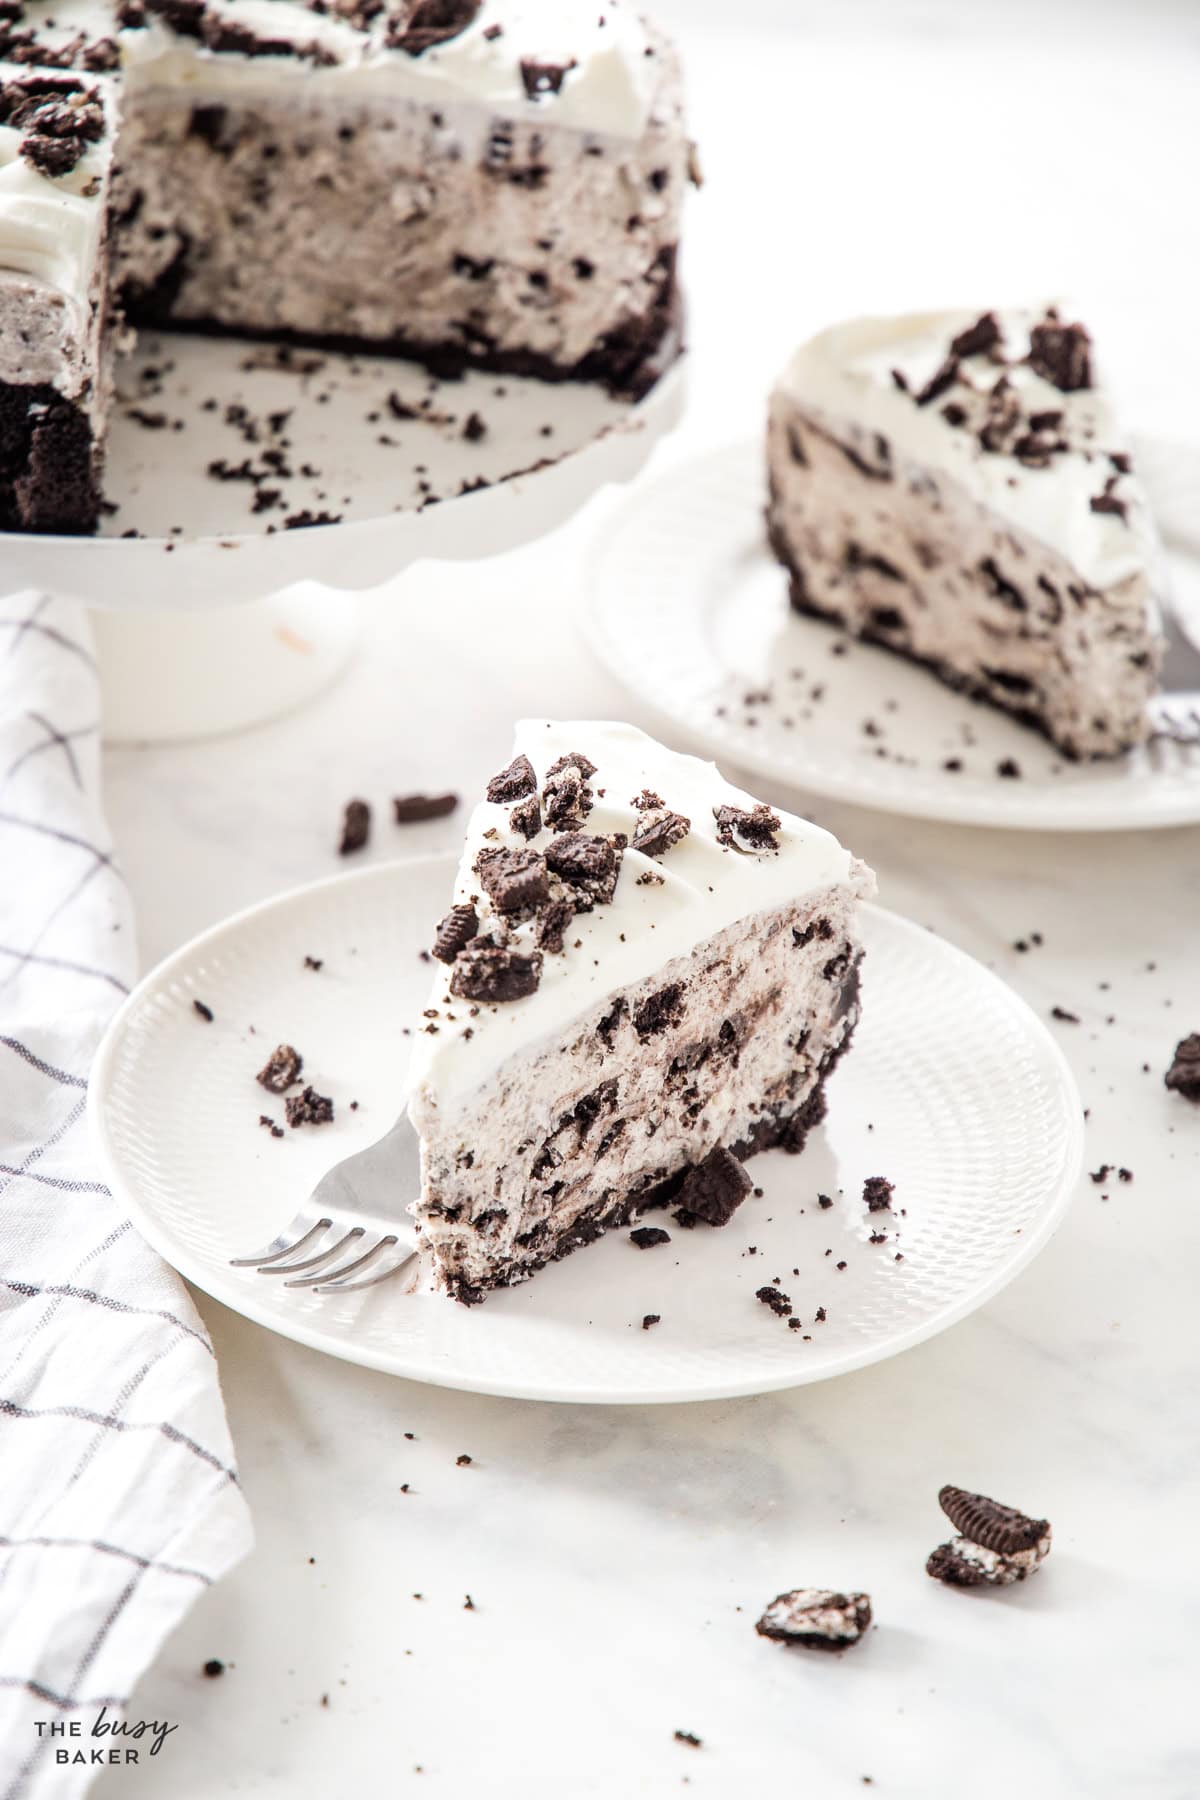
This easy no-bake Oreo cheesecake skips the gelatin, calls for just 6 simple ingredients, and comes together in only 20 minutes of hands-on time. It’s been a reader favourite for years and it’s one of the top no bake cheesecakes on the internet. It’s the kind of recipe you’ll find yourself making again and again!
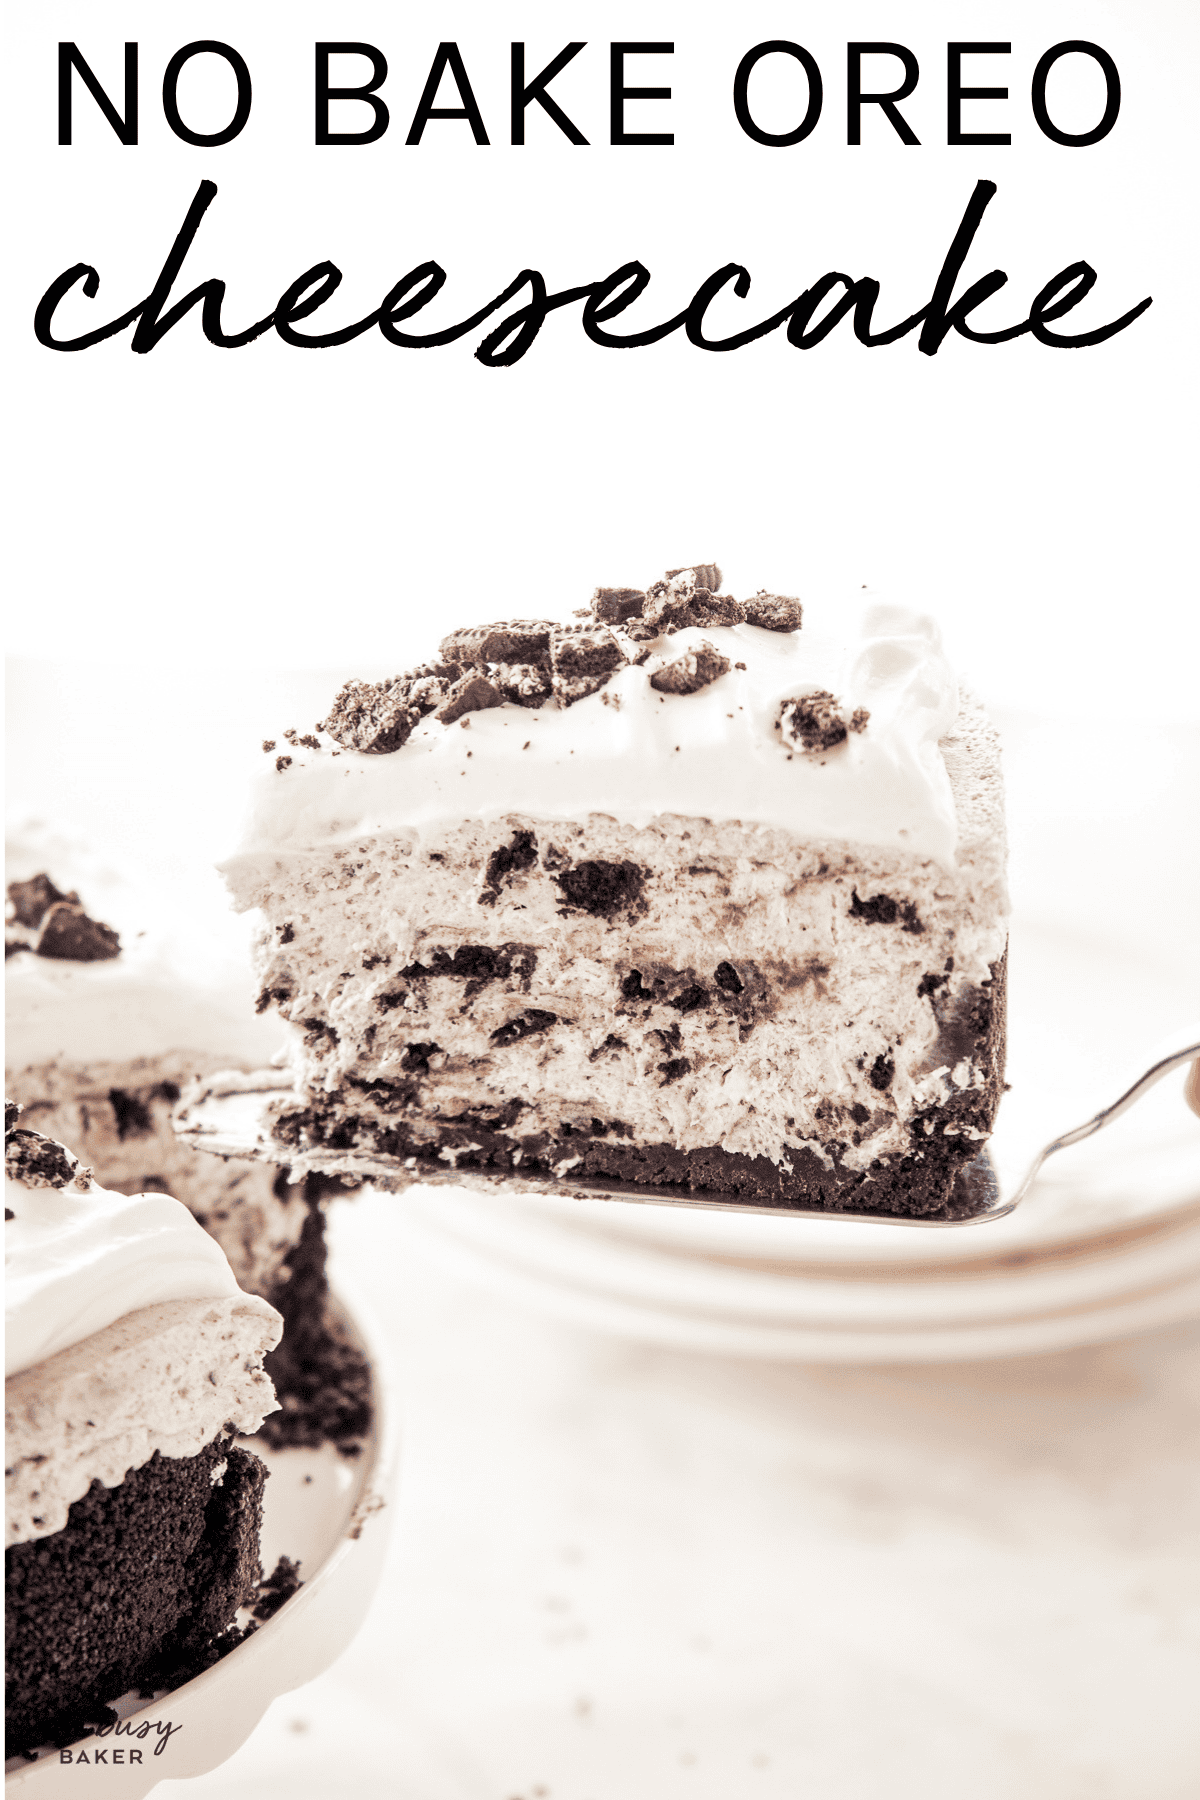
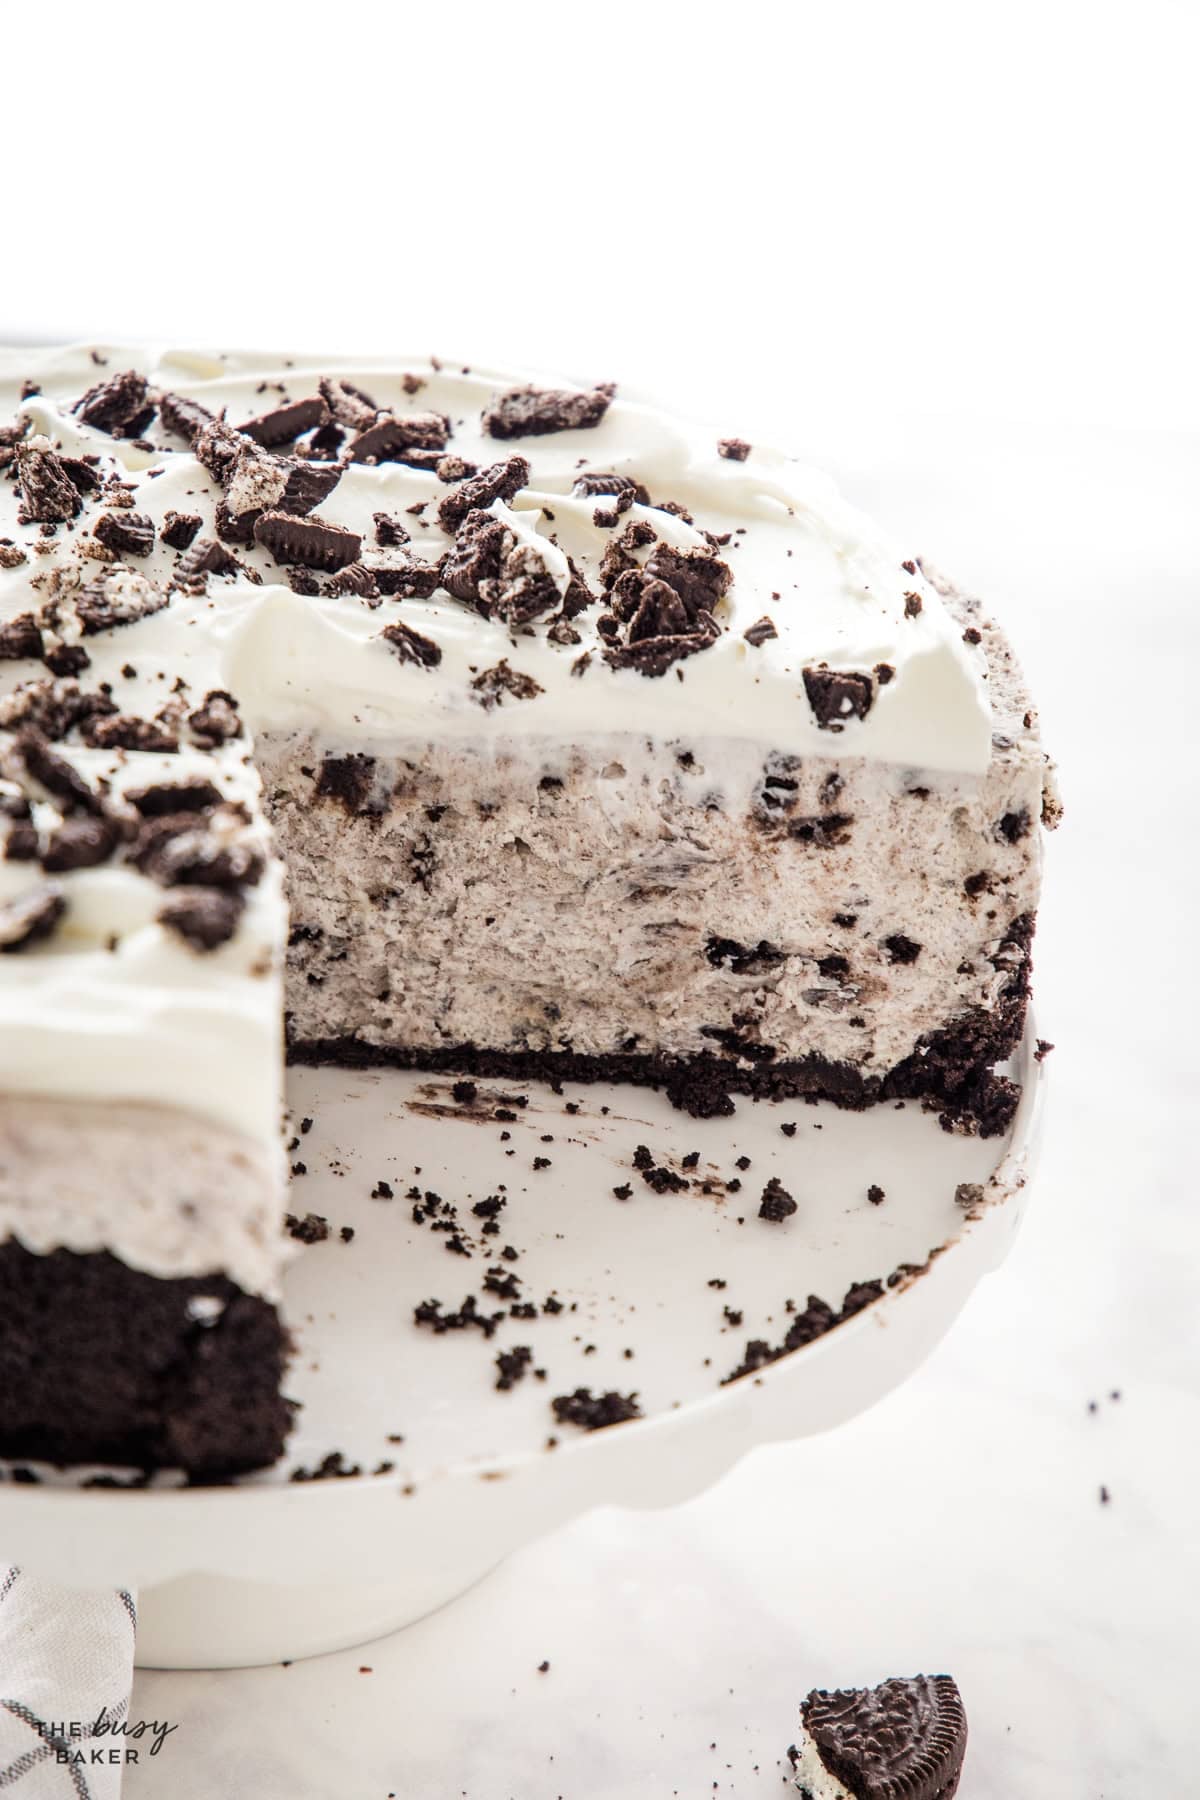
This Easy No-Bake Oreo Cheesecake is one of those recipes that never, ever disappoints. It’s been a reader favourite on the blog for many years, and the reason is simple: it tastes like the cheesecake you’d order at your favourite café, but you can make it in a single bowl with no oven, no water bath, and no gelatin. Just cream cheese, real whipped cream, and a stack of Oreos folded right into the filling.
It’s a make-it-in-the-morning, serve-it-after-dinner kind of dessert. Twenty minutes of hands-on time, a few hours in the freezer, no fancy equipment beyond a 9-inch springform pan. That’s it! Make it once and you’ll understand exactly why readers come back to it again and again – for birthdays, for company, and for the random Friday when you just need something sweet, indulgent and low maintenance.
No gelatin, no chalky texture. Most no-bake cheesecakes call for gelatin to help them set. I’ve never loved the texture of no bake cheesecakes with gelatin…it sets the filling firm in a way that doesn’t taste like real cheesecake. This recipe sets with cold and the structure of properly whipped cream instead, so the texture stays soft and creamy, yet it’s totally sliceable. It’s the closest I’ve gotten to baked cheesecake without ever turning the oven on.
Six ingredients you probably already have. Oreo cookies (for both the crust and the filling), butter, full fat cream cheese, powdered sugar, heavy whipping cream, and a few extra Oreos and whipped cream for the top. That’s the whole list. No food processor required if you crush the cookies by hand in a zip-top bag, no specialty pans beyond a 9-inch springform pan, and no fancy baking-aisle ingredients.
Tested for the freezer setup. I set this cheesecake in the freezer, not the fridge. That one choice is the difference between a clean, sliceable cheesecake and a sad puddle on a plate. It’s also why I can prep it before lunch and serve it after dinner.
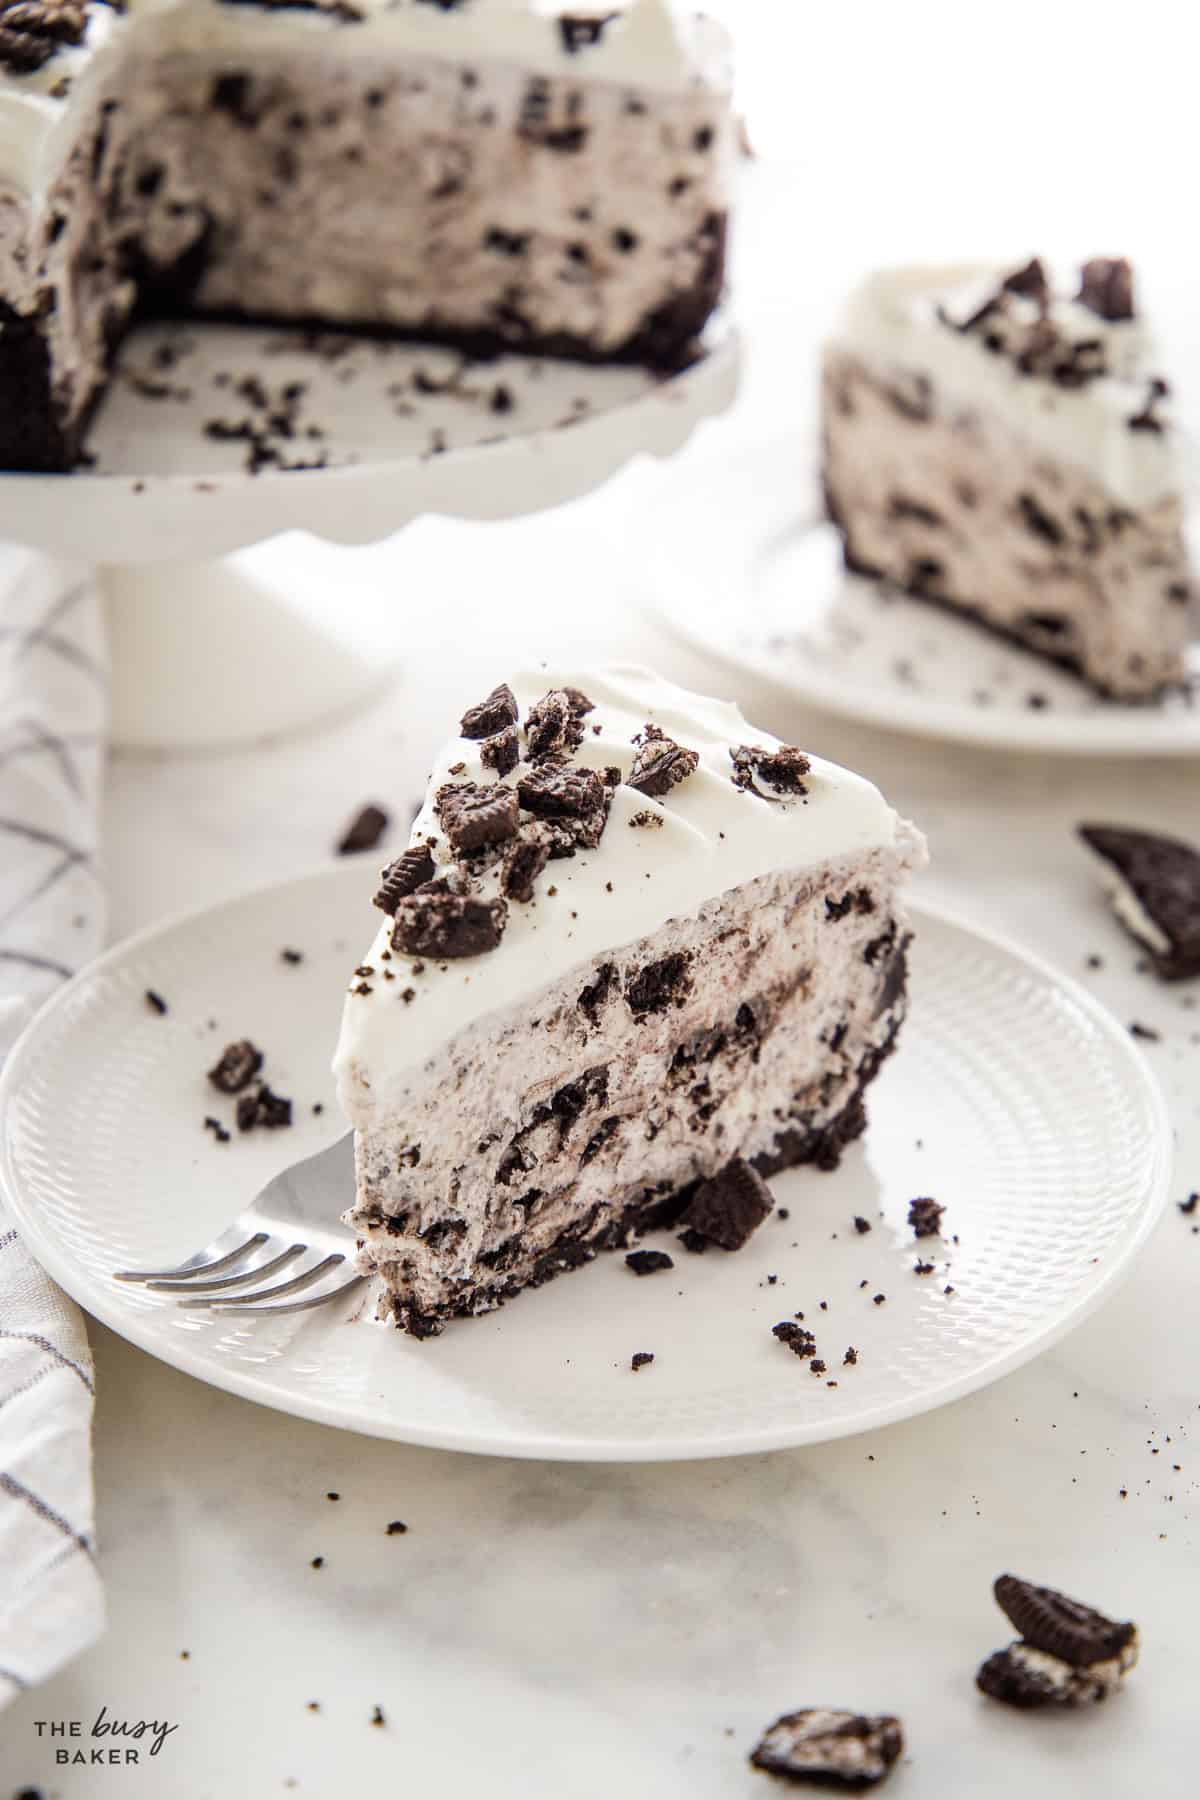
It actually feeds a crowd. A 9-inch springform pan gives you 10 generous slices or 12 reasonable ones, which is enough for a birthday party, a family dinner, or a Sunday potluck where you’d rather not show up with one more tray of grocery-store cookies because you’re not brave enough to bake something from scratch. Make it once and I guarantee it will earn a permanent spot in your dessert rotation!
A few small calls make the difference between a no-bake cheesecake you’ll be proud of and one that won’t slice cleanly. After making this recipe more times than I can count and reading every comment readers have left on the blog, these are the PRO tips that matter most.
Low fat cream cheese has a much higher water content, which means it liquifies easily at room temperature and never quite sets the way you want it to. Full fat gives you a firm, sliceable cheesecake every time. Splurge on the brand-name cream cheese here – it’s totally worth it.
If your whipped cream isn’t fully whipped before it goes into the filling, the cheesecake won’t hold its structure. Stiff peaks – where the cream stands straight up on the beaters without flopping – is what you’re after. Then fold the whipped cream into the cream cheese mixture very gently, not vigorously, to keep all that air in.
Cold cream cheese turns lumpy when you try to whip it smooth, and no amount of mixing will save it. Let it sit on the counter for at least an hour before you start, longer in the winter if your house is cool. The filling will whip up creamy in about 30 seconds.
This is the question I get asked about more than any other. The freezer sets the filling firm enough to slice cleanly. The fridge alone leaves it too soft for slicing, especially in a warm kitchen. Freeze for at least 2 hours – 4 hours or overnight is even better – then move it to the counter for 20 to 30 minutes before slicing.
I see this question all the time in the comments. Leave the cream filling right where it is, in both the crust cookies and the chunks you fold into the filling. The cream is part of what makes the texture and the flavour work.
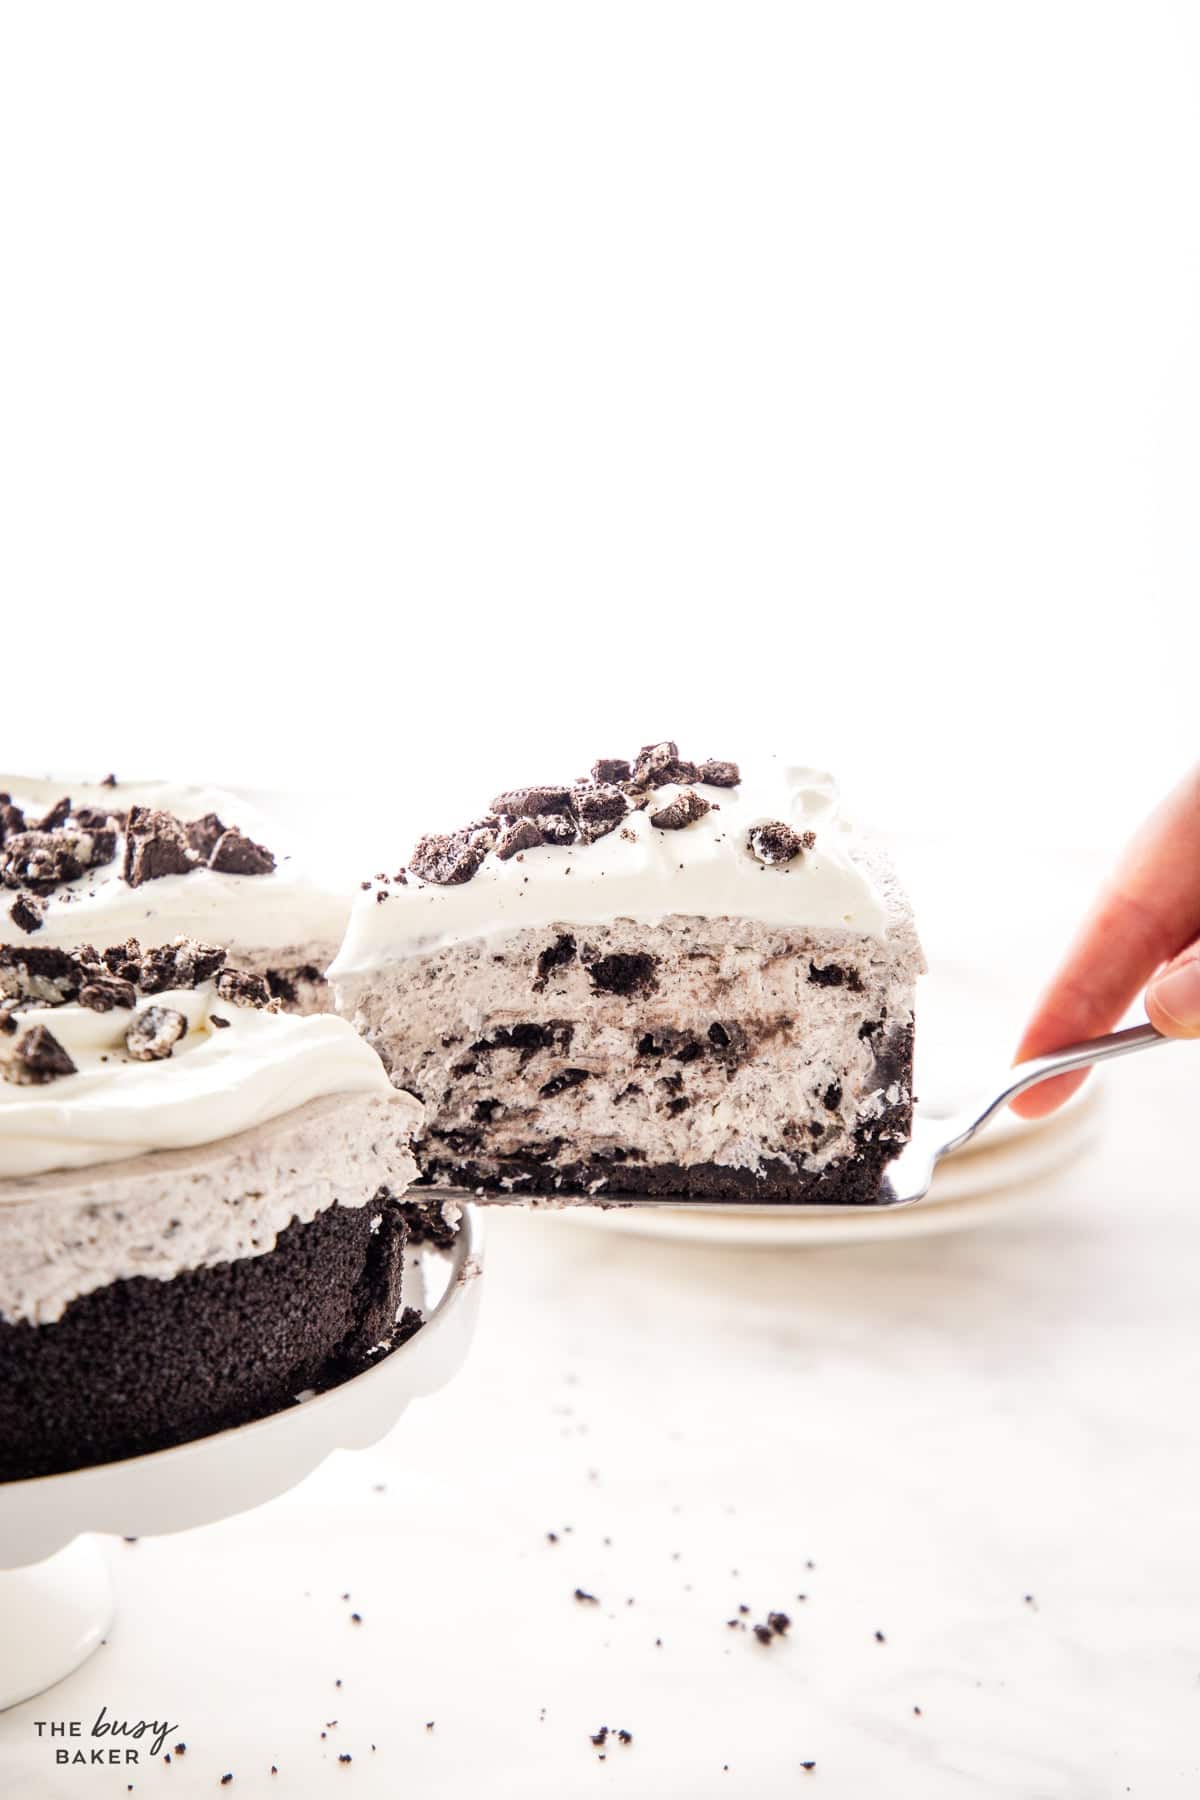
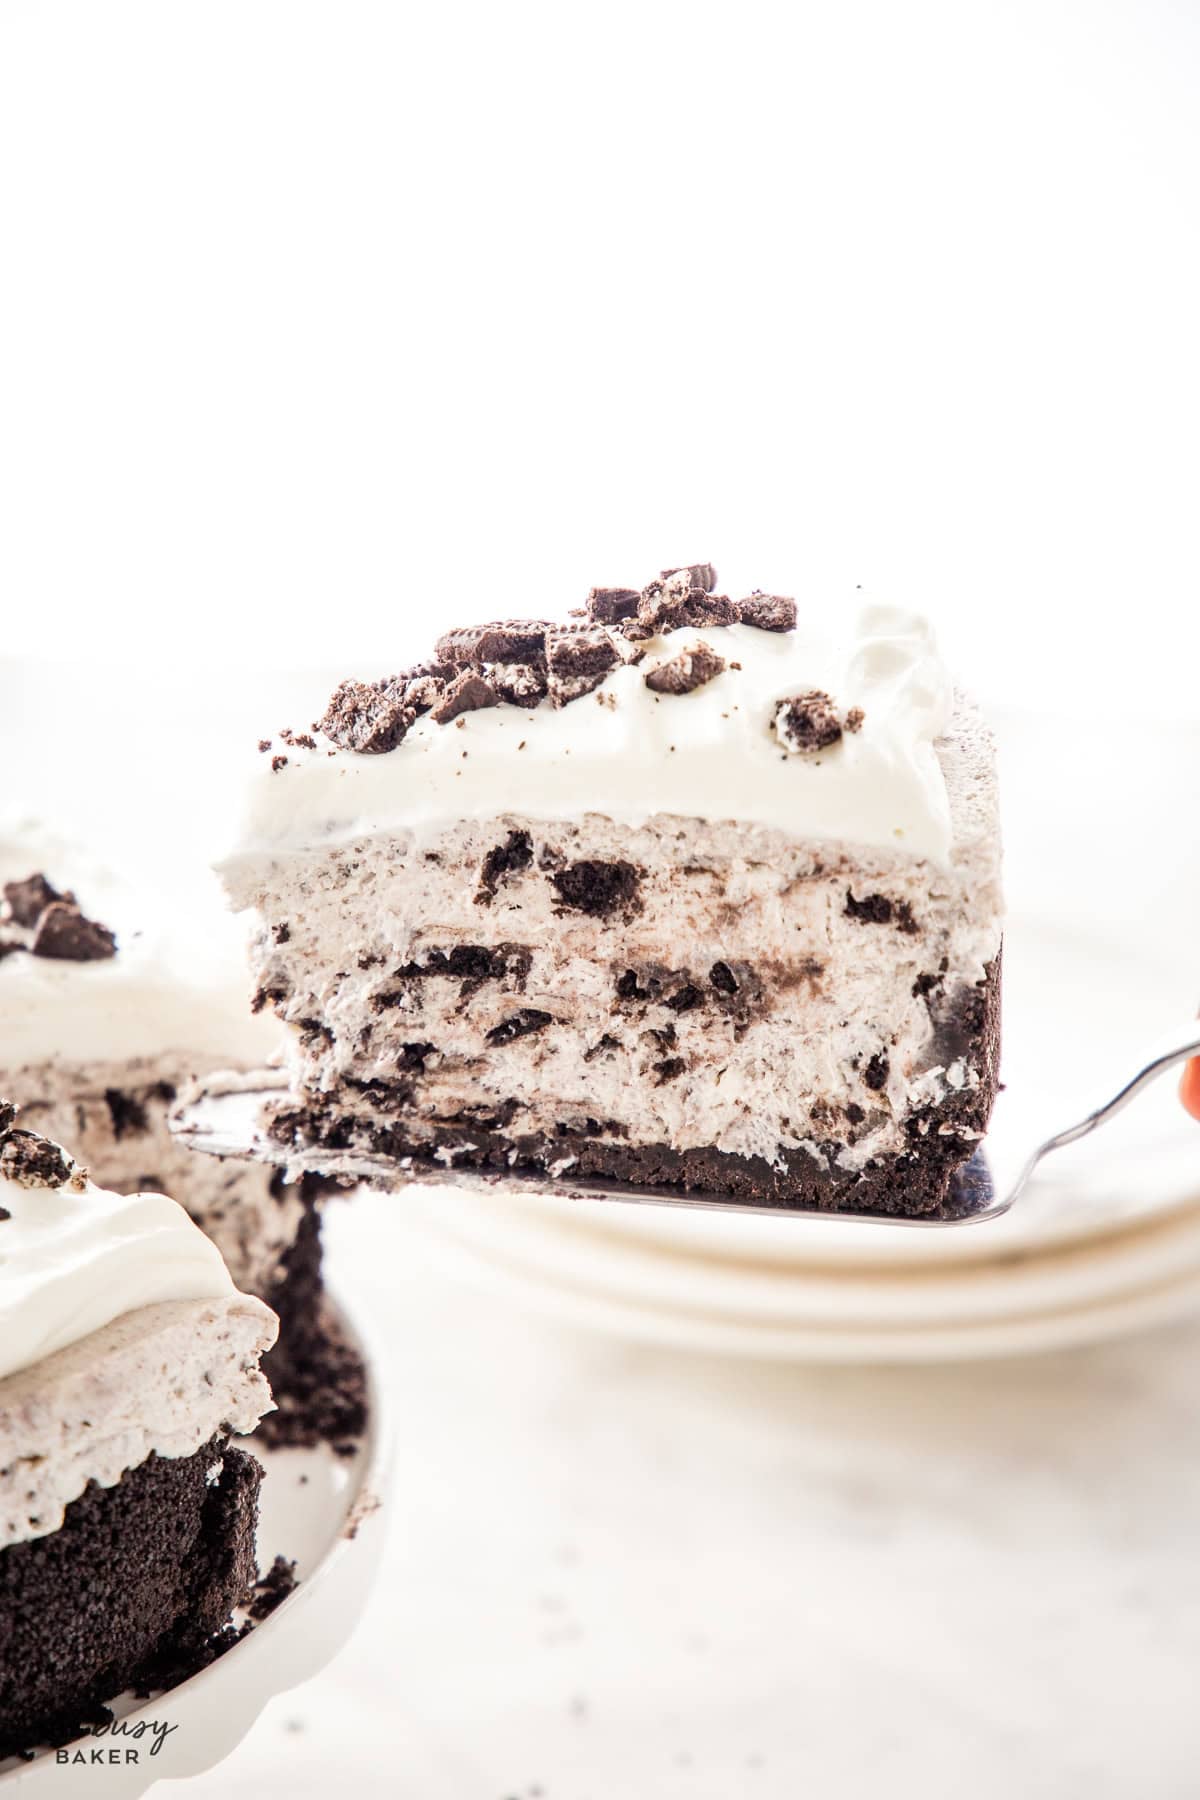
After the cheesecake has set and rested at room temperature for 20 to 30 minutes, run a thin, warmed butter knife between the filling and the inside of the springform before you release the pan. This is the easiest way I’ve found to get clean, sharp edges on the slices instead of ragged ones.
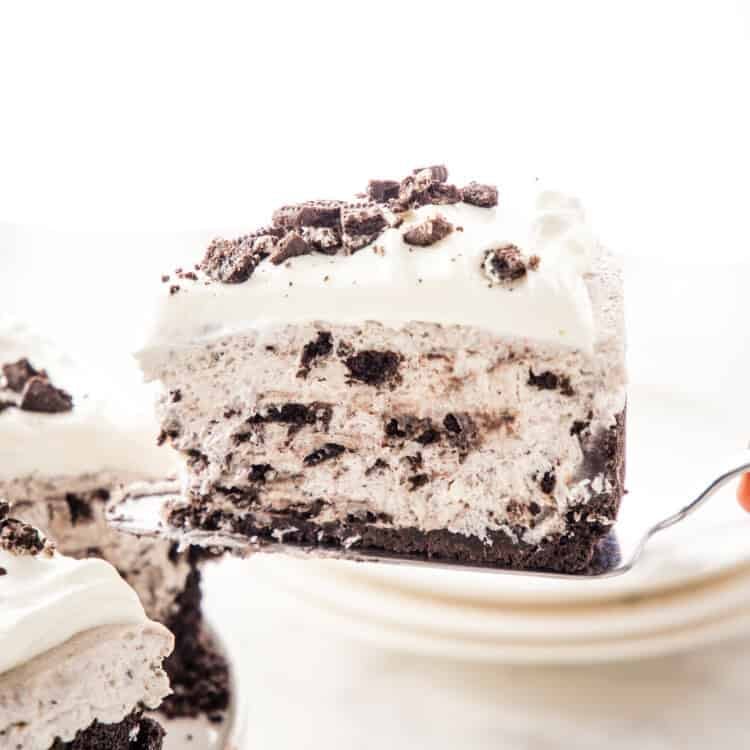
The crust needs fine crumbs – a zip-top bag and a rolling pin works fine. The filling needs coarse chunks, big enough that you bite into actual cookie when you eat it. Keep them separate so you don’t end up with crumb-dust in the filling.
Whipped cream piped or spread on top and chunks of Oreo will get soggy if they sit too long. Decorate once the cheesecake is on the serving plate and you’re 10 minutes from serving. If you’re plating individual slices, garnish each one as you go.

Here’s how the recipe comes together. Total hands-on time is about 20 minutes – the rest is chill time.
- Crush the cookies for the crust. Crush 24 Oreo cookies (or use 1 1/2 cups of pre-made Oreo baking crumbs) into a fine crumb. Leave the cream filling in – it adds flavour and helps the crust hold together.
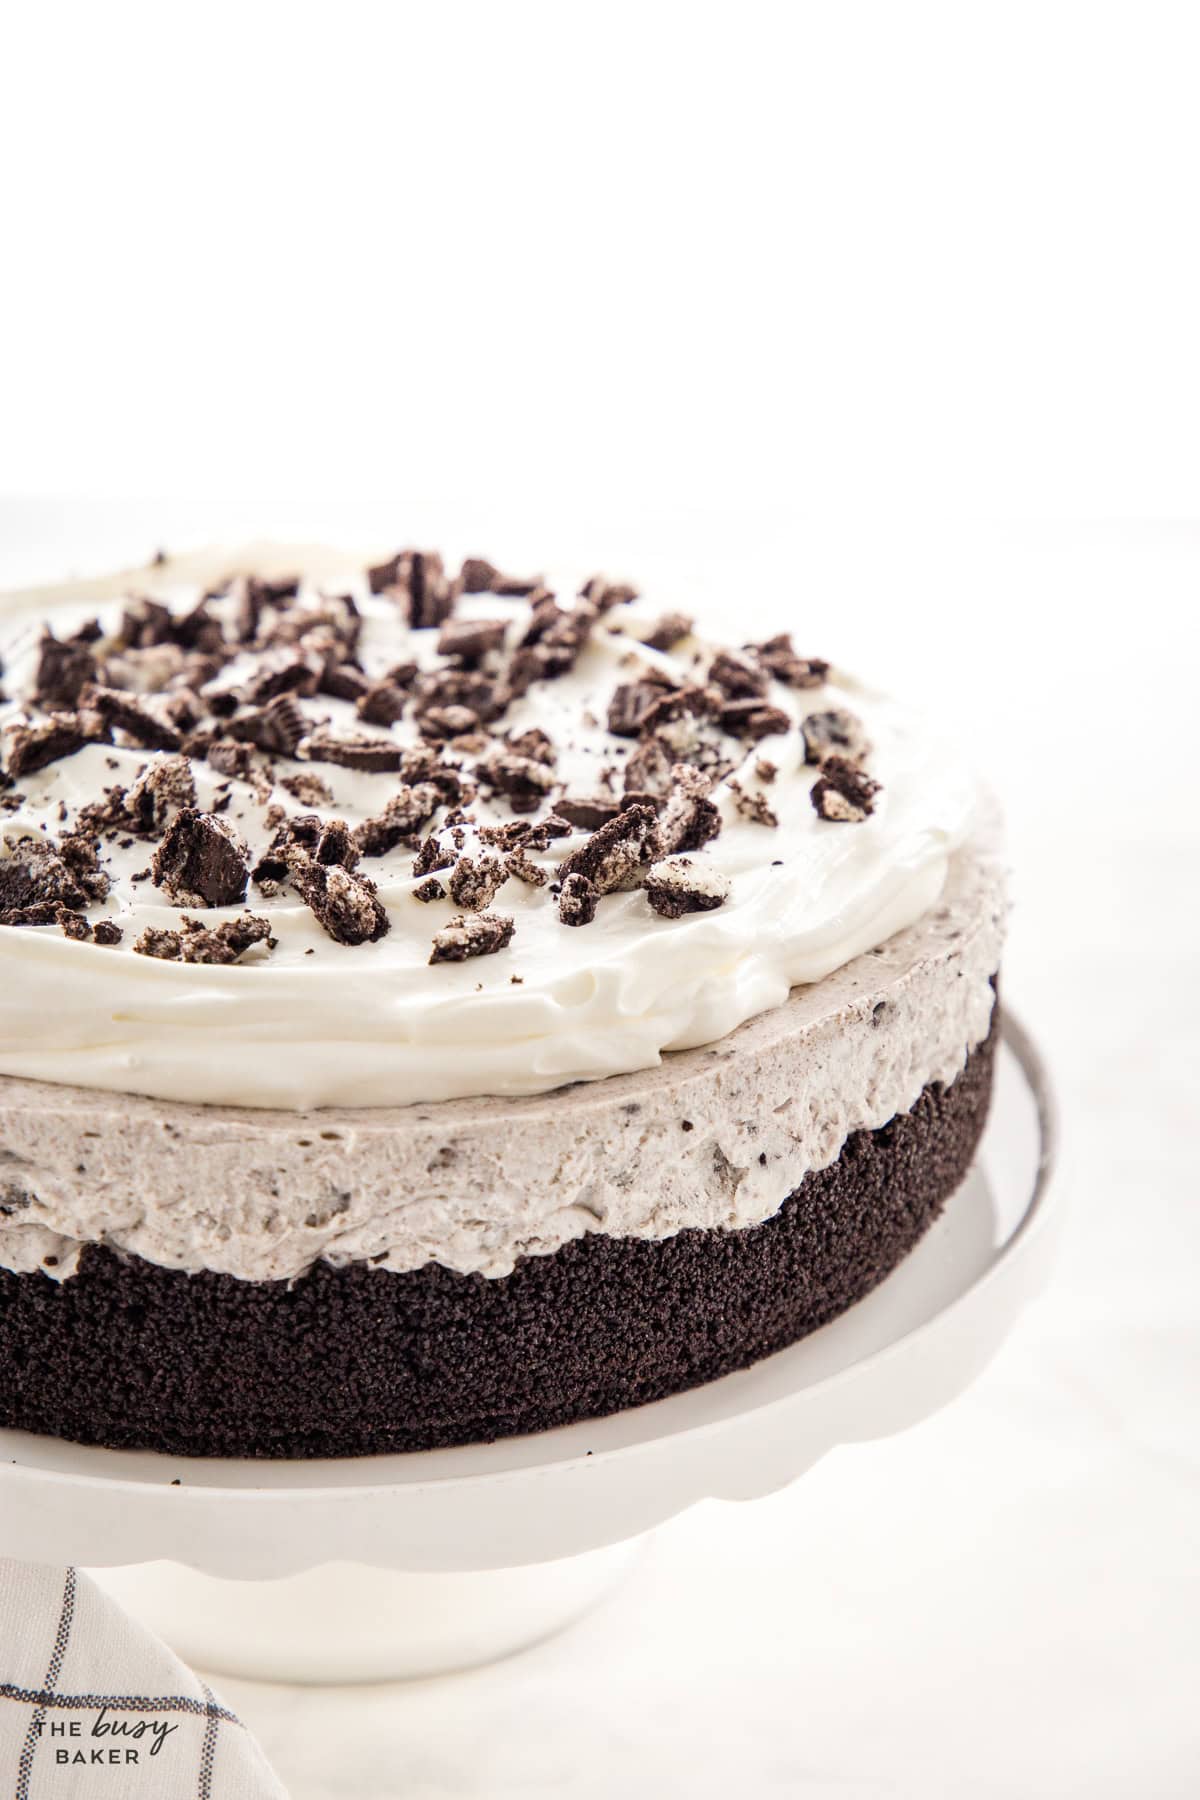
- Mix the crust and press it in. Combine the Oreo crumbs with 5 tablespoons of melted butter and stir until evenly moistened. Press the mixture firmly into the bottom of a 9-inch springform pan. Pack it tight with the flat bottom of a measuring cup for a clean, even crust.
- Whip the cream cheese smooth. In a stand mixer or with hand beaters, whip 900 grams (32 oz, or four 8-oz blocks) of full fat cream cheese on high speed until completely smooth. This usually takes 30 seconds to a minute with room-temperature cream cheese.
- Add the powdered sugar. With the mixer running, gradually add 1 3/4 cups of powdered sugar. Continue whipping on high speed until the mixture is light and fluffy. Scrape down the bowl once to make sure everything is fully incorporated.
- Whip the cream separately. In a second, clean bowl, whip 1 1/2 cups of cold heavy whipping cream to stiff peaks. This will give you the 3 cups of whipped cream the filling needs.
- Fold everything together gently. Add the whipped cream and 24 to 28 coarsely crushed Oreos to the cream cheese mixture. Use a rubber spatula to fold (not stir) until just combined. You want to keep as much air in the filling as possible.
- Smooth it into the pan. Spread the filling over the prepared crust. Smooth the top with an offset spatula or the back of a spoon or spatula. Tap the pan gently on the counter once or twice to release any air pockets.
- Freeze. Freeze for at least 2 hours, ideally 4 hours or overnight. Before serving, move the cheesecake to the counter for 20 to 30 minutes, run a warm knife around the inside of the pan, and release the springform.
- Garnish and serve. Dollop extra whipped cream around the top, scatter on chunks of crushed Oreo, and finish with a generous drizzle of chocolate sauce, if you want. Slice with a warm knife – run it under hot water and wipe dry between cuts for the cleanest slices.
There are so many ways to make this no bake Oreo cheesecake your own, and my readers have shared their tested variations too. Here are the best of the best:
- Use Cool Whip or Dream Whip instead of fresh whipped cream. Substitute one 8-oz tub of thawed whipped topping for the 3 cups of fresh whipped cream. If you use a sweetened whipped topping, reduce the powdered sugar to 1 cup so the cheesecake isn’t too sweet.
- Swap in Golden Oreos, Mint Oreos, or birthday cake Oreos. Same amounts, different flavour. Mint Oreos make a great holiday version, Golden Oreos give it a vanilla cookies-and-cream feel, and Birthday Cake give a festive twist.
- Freeze it in a 9×13 pan instead. Press the crust mixture into a parchment-lined 9×13, add the filling on top, and freeze the same way. Lift out using the parchment and cut into squares. This is a great go-to for parties of 15 people or more.
- Use a store-bought Oreo cookie crust. A pre-made Oreo cookie pie crust works in a pinch, but it might leave you with a little bit of leftover filling.
- Turn it into individual cups. Layer the crumbs and filling in mason jars or wine glasses for plated dessert at a dinner party. They set in the fridge in about 3 hours since they’re smaller portions, but the freezer still works if you have time.
- Top it with chocolate ganache. Make a quick ganache by stirring 1 cup of semisweet chocolate chips into 1/2 cup of warm heavy cream until smooth. Pour over the chilled cheesecake and let it set for 10 minutes in the fridge before slicing.
This cheesecake is rich on its own, but here’s what I serve alongside when I want to make it feel like a real occasion:
- A cup of strong coffee, an espresso, or an Iced Vanilla Latte for an after-dinner treat
- Easy Party Punch for kids’ birthdays and family gatherings
- A scoop of vanilla bean ice cream alongside each slice
- Fresh strawberries or raspberries on the side – the tartness cuts through the richness of the cheesecake
- A drizzle of warm chocolate sauce or hot fudge over each slice right before serving
This recipe is a make-ahead dream! Here’s how to handle leftovers and make-ahead prep:
In the refrigerator – Store the cheesecake in an airtight container or covered with plastic wrap in the fridge for up to 3 days. The filling softens slightly the longer it sits, so plan to serve it within the first 24 to 48 hours for the best texture.
To freeze – No-bake Oreo cheesecake freezes beautifully. Once fully set, wrap individual slices tightly in plastic wrap and then in foil, or freeze the whole cheesecake (un-garnished) in an airtight container. It keeps for up to 3 months in the freezer.
To thaw – Move slices from the freezer to the fridge the night before you want to serve them, or let them sit at room temperature for 20 to 30 minutes before serving. Don’t try to thaw the whole cheesecake on the counter – it will lose its structure and be difficult to slice.

These are the questions readers have asked me most often over the years:
Can I set this cheesecake in the fridge instead of the freezer?
The fridge alone won’t set it firmly enough to slice cleanly. You can refrigerate overnight if you’re serving it more like a pudding-style dessert, but for clean slices and the right texture, freeze it for at least 2 hours. Take it out 20 to 30 minutes before serving to soften slightly.
Why is my no-bake cheesecake runny?
Here are the three usual culprits of runny no bake cheesecake: low fat cream cheese (use full fat), whipped cream that wasn’t whipped to stiff peaks before folding it in, or skipping the freezer step entirely. Fix any one of those and the next one will set up beautifully.
How many Oreos do I need in total?
About 48 cookies, which is roughly two standard packages – 24 for the crust (or 1 1/2 cups of Oreo baking crumbs as a shortcut) and 24 to 28 for the filling. Plus a few extras for garnishing the top.
Can I use whipped topping like Cool Whip instead of fresh whipped cream?
Yes! Substitute one 8-oz container of thawed Cool Whip for the 3 cups of whipped cream. If your whipped topping is already sweetened, reduce the powdered sugar to 1 cup so the cheesecake isn’t too sweet.
Do I scrape the cream filling out of the Oreos?
No. Leave the cream filling right in. It melts into the crust and the filling and adds to the flavour.
Can I make this a few days ahead?
Yes, make it up to 3 days ahead and refrigerate, or up to 3 months ahead and freeze. Add the whipped cream and Oreo garnishes within 30 minutes of serving so they don’t get soggy.
Can I use a different pan size?
A 9-inch springform is the standard. A pre-made Oreo pie crust works (with a little leftover filling). A parchment-lined 9×13 pan works too. Avoid pans without removable bottoms if you can – it’s nearly impossible to get clean slices.

EASY NO-BAKE CHEESECAKE RECIPES & TIPS
Get my easy no bake cheesecakes e-cookbook!

More No-Bake Cheesecake Recipes You’ll LOVE
If you love this Easy No-Bake Oreo Cheesecake, you’re going to want to try these other easy no-bake cheesecake recipes:
- Classic No-Bake Cheesecake
- No-Bake Golden Oreo Cheesecake
- Easy No-Bake Nutella Cheesecake
- Easy No-Bake Snickers Cheesecake
- Easy No-Bake Cookies and Cream Oreo Icebox Cake
- Easy No-Bake Mint Chocolate Chip Cheesecake
- Easy No-Bake Strawberry Swirl Cheesecake
- Easy No-Bake Lemon Raspberry Cheesecake
- No-Bake Blackberry Cheesecake
- No-Bake Oreo Cheesecake Truffles
Watch the video below to see exactly how I make this decadent dessert. You can find more delicious recipe videos on my YouTube channel.
If you made this, share a photo!
Are you trying this recipe? Use the comment form below to share your take; now with support for image uploads and comment voting!
Easy No Bake Oreo Cheesecake
Recipe: Equipment
- Stand Mixer or hand mixer
- Zip-top bag and rolling pin (for hand-crushing cookies, optional)
Recipe: Ingredients
- 1 1/2 cups Oreo baking crumbs (or 24 Oreo cookies, finely crushed)
- 5 tablespoons butter, melted
- 900 grams plain cream cheese (4 cups or about 32 ounces)
- 1 3/4 cups powdered sugar
- 3 cups whipped cream
- 24-28 coarsely crushed Oreo cookies
- extra whipped cream, chocolate sauce, and Oreo cookies for garnish
Recipe: Instructions
- Combine the Oreo baking crumbs and melted butter in a medium bowl and stir until evenly moistened. Press the mixture firmly into the base of a 9-inch springform pan, packing tightly with the flat bottom of a measuring cup for a clean, even crust.
- In a stand mixer or with hand beaters in a mixing bowl, whip the cream cheese on high speed until completely smooth and creamy, about 30 seconds to 1 minute. Add the powdered sugar with the mixer running and continue whipping on high speed until light and fluffy. Scrape down the bowl once to make sure everything is fully incorporated.
- Fold the whipped cream and coarsely crushed Oreo cookies into the cream cheese mixture with a rubber spatula until just combined. Fold gently to keep the filling light and airy.
- Pour the filling over the prepared crust and smooth the top with an offset spatula or the back of a spoon. Tap the pan gently on the counter once or twice to release any air pockets.
- Freeze the cheesecake for at least 2 hours, ideally 4 hours or overnight. Before serving, move to room temperature for 20 to 30 minutes, then run a warm butter knife around the inside of the pan and release the springform. Garnish with extra whipped cream, chocolate sauce, and crushed Oreo cookies just before serving.
Recipe: Notes
Recipe: Nutrition
Notice: Nutrition is auto-calculated, using Spoonacular, for your convenience. Where relevant, we recommend using your own nutrition calculations.
I’ve made this many times now. A family favourite. Very easy recipe. Thank you!
We’re so happy you enjoyed it! Thank you for taking the time to leave your feedback!
I’ve made the baileys cheesecake and twice the key lime, absolutely delicious, and pretty easy, oreo one next,
Let us know how it turns out!
Hello. I understand you are asking us to freeze the cheesecake. However, is it okay to leave it in the fridge overnight? I just made it and it’s currently in the fridge. Should I remove it to the freezer overnight instead? I have made it before and it’s delicious. I can’t remember if I left it in the fridge though. I am bringing it to work tomorrow so I am wondering if I can leave it in the fridge overnight or freezer overnight. Work is one hour away. Please advise.
You can leave it in the fridge overnight however, if you want to keep it outside of the fridge for an hour, we’d suggest that you freeze it.
Oreo flavor is tasty in milkshake, and of course it is in cheesecake!!!
We’re so happy you enjoyed it! Thank you for taking the time to leave your feedback!
Made it with dairy free cream cheese and coconut milk whip
It was amazing!!
I’m so happy you enjoyed it! Thank you for taking the time to leave your feedback!
How much ml is the whipped cream as a liquid before u whipped it
It’s 350 ml.
Loved this recipe of Oreo Cheesecake. Thanks for such amazing recipe. Please visit http://www.temptingrecipe.com
Thank you!!🙂
Are we meant to remove the cream from the oreo cookies before crushing them ?
No! Leave the filling in 🙂
Hi,
Can I make this in a rectangular tray instead? I have an 13×9 and an 11×7. I do have a springfoam pan but it might only be a 7″ one.
Thanks
Sure you can! The 11×7 would work best for this recipe as it holds the same volume as a 9 inch springform pan (about 10 cups).
Hi,
Thanks for the recipe. I made this cheesecake, but it didn’t set properly. I put it in the fridge overnight (around 8 hours), but when I tried to cut it in pieces, it wouldn’t give me well defined pieces. The crust didn’t come out either when I tried to cut. Any idea why it must have not set? It tastes awesome though.
Hi Pooja, I’m sorry it didn’t turn out well. I suppose the problem would be that you put it in the fridge instead of the freezer as the recipe requires.I hope next time it will turn out perfect!
My cream cheese will not become smooth. What can I do? It’s all in small lumps.
Is it straight out of the fridge and too cold? Or perhaps it’s old and has gone off. Room temperature cream cheese should have no problem becoming smooth.
The cheesecakes turned out nice however consistency isn’t quite right, it’s a bit moussy if that makes sense . I have followed the recipe from start to finish so not quite sure why that is…
No bake cheesecakes have a smooth, sometimes mousse-like texture, because they contain no eggs or gelatine. It should be smooth, but it could be your cream cheese or whipped cream that is giving it a strange texture.
Can I make these into cupcakes? Will they set up as well
This recipe works best as a cake, but they will set as cupcakes if you set them in the freezer. Just be sure to grease or line the cupcake tins!
My cream cheese/whipping mixture wasn’t as fluffy as it was in the video. It wasn’t extremely runny by all means but it didn’t fold as nicely. Is this ok? Should I put it in the freezer overnight ? Thanks!
Yes, it’s fine! Freezing overnight should do the trick 🙂
Hi, my cheesecake was liquid when cut, any reason why?
It sounds like you didn’t give it enough time to set. My suggestion is to set it in the freezer if you find it’s too soft in the fridge.
Can I put the cheesecake in the freezer so it will set faster, or is that a bad idea?
Yes, you can. Just be sure to defrost for about 45 minutes before slicing!
I made this for my birthday 2 weeks ago and everyone loved it! Even people who don’t like cheesecake (my husband include). One of my friends said that he wanted to adopt it! Thank you for this amazing recipe!
I am using a 10 inch pan so how much would I need of each ingredient?
I’d suggest using a 9-inch pan, or adding 1/3 (approx 33%) to each of the ingredients.